Thanks to modern tools, even amateurs can perform finishing work today. A paint sprayer is one of those “smart” assistants that undoubtedly should be in the arsenal of a home craftsman, and even more so a professional. Such devices make it possible to apply paint, putty and other materials with suitable density and viscosity characteristics in a uniform layer on surfaces made of various materials.
The spray gun is a gun equipped with an air valve; there are several regulators that allow you to control the supplied volumes of paint and air.
Selecting a spray gun
Novice craftsmen often try to save money by choosing a paint sprayer with a minimal price tag when purchasing. However, when buying cheap equipment, you need to understand that the low price is a consequence of not the highest quality materials and the maximum technological simplification of the spray gun. Therefore, you should not save too much on buying a sprayer - this will affect the quality of the varnish.
When choosing a spray gun for varnish, it is recommended to pay attention to the following parameters:
- The material from which the nozzle cover is made. The best material for this part is stainless steel.
- Tightness of the structure. The spray gun maintains a certain pressure, so its components must be sealed, otherwise it will be impossible to obtain an evenly painted surface. Sealing is ensured by gaskets, and the best material for them is Teflon.
- Receiver location. This parameter does not have a direct effect on the operation of the equipment; however, if the tank is located at the bottom, it will be somewhat more difficult to control the spray gun, since such a device must be held strictly vertically.
- The material from which the tank is made. Metal tanks are easier to clean from paint or varnish residues, but in this case it is difficult to control the consumption of material. Plastic containers have exactly the opposite characteristics: they are difficult to clean, but it is easy to track the consumption of paint and varnish composition.
- The material from which the spray gun itself is made. The best option is high-strength plastic. It is not as heavy as metal, which means it will be physically easier to work with such equipment. On the other hand, many craftsmen recommend purchasing paint sprayers made of stainless steel, motivating this choice by the durability of this material.
- Torch width. This parameter indicates the area that can be processed per unit of time. The width of the torch is greatly influenced by the length of the hose. It is worth noting that not all jobs require a large flame width. For example, for processing small parts, a thin jet is much preferable. But for large-scale surfaces it is better to have a larger torch width.
- Correspondence between the performance of the spray gun and the external compressor. A situation where the power of the spray gun is greater than the power of the compressor is unacceptable.
- Ease of access to device controls. All buttons on the device must be easily accessible, since they are used to control the compressed air pressure and other functions.
Note! The diameter of the nozzle and the grain of the sprayed composition are interdependent parameters. The smaller the grain, the smaller the nozzle should be. It is wise to purchase several replacement nozzles and needles at once.
You should choose a specific model based on your real needs. Some people will prefer a paint sprayer with a plastic tank, while others will prefer a metal one, some will prefer a wide torch, while others will prefer a narrow one. In many cases, there is no need to spend money on professional pneumatic equipment and it is easier to get by with an electric or even manual device.
Spray gun design
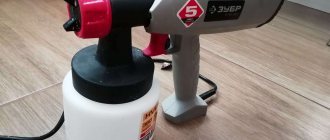
Spray gun "Wagner"
As an example, let’s look at the features of the German W670 model spray gun. The spray gun includes a fine spray nozzle, a container for paint and varnish composition, an electric motor, an extension cord and a hose.
The Wagner paint sprayer allows you to work with any type of varnish: both water-based and soluble organic solvents. By changing the working nozzle (there are several included in the set), you can apply varnish of any viscosity level.
The model is characterized by a large spray angle, which allows the maximum possible surface area to be treated when applying varnish. The extension handle further expands the working area. The paint supply rate is controlled by a roller device.
The spray gun is equipped with an I-Spray nozzle, which gives two types of jet: flat horizontally and flat vertically. Another nozzle - PS800 - is designed specifically for spraying a thin layer of liquid compositions, primarily varnishes.
Equipment characteristics:
- Spray method: air.
- Power supply: 220 V mains.
- The required power is 350 W.
- Spray power - 120 W.
- Permissible soil viscosity is 3300 mPa/s.
- The maximum flow is 375 milliliters per minute.
- Tank volume - 0.8 l or 1.8 l.
- The length of the extension cable is 60 centimeters.
- The length of the air hose is 3.5 meters.
- Weight - 4.3 kg.
Spray equipment:
- spray gun;
- I-Spray nozzle and 1.8 liter tank;
- nozzle for liquid compounds PS800 and a 0.8 liter tank;
- air hose;
- extension;
- handle;
- shoulder strap;
- filler funnel;
- user manual;
- warranty card.
Guide to choosing an electric spray gun for household work
The time has come to take care of the dacha concerns, and I came to the choice of a spray gun. In general, there are mechanical paint sprayers, pneumatic and electric. I dismissed the first ones due to the fact that they have a minimum of ease of use and have many complaints about painting skills and experience. Pneumatic ones were also dismissed for one simple reason: I don’t have an additional convector, and the work is very far from industrial. So, electric spray guns are more than suitable for household work.
First, let’s determine what type of electric spray guns are available on the tool market.
Electric spray guns can be of several types:
- Airless electric spray guns
- Air electric spray guns
- Corded electric spray guns
- Cordless electric spray guns
Airless electric spray guns.
The most common spray guns in household use. They are characterized by feeding paint directly into the nozzle using a piston pump. The pump can generate the required paint pressure with varying performance and application depends on the design of the spray gun nozzle. The advantage of this type of spray gun is accessibility and mobility. It can be used for domestic purposes, but has certain disadvantages. This type of electric spray gun is characterized by increased paint consumption, plus paint smudges may form, which affects the final result of the work. They are great for applying primers and paints in areas that do not require special quality paint.
A special difference (not necessarily, but often) of this type of household spray gun is the presence of a certain “hump” where the pump itself is located.
Here is an example of similar household spray guns
There are also options where the pump is located a little behind and they look like this
Air electric spray guns
This type of paint sprayer differs in its application method. It is characterized by the fact that the paint is sprayed onto the surface to be painted due to the atomization of fine dust by the incoming air flow. The only difference is where this air comes from. There are two subtypes of electric motors for these spray guns: solenoid or turbine electric motors. Depending on the selected type of action, they can be built into the body of the spray gun itself, or placed aside and supply air through a hose or pipe. If the spray gun has a free-standing engine, then it either has wheels to carry it along with you, or can be hung on the shoulder and worn like a bag. The main popular type for household use are models with a remote electric motor. This is convenient, since you will have to work while holding only a gun with a container of paint in your hands. The advantages of this type of spray gun are low paint consumption and high quality of painting. But there are also disadvantages. Firstly, a cloud of fine dispersed paint forms at the painting site. Increased operating noise (comparable to a vacuum cleaner).
This is what aerial electric spray guns look like
Corded electric spray guns
This is the overwhelming number of spray guns on the market. The advantages are any power selected for the task, as well as an almost unlimited service life, which is limited only by the characteristics of the electric motor.
The downside is, of course, the dependence on the outlet. Well, there is some restriction in mobility when working.
In general, all the pictures shown above are networked spray guns
Cordless electric spray guns
This type of paint sprayer came relatively recently, and has become very common due to its portability. There is no longer any dependence on the outlet and it is much more convenient to work without disturbing yourself with a wire. Among the minuses, I note a limited choice of power, a higher weight of the spray gun due to the battery, and limited operating time due to the need to replace/charge the battery.
Cordless spray guns look something like this
Also, spray guns differ in the level of operating pressure
Pressure spray guns are divided into 3 types:
- Low pressure (up to 3 atmospheres).
- Medium pressure (from 2.5 to 10 atmospheres).
- High pressure (from 10 to 55 atmospheres).
There is also a classification according to the paint spray system:
- HP – high-pressure electric spray guns, with a uniform torch and high speed of paint movement.
- MR - medium pressure sprayers.
- LVMP - devices capable of painting a surface with a small volume of paint and medium pressure.
- HVLP - in such sprayers the torch is created by low air pressure, with an average speed of paint movement, which allows you to achieve 70% of the paint volume distributed in an even layer.
- LVLP – such electric spray guns are capable of painting a surface at low pressure with a small supply of paint. As a result, a homogeneous torch is formed, thereby achieving good quality coating.
- NTE – spray guns that provide the highest paint supply.
- RP – low pressure spray guns.
These parameters cannot always be found in the characteristics of the product, so after we have decided which type of electrospray paint is suitable for us, we look at the following few important points
- It is worth clarifying what viscosity of paints the spray gun can work with.
20-30 DIN - suitable for ordinary household paints, glazes, enamels and oil-based compositions
40-60 DIN - for working with thick latex compounds and primers
80-100 DIN - for working with particularly viscous compounds. For example, compositions with fire protection.
- Be sure to indicate performance. Here it’s worth choosing a spray gun specifically for your tasks.
You can choose the performance yourself.
- The diameter of the nozzle is directly related to the paints used
0.8-1.2 mm - stains, primers, water-based paints
1.3-1.6 mm - most enamels and varnishes
1.6-3 mm - adhesives, resins, liquid putties
3-6 mm - thick building mixtures
- It is worth considering the paint container used
Capacity up to 500 ml - used for local work, painting furniture or small objects
For painting walls and fences - from 600 ml
Eventually
For rare home use, it is worth looking at airless spray guns with a productivity of 300-500 g/min
For frequent home use, you should choose an air spray gun model with a productivity of 600-800 g/min and a viscosity of 35-60 DIN
For professional use, you should look at models with a larger tank volume (from 1 liter) and a productivity of 800 g/min.
Preparing the Spray Gun
The spray gun is equipped with a step power switch. The presence of this option makes it possible to regulate the pressure and width of the torch, choosing the most suitable mode in which the varnish will lie evenly on the surface without excessive splashing.
The switch in position “0” indicates that the spray gun is on. If you set the switch to “1”, the device operates at medium speed, allowing you to spray even the most liquid varnishes. Mode “2” means that the device is capable of spraying viscous compounds.
Important! Before use, the spray gun must be configured.
This is done as follows:
- We hang the spray bottle in a vertical position above a test sheet of cardboard or wood at a distance of 15-20 centimeters.
- We press the trigger and hold it until streaks appear on the varnish stain.
- Next, we adjust the settings in accordance with our goals.
- We turn the nozzle so that the torch resembles a fan.
- We practice applying continuous strips of varnish, overlapping in different directions.
- To create a uniform coating, move the jet at the same speed. All movements are smooth, without jerking.
- We press the trigger at the edge of the surface to be treated, but not before it begins.
- The spray gun must not be tilted.
How to set up the unit
To prime an object efficiently using a spray gun, you need to configure the spray gun properly.
Tuning involves adjusting the torch according to parameters such as size and shape.
Aspects of adjusting the spray gun:
- regulation of the torch shape by a screw mechanism;
- control of primer release using an adjusting head.
You should first apply the product to the test surface, and then apply it to the object being treated. This helps to estimate the quantity of the composition released.
The pressure indicator is set using the adjusting head of the passage hole. The most optimal indicator is 3-5 bar.
Using the head it is possible to change the conical flare shape.
The nozzle is a very important element that is responsible for the quality of the priming process. The nozzle diameter is directly proportional to the grain size of the primer.
Varnish preparation
We open the jar with a knife (included in the kit with the paint sprayer) and fill the tank with varnish - not to the top, so that the mass can be further diluted and stirred. Add water to the tank (approximately 10% of the total mass). Stir the mixture well.
If necessary, add additional components. However, first the ingredients need to be filtered. The best choice for this purpose is a mesh filter, which can be purchased in the same place as the varnish. If the filter is not at hand, you can use a nylon stocking.
We prepare the mixture in a metal container specially designated for this purpose. There is no need to add the entire composition at once, since the varnish very quickly becomes viscous due to the effects of additives. It's better to make several batches.
Mixture components:
- hardener (about half of the mixture);
- anti-silicone to make the coating resistant to dust, grease and crater formation (the proportion of the substance is approximately 5-7%);
- drying accelerator (2-3% of the total amount).
Advice! The accelerator is especially useful at low air temperatures, but may cause a cloudy surface color. Even if this happens, there is no reason to despair, since the defect can be corrected by polishing.
Additives can significantly improve the technical characteristics of the varnish. However, you should not be too zealous in this matter, since exceeding the permissible concentrations will lead to a deterioration in the quality of the composition.
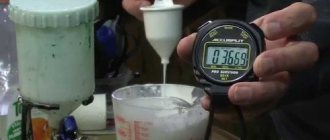
It is very important to mix the composition thoroughly. This will ensure the mixture is homogeneous. The fact is that the molecules of the constituent mixtures begin to actively interact with each other only with intensive stirring. You need to stir the varnish while working. To do this, you need to shake the container periodically for 15-30 seconds.
Spray gun for applying glue
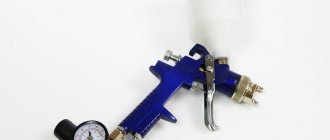
The connection of all kinds of materials over a large area requires a very uniform adhesive layer. Typically, a glue spray gun is used in the furniture industry to reliably connect foam rubber to wood, leather, fabric and other materials. For such tasks, the most optimal is a pneumatic spray gun with an upper tank, capable of creating the most even layer of adhesive. The range of suitable models and prices varies significantly, but for household and semi-professional work almost any gun with a 1.7 mm nozzle is suitable.
When choosing a pneumatic spray gun for applying glue, it is recommended to consider models with an LVLP (Low Volume, Low Pressure) spray system, which has the least fogging during operation and the greatest transfer of material to the surface. Make sure the nozzle and needle are made of brass or steel to resist corrosion. If models with a stationary compressor are not suitable, you can consider an electric spray gun with a remote compressor. It is desirable that the pistol body be made of metal, like the next model.
Surface treatment features
Preparatory work
- The quality of varnishing largely depends on how thoroughly the surface has been prepared. Therefore, first we remove the old coating and thoroughly sand and degrease the surface. We pay special attention to the condition of the wood and the presence of traces of rotting on it. If affected areas are found, we also carefully putty them and sand them with fine-grained sandpaper.
- We unfold the suction tube of the paint sprayer with the curved end facing forward. In this position, the varnish from the container will flow more evenly into the nozzle.
- Set the power switch to two. This mode is designed for working with viscous compounds.
Note! Softwoods must first be primed with a “pile fixation”. Then you should sand the surface again.
When applying varnish, you must adhere to a number of technological requirements. For example, you should know that the initially released varnish usually has a heterogeneous composition: clumps of the mixture fly out of the sprayer. Therefore, before applying varnish to the finished surface, you need to spray a little varnish onto a sample (cardboard, piece of wood, paper, etc.). We do test spraying with both horizontal and vertical position of the nozzles.
Tips for applying varnish
- Having made sure that the torch has acquired the desired shape and width, and the composition is released evenly, we begin varnishing the surface.
- We apply the varnish with smooth movements from the shoulder, that is, with the whole hand - thanks to this style of movement, it is easier to maintain the recommended distance to the surface to be treated.
- Once spraying of varnish has started, you can stop only when the entire surface has been treated, otherwise unevenness and stains may form.
- If the work needs to be completed, you should first move the sprayer away from the area being treated and only then turn it off.
- We move the sprayer away from ourselves so that excess paint and varnish composition falls on untreated areas.
- We try to maintain the same distance from the device to the surface being treated.
After the varnish layer has dried, sand the surface, clean it of dust and apply the next layer of varnish.
What does a spray gun consist of?
Any spray gun contains certain elements. Let's list them:
- Spray head. Its function is to spray paint over an object. This element has a special protrusion with holes that are responsible for ensuring air flow. These flows form a torch (otherwise called primer flows). If there are no side flows, then the spray of the product has a round shape, and if there is, it has an elliptical shape. The air volume affects the flare size (width). The control function over the torch is performed using a special valve element.
- Nozzles are a precisely calibrated opening. Some types of guns have a diffuser (or, in other words, a deflector) that serves as the direction of the jet. If the compositions have different consistencies in viscosity, then different nozzles are used, which differ in the radius of the opening. The manufacturer usually marks on the packaging how to use specific nozzles on certain materials. For primers, the size varies from 1.5 to 1.9 mm. The main functions of this element: - doses the flow stream; - directs the stream; - acts as a groove for a needle.
- Needle. The functions of the needle are to organize a strictly dosed release, control the flow of paint (decrease, increase or stop the flow). You can control the needle by moving the trigger. Needles and nozzles are a single unit and are usually sold as a single unit, since each nozzle must correspond to a specific needle. These elements are adjusted to each other, so they must fit together.
- Body and handle. Takes up a large share of space in the spray gun. Expensive and relatively expensive units are made from aluminum. The aluminum alloy used to make the device is a whole part that has channels in its interior. It is this design principle that ensures very good calibration accuracy. Cheap spray guns have a seam joint, which indicates that the devices are manufactured by casting.
- Flare adjustment valve. It controls the air flow to the air valve mechanism. In the case of an open valve, air moves towards the protrusions and the flare size changes to maximum. In the case of a closed valve mechanism, the released primer has a round shape of a fairly small size. The valve mechanism is located either on the back of the spray gun above the paint release adjustment valve mechanism, or on the side of the unit. The soil release valve mechanism performs a controlling function regarding the amount of product released. In addition, he takes part in adjusting the composition by narrowing the needle. This object is located at the level of the needle inside the unit. The valve mechanism is controlled by limiting the trigger and needle. The valve mechanism for releasing the air flow is located under the trigger. Its function is to direct compressed air into the channels of the paint gun. The valve mechanism is formed by a quick-release fitting or a pressure gauge.
- Trigger mechanism. The function of the trigger is to control the release of the primer. The trigger, after being pressed, presses on the air valve mechanism, this leads to movements of the compressed air flow throughout the unit. When you press hard on this element, the needle shifts, and the air seems to grab the ground.