Tiles and porcelain tiles are very practical for use in the kitchen, bathroom, toilet and even in the bedroom. But their main disadvantage is that their surface is cold at any time of the year. This can be easily corrected by installing a heated floor system. The easiest and fastest installation method is an electric heated floor under tiles, which we will talk about in this lesson.
Water or electric?
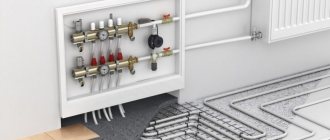
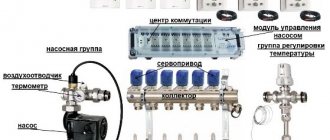
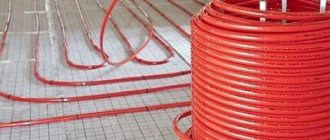
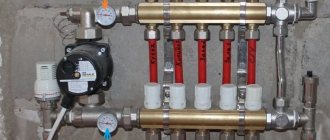
To begin with, you should decide whether you will be considering a water or electric heated floor. Water means a lot of money at the installation stage, the minimum thickness is 5.5-6 cm, complex installation and wait almost a month after pouring the screed before starting operation. The tiles can actually be laid in just two weeks. And turning on the heated floor is definitely not earlier than a month. But during the heating season, heating costs will be higher, if at all, but only slightly.
Types of heated floors under tiles, their advantages and disadvantages
Electric under-tile heaters are quicker and easier to install. The cost of installing an electric heater under tiles is low. You will need special tile adhesive (for heated floors), a heater and a temperature control and regulation system. The entire installation and connection of an electric heated floor for one room can take one day. Together with laying tiles, more is possible. Depends on experience and area.
There is an option for a warm electric floor under tiles, with which the height of the floor increases slightly. A centimeter, maybe a little more or less. The commissioning period is a couple of days. Until the glue dries. This is if you lay cable mats under the tiles. The floor level will rise three centimeters or more if heating is made from a heating cable. But in this case, the screed should also “mature” for a month. But the cost of floor heating equipment is lower.
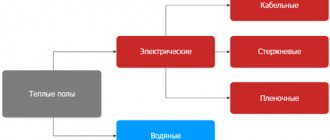
All types of floor heating
It seems that electric heated floors look more attractive. But we must take into account that electric floor heating is more expensive. That is, heating costs will increase. How much is difficult to say. Depends on the quality of thermal insulation of the floor and the room as a whole.
In fact, you have to choose - invest a lot of money during installation or pay a little each month for heating. Well, we must take into account the complexity and duration of installation and the timing of commissioning.
Cost of heating systems
To give an idea of the price of electric heated floors, the table shows several system models:
| Model | Short description | Specific power W/linear m | Mat width | Price |
| "National Comfort" NK-250 | Single-core heating cable, 10 m | 25 | — | 1920 |
| Arnold Rak PHS-CT | Two-core heating cable, 9 m | 20 | — | 2100 |
| "Teplolux" ECO 5-100 | Two-core heating cable, 5 m | 20 | — | 1600 |
| DEVI DTIR-150 69 / 75 | Mesh two-core mat | 75 | 0.5 m | 3900 per lin. m. |
| Veria Quickmat-150 | Single core mesh mat | 75 | 0,5 | 2835 per sq.m. |
Types of electric heated floors under tiles
Two types of electric heated floor heaters are recommended for tiles: electric mat and heating cable. But this is far from small. There are different types of cables, although they are all heating or heating cables.
Types of heating cables and their properties
There are two types of cables for underfloor heating - resistive and self-regulating. To manufacture resistive materials, materials are used that emit heat when current passes. Usually it is an alloy of metals in a polymer heat-resistant shell. Resistive heating cable for underfloor heating can be single-core or double-core. Single-core must be connected from both ends, two-wire - only from one. This is the main difference between them.
Cables for underfloor heating are resistive and self-regulating or “smart”
What are the disadvantages of resistive heating cables? The main thing is that if they overheat, they can burn out. And they can overheat if something is placed on the floor for a long time that will worsen the removal of heat from this area of the floor. So you have to be careful with this.
Self-regulating cables are so named because they automatically cool down as the temperature rises. In fact, these are not cables, but polymer matrices connected in parallel. The polymer is used with special properties. The higher its temperature, the higher the resistance.
Difference between connecting single-core and double-core heating cables
An increase in resistance leads to a decrease in current, which in turn leads to a decrease in temperature. In this way, the degree of heating on a segment of such a cable is regulated. Seems like an ideal option. Except that it is not very reliable and often burns out. Therefore, despite the shortcomings, most often it is resistive cable or mats made from it that are placed under the tiles. They are cheaper and more durable.
How to lay a heating cable and what is a cable mat
The heating cable is usually laid in a snake pattern on the floor surface, not occupied by furniture. The cable laying pitch is determined by the required heating power. During installation, the hinges are attached to special clamps. That is, the process of laying out and securing it takes time. And the cable is filled with a 3 cm screed. That is, if you want to lay a heating cable under the tiles on the floor, you will need to fill the screed. And wait 28 days before the first turn on. It is not possible to lay the heating cable directly under the tiles. He does not provide for this.
Warm floor made from heating cable under tiles. The heater is rolled into the screed, and then the tiles are placed on the screed using tile adhesive
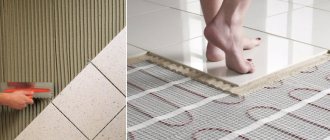
A cable mat is a polymer mesh onto which a heating cable is glued like a snake. These fragments can be of different lengths and powers. And the width is usually 60 cm. So you can choose the size for any room. When laying the mat, simply roll it out on the floor. And the floor is ready for laying floor tiles.
The easiest to install is a cable mat
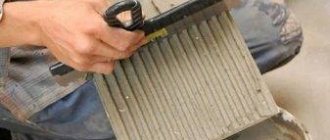
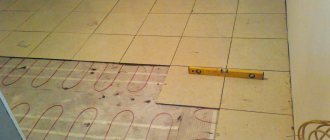
Tile adhesive is applied to the mat “under the comb”, and the tiles are immediately laid on it. No additional layers or work. So this type of heater is ideal for tiles.
Other types of electric heated floor floor tiles
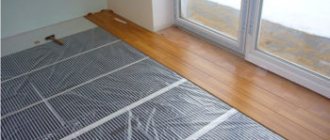
You can also place a film and rod heater under the tiles on the floor. But in this design they have more disadvantages than advantages.
If we consider all the options for heated floors, then only infrared film is not suitable for laying under tiles
Is it worth using infrared film flooring?
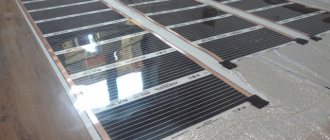
Film heated floor - strips of carbon paste rolled into film. When laying under tiles, an adhesive composition is applied to the film, and the film is laid on top of it. That is, installation is the same as when laying a cable mat. But this heating option is worse in terms of durability. The heater itself is a separator between the base and the adhesive layer. It turns out that the tile lies on a layer of glue and is in no way connected to the floor underneath it. And this leads to the fact that over time the top layer is destroyed by vibrations. The layer of glue, and behind it the tiles, crack.
It is better not to lay even special perforated film under the tiles
Manufacturers, in an attempt to adapt this material for laying with tiles, make a film with through holes. This option provides a certain degree of adhesion to the base. But it only works when the base is heavy and stable. Something like a monolithic slab. That is, when vibrations capable of destroying a point connection occur very rarely. And there are no guarantees. Film flooring is ideal when laid under laminate, but under tiles it is not very good even with holes.
Rod infrared floor: it's in the design
This heater is supposed to be very good under tiles. These are carbon rods connected by wires. The rods are connected in parallel, which increases the reliability of the heater. If one of the rods burns out, the rest work. On this side everything seems to be fine.
The floor heater rod is placed in a layer of glue. Provides excellent adhesion of the finish to the base. The area of the heater itself is small—thin rods. And the space between them is filled with glue. So on this side everything is fine too.
Rod heated floor is unreliable
The problem is that this type of heater often fails. Specifically, the rods burn out at the points where they are attached to the wires. It doesn't seem to be a big deal. If one or two rods do not work, this is not a problem. The rest are working. But others gradually stop working. When several pieces burn out, more current flows to the rest, which leads to overheating of the connection and they simply cannot withstand it. And so far this problem has not been solved.
Choosing the best option
Let's summarize. The main criteria for choosing a floor heating method are reliability and durability. After all, repairing a heated floor under tiles is an almost impossible undertaking. It is necessary to remove the tiles and break the screed or adhesive layer. You can't get by with a little bloodshed. The only way. Based on these considerations, there are only three types of more reliable heated floors for tiles:
Installation requires special glue and grout
- water;
- resistive cable;
- cable mat made of resistive cable.
Not such a wide choice. But there are more design options, so it actually ends up being a little more.
Water and cable in a screed
The installation of a water floor and cable floor is possible only at the stage of major repairs. They are placed in a screed, and it must mature for 28 days. But the screed works as a heat accumulator and equalizes the temperature. What is the difference between these two types of heaters? That:
- water requires more money (more equipment and it is more expensive);
- the screed with a water floor should be thicker (5.5-6.0 cm versus 3 cm);
- the load on the water heating ceiling is greater (due to the thickness of the screed and due to the fact that the coolant also has considerable weight).
The cable must be laid out and secured, then covered with a layer of concrete.
But a water floor is more economical in operation. But it is almost impossible to do it legally in an apartment. No one will give permission to connect to the heating system. Installing a separate boiler means increasing already considerable costs. And not every ceiling can withstand such an increase in load. The exception is new houses, which have special risers with a lower temperature, and ceilings are designed taking into account the possible installation of a water-heated floor.
Water and cable without screed
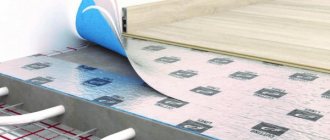
There is also a “dry” method of laying water or cable heated floors. It's good if you don't mind making the floor with joists. The boards are laid on the joists not close to each other, but spaced out. If the board is too expensive, chipboard cut into strips, thick plywood or other similar material will do. Metal heat distribution plates are laid on the boards. A groove is formed in the center of the plate into which a pipe or cable is laid. Sheet material (plywood) is placed on top; tiles can already be laid on it with glue.
Dry method of laying water and cable floors
As you can see, the design is multi-layered. The heating of the floor is not direct (directly from the heating element), but through the heat distributed by the plate. And first the plate is heated, the plywood from it, and only then the layer of glue with the tile. So it will take a long time to heat such a floor. And take the power of the heating element with a large margin. In general, this option is only suitable if you need a warm floor to keep your feet warm. For main heating, this is an unlikely option.
The fastest in laying under tiles
If repairs need to be done as soon as possible, only one type of heated floor is suitable for laying under tiles - cable mat. It installs really quickly and is reliable in operation.
The easiest and fastest cable mat to install under tiles
What difficulties might there be? You need a good tile adhesive for underfloor heating. It can't be cheap. The cost will be higher than when laying tiles on a screed. It is necessary to take into account the thickness of the heating cable and mesh. So the cost of tile adhesive will be significantly higher than without underfloor heating.
Main stages of installation
All of the above is true for any electric heated floor. First, install the thermostat on the wall. This is a small device. It usually fits into a standard socket box. So we install a socket box in the wall and a thermostat in it. It will be necessary to attract food to this place. It is better to have a separate line from the distribution cabinet. The power of an electric heated floor is calculated in kilowatts. So a dedicated line with a circuit breaker is desirable. Down from the thermostat - to the floor level - we wall up the pipe in the groove. We will use mats in it and connect it to the thermostat.
General arrangement of electric heated floors
A heated floor sensor is also required. It is better not to wall it up tightly. This is the part of the system that most often fails. To make it easy to change the sensor, a piece of plastic pipe is embedded in the floor. The far end is placed between the heating elements to make the readings more realistic. Leave the edge of the pipe open. To do this, before laying the tiles in this place, we plug the cut with a rolled up rag. We tie a wire to the rag and pull it through the pipe. We laid the tiles on the heated floor, the glue dried, and the cork was pulled out. The sensor was lowered into the free pipe. Replacing it will be done in the same way: pull out the old wire, insert the new one.
You can choose any type of heater for the tile. But a heating cable attached to a mesh requires less time.
And further. Do not forget to check the functionality of the heated floor before laying the tiles. When you have laid the mats and connected them to the thermostat, you can check the system. First, we supply power to the thermostat, set the temperature on it and wait for a while. After a few minutes the cable should be warm. We check all areas. Heating should be uniform over the entire area. If everything is fine, you can lay the tiles. If not, we look for errors in the connection.
Thermoreg TI 200 thermostat
| Manufacturer: | Thermo |
| Model: | TI 200 |
| View: | electronic thermostat |
| Power: | 3600 W |
| Installation type: | recessed |
for comparison
old price 3,544 rub.
RUB 3,190
Product added to cart
| Photo | Name | Price per piece | Quantity | Price |
| Thermoreg TI 200 thermostat | RUB 3,190 | < 1 > | 3,190 3,190 rub. |
There are 0 items in the cart worth 0 rub.
Go to cart
Buy
Availability
What power heated floor to choose
Let's start with the fact that the floor temperature is regulated by sanitary standards (SNiP 2.04.05*91*, clause 3.16). According to this document, the floor cannot be heated above:
- 26°C - in rooms where people are constantly present (residential);
- 31°C - floor in rooms where people are temporarily (bathroom, toilet, etc.).
At the same time, the maximum heating temperature above the heating element is also limited. It should not be higher than 35°C. In fact, you feel comfortable if it’s about 26-29 degrees under your feet. It is, of course, a personal matter, but a warmer floor feels hotter.
After you decide on the power of the heated floor, you can choose the power of the cable or heating mat
Why do we need floor temperature? But because the required power per square meter depends on it. If you do everything according to the rules, you need to calculate the heat loss of the room, take into account the heat capacity of the materials, the presence and quality of insulation. Calculating the power of a heated floor is a whole process. But it can be made simpler. There is an “average temperature in the hospital.” The data collected on the basis of actually working structures is shown in the table.
What power should I use for heated floors under tiles?
But this does not take into account the layer of glue and the thickness of the tile. These are really “average” indicators. How can I correct them? If the adhesive layer, tiles or porcelain tiles are thick, add about 20%. This will give the required temperature. In general, it is better to take power with a reserve. There are two reasons. Firstly, operating at the limit damages the equipment. It breaks down faster. This also applies to heating elements.
Secondly, in case of extreme cold or the main heating is turned off, you will have some reserve. True, an increase in the maximum power of the heating elements leads to an increase in the diameter of the wires in the power line and the power of the machines. But in electrics, a power reserve is always better than a lack. More safely.
Calculation example
In the table we have standards, but they are for one square meter. To calculate the required power for the entire room, you need to calculate the heated area. We multiply the resulting figure by the selected norm.
Let us show with an example how to calculate the power of a heated floor. We will lay the electric warm mat only in the free area. In the bathroom this is 3.5 square meters.
First you need to determine the heating area
Based on the table, a bathroom requires 150 W of heated floor power per square meter. But we will be laying thick tiles, so we will take the power with a reserve. We will count 180 W/m².
A total of 180 W/m² * 3.5 m² = 630 W is required. That is, you will need to find a cable mat that will produce at least 600 W of heat over 3.5 square meters.
Thermostat Caleo UTH-130
| Manufacturer: | Caleo |
| View: | mechanical thermostat |
| Power: | 4000 W |
| Installation type: | overhead |
for comparison
RUB 3,664
Product added to cart
| Photo | Name | Price per piece | Quantity | Price |
| Thermostat Caleo UTH-130 | RUB 3,664 | < 1 > | RUB 3,664 3,664 |
There are 0 items in the cart worth 0 rub.
Go to cart
Buy
Availability

