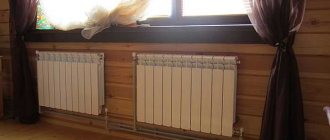
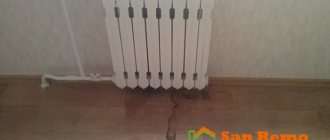
A leak in a heating battery is quite a big problem for home owners. This situation most often occurs at the most inopportune moment - during the heating season. But even this problem can be quickly solved if you take into account a few simple but effective recommendations from experts. To achieve the desired result, you must determine exactly where the battery is dripping, as well as prepare all the necessary tools and devices.
Detection of a fistula in a cast iron product
Factors that cause radiator damage
In order not to have to figure out ahead of time how to properly fix a leak in a cast iron heating battery, you need to understand that structural damage is most often caused by temperature changes in the system and water hammer. Despite the fact that such radiators have increased resistance to various negative factors, they can also fail. Large changes in the temperature of water or other filled coolant negatively affect the condition of the batteries.
If liquid hotter than 100C circulates in the system, gaskets and sealants may eventually be damaged. When water boils, the pressure in the central system can rise several times. This situation does not exclude damage to entire sections. In some cases, the radiator may even burst.
When a previously working battery leaks, the main reason may be due to improper installation of the equipment. This problem can arise just 1-2 years after installation. If cast iron products were chosen to complete the system, then the risk of manufacturing defects cannot be excluded. That is why it is better not to save on heating equipment, so that in the end you do not have to overpay for unscheduled repair work.
Destruction by rust
What problems occur most often and why?
- As you know, cast iron batteries are very heavy, so they should be mounted on special fasteners. If a minor mistake is made during installation, the radiators may sag and tilt under their own weight. A misalignment of just a few millimeters already negatively affects the efficiency of the device. If this problem is not corrected, then after some time corrosion will begin to form in the place where the coolant does not reach. Over time, cast iron becomes thinner under the influence of corrosive processes, which leads to the formation of a fistula. It is through this that water flows.
- In apartment buildings where a centralized heating system operates, powerful water hammers very often occur. As a result, leakage occurs at the joints of sections.
- Due to the roughness of the inner surface of cast iron batteries, a lot of different debris accumulates on it. If we take into account that the coolant is rarely free of impurities, then over the years of operation a sediment of rust, pieces of metal and other foreign impurities accumulates inside the batteries. The channels become clogged and can no longer pass water fully. In this case, the risk of battery breakdown will increase. Increased acidity of the coolant also negatively affects cast iron.
- The weak points in batteries are gaskets and nipple threads. This is where leaks most often occur.
Usually, before a leak occurs, certain signs are observed: the room becomes colder, plaque appears on the radiator, and rusty spots appear on the surface of the device. You shouldn’t be inactive at the first suspicion of a leak - you need to quickly fix the problem without waiting for an accident. If puddles of water are already appearing under the battery, or the level of humidity in the room has increased, then it is necessary to urgently repair the product.
The best time to start repairing heating radiators is from late spring to early autumn. The heating season is over, and you can calmly, thoughtfully and without undue haste, inspect the sections for damage, and carry out their full restoration. However, unfortunately, troubles always come when you least expect them, and according to the law of global meanness, the batteries burst in the middle of the heating season.
It’s good if the residents were at home when the heating battery leaked and responded to the problem in time, preventing the neighbors below from flooding. If this trouble happened to you in winter, then be prepared to live in not very comfortable conditions for some time. Also, do not forget to warn your neighbors that you have heating radiators that you plan to repair.
Types of radiators by material
Let's look at a few of the most popular types of batteries and look at their features.
Bimetallic radiators
This type of heating device has a beautiful appearance and is inert to corrosion. Able to provide excellent heat transfer. Repairing this type of radiator is quite affordable on your own, but not so common, since they are distinguished by quite good reliability.
Steel batteries
This type of radiator, like the previous one, is characterized by excellent heat transfer and low weight, but is not nearly as reliable. And most of the cases when heating radiator repairs are required are associated with these heating devices. This type of radiator should not be installed in houses where the heat supply is centralized, since their short service life and high susceptibility to the negative effects of corrosion will not allow them to last long.
Aluminum
This type of heating device is very good to use, has excellent heat dissipation, weighs little and looks beautiful. However, this type of device is very picky about water quality, and can be damaged if there are strong pressure surges. If too many chemical impurities have accumulated in the heating fluid, repairing the aluminum heating radiator will be impossible, so they can only be installed locally. Where the quality of the coolant is constantly monitored.
Cast iron products
One of the most reliable and well-known types of heating batteries. They are characterized by high heat capacity, reliability and excellent strength. They are not afraid of corrosion, and are not at all picky about the quality of the coolant. So you are unlikely to need to wash cast iron batteries yourself more than once every ten years. Due to the fact that, despite all their advantages, these heating devices weigh a lot, it is quite difficult to install and maintain them, so replacing heating batteries in an apartment with your own hands, especially if the radiators are made of cast iron, is only possible if you are completely confident in your abilities and knowledge. In addition, the repair of cast iron batteries is a fairly common occurrence, since their intersection gaskets are subject to fairly rapid wear, as a result of which they leak relatively often.
Most common faults
If the homeowner decides to independently figure out how to quickly eliminate the resulting leak, then it is necessary to familiarize yourself with what types of defects of this kind exist:
- Violation of previously created pipe tightness.
- Cracks in the casing of tubular, sectional and panel radiators.
- Formation of a leak in the area where the structure is connected with the pipeline.
- Violation of the tightness of the seam that serves as the connecting element of the sections of the device.
Even the most minor breakdown inevitably leads to a leak in the heating unit. This is a clear sign that the system is out of order. Even an untrained person can detect such a problem. More serious problems can only be identified by a qualified specialist who has at his disposal a special device for measuring pressure in pipes. This approach is especially relevant if the characteristic sound of a leak is heard, but the damaged compartment cannot be found.
The most problematic area
Damage to a piece of material that does not have a thread
You can qualitatively eliminate a leak in an operating heating radiator on your own. This is an excellent option for those situations when there is no time to wait for representatives of the housing and communal services organization, and a welding machine is also unavailable. Many deformations occur due to poor-quality welds and corrosion damage.
There are several available ways to restore the system:
- At a plumbing store, you need to buy a factory-made clamp, which is designed to combat leaks. The disassembled product is placed on the pipe so that the durable rubber gasket is located opposite the leak. At the final stage, the clamp is tightened with bolts.
- The problem can be solved with the most common aluminum clamp, which is designed to tighten hoses on fittings. First, a thick rubber gasket is applied to the current areas. The structure is clamped with a regular screwdriver. This option is distinguished by its accessibility and simplicity.
- If you don’t have time to visit stores, but you urgently need to solve the problem and eliminate the leak, then you can safely use thick copper or annealed steel wire. The product is folded in half and the gasket is pulled to the location of the detected leak in order to twist it with pliers.
Attention! If the user does not know how to cover up the formed hole, and paint streaks are clearly visible at the leak site, then the structure is first cleaned with a knife. The performer of such painstaking repair manipulations should be prepared for the fact that after the completed manipulations, the liquid pressure will increase slightly.
An accessible way to unscrew the plug
The main causes of malfunctions of cast iron radiators
Cast iron is highly durable, the service life of heating products is 25–30 years , under optimal conditions - 50 years or longer.
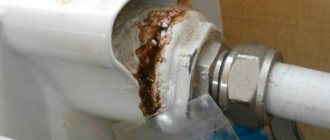
But thick-walled cast iron batteries have vulnerabilities: most often radiators leak between sections, at connections with pipes, and sometimes fistulas and cracks appear on the cast iron itself.
The main reasons why repairs have to be carried out:
- Heavy weight. Depending on the type and manufacturer, the weight of one cast iron section is 4.5–7.1 kg, the filling volume is 1–4 liters , the standard set consists of 4–10 elements. In case of unskilled installation and incorrect calculation of the number of brackets, the radiator becomes skewed. As a result, the joining elements suffer and metal fatigue occurs. In places where there is no coolant, corrosion appears, then a fistula.
- Instability to water hammer and high pressure. When an obstacle is abruptly removed, the liquid acquires enormous speed and rushes to the area of lowest pressure. The power of the water hammer in the heating circuit exceeds the force of a hammer blow. A sudden change in pressure or its high levels threaten depressurization of the heating system - leaks most often occur at the joints where parts of the radiator are connected.
- Dirt and trash. Elements of domestic cast iron batteries are produced by casting. The technology is such that the surface remains rough, which is excluded in imported analogues.
Due to the granularity, particles of rust and suspension that fill the coolant settle on the walls. Gradually, the channels become clogged and cannot withstand the pressure of water - the battery may burst from pressure or water hammer. To prevent repairs, regular flushing of the system is required.
Photo 1. The elements of the cast iron battery are clogged with rust and debris; because of this, the radiator cannot cope with the water pressure.
- Wear of intersection gaskets. The strength of collapsible joints is always inferior to monolithic structures. Intersectional gaskets and threaded battery nipples wear out faster than cast iron and are more susceptible to temperature and pressure. To avoid leaks and emergency repairs, do not forget about prevention: after the heating season, check the connections and change the gaskets.
Tools and materials for eliminating defects with your own hands
Minor repairs of cast iron radiators are possible without the involvement of master plumbers , with your own hands. Depending on the method of restoration work, you will need:
- metal cable or sandpaper - to clean the defect area ;
- for repairing section joints: clamp - a fastener consisting of two rubberized plates from the inside, connected by bolts;
- to eliminate fistulas: cold welding for radiators - a plastic mass intended for fixing metal parts without thermal heating;
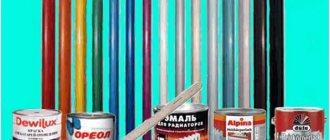
- degreasing solvent: gasoline, acetone, white spirit and others;
- one of the sealants: iron powder, polymer, cold welding, epoxy resin;
- bandage or strips of fabric;
- a wrench to match the size of the clamp fasteners, pliers;
- rags, oilcloth, container for collecting water.
Attention! For emergency repairs, instead of a clamp a piece of thin rubber cut from a car inner tube or an elastic rubber bandage and wire for fixation are used.
To wash cast iron batteries, prepare an adjustable pipe wrench, solutions of 10% caustic soda , citric acid ( 50–60 g per liter ) or a special liquid for heat exchangers.
Photo 2. Preparation of a solution for flushing a cast iron radiator; soda and citric acid are added to it.
Repair and cleaning in case of battery leakage
Actions to eliminate the defect depend on its location and the severity of the failure. In all cases, repairs begin with preparing the workplace.
Attention! If the leak is significant, call an emergency team. Attempting to tighten a crack under pressure with a clamp is dangerous to health, as it can lead to rupture of the radiator.
Sequence of work when repairing section joints:
If rubber is used instead of a clamp to repair the joint of cast iron radiators, wrap it around the leak area and tighten it with wire using pliers.
Reference! A clamp without prior application of sealant is used to quickly eliminate minor leaks. The rubberized base ensures tight connections.
If the fistula has formed on a cast iron surface, apply cold welding using the indentation method to the cleaned and degreased area to repair it. A non-standard solution to the problem is to drive a wooden plug into the hole or screw in a self-tapping screw and cover the top with sealant.
How to fix a leak from a locknut
There can be several reasons for this problem:
- As a result of mechanical impact, the tightness of the connection was broken. A common problem often occurs as a result of someone simply becoming naked on the pipe.
- The used plumbing linen burned out.
- The thinnest section was destroyed by corrosion.
If a person has not yet figured out the best way to seal a small leak, then it is best to adhere to the following scheme:
- The heater risers must be turned off and reset.
- Use an adjustable wrench or a gas wrench to unscrew the lock nut in order to be able to clear the threads of winding residues. After the manipulations have been completed, you should carefully inspect the structure.
- If the technician does not find any signs of fistulas, then you can rewind the locknut with flax and paint, sealant or drying oil. As an affordable alternative, you can use a polymer thread, which should be tightened with moderate force.
- At this stage, outside help will be needed, since when starting the risers it is necessary to monitor the damaged area.
- If the technician managed to repair the leaks in the battery the first time, then the repair work can be considered complete. You just need to bleed the air. If after rewinding the locknut the leak was not eliminated, then the fistula formed precisely in the thread.
- It is necessary to push the radiator cap and locknut all the way down the pipe. Now you need to carefully disconnect the wiring from the radiator. The existing thread should be driven with a die and an additional six threads should be cut. Be sure to clean the surface of paint first.
- All that remains is to cut the pipe to the problem area in order to run the thread with a die again. After this, connect the radiator.
- At the final stage, all that remains is to launch the system to fully heat the rooms.
Important! Experts recommend applying very little oil to the pipe, since in this case the die will go much easier and will not leave unwanted damage on the metal.
How to deal with battery leaks on your own
Cold welding for cast iron and other heating batteries
Although heating batteries have a service life of more than 50 years, you can often encounter a situation where the radiator requires repair. Several years ago, battery repair was possible only in one way - hot welding. Today we can use a more convenient repair option - cold welding for heating radiators.
Let's figure out what cold welding is for cast iron batteries
In simple terms, cold welding for cast iron radiators is the gluing of bases without preheating. This glue has a special composition, most often it consists of epoxy resin and hardener. After drying, a seam made from such an adhesive composition has the properties of metal. This welding method can withstand heavy loads, high temperatures, and can be used at sub-zero temperatures, so it is considered very reliable for cold welding battery repairs.
How to prepare a battery for cold welding
To understand whether it is possible to cover a battery with cold welding and for high-quality repair of a cast iron battery with cold welding, it needs to be prepared for this. How to seal a heating radiator using cold welding:
- To cover a battery with cold welding, the surface that needs repair must be cleaned using sandpaper, as the roughness will increase the level of adhesion to the adhesive. Many people ask, is it possible to cover a hot battery with cold welding? If you can paint heating radiators while they are hot, then it is better not to use cold welding with hot radiators. The radiator temperature should be room temperature.
- Then degrease. Particles of dirt and dust, on the contrary, will worsen the quality of gluing.
- When using hard welding, keep your hands wet to prevent the compound from sticking. When using a liquid solution, you need to act very quickly.
- We apply the solution to the surface to be repaired and do not forget that it is better not to use cold welding for heating with hot radiators.
- For better adhesion and gluing, you need to secure the gluing area with a tourniquet or clamp.
- The curing time of the composition is from 15 minutes to one hour, it depends on the chosen welding grade, after which it can be processed, drilled, etc. Final strength also depends on the brand, but is usually achieved after 24 hours.
Types of cold welding for batteries
When a battery breaks down, many people ask who to complain about cold batteries in the apartment and how to seal the battery with cold welding and is such a repair durable? Any professional in this matter will tell you that a seam made using cold welding is reliable. Of course, a lot will depend on the choice of adhesive composition. They are divided into two types:
- Liquid. When purchasing this type of cold welding, please note that this composition is two-component. This means that there are two tubes in the package. They must be mixed before use. Please note that after mixing, the solution is stored for no more than 20 minutes.
- Solid. The feel of this type of welding is indistinguishable from ordinary plasticine for children. More often it is a two-part bar, which must also be mixed before use. There are also one-component bars, then you don’t need to mix anything, you just need to knead them before use.
Which cold welding machine should I buy?
In order to correctly buy cold welding for cast iron radiators, when choosing, you should pay attention to the fact that it differs in composition. Not every cold weld can be used to seal leaks in batteries. Depending on the composition, cold welding is used for different purposes:
- Multifunctional. This welding can be used to repair any materials: metals, wood, plastic. But it is considered the least reliable.
- For metals. This type of welding has a special composition that, when working with metals, securely holds them together.
- Special cold welding for batteries and pipes. It firmly glues parts and does not lose its properties even at a temperature of 1500 degrees.
- Automotive. It is also used for fastening metals, but has a more gentle composition.
- Cold welding for underwater repairs.
Be sure to check the packaging for the temperature conditions at which the seam retains its properties. The higher the temperature, the more reliable the welding. More often, instructions for adhesive compositions indicate a temperature of 260 degrees, but as practice shows, such a seam retains its qualities only at room temperature. Therefore, to avoid this situation, you need to choose cold welding, where the operating temperature will be 1300 degrees and above. Such solutions are the most durable. You can buy cold welding for heating radiators at any manufactured goods store. One of the most popular is cold welding for Mastix batteries. It is sold in a 55 gram tube and the price starts from 40 rubles. Often when repairing a battery, the question arises, how to treat the battery after cold welding? Experts answer that no processing is required. But we should not forget that cold welding is still a temporary solution to the problem. Is it possible to seal a battery by cold welding? It’s possible, but it’s better to call a technician after the end of the heating season to carry out major repairs and, if necessary, replace the radiator. You may be interested in the article “If it’s cold in the apartment, where to go in Moscow?”
If, after removing the paint layer, a rubber gasket is found in the joint area, it will need to be cut off and a new one put in its place. As each nipple is tightened, a silicone gasket is pulled over it.
Quite often it is quite difficult to determine the problem area on the radiator, since water floods almost its entire surface. To find a crack, you have to wipe the battery several times and quickly look for the damaged area. As soon as a leak is detected, immediately close the shut-off valves to ensure that no water remains inside the radiator. After this, lower the pressure by gradually opening the Mayevsky tap. Start repair work only after water stops dripping from the crack. To eliminate leaks between sections, use cold welding. In addition, you can cover the problem area with epoxy mastic with various impurities. Before applying the composition, thoroughly clean the surface of the battery. First, remove the old paint, then use a steel cable to remove the rust inside the battery. The durability of the patch will depend on how well you prepare the surface. When purchasing mastic, pay attention to the instructions for use. Some lubricants are not suitable for working with metal, so they will not stay on the battery for a long time. Often, in order to get a reliable putty material, you need to mix several products and carefully apply them to the crack using a syringe. The mastic will dry for at least 2 hours. At this time, heating the battery is strictly prohibited. Remember that the quality of the repair does not change depending on the amount of material applied. For a reliable patch, a layer 5 mm thick is sufficient. After repair, the device will no longer have the same appearance. However, you can by choosing the right paint for this.
Damage to the radiator plate
Heating of residential premises must be of high quality and reliable. But too thin, corrosion-resistant battery metal will eventually develop a leak that needs to be fixed quickly. If a spare plate is not at hand, then cold welding can be used. This material is a two-component epoxy adhesive with the addition of fine steel filings. All further actions must comply with the following scheme:
- When a heating device leaks, it is necessary to reset the risers. Damaged areas are cleaned of paint and rust. It is advisable to degrease with acetone or gasoline.
- Apply the glue evenly. Detailed instructions must be indicated by the manufacturers on the packaging. It is best to treat an area of at least 4 cm2.
- You need to wait enough time for the composition to harden. After 40-50 minutes, you can start the system and bleed off the accumulated air.
Damage to worn-out products
Features of surface preparation for applying adhesive composition
The use of an epoxy resin-based adhesive requires the fulfillment of a number of conditions regarding the preparation of the surface for gluing. First of all, it is the cleanliness of the surface. Cold welding fits perfectly on metal surfaces and, when it contains metal powder, forms a strong connection, which subsequently also forms a diffuse connection. But in order for the plastic mass to be evenly applied to the surface of the metal, it is necessary to prepare it.
When preparing you need:
- Remove traces of drips;
- Remove the paint layer down to the metal;
- Clean the metal with sandpaper;
- Degrease the surface to be coated.
There are no minor operations in the list of operations; all of them are important for proper gluing of surfaces. True, it is worth dwelling on degreasing in more detail. During mechanical processing, dust and other particles, such as paint residues, enter the battery repair point in the roughness of the metal. In order for the glue to adhere as closely as possible to the metal, the area is additionally degreased so that the surface is as clean as possible. This operation will avoid the formation of a fatty film on the metal, which, after the cold weld has dried, will form a cavity into which water will leak.
Constant hydraulic pressure and temperature fluctuations will quickly expand the area of the cavity, and the coolant will again begin to seep out.
What to do if a leak has formed between two sections of the battery
This problem often occurs as a result of a decrease in the temperature of the charged coolant. If the user decides to seal a tiny defect, then there is no need to rush into performing this procedure until the next frost. The temperature of the battery will gradually rise, causing the naturally expanded sections to again compress the leaky gasket.
Comprehensive leak control includes several stages:
- The first step is to turn off the system and gradually disconnect the radiators from the supply lines.
- You need to measure the distance from the nearest end of the heating device to the leak in order to throw a thick steel rod into it, which is flattened at the end. The master needs to try to hook the problematic nipple. The technology for placing this part directly depends on the side from which the key was inserted.
- The nipple must be tightened along the thread until it stops. In this situation, additional efforts can be made.
- All that remains is to tighten the plugs furthest from the liner. The unit is connected to the riser, the air is vented and started up.
Attention! When disconnecting the liner, it is better to substitute a capacious basin, since a certain amount of water necessarily remains in the riser.
Formation of cracks between different sections of heating installations
The most effective methods for eliminating leaks in the battery
With the onset of the cold season, many apartment and house owners discover that a recently working radiator has begun to leak. In such a situation, you need to try to shut off the water supply as quickly as possible and drain all the coolant from the circuit. In emergency situations, the battery simply needs to be replaced. If the structure is collapsible, then the financial costs for restoration work will be minimal, since to fix the problem you can purchase only one new section or plate.
Important! Before a comprehensive replacement of equipment, you should try to take all measures to restore tightness and eliminate leaks. It is for these purposes that experts have provided several simple and affordable home repair options.
Leaking from the connection between the radiator and pipes
Most often in this case, problems arise with the seal on the thread. Troubleshooting will require shutting off the water and reducing the pressure.
For such cases, it is advisable to keep spare nuts and couplings at home. The old ones could become unusable. Rusted parts do not always withstand the stress of working with them. In cases of thread damage, a die will be needed. When everything is ready, tow is wound onto the threads and a layer of Unipak paste is applied on top. The parts are tightly screwed. Gradually opening the water supply tap, the reliability of the work done is checked.
Instructions for sealing a threaded connection with tow and sealing paste (click to enlarge).
Universal hermetic seal
Leaks often occur in an aluminum radiator, which are directly related to various unfavorable operating parameters. To restore the integrity of the structure, a high-quality sealant can be used, which can be purchased at any hardware store. The product that manufacturers produce specifically for heating radiators, consisting of polymers or a special powder, has proven itself to be excellent.
Attention! Due to its specific composition, upon contact with air, the sealant simply polymerizes.
After complete hardening, the applied composition perfectly eliminates leaks, so you can avoid large financial investments in major repairs. If the homeowner has previously worked with sealants, he can quickly take emergency measures so that the system can continue to heat the house.
Battery Features
Despite all its attractiveness, this type of heater is in the least demand among consumers due to the prevailing opinion that the service life of aluminum radiators is short, and they have many shortcomings and “claims”.
This is not entirely true. Aluminum heating radiators have a number of attractive features that have won the hearts of many customers.
Among them:
- They are able to withstand pressure drops of up to 20 atmospheres and above. If they are intended to be installed in a house with centralized heating, then you should carefully study the operating system and, when choosing radiators, familiarize yourself with their technical characteristics specified in the data sheet.
- Aluminum radiators weigh little, so they are easy to both transport and install.
- Their design is so simple that, if necessary, it allows you to repair aluminum heating radiators with your own hands if you have the necessary tools.
- High heat transfer ensures rapid heating of the room while saving energy resources.
- A small volume of coolant provides almost instantaneous heating of the entire radiator area.
- Aluminum radiators have a stylish design and fit perfectly into any environment.
Such a number of advantages could make them leaders in sales on the heating systems market, if not for the fact that they “feel” best in individual heating systems.
This is due to the fact that aluminum is susceptible to corrosion in the absence of a coolant for a long time (as is known, in centralized systems it is drained in the warm season) and its purity and alkaline balance.
If with autonomous heating the quality of the media can be monitored and left in the system, then in an apartment building with central heating it is very difficult to do this.
If aluminum batteries are installed correctly and operated in the conditions required for them, then their service life significantly exceeds the warranty (10 years) from the manufacturer. Repairing an aluminum heating radiator will not be as difficult as adding additional sections.
The use of rubber gaskets and conventional clamps
Before repairing bimetallic heating radiators, you should prepare some materials and equipment:
- Pliers.
- Aluminum clamps.
- Wire.
- Classic gasket made of durable rubber.
The repair technology includes a certain list of important stages. A gasket is placed in place of the leak and everything is secured with a clamp. If you don’t have the right tools at home, then a simple wire and a bicycle tube will do just fine. From this material you can carefully cut a piece of rubber of the appropriate size. You can secure the homemade gasket with strong wire. To achieve a good tie, you need to use pliers.
What to do in case of a breakthrough: step-by-step instructions
If your battery is leaking, you won’t be able to fix the leak on your own, but you can minimize the consequences and prevent serious damage. The sequence of your actions should be like this:
- Remove children and pets from the room; if hot water is spurting out, you need to throw something thick, such as a blanket, over the radiator to prevent thermal burns.
- Turn off the power to the apartment or at least turn off electrical appliances that are located near the battery.
- Turn off the water. If there are no shut-off valves in the apartment, then you can shut off the coolant supply at the main pipeline at the entrance to the basement, but this method is used in exceptional cases, because the entire house will be left without heat.
- Call an emergency plumbing team.
- Take possible measures to eliminate (reduce) the leak.
How and what can you fix with your own hands?
If the leak is small, you can try to fix it yourself. For this you will need:
- Find the exact location of the leak. Use dry toilet paper (napkins or newspaper) for this. By looking at the wet spots, you will understand where the water is flowing from the pipe.
- If a leak has formed in a cast iron battery, it is eliminated with a self-tapping bolt, which is screwed into the resulting hole.
- If you have the necessary materials, you can make a plaster-cement bandage. Strips of a regular bandage are moistened in cement or gypsum mortar and applied to the leak site.
- If a leak has formed at the threaded connection between the pipe and the radiator, you can use a salt dressing. Strips of bandage soaked in water are rolled in salt and applied to the leak site. Salt dissolves in water and cokes the point of damage. A cement bandage is applied on top.
It is important to understand that all these measures are temporary; if even a small leak in the system occurs, over time this can lead to an emergency and serious damage. Therefore, it is better to replace such a device
Where to go in other cases?
If a serious leak occurs, you need to call the management (maintenance) company. It is her responsibilities that include eliminating leaks and organizing repair work.
Drawing up an application
After eliminating the malfunction, a report is drawn up, which records the amount of damage. If heating radiators need to be replaced, residents must file an application addressed to the management company (who should repair and replace heating radiators in apartments?). The application is drawn up in any form, but it must contain the following information:
- name of the management company and details of its director;
- the applicant’s personal data and specific address;
- text demanding replacement of radiators and indicating the cause of their damage;
- signature and date of submission.
We do not recommend completing the documents yourself. Save time - contact our lawyers by phone:
The application must be registered as a written appeal, in which case it must be considered within 3 deadlines and a written response must be given, in accordance with paragraph 34 of Government Decree No. 416.
Innovative moisture-resistant adhesive
In this case, the technician will not be able to rehabilitate the heating without draining the water. If liquid begins to drip at the junction between the metal sections, then to eliminate this damage you will need a cloth that must be soaked with glue that is resistant to high humidity and high temperatures. When the composition hardens, the leak will be reliably eliminated. For these purposes, it is better to buy universal epoxy glue.
The video provides interesting information about cold welding and its versatility:
conclusions
There are several ways to eliminate emergency leakage of heating radiators:
- using a self-tapping bolt;
- using a cement-plaster cast;
- using a rubber pad with wire or a clamp;
- using fabric impregnated with waterproof and heat-resistant glue;
- using a special sealant;
- using welding.
All of these methods of eliminating leaks are temporary measures that make it possible to have time to purchase new heating devices and plan their replacement.
The leak is repaired using a regular bandage or strip of fabric and epoxy glue. The bandage is impregnated with glue and tightly wrapped around the leak site. After the glue has dried, the repaired area is painted the same color as the battery. This “ambulance” ensures tightness for 1-2 years.
How to seal a heating radiator Miraculously, a problem with an aluminum heating radiator arose when frosts set in throughout Russia. Moreover, the radiator leaked late at night. I woke up several times at night because the heating radiator was making noise. I also thought that this was not without reason and was very similar to depressurization. Alas, I was not mistaken - in the morning there was a decent puddle under the radiator on the laminate floor. Initially I thought that the problems were related to the faucet, but then I discovered swollen paint on the side surface of the radiator from under which water was oozing. I was able to determine the location of the leak by the swollen paint. Having removed the swollen paint with a flat screwdriver, I saw the cause of the leak - two small holes. Two holes in the left sections of the radiator. Most likely, the microscopic hole appeared a long time ago, since just a year ago, a noise similar to a clicking emanated from this battery. I kept blaming Mayevsky's damaged faucet, but even after replacing the faucet, the noise did not stop.
What to glue with?
After searching for information on the Internet, I decided to buy cold welding. There was no choice, so I took what was in the store - “Almaz Universal Cold Welding Adhesive.” Almaz Cold Welding Adhesive Previously, I had the opportunity to use this glue to repair a leak in a steel heating pipe under pressure of about 2 atmospheres. It was not possible to completely eliminate the leak, since it was not possible to drain the water from the system and properly degrease the surface of the pipe at the place where the glue was applied.
Equipment:
- Plastic tube packaging;
- Glue wrapped in film;
- Instruction insert.
What does Almaz universal glue:
- Parts made of ferrous metals;
- Parts made of non-ferrous metals;
- Plastics;
- Glass;
- Ceramics;
- Tree;
- Marble;
- Concrete;
- Granite;
- Plexiglas.
Be sure to look at the manufacturing date on the back of the insert - the glue has a shelf life of two years. The shelf life of cold welding does not exceed two years. The adhesive is two-component - before mixing, the components are inert to each other. The adhesive is two-component. Visually it looks like a brown core and a white shell
Instructions for using Almaz welding adhesive:
Clean off dirt, degrease and sand the parts at the joints. Cut off the amount of compound required for repair, thoroughly mix its components with each other with wet hands (use gloves) until a working mass of a uniform color is obtained. The composition should warm up in your hands and become plastic and sticky. Immediately apply the composition to the surfaces to be glued, if necessary, fix them for 15-20 minutes with a clamp or tourniquet. Curing time is 1 hour, after which the composition can be processed, drilled, threaded, painted. Final strength is achieved after 24 hours, after which it can be subjected to structural loads. Wrap the remaining adhesive with film, secure with an elastic band and pack in a tube for reuse.
Gluing process
Before gluing the radiator, I turned off the taps on it and waited until water stopped flowing from the leak. The heating radiators are equipped with bronze half-turn taps with an American nut. Thanks to this, you can close the taps and dismantle the radiator without draining the water from the system. If necessary, you can always loosen the American nut to quickly drain the water. For these purposes, it is convenient to keep a plumbing wrench on hand. When the gluing process began, the surface near the damaged area was dry. In principle, Almaz cold welding can be glued to a wet surface, but I prefer a dry one. Alcohol applied to a cotton pad was used as a degreaser. The adhesive area was degreased with alcohol applied to a cotton pad. After cutting off the glue and mixing the components, I got a ball with a diameter of about 15 mm. The composition is ready for use. Cold welding was first applied by hand and then pressed tightly to the radiator using the tip of a screwdriver. It doesn’t look very neat, but the glue is applied between the fins of the radiator, where it is still not visible
To improve the quality and speed up gluing, the composition applied to the radiator was heated using a household hair dryer for 5-10 minutes.
Heating with a hairdryer allows you to get better bonding and speeds up the hardening process of the composition. In principle, after 10 minutes, the glue has hardened considerably. However, he decided not to rush and opened the taps only after an hour. The leak has now been eliminated.
Bandage based on plaster and cement
To figure out how to repair a damaged radiator, you can use this technology. To work you will need prepared alabaster, sharp scissors, a regular bandage, a container for water, and cement. In a vessel you need to prepare a solution of a thick consistency, into which you need to dip the pieces of bandage. One strip should be 35 cm long. Bandages thoroughly soaked in alabaster are applied to the detected leak area. To achieve maximum results, you need to apply several layers at once. This option is actively used by both beginners and professionals.
Application of universal welding
Thanks to this device, you can eliminate absolutely all traces of leakage. Welding allows you to eliminate leaks in any type of battery in just a few minutes. The master can purchase a high-quality installation in a specialized store.
Important! Classic welding copes well with all types of cracks and breakdowns, due to which you can quickly return the system to its previous tightness.
This option is in great demand, since the result of the manipulations performed is not afraid of the negative effects of moisture and high temperatures. Welding is one of the most reliable ways to eliminate leaks in a heating system. If a person has not previously encountered such a device, then it is better to entrust all manipulations to a specialist.
A variety of products for filling holes in cast iron products
Locate the leak
When an aluminum radiator leaks, the most difficult thing is to determine the location of the damage. Believe me, it's not as easy as it seems.
When you see a puddle on the floor under the radiator, you can determine which section the water is coming from. But the shape of the sections is such that it is difficult to look under the outer feathers; the gap between them is usually 4-6 mm. Therefore, you will not be able to determine the real cause and location of the damage.
First of all, inspect the joints at the top of the radiator. They are visible through the gaps between the feathers that remove air. If there are drops of water on the connection or it is wet, you are lucky and you are deprived of most of the problems with “making a diagnosis”. You can proceed to the section “How to fix a leak between sections of an aluminum heating radiator.”
The lower joints are difficult to inspect, since you cannot get close to them. You can feel them with your fingers, but it’s better to be smart. Use a small mirror to examine them.
If all connections are dry, then the problem is more complex and a crack has appeared on the side wall of the radiator. In this case, water drips onto the floor from one of the feathers.
From the author: Hello, dear readers! Heating radiators are very simple and reliable equipment that brings warmth and comfort to any home. Its design can be called elementary - in most cases, it consists of a housing within which the coolant circulates.
However, even such a simple device can fail. As a rule, such cases are unexpected for the owners. Sometimes the situation can only be resolved by urgently calling an emergency team. Fortunately, owners are often able to cope with the problem on their own. You just need to know how to repair a leak in a heating battery so that the equipment can last for quite a long time.
However, let's initially decide when it is still necessary to call the emergency service, and not try to fix the situation ourselves. If you live in a private house, then at any time you can turn off the heating system and calmly fix the leak or replace the radiator, so such cases need not be considered. But if you live in an apartment connected to central heating, then everything depends on how the radiators are connected. There are two options:
with shut-off valves. If there is a valve on the pipe to which the battery is connected, then with its help you can shut off the coolant flow
But at the height of the heating season, this should be approached with caution. In many cases, closing the valve will stop the supply of coolant to the neighbors in the riser - this depends on the wiring diagram of the heating system
In such situations, you can close the valve only if there is a bypass. This is a piece of pipe that forms a bypass path for the coolant current. This way, the liquid can circulate freely further along the route while you are repairing the radiator;
without shut-off valves. If there is no way to shut off the coolant flow, then if a 100% leak occurs, it is necessary to call an emergency team. Firstly, in this case, the liquid supply can only be shut off using a valve on the common riser - residents of an apartment building, as a rule, do not have access to it. Secondly, this needs to be done urgently, even in a situation where the leak is not that strong - for example, water drips in a thin stream. Remember that this can suddenly turn into a real fountain, with almost boiling water running in the pipes. Workers of any emergency team can tell you about cases where delay led to severe flooding of the apartment, which, given the temperature of the liquid, is very difficult to eliminate. And even before flooding, water “rushing” from the radiator can leave serious burns on people nearby. In general, you shouldn’t delay - at any time of the day or night, if you notice a leak, immediately call the emergency services.
Fixing a leak between two sections
The technician needs to perform additional sealing of the joints. Those areas that are located between the two sections are distinguished by their unique rectilinear shape and small area. Thanks to this, you can find a defect much faster and eliminate it efficiently. Experts recommend using a simple algorithm of actions:
- You should try to strengthen the guide screw using a classic car clamp.
- If desired, the master can make the fastening element himself. To work, you will need several plates made of durable steel (aluminum blanks). The hinges can be tightened using a classic bolt connection.
- Before using clamps, you should isolate problem areas using a rubber gasket. You can also use a piece of fabric that is impregnated with epoxy glue.
Attention! The winding between the batteries must be done as carefully as possible so as not to overtighten the connection. Particular care is also taken when fastening the clamps.
Combating defects that have formed at the junction of the riser and the pipe
Damage to the heating battery used may be caused by incorrect installation of the equipment. The first problems become noticeable to the user after the first start-up of the heating system. To connect the riser to the pipe, experts use threads or conventional welding. But poor-quality assembly, failure to comply with basic techniques, as well as the use of pipes of different diameters can provoke the occurrence of leaks, which is why unscheduled repairs are simply inevitable.
If a large mechanical pressure is applied to the created structure, this can provoke the formation of a fracture at the junction or distortion. This situation most often occurs when a person needs to get to the top of the window or due to careless play by children. The salvation in such a situation is the use of a clamp in strict combination with a rubber gasket.
Professional approach to repairs
First signs of breakdown
There is a list of “symptoms” indicating that not everything is in order with the heating batteries. These include:
- the rooms became cool. Try asking your neighbors and find out if their apartment is warm. If they are doing well, then you have a problem. The reason may be contamination of the equipment, misalignment or the presence of fistulas. In the first case, it is enough to wash the batteries; in the second, fix or replace the brackets and check the correct installation with a construction ruler. In the third - radiator repair;
- If a strange coating appears on the surface of the battery, then the reason is the wear of the gaskets. It is necessary to turn off the system, remove the batteries and install new ones;
- The leak is immediately visible. If it is small, then you can use a clamp or cold welding, otherwise you will have to change the equipment.
Even small, barely noticeable defects can turn into a large and serious problem if they are not corrected in time. Temporary clamps and patches will not help. Only professional specialists will make diagnostics, determine the reliability and density of the heating circuit and its parts, and also carry out qualified repairs.
Fighting cracks of different diameters
Elimination of such defects has its own characteristics. The most suitable option is to use traditional welding. But this option is quite labor-intensive, and also implies the presence of appropriate equipment and minimal skills. As an excellent alternative, you can use special glue. First, the technician needs to prepare the problem area of the battery. The process itself is based on cleaning the surface and degreasing it.
The prepared cold weld fragment is pressed against the crack formed with a certain force. This material stands out for its quality and reliability, since it polymerizes within a few minutes. It takes 35-45 minutes for the formed seam to harden. The very next day, the restored battery can be put into operation, but after the end of the heating season, such a device will need to be replaced, since such welding falls into the category of temporary repair work.
Rewinding the cork for better sealing
Cases in which you can fix a pressure leak without draining the water
If a minor water leak occurs in a private home, you should use one of the appropriate methods to eliminate the leak without draining the water and reducing the pressure. The same applies to an apartment, if the accident does not cause difficulties.
Before you get to work, you need to make sure that the water in the radiator is not very hot. Otherwise, you may suffer serious burns.
No special equipment is required to eliminate minor accidents. The most suitable chemical materials that can stop leaks include various sealants used in automobile engine repair (BBF Super, Liqui Moly Kuhler Dichter). They are able to withstand high temperatures and withstand high pressure. A leak in a straight pipe should be stopped using sealant in the following order:
- Apply sealant to durable cloth.
- Wrap the fabric tightly around the pipe.
- Secure the bandage with clamps, wire or rope.
Wider clamps can also be used, but they are harder to find.
At high temperatures, the sealant hardens quickly and retains its properties for a long time even at high water pressure. In addition to sealants, compositions based on epoxy resin are used to eliminate leaks.
If a metal pipe is leaking, it is customary to use rubber-based materials. Such compositions are also able to withstand high temperatures and are used to seal leaks without draining the liquid. This is done as follows:
- The pipe is wrapped with serpyanka.
- A rubber compound is applied to the winding.
Serpyanka is an adhesive reinforcing tape.
Such methods of eliminating leaks are effective only in cases where the liquid only drips. If the problem is more serious, you will have to resort to mechanical methods. They are able to completely eliminate water leakage under pressure. However, all these methods are used only as temporary ones.
Effective mechanical methods include a crimping device and installing a self-tapping screw if there is a hole at the leak site.
The crimping device is very simple to make:
- Take a rubber band.
- The leak area is tightly wrapped with rubber.
- The winding is fixed with a clamp or wire.
A metal self-tapping screw with a rubber gasket under the head is suitable for sealing the hole. You can tighten the hardware with a wrench, pliers or a screwdriver.
Restoring the integrity of pipes
If the structure is already leaking, then you simply cannot do without a plaster-cement dressing. The repair of heating equipment itself includes several main stages:
- Cement is diluted in a pre-prepared container to a consistency that is convenient to use.
- A classic medical bandage is cut into pieces 35-40 cm long.
- The prepared strips are thoroughly soaked in the prepared cement mortar.
- The fastening blanks are carefully wound onto the formed crack in several layers so that maximum joint strength can be achieved.
If the user does not have the opportunity to turn off the tap on his own, then the first dressing must be treated with an alabaster solution. All subsequent layers can be based on classic cement.
Welding all cracks and large holes on the battery
Sequence of work
Depending on how serious the breakdown is, the steps to fix it depend. So, if the leak is small, then you can do without disconnecting the battery from the circuit, and for repairs you will need:
Place a container under the breakdown site in case of a breakthrough or an oilcloth with rags to collect water.
The area of the rupture or crack must be cleaned down to the base using a cable or sandpaper. It is necessary not only to remove a layer of paint, but to expose the metal itself. Degrease the prepared area with some solvent. If special glue or epoxy resin is used to repair the damage, then strips of thick fabric or bandages will be required
Apply the product to them and wrap several layers around the tear site. If cold welding is used, fabric is not needed. A clamp is put on and screwed onto the area captured by the sealant, but it is important to ensure that its clamps are on the opposite side of the leak. For example, a crack has formed on the inside of the radiator, which means the clamps will be on the outside, and vice versa. If the breakdown is serious and hot water is gushing out of the battery, then you need to call an emergency team, and not try to stop the leak yourself without the necessary tools.
Even the highest quality repairs do not guarantee long service life of the device. Restored cast iron radiators will still have to be replaced, and the sooner this is done, the safer it will be in the apartment.
Effective prevention measures
Every property owner can detect a leaking pipe, regardless of the operating characteristics of the heating system. But all of the above methods of dealing with defects are relevant exclusively in the winter season, when it is necessary to take any measures as quickly as possible to restore the structure. But at the end of the heating season, it is imperative to organize professional scheduled maintenance of batteries and pipes.
The radiators are carefully dismantled and disassembled into separate sections, trying to remove all the old sealant from all threaded connections. In some cases, it may be necessary to replace old nipples. Experts definitely recommend preparing new intersectional rubber sealing gaskets. If the repairman also finds fistulas, then they must be welded in order to subsequently be able to return the already restored radiator to its place.
If the house has not previously undergone a comprehensive replacement of all components of the designed heating system, then the resulting risk of a leak increases exponentially. This is caused by natural wear and tear of communications. Experts always recommend having classic thick rubber gaskets and various clamps in your home arsenal. For emergency repairs, you will need cold welding to be able to immediately shut off the flow of moisture. In practice, it has been proven that specialized glue is capable of eliminating any leaks that form in heating devices.
Important! There is a huge range of sealants on sale that will help even an inexperienced craftsman improve the tightness of the structure. The final choice depends on the allocated budget and the actual condition of the equipment.
After all the manipulations have been done, you can install the battery in the circuit and fill the system with water to check the integrity of all connections. This stage must be performed with the boiler operating, since under the influence of pressure the circulating coolant is able to identify all weak points in the pipes. If no defects were found within 24 hours, then the problem can be considered resolved.
More interesting and educational information on this topic is presented in the video:
Average score of ratings is more than 0
Share link
Comments There are no comments yet, but you could be the first...
Types and causes of leaks
As a rule, a leak occurs in the off-season, when the heating is turned off, as the metal cools down, the metal narrows and water begins to seep into the threaded joints.
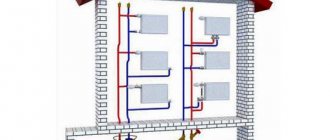
If the heating radiator is leaking, then it is necessary to determine the cause and location of the breakdown. Each plumbing point consists of a heating radiator and an adjacent pipeline. The connections of these elements can be disrupted under the influence of the following factors:
- Long service life as a cause of wear;
- Poor installation of the heating system;
- Mechanical impact, brute force;
- Corroded metal.
Depending on which elements the coolant leak occurred between, the following types of failures are distinguished:
- Violations of the seal between the riser pipes and the battery pipes;
- Partial destruction of the main pipes that connect the radiator and the riser;
- Leakage in the area of intersection connections;
- Formation of a fistula or crack in one of the radiator sections.
For each of these cases there is a different way to eliminate the accident. If the battery is dripping, don’t rush to find out what to cover it with. You may not need to smear at all.
Dripping between the nozzle and the main pipe
A leak at the junction is often the result of improper installation, or a domestic situation where the batteries were used as a support for heavy objects or residents. To complete the repair you will need:
- Car clamp or wire;
- A piece of thin and flexible rubber.
Procedure:
- Cut strips of rubber measuring 5x35 cm or use a rubber bandage from a pharmacy;
- Wrap the strip around the damaged area;
- Secure the rubber with wire or a zip tie.
In this situation, a clamp will be a more suitable option, since it is inexpensive and fixes the damaged joint reliably, evenly, without the risk of overtightening.
Main pipe leaks
There are always two such pipes. One for supplying coolant to the radiator, and the second for discharging cooled water. They are made of steel and tend to corrode and wear out from the inside over time for two reasons:
- Filling with water in the off-season;
- Impurities in water supplied through heating mains.
Most often, the question of what to do if the heating radiator is leaking arises at the height of the heating season. In the event of an accident, a cement-plaster bandage is used on a straight section of pipe. To prepare it you will need:
- Non-sterile bandage;
- Cement;
- Alabaster;
- Container for mixing the mixture.
Important! Alabaster is required when there is no way to turn off the water. It is applied as the first layer, as it dries faster than cement and adds reliability to the dressing.
- Mix cement with water to the consistency of liquid sour cream;
- Prepare strips 25-30 cm long;
- Soak the bandage strips in the mixture;
- Wrap them around the damaged area layer by layer;
- Continue until a tight bandage is obtained.
If a stream of water gushes like a fountain
If a fistula has formed and water flows in a stream, then you can hammer in a wooden wedge before the mechanics arrive. The wood gets wet and holds water well.