Hi all! Today’s post is dedicated to painting skills, or more precisely, drips. Causes of leaks. Ways to eliminate them.
First, let’s figure out why “drips” appear when painting.
As practice shows, many Painters are afraid of drips, so they try to move their hand with the spray gun faster on the edges. Hence the small amount of paintwork. But as soon as they begin to apply a layer of the same thickness as on a horizontal surface, the paintwork immediately flows away.
Why is this happening ?
There is such a thing as thixotropy.
[Thixotropic liquids (from the Greek ????? - touch and ????? - change) are liquids in which, at a constant strain rate, the shear stress decreases over time.]
In other words, thixotropy is the property of a material to become denser when stationary.
That is, while the paintwork material flies out of the nozzle of the spray gun, it is liquid, but as soon as it hits the product and stops moving, it becomes denser and more viscous, the paintwork molecules become more tenacious to each other (if you move the paintwork paint, it’s like water, it stops moving, and immediately becomes like pudding)
On a horizontal surface everything is clear, it’s applied... but on the edges (vertical surfaces) the thicker the layer, the greater the likelihood of a drip. So, the higher the degree of thixotropy in a coating, the more resistant the coating is to sagging.
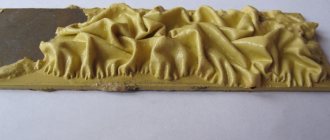
Thixotropy is good, but it also has its limits and boundaries. Too much material on a vertical surface and voila...
There should be no drips on the edges, but there should be some paintwork. So how to do this?
Causes of leaks
There may be one reason, or maybe several at the same time. When painting any surface, the following factors should be avoided:
- The thicker the coating, the harder it is to spread over the wall or ceiling. Before starting painting work, the paint must be sufficiently diluted, this is most important for the very first layer.
- Manufacturers of paints and varnishes often indicate on the cans that the paint is ready for use or that it can be diluted no more than 10%. However, any coating needs to be thinned. Water-based paints are thinned with water, while oil-based paints and enamels are thinned with a solvent. The amount of liquid may exceed 10% of the paint volume, but at the same time you should not add more than 20%.
- After dilution and thorough stirring, you need to check the thickness of the coating. Dip the roller into the paint and lift it up. If the paint flows off it slowly (it flows, not flops), then the viscosity is normal.
- You need to apply and roll the paint over the surface quickly, without interruption. Otherwise, the painted areas will dry before you roll the boundaries between them. And after complete drying, the walls will become striped.
- It is best to paint a smooth surface with a short-haired roller. Using a long-haired roller is advisable only if you are working with a textured coating. In all other cases, such a roller will certainly “decorate” the ceiling and walls with smudges.
- The problem of poorly painted areas occurs when there is insufficient lighting or poor vision of the painter. On a wet surface it can be difficult to see areas that have not been completely painted. Therefore, you need to take care of a bright, but not blinding lamp, or don’t be shy about wearing glasses.
- If you apply paint to a plane in stripes, their boundaries become very clearly visible after drying. The coating should be applied in a W-shaped motion, which will be discussed in more detail below.
- A poorly puttied, sanded, or cleaned surface after painting will certainly expose the defects to everyone. Hoping that paint will hide some imperfections is deeply mistaken. On the contrary, she will show them “in all their glory.”
Preparatory work
Important! Stains must be eliminated before the finishing layer has been applied.
So, you will need the following materials:
- masking tape;
- water;
- polishing machine;
- sandpaper;
- wooden block;
- polishing paste;
- sharp blade.
If defects have already appeared
It is easier to prevent smudges from appearing than to clean them up later. But still, no one is immune from mistakes, and if this has already happened, of course, there is no point in groaning and aahing. You need to arm yourself with patience and take up the correction.
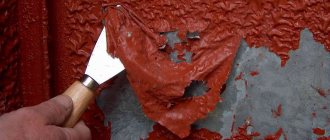
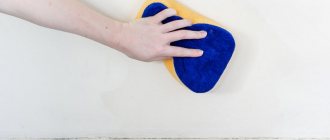
Firstly, the area must be cleaned of the applied layer of paint using fine sandpaper or a special device. You need to act carefully so as not to remove the putty along with the paint.
Secondly, the cleaned area is sanded until it is perfectly smooth. Then the wall (or ceiling) is wiped with a damp cloth and inspected for possible flaws. If any are identified, a finishing putty is applied to the surface and another grinding is performed.
When the area becomes flat and smooth, it should be primed. The primer is applied in 1 layer, which must dry completely, then 1 more layer. After drying again, evaluate the smoothness of the wall or ceiling again. If doubts still remain, repeat the priming procedure.
How to paint edges without drips?
I'll give an example of what I do. This is a proven method and I practically never have any drips, except when they are permissible (on the ground).
Let's imagine that we have set up the spray gun, filled it with primer and are about to cover the door leaf.
Often inexperienced Painters begin to cover the horizontal plane first, and then the edges...
What's bad about it ?
Yes, nothing bad, only on a horizontal plane you apply layer after layer, you can make it thicker and thicker even with a slide :), but on the edges this doesn’t work, gravity, mass of bodies and all that...
What to do with old stains
There are long-term stains that appear from long-standing leaks and are not eliminated. No matter how much you make repairs, they will show through the paint again and again.
To remove these unsightly places, they should be thoroughly cleaned and washed. Then the problem areas need to be treated with any biocidal solution (a means for destroying fungus, mold, etc.). There is no need to rinse off the solution!
Be sure to wait until it is completely dry to ensure that re-cleaning is not necessary.
Next, a blocking primer is applied to the areas. It is waterproof and will reliably protect your walls and ceiling from stains and smudges. After drying, you can begin painting.
Advantages and disadvantages of aerosols
The aerosol can has a number of main features:
- ease of use;
- application without the use of brushes, rollers, solvents;
- anti-corrosion properties;
- acceptable price;
- convenient storage and transportation;
- quick drying after application;
- uniformity of the applied layer;
- aesthetic appearance for a long time;
- variety of colors;
- compliance of the color shade with that stated on the packaging;
- long shelf life;
- Empty cans are recycled.
For a more uniform application, it is preferable to choose mixtures in aerosols with a jet directional regulator, which will allow you to direct the paint in both horizontal and vertical positions.
Despite many advantages, the spray has some disadvantages:
- the inability to mix several colors and add dyes;
- to obtain clear edges you need to use a stencil;
- work should be carried out in the complete absence of wind, as the paint may get on nearby surfaces.
In ancient times, black coal was used to capture an event. Later, drawing became more widespread and different materials and substances began to be used to create drawings. Modern spray paint has a significant disadvantage - the tones of black paint can become much duller than the declared color.
Secrets of excellent results
- Lighting. Paint in daylight. You should be able to clearly see the painted areas and their boundaries.
- Humidity. The humidity level in the room should be above average (45%). That is why painting work carried out in the summer gives better results. In winter, the air in the room is very dry, which speeds up the drying of the paint. You simply won’t have time to distribute it over the entire area. During the cold season, it would be advisable to use a humidifier.
- Order. Agree that painting walls and ceilings when you always have to step over something is uncomfortable. Before finishing work, you should remove all objects from the room, or, in extreme cases, move them to the middle of the room. Instead of a stepladder, use a roller extension, this way you won’t waste time going up and down, and you won’t have to lift your head too much when working with the ceiling.
- Paint consistency. Be sure to dilute the paint with water or thinner and mix well so that it is uniform. It happens that a film forms on oil paint. In this case, it must be filtered through tulle fabric or nylon stocking.
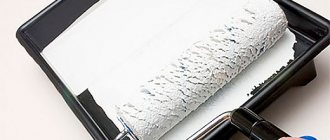
- Roller squeezing. The painting cuvette has one wall located at an angle and covered with protrusions. This is necessary to evenly distribute the paint over the coat of the roller, and not for squeezing. The roller should not be dry. Dip it in paint and “walk” without pressing along the ribbed slope. The paint will be distributed throughout the coat, and its excess will flow into the ditch.
- Zeal. When moving the roller along the work surface, you do not need to put pressure on it. It should roll easily.
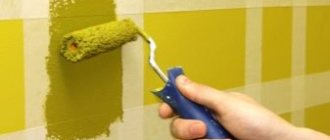
- Coating. As noted, paint over large areas should be applied not in stripes, but in W-shaped movements. Divide the area into squares and paint each one in turn. We made a zigzag, distributed the coating over the square and moved on to the next one. We rolled out the boundaries of the plots and moved on. And paint drips will not appear. If you are painting walls that have been previously plastered, spread the paint in a vertical motion. In log rooms, paint is rolled out horizontally - in the direction of the wood fibers.
- Control inspection. The surface must be inspected immediately after painting. To make possible imperfections more visible, illuminate yourself with a bright flashlight. If there are unpainted areas, roll them immediately.
Therefore, today aerosol cans are widely used:
- when carrying out restoration work;
- in the automotive industry;
- during construction and finishing works;
- for painting heating and heating devices;
- for painting individual objects, any surfaces and premises;
- creating images using stencils and graffiti.
The main thing is to choose the right type of aerosol. Indeed, today on store shelves there are cans of acrylic, latex, oil, heat-resistant, epoxy, water-repellent paints and primers. Therefore, choose an aerosol in accordance with the material on which it will be applied. The number of cans can be calculated based on the data on paint consumption per square meter printed on them, and the shade is selected from the catalog.
Other things to consider
Stains appear more often when working with glossy and semi-gloss finishes. If you are not confident in your skill, use matte paint. Follow the link to learn how to make matte paint from glossy paint.
Flaws are best shown in white. To protect yourself from possible failure, do not take a snow-white coating or add a little color to it.
Over a large area, there are more defects. The larger the surface to be painted, the more responsible you need to approach the work.
To paint the walls, take the paint that you like best. For the ceiling, take the highest quality one. The ceiling is the most finicky of all planes, especially since you cannot cover the flaws on it with furniture or paintings.
The main components of an excellent result: a well-prepared base, a non-viscous coating and adherence to painting technology. But at the same time, know that the ideal does not exist, which means you shouldn’t squeeze all the juice out of yourself to achieve it.
Area of use of different types of aerosol CM
Manufacturers produce paint for painting various surfaces in different types of spray cans:
- Acrylic-based composition is widely used. It covers plastic, glass, wood, ceramics, and metal.
- Stone and wood are coated with an alkyd composition. This aerosol CM is widely in demand in car repair work.
- KM epoxy in a can is a restoration material, in demand in construction, it interacts with wood.
- The nitrocellulose composition decorates and protects metal, wood, glass, and ceramics.
Spray painting allows you to create a matte, semi-matte, or glossy finish on the surface, with different effects. The range of ready-to-use dye colors is very rich. If you need to create a phosphorescent coating, give the surface a chamelin effect, or imitate the texture of natural materials, then the best option for accomplishing the tasks is aerosol CM. But it can also be used to simply update decorative items. In order for your plans to be realized, you need to know how to spray paint.
In a spacious, clean, draft-free room (to prevent dust and small debris from blowing in), the surface of the car is prepared for painting. It is thoroughly cleaned and washed with a special product diluted in water. Then the car body is degreased with anti-silicone with a lint-free cloth and wiped dry.
Do not forget that all work must be carried out with gloves, since we are talking about chemicals. In order not to stain the surface being treated, it is necessary to cover it with polyethylene or masking tape.
Before using a can of the selected pigment, you need to sand and prime the area to be painted. The choice of putty directly depends on the severity of the defects. For extensive deep damage, a fiberglass-based composition is suitable. To eliminate small defects, such as cracks or scratches, soft automotive putty is suitable.

