Today, the shelves of hardware stores are bursting with a variety of finishing materials. Wallpaper of different types, decorative plaster, stone, tiles - choose what you want, but with all this, the good old whitewash does not lose popularity . Among the main reasons are low cost, ease of application and environmental friendliness. These qualities are sometimes enough to turn a blind eye to the low durability of the coating. Let's figure out how to whitewash the ceiling and walls with lime and chalk, decide whether water-based paint is a whitewash, and which material performs better.
Which roller should I use to apply lime whitewash?
If we are talking about whitewashing with lime and not chalk, then the roller can only be used as the first layer.
The fact is that the roller rotates on an axis and because of this very rotation, the first layer of lime will move away from the surface. “Bald patches” will form.
After all, they usually whiten with lime in at least two layers. Moreover, the second layer is applied before the first one is completely dry.
If you still decide to work with a roller, then take a large “VP” roller; “VP” is a roller with a polyurethane (foam rubber) “coat”.
It is the “VP” rollers that are used to work with aqueous compositions (in our case, lime is diluted with water).
Large size means 30 cm, no less, because we are talking about 2,500 square meters.
And if we talk about the right approach, then wash brushes are used for whitewashing with lime.
Wash brushes are made from natural materials.
Before use, brushes should be soaked in warm water for a couple of hours.
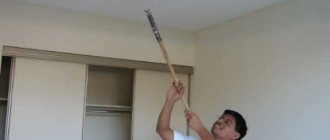
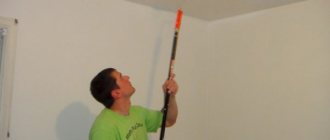
In your case, a brush is a more convenient option; you can put it (the brush) on a pole and whitewash ceilings or walls at high altitudes.
And the best option for such volumes is a special sprayer (spray gun) for lime.
A cheap option is a manual sprayer, one worker pumps (like a pump) creating pressure, the other sprays lime onto the surface (keep it at a distance of at least 30 cm so that there are no smudges).
In principle, the required pressure is created by several pumps; you can work alone, sometimes only by pumping.
Source
Do-it-yourself whitewashing of walls
You can do this work in three ways:
- brush,
- roller,
- spray or vacuum cleaner.
I would like to note right away that it is better to whiten brick walls, as well as various non-smooth and rough surfaces with a brush, or even better, with a sprayer or vacuum cleaner.
How to whitewash walls with a brush
- Stir the solution thoroughly.
- Paint a small stripe around the perimeter of the wall with a brush. Do this carefully and slowly. The main task is not to stain the surfaces of the mating ceiling and floor.
- Apply the first layer of whitewash using smooth movements from bottom to top or vice versa, leaving no excess on the surface.
- Let the surface dry.
- Apply the second coat from right to left or vice versa so that brush strokes are not visible when drying. Otherwise, the wall will look untidy.
How to whitewash walls with a roller
If you do not have experience working with a brush, as this requires relevant experience, it is better to work with a roller to get a flawless surface.
- Stir the solution thoroughly.
- Paint a small stripe around the perimeter of the wall with a brush.
- Pour some of the solution into the roller tray.
- Apply the first layer with a roller using smooth movements from bottom to top or vice versa, carefully rolling over the surface.
- Let the surface dry.
- Apply the second layer from right to left or vice versa.
The surface painted with a roller usually takes on a pleasant matte finish.
How to whitewash walls with a vacuum cleaner or sprayer
The easiest way is to bleach using a spray or a regular vacuum cleaner. If you do the work with your own hands correctly, you will end up with a very high-quality result.
- Stir the solution thoroughly.
- Fill the prepared jar with the solution.
- Close the jar with a lid, after moistening it in water so that it fits more tightly to the edges of the jar.
- Insert the vacuum cleaner hose into the corresponding hole in the cover.
- Turn on the vacuum cleaner.
- Shake the solution in the jar.
- Close the air valve in the vacuum cleaner lid with your finger or press the spray lever.
- Apply the solution to the surface of the walls, observing the following conditions: do not allow drops to form, make smooth circular movements (not jerkily), keep the spray nozzle at a distance of 70-100 cm from the surface.
To achieve the desired result, apply 3-4 layers.
When applying the solution with a vacuum cleaner or sprayer, minor defects are hidden, as it is applied in a thicker layer.
Stages of work
Step #1. Preparatory stage
If possible, remove all furniture from the room. The furniture that could not be removed, as well as all surfaces that will not be whitewashed, should be thoroughly insulated. For this, ordinary plastic film is useful. Whitewash really likes to seep into cracks, so it’s better to apply several layers of film.
Step #2. Ceiling preparation
Cracks and flaws must be filled with putty.
To begin with, you just need to inspect the surfaces. There should be no cracks or heavy stains on the ceiling.
If they were discovered, you will have to wash off the old layer of whitewash. To do this, take a moistened roller or brush to wet the old whitewash. Then the layer is scraped off with a spatula, and the rest is washed off with a regular sponge. After this, cracks and irregularities must be puttied and primed.
If there are no visible changes to the ceiling, then it is enough to treat the old whitewash with an ordinary dry broom or vacuum cleaner. Do this very carefully so as not to damage the plaster layer. Otherwise, the new whitewashed ceiling may have unevenness or stripes.
Step #3. Primer
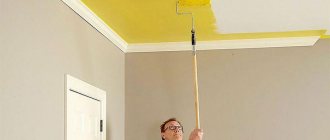
Prime the ceiling with a roller
Before whitewashing, the ceiling should be primed. This is done with conventional compositions based on chalk or lime (depending on the type of whitewash planned). You don’t have to use a primer, but it will provide the plaster with additional moisture resistance and also reduce the consumption of whitewash.
Step #4. Selection and preparation of solution
You can whitewash the ceiling in an apartment with either chalk or lime mortar.
To prepare a chalk solution you need to mix:
To prepare a lime mortar, mix slaked lime and cold water (proportion 1 to 3). Add 50 g of table salt. It is recommended to apply lime whitewash to a damp ceiling. You can also buy ready-made mortar at a hardware store. In terms of price, the option of preparing it yourself and purchasing a ready-made solution will not differ much.
Step #5. Roller whitening technique
Use a roller with a long handle
Any foam roller is suitable for whitewashing. It is very important to make a long handle for it. Then it will be possible to work standing on the floor without any stools or tables.
The whitewash is poured from the container into a special tray for working with a roller. The roller is immersed in this tray and gradually rolls out on the surface. The whitewash should evenly saturate the entire roller.
The process of whitewashing the ceiling begins with reciprocating movements. Then you can avoid streaks and stains.
When whitewashing with a roller, it is important to make the first layer parallel to the wall on which the window is located. The last layer of whitewash should be applied perpendicular to the light rays that fall from the window. Before applying the second layer, the whitewash must dry thoroughly. During drying and work, there should be no drafts in the room, and there should be no direct sunlight on the ceiling.
No. 5. Preparing a solution for whitewashing
Since lime is used more often, we’ll start with it. The process of preparing the material is simple, but it still requires care. So, how to dilute lime for whitewashing?
- First you need to prepare all the necessary ingredients in the required quantities. We will need 10 liters of water, 2-3 kg of slaked lime, 150-200 g of aluminum alum, 50-100 g of coarse salt, which is pre-soaked, and a teaspoon of blue (if whitewash is needed) or 400-500 g of dye;
- dissolve all components in a small amount of warm water (about 1 l), then bring the volume of the solution to 10 l and mix thoroughly;
- if you are preparing a solution of colored whitewash , then it is better to immediately prepare the amount required to finish the entire surface. Otherwise, it will be almost impossible to repeat the shade, no matter how accurately you measure all the ingredients;
- quicklime at your disposal , then you can extinguish it at home. It is enough to mix it with water in equal proportions and stir thoroughly for 15-25 minutes. It is advisable to then leave the lime for 15 days in a closed container - this way it will lie on the surface as evenly as possible;
- The consumption of lime whitewash solution depends on the type of tool used for application and the characteristics of the material. The average consumption is 0.5 liters of solution per 1 m 2 of surface.
Key points in painting the ceiling
The first stage of painting work begins with the purchase of paint. It is best to choose water-based dyes for painting ceilings. They are practically odorless, dry quickly, are easy to apply, immediately improving the appearance of the ceiling surface. The instructions on the can will help you make the right choice of paint, where you will also find information about the method of diluting the composition. As a rule, ordinary water is used as a solvent, which is added to the jar in an amount of approximately 10% of the total volume.
But most often the emulsion is already sold ready-made, and it can be immediately used for coloring.
Advice! To make painting easier, add a small amount of paint to the paint tray. Then splashes will not form, and the paint in the required amount will be collected on the roller.
Water-based paints are made on acrylic, silicate, silicone or mineral bases. For example, an acrylic coating is not completely washed off with water, since it contains glue and latex, which ensures reliable adhesion to the surface being painted.
Water-based paint dries much faster than oil paint. And this is an absolute plus. For the bathroom or kitchen, choose silicone-based compounds that tolerate temperature fluctuations well and are resistant to mechanical stress.
A detailed report on what paint to use for the ceiling, the best manufacturers and compositions.
Basic mistakes
Painting the ceiling is a simple matter. But even in this work, mistakes occur that will affect the final result.
It is important not to stop the painting process until the layer is applied to the entire surface of the ceiling, otherwise streaks and the appearance of “bald spots” cannot be avoided. It is necessary to avoid high humidity and drafts: this affects the drying speed of the paint and provokes the formation of air bubbles
It is necessary to avoid high humidity and drafts: this affects the drying speed of the paint and provokes the formation of air bubbles.
Even an inexperienced person in repairs can master the rules for painting a ceiling. The main thing is to carry out all actions step by step and avoid mistakes.
Criteria for choosing a paint roller
Depending on the coating of the roller for applying paint, rollers are:
Sheepskin rollers are considered to be of the highest quality, but they are not cheap, so not everyone can afford to buy such a tool. A budget analogue is rollers made of foam rubber or plush. They can be used not only for painting the ceiling, but also walls. At the same time, they are suitable for working with almost all compositions.
Mohair rollers are usually used to work with paints containing synthetic resins.
Important! When choosing rollers for painting ceilings, pay attention to the length and diameter of the pile. Wide pile or foam rubber will quickly absorb a large amount of liquid, but the resulting layer of paint will be thick and durable.
Choosing the right roller for convenience
In this case, devices for working at height play a major role. It's good if you have a stepladder or sawhorses. Then it is enough to buy a roller with a handle length of 30-40 cm. If you have to carry out work from a chair or stool, you will have to look for a tool with a long handle or other devices that allow you to raise the roller to the required height.
Depending on the size, instruments are divided into several types:
At the same time, the rollers on which the fleecy covering is placed are equipped with adapters made of plastic or metal, and inside they are made hollow so that it is convenient to attach them to a handle of any length.
On the modern building materials market you can find handles of different sizes on sale, the length of which starts from 70 cm, and the telescopic base allows you to extend it even up to 4 meters. Unfortunately, not every roller can be equipped with a long retractable handle, so you need to choose the appropriate option in advance.
How to determine which roller is best for painting the ceiling
There are many materials used to make rollers. In order not to get confused in this diversity and to choose the right option correctly, they are divided into four groups:
Not every roller can apply one or another composition. If you are thinking about which rollers to paint ceilings with water-based paints, the store salesperson will advise you to purchase foam rubber attachments.
If you are using paint that contains synthetic resins, choose a mohair or fur roller. It is better to apply varnish to the ceiling with thin, small nozzles, and for water emulsion, use wide and thick rollers.
If we are discussing which rollers for painting ceilings will be the best, then experts advise choosing tools with fur attachments, namely, expensive sheepskin. A universal option is foam rubber, which, in the absence of a better alternative, will successfully cope with the functions assigned to it. It can be used to work with acrylic, oil or water-based paint. Nylon, which is well suited for applying paints and varnishes, is also considered popular.
Design of rollers for painting ceilings
Depending on the type of construction, rollers can be clasp or double-shouldered.
The clasp is made in the form of a curved metal rod. The nozzle is attached to the clasp using a pin or a special coupling.
The double-armed one resembles a kind of fork in appearance, holding the nozzle in the form of a movable cylinder on both sides. Clasp rollers are more common and are more convenient to use.
The sizes of the clasp, as well as the nozzles, vary. You can find very small rollers on sale (4-5 cm) or large ones (up to 40 cm and above). The wider the nozzle, the larger the surface the roller covers at one time. When choosing, you also need to pay attention to the diameter of the drum. The larger it is, the slower the roller rotates, and, accordingly, the less splashes are formed during the painting process.
The design of the fastener is also important. It comes in three types:
The most convenient type of tool for painting the ceiling is the coupling roller.
There are rollers with paint supply during operation, which are equipped with manual air injection mechanisms and special tanks.
Ceiling paints
The huge variety of paint and varnish products can confuse anyone. For the ceiling, the best option is water-based emulsion. This is a water-based paint that evaporates after application, leaving a layer of paint on the surface. This type of paint and varnish product is considered the safest. Let us add that the water-based emulsion dries quickly, which is also a significant plus.
Water-based paint in cansSource stroimmaster.ru
We must pay tribute to the manufacturers who supply several types of water-based paint to the market today.
- Silicate. It is based on silicate glue. This type belongs to the cheap category. But it has good performance characteristics. The only drawback is high abrasion. That is, it is not recommended to wash a ceiling painted with this variety.
- Mineral. The base is either lime or cement. Rarely used for painting ceilings.
- Acrylic. One of the best varieties with excellent characteristics: low abrasion, copes well with humidity and temperature changes. Therefore, they try to use acrylic water-based paints in damp rooms. The base is acrylic resins.
- Silicone. Based on silicone resins. The characteristics are the same as the previous type. Let’s add that this paint can be used to cover small cracks. The disadvantage is the high price.
- Polyvinyl acetate. Not the best option for wet rooms, because droplets of condensation and water leave marks on such paint. The surface covered with polyvinyl acetate coating cannot be washed.
As you can see, there is a choice, but it must be made taking into account the purpose of the room.
Acrylic water-based paintSource spravka.kz
Preparation for work
Before removing old whitewash from the walls and ceiling, you need to know what was previously used - chalk or lime. The check will not take much time. It is enough to moisten the surface with water. If lime was used, the wet area will darken. Or just run your finger along the wall. If the surface was whitened with chalk, the finger will turn white. After lime it will not color.
The success of whitewashing is primarily influenced by careful surface preparation. To do this, just follow simple rules:
Types of lime and methods of its preparation
To obtain a solution for whitewashing, lime is used, which can be quicklime or slaked. The first type of bulk material is calcium oxide, which is usually packaged in bags in the form of small lumps. To prepare a solution for whitewashing, quicklime must first be slaked. To do this, pour it into a metal container and gradually fill it with water in a 1:1 ratio, stirring constantly. By increasing the dosage of water, lime milk is obtained.
When preparing lime, the mixture must be thoroughly stirred
After completing the slaking process, the reservoir with the lime solution is set aside for a day, and then the contents are filtered through gauze. Since the combination of calcium oxide with water is accompanied by a violent reaction and the release of heat, all work should be carried out taking precautions and avoiding splashing of the solution.
How to whitewash walls
The composition used for whitewashing is available in three types: lime, chalk, and water-based emulsion. But each finishing material has both its advantages and disadvantages.
Whitewashing walls with lime
To obtain a ready-to-use material, the lime is slaked with water. This type of whitewashing is the most popular. Among the advantages of lime it should be noted:
However, along with obvious advantages, lime has significant disadvantages:
Application of chalk
Along with being cheap and environmentally friendly, chalk has a number of advantages over lime:
Chalk also has disadvantages that need to be taken into account:
Whitewashing walls with water-based paint
It would be more correct to call painting walls water-based paint. Since the composition usually contains lime, they talk about whitewashing, not coloring. In any case, this is a good alternative to chalk with a number of undeniable advantages:
The disadvantages depend on the composition of the water-based paint and its constituent polymers. For example, vinyl or latex enamel is ideal for surfaces that constantly experience high moisture and temperature changes. Acrylic under such conditions will crack and peel off like chalk.
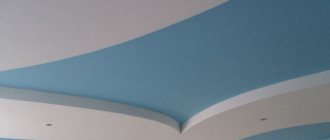
Whitewashing the ceiling with lime: types, preparation, application of lime
Whitewashing the ceiling with lime will make the coating snow-white
Ceiling finishing is an important stage of renovation work, which determines the aesthetic perception of the interior space and affects the microclimate in the room. When choosing a technology for carrying it out, the purpose of the room, temperature and humidity conditions and financial capabilities are taken into account. The traditional finishing option is to whitewash the ceiling with lime, which can be done in several ways. It allows you to get a snow-white surface without significant costs.
Content:
- Advantages and disadvantages of lime whitening
- Preparatory work
- Materials and tools
- Types of lime and methods of its preparation
- Applying whitewash with a brush and roller
- Other whitewashing methods
How to change the color of whitewash
By introducing dye, you can achieve any shade. Since the walls and ceiling do not have to be white, like in a hospital. Previously, only one dye was used - blue. Ignorance that whitewashing can be done using certain, suitable pigments, which, above all, made the walls typically white, without an ounce of imagination.
To make lime whitewash colored, you need to add an alkali-resistant pigment to the finished solution. Liquid will not work, as the lime will simply dissolve it! The following colors are used to give different shades:
It should be taken into account that the more pigment in the lime mortar, the worse the strength of the surface.
Chalk, unlike lime, can be tinted with both liquid and dry pigments. This is easy to do: just add a dye of the desired shade to the solution. You just need to keep in mind that when wet the color is richer than when dry. Therefore, it won’t hurt to “paint” the surface again, after complete drying.
Among the significant disadvantages of colored chalk whitewash, it should be noted that it is easy to get dirty when interacting with it. In addition, the room must be dry, without dampness or temperature changes.
No. 1. Benefits of whitewashing
Whitewashing ceilings and walls is not the most modern way of finishing, and far from the most fashionable. What makes thousands and tens of thousands of people across the country still whitewash in the old fashioned way? Whitewashing has enough advantages:
- low price is the main argument in favor of this type of finishing. When the budget is limited and the room needs to be tidied up, the choice falls on whitewashing. For this reason, hospitals, schools and other government institutions still actively use gypsum and chalk to decorate ceilings and walls;
- ease of application. A person without special training can handle whitewashing - no special skills, abilities or tools are needed;
- neat appearance . Of course, in terms of intricacy and decorativeness, a whitewashed ceiling is inferior to a tension system, and whitewashed walls are inferior to those finished with Venetian plaster, but if you apply whitewash correctly, you can end up with a fresh white surface with an even matte color. If desired, dye can be added to the whitewash solution;
- harmlessness, environmental friendliness , ability to pass moisture and air. Conventional whitewashing in this regard is far ahead of vinyl wallpaper and polystyrene foam ceiling tiles, so in some cases it will be even more preferable;
- Lime whitewash has bactericidal properties , so it will provide additional protection against mold and mildew.
Among the disadvantages are low durability (1-3 years), uncomplicated appearance and dirt during application.
Tips: how to whiten correctly and effectively
Before actually carrying out the work, it is necessary to acquire a suitable tool: in an alicom, in a brush, in an excavation tool.
Most often, in terms of financial accessibility, brushes and rollers are used. Whitewash, after thorough mixing, is applied in at least 2 layers. The brush is pre-soaked so that it swells. Then its fibers do not fall out to the surface.
It's much easier to work with a roller. Since the surface is smooth, perfectly white. After completing the work, do not forget to rinse the tool so that it can be used again.
There are important safety rules that must be strictly followed:
If you follow these simple rules, whitewashing walls will not take much time and effort. The surface, when properly applied with lime or chalk, will delight the eye for a long time, and will also make the room sterile, clean and aesthetically pleasing.
Source
Materials and tools
You can whitewash the ceiling using a roller. brushes or special machine
To whitewash the ceiling with lime with your own hands, you will need a spatula for clearing cracks and applying a leveling compound and a block of sandpaper for rubbing the putty. To protect the surface from fungus, it is treated with special means, and traces of soot are removed using a 2-3% solution of hydrochloric acid.
The following tools and equipment can be used to apply whitewash:
- brush. It is convenient for repairing a small area, as well as for treating joints between the ceiling and walls with lime mortar;
- roller Allows you to avoid streaks on the surface and significantly reduces finishing time;
- spray. Provides a dense layer of whitewash without gaps or unevenness.
When treating a large area with lime mortar, it is advisable to use a whitewashing machine, which is equipped with a piston pump and can be equipped with a gasoline or electric motor. It is in demand when finishing various buildings and structures, as well as during disinfection.
How to properly paint a ceiling with a roller: instructions for beginners
To update the ceiling, you have to work with your hands up, and this is difficult. Some use special equipment, such as a spray gun. But this is not always convenient. Painting tools will help make the task easier. We tell you which roller to paint the ceiling with and how to do it correctly. Unlike brushes, this tool is the most effective and convenient for painting large, flat surfaces.
Which primer to choose
There are several criteria for choosing a primer:
- First of all, you need to determine what the ceiling will be covered with. There are primer mixtures for enamels, water-based paints and universal compositions.
- The material of the ceiling should be taken into account. For concrete and plaster, acrylic compounds with deep penetration are suitable. Porous bases, ceilings made of wood and plasterboard are treated with strengthening mixtures with latex or antiseptic compounds.
- Some craftsmen use homemade compositions - a mixture of PVA glue and putty.
Primer for preparing the ceiling for painting
According to their intended purpose, primers are of the following types:
- Deep penetration - the most popular Ceresite mixture, the composition penetrates as deeply as possible into the ceiling structure.
Deep penetration ceiling primer Ceresit
Strengthening compounds - they contain adhesive elements that prevent cracking and shedding. Strengthening primers are only suitable for loose surfaces. On solid substrates, after application, a polymer film is formed on which the paint will not adhere.
Strengthening primer for ceiling
Universal mixtures are the best choice for treating ceilings for painting. Paint applies to this primer easily and quickly. Universal action compositions are used as a finishing layer.
Primer “Prospectors” 5l, universal
As for the drying period of the product, it is individual for each primer and is determined by the type of mixture and the base on which it is applied. Typically, the primer dries in two days. Construction and finishing work should be postponed during the drying period.
Selecting a roller by parameters
The painting device is a curved metal bracket, on one side of which there is a rotating roller with a “fur coat”, on the other there is a comfortable handle. Tools differ in roller length, as well as in diameter, material of the “coat” and the length of its pile (from 0 to 20 mm).
Weight
Which roller is best to paint the ceiling? When choosing, you should first of all pay attention to the weight. The lighter it is, the more convenient it is to work with it. Try the handle, it should fit well in your palm.
Size
As for the size, it must correspond to the size of the surface being updated. The larger it is, the longer the length of the video should be. With this tool you will have to make fewer movements, and the paint layer will be more uniform. However, when working with your hands up, an impressively sized tool may be too heavy. After all, a lot of colorful composition will be added to its mass. A long tool of small diameter will help reduce this component.
Roller STAYER Master Velor
Rollers are divided into small (roller length from 4 to 10 cm), medium (roller length from 10 to 15 cm) and large (roller length from 15 to 24 cm). The former are used to process hard-to-reach places, such as corners. The latter are designed to work on large areas, when updating facades and roofs.
For most DIY home painting projects, medium rollers are the most suitable.
Protective cover
Those with particularly high ceilings should pay attention to tools equipped with a protective casing. Then splashes of paint will not fall on the master, who is located directly under the area to be painted, and on the floor covering.
Roller RemoColor
Pile material
How to paint a ceiling with a roller without streaks? The “coat” of the painting tool is made of foam rubber and fleecy materials: inexpensive polyester, polyamide, and the most wear-resistant polyurethane. If you make the right choice, the paint coating will be even and smooth. For example, for oil paints and alkyd-based paints, “fur coats” made of faux fur or velor are suitable. For water-dispersed ones, a polyamide “coat” is optimal. Flock, made from polyurethane fibers glued to the base, is usually used for finishing with glossy paints.
For ceiling painting work, it is preferable to wear “coats” made of faux fur or velor, and made not from the cheapest materials, but from durable polyamide. In special ceiling rollers, the inner layer of the “coat” is denser than the outer one. Thanks to this, the colorful composition is distributed evenly over it, and when pressed firmly, it releases an additional portion.
Roller RemoColor
Pile size
As for the size of the pile, it is better to choose a long-pile “coat” for processing porous and rough surfaces. Keep in mind that the long pile absorbs and holds a large volume of paint, and may splash it during application. Therefore, after taking the paint, you need to squeeze it out slightly. But for smooth putty surfaces, the length of the pile does not matter.
Types of paints for ceiling decoration
When arranging the ceiling with your own hands for painting, you should know what the main types of paints exist today that are intended for finishing the ceiling. These include:
- acrylic
paints, which are the most common in the category of water-based paints. According to experts, in order for the final result of finishing the ceiling to be positive, it is enough to cover it with just two layers of acrylic paint (more details: “How to paint a ceiling with acrylic paint - technology”). This coating has good elasticity; it also has the ability to close ceiling microcracks up to 1 millimeter wide. Such paints are resistant to possible contamination and are easy to clean; - silicate
paints used for ceilings in technical rooms with difficult operating conditions. Their main advantage is the ability to protect the ceiling surface from the appearance of harmful microorganisms on it. The use of such paints does not require pre-treatment of the ceiling with antiseptics. The main places of their use are saunas, swimming pools, basements and other technical premises; - silicone
paints. Such samples have excellent vapor permeability properties; they are able to form a reliable and non-contaminating base for further coatings. Their distinctive feature is high elasticity, thanks to which they are able to close microcracks up to 2 millimeters thick. These paints also do not require the application of an antiseptic; in addition, as for the price category, they are usually classified as expensive samples.
To determine how much paint should be used to cover the ceiling, it is important to take into account its technical properties, first of all, hiding power.
How to paint a ceiling with a roller
First, apply masking tape to the top of the walls around the entire perimeter of the room so as not to stain their edges. It is easier to paint corners and lines connecting to walls with a brush. When decorating a large surface, it is correct to start from the window and move towards the opposite wall.
How to properly paint a ceiling without streaks with a roller? Very simple. First of all, you need to take into account that warm air always tends upward. Therefore, the ceiling surface, compared to the floor and walls, is always the warmest in the room. To ensure that the paint does not dry too quickly and that traces of lint are not noticeable in the room, it should be cool throughout the entire work.
Algorithm for painting the ceiling
First, you need to carefully paint all the ceiling corners, starting with the one furthest from the entrance. To do this, the brush is wetted halfway in the paint, and the excess paint is wrung out. You should only paint a strip 3 to 5 centimeters wide, running along the perimeter of the ceiling. This is done so that further painting with a roller does not spoil the appearance of the corners and junctions of the walls and the ceiling. Next you need to start the main painting process. To avoid smudges, the roller does not need to be completely immersed in a can of paint; it would be more correct to roll it in a special tray with water-based paint, and then squeeze it out and remove excess paint with a brush
It is important that the paint is applied evenly to the roller. Apply the paint evenly using a roller, and the layer should not be too thick, otherwise drips or folds may appear on the surface. To eliminate such a defect, the paint must be brought to the required consistency and the damaged surface must be repainted.
Painting should be carried out according to the principle of parallel stripes with an overlap of 5 centimeters.
Painting the ceiling, more details in the video:
Additional accessories for painting
The roller for painting the ceiling has been selected. But you will need additional tools and materials:
- dye;
- brushes (small and large) for painting hard-to-reach places;
- foam rubber or rags.
Important: how correctly the tool is selected depends on the quality of the surface being painted and ease of use.
Painting begins with painting over the decorative elements (if any), so if you plan to decorate the ceiling, decide in advance on their installation. It is more convenient to paint decorative elements using a brush.
Useful tips
The main stage, which should be given special attention, is surface puttying. If the ceiling is well puttied, then applying the paint yourself will not be difficult.
But this process has its own tricks:
- the coloring composition must be applied quickly;
- Separate tools must be used for each layer;
- structural paint will help hide some minor flaws;
- for kitchens and bathrooms it is better to use waterproof washable paint;
- be sure to use plastic barriers that can protect walls from paint splashes;
- when painting surface joints, use adhesive tape and masking tape;
- drying should take place in a dark room in the absence of drafts, otherwise the paint may peel off;
- It is not recommended to carry out work in a cold room with high humidity; you should also not paint in the heat, the coating will dry out too quickly;
- Painting should start from the window.
See below for more details.
Spray painting technology
This tool is often used to whitewash the ceiling. It is also suitable for applying acrylic-based liquid paints or water-based paints. It is better to use an electric rather than a mechanical device, as it produces a powerful, uniform stream.
Painting the ceiling with a spray gun is carried out in compliance with the following rules:
- When applying paint, make sure that the layer is uniform over the entire surface. To do this, maintain the same jet length, that is, spray the composition at the same distance from the ceiling surface. The optimal distance is 10-60 cm. Moreover, make sure that the stream is sprayed perpendicular to the surface.
- Don't stay in one place for a long time. Otherwise, the layer will be too thick, causing drops to form or the color scheme to be distorted.
- When working, make slow rotational movements at the same pace.
- Before applying a new layer of paint, the previous layer must dry well.
- Pre-thin paints that are too thick with solvent or water. Otherwise, the spray gun may break or the coating may turn out to be of poor quality.
- Protect walls and ceiling plinths from accidental painting with masking tape.
- Be sure to cover your hair, face, and clothing to prevent paint splashes.
Coloring
When purchasing a water-based paint composition for the ceiling, it is especially important to have a good understanding of the assortment. Currently it is represented by five main types of products:
Currently it is represented by five main types of products:
- with acrylic;
- with latex and acrylic;
- with silicone;
- with polyvinyl acetate;
- with silicates;
- with mineral supplements.
Prices for acrylic paint
acrylic paint
The modern range of water-based paints is quite large
Table. Rating of water-based paints according to consumer reviews.
To choose the right water-based paint and purchase it in the right quantity, you should carefully read the information text of the label. It must contain the following important parameters.
- The purpose of the paint with a list of types of work.
- Consumption per square meter – allows you to calculate the required purchase volume. In this case, the paint must be purchased with some reserve, since the tone of different batches may differ noticeably.
- Covering power is the ability to completely, without gaps, paint over a much darker base.
- Abrasion resistance is the main indicator of durability and resistance to cleaning and washing.
In addition, you should read additional inscriptions, often in the smallest font.
- "Recommended for use in dry areas." Such products are not suitable for either the bathroom or the kitchen.
- “Indelible” or “Highly durable”. The painted surface can be washed exclusively with water without additional detergents.
- “Abrasion-resistant”, “Dirt-repellent”. The coloring composition forms a layer that can withstand wet cleaning using detergents.
When choosing paint, pay special attention to the label information text
The process goes in the following order.
Latex paint prices
latex paint
- Thick paint must be diluted with water to a kefir consistency. If you want to make a colored ceiling, the color should be added little by little so as not to immediately get an overly saturated tone.
- Using a wide brush, paint the corners, areas around the perimeter of the ceiling lamps, the joints of the ceiling with the walls and, if any, ceiling cornices. In this case, it is useful to use masking tape so that the paint does not get on the areas of the walls directly adjacent to the ceiling. The direction of movement of the brush is parallel to the light, from the wall with the window. If there are windows in more than just one wall, choose the direction from the one that gives maximum light.
- Pour not too much paint into the cuvette tray, immerse the roller in it, be sure to roll it repeatedly along the corrugated inclined surface, squeezing out the excess paint composition.
- Evenly and gradually, in parallel strips, offset each time by 2/3 of the width, apply the coloring composition to the ceiling perpendicular to the direction of light using small zigzag movements. Before it thickens, it is useful to roll a roller without paint over the painted surface to remove any possible sagging. Paint over small defects and gaps with a narrow brush. The first layer should be allowed to dry completely at room temperature for several hours - usually from 8 to 12. There should be no strong drafts. The freshly painted surface should also be protected from direct sunlight. The roller, brushes and tray must be thoroughly washed immediately before the paint dries on them. paint roller
- At a right angle to the direction of painting the first layer, that is, parallel to the main light, apply a second layer of paint using the same technology - pour, squeeze, paint with small zigzag movements, remove excess, let dry, meanwhile wash the tray, brushes and roller. The minimum number of layers is 2, but if a larger number is required, the painting directions must be calculated so that the last of them runs parallel to the main flow of light.
How to paint a ceiling with water-based paint. Step-by-step instruction
If all preparatory operations were carried out carefully enough and the painting process went correctly, the new water-based ceiling coating will be smooth, uniform and durable.
What to add to lime so that it does not crumble?
The lime composition is applied directly to the plaster; it is prepared in a special way: alum, drying oil or table salt are added to make lime
more dense so that the whitewash
does not crumble
.
Interesting materials:
What is 2nd grade bread? What is wholemeal bread? What is the piston stroke of a hydraulic cylinder? What is piston stroke? What is storage in Meizu? What is hummus and how to prepare it? What is Kish Lauren? What is a Westgate valve? What is a VKG valve? What is a class and interface?