Methods for determining a reversal
Previously, a common solution was how to create a 90-degree angle, for example, there was a regular construction corner on the foundation. The main thing is that it has been tested and corresponds to 90 degrees. Today, professionals use laser levels to simplify the process and speed up installation work. The third option is to use a regular measuring tape.
Regular construction tape Source unews.pro
Pythagorean theorem
Anyone who attended school is familiar with this proven theorem. It applies only to triangles in which one of the angles is necessarily right. The sides adjacent to it are legs a and b, the connecting segment is the hypotenuse (c). The formula looks like this: a²+b²=c².
The convenience of using this method of finding a right angle during construction is that markings can be applied in any room of any size. The presence of foreign objects is even acceptable here. The main thing is that there is access to the corner and walls, so that the connecting hypotenuse can be freely extended. Additionally, you only need a calculator to quickly make the necessary calculations.
Egyptian triangle
The Golden or Egyptian triangle is a figure with a right angle, whose sides are equal to 3, 4 and 5 parts. The convenience here is that there is no need to square the parameters and extract the roots. It is enough to take one or another conventional unit as a part. This can be either 1 cm or 10 meters, which is especially convenient for deciding how to create a 90-degree angle on plaster walls.
Egyptian triangle Source mmonline.ru
If there are doubts about the validity of the statement about an angle of 90 degrees, then you can check it using the Pythagorean theorem: 3*3+4*4= 5*5 or 9+16=25. All that remains is to start applying this technique in practice.
Possibility of precise measurement in internal corners
When measuring the distance between opposite walls in a room, it is quite difficult to obtain accurate data due to the inability to completely bend the tape measure in the corner. Of course, this is not a problem if you use a laser rangefinder, but you have to accept some error.
But, as it turned out, there is a way out. It is enough just to know the dimensions of the tape measure body and place it close to the wall. And then you just need to add this number to the result. By the way, some manufacturers indicate on the tape measure the width of its body precisely for this purpose.
To measure or copy a round object, you need to wrap a tape measure around it. And to make it easier to read the results, there is a special marking on the back of the canvas with a separate zero.
In general, the presence of markings on the back side is now considered a rule of good form among well-known foreign manufacturers. Often here you can see the vertical arrangement of numbers - for more convenient height measurement.
Angles of 30 and 45 degrees
By choosing one of the methods for calculating a 90 degree angle with a tape measure, it will not be difficult to form three options for acute angles. 45 degrees is obtained if it is an isosceles triangle. For 30 degrees you need to extend the hypotenuse, which will be equal to two short legs. Here between them there is then an angle of 60 degrees.
Right triangle with angles of 30 and 60 degrees Source wikimedia.org
We start marking from the first wall
First of all, let's check our first wall for verticality and plane. If we align 2 corners, then this is a wall parallel to the bathtub, if we align 4 corners (the entire area), then it is a wall with an opening. If the wall is blocked, it will need to be leveled first, but take your time, because we have not yet checked the entire area.
To begin with, let’s simply cut a straight line parallel to the first wall, as close as possible to it.
Let's draw the first line parallel to the first wall
Next, between the first wall and the second wall, we will install a square with one edge parallel to the first line, and apply a rule to the second edge of the square. We combine the edge of the rule and the square, thereby “lengthening” our square. Draw a line on the floor to the end of the wall as close as possible to the wall. We adjust and combine our enlarged square so that:
This is how we get the first right angle.
From the first line we will beat off the second one, perpendicular to it
Next, we go to the next corner to which we drew the line, and align the square with one edge parallel to the second line. We repeat the procedure with the rule (combine it with the square) and draw a third line perpendicular to the second, again as close as possible to the wall.
It requires some skill to combine the rule, the square and make a right angle with the lines as close as possible to the wall (this is done so that when plastering you don’t “eat up” the extra space). If the rule is not enough, we draw as far as there is enough, rearrange the rule, combining it with the line, and draw it to the end of the wall.
Draw a third line perpendicular to the second
We draw the fourth line, by analogy. As a result, we should end up with a rectangle
inside our premises. We check it along the first edge - along the wall with the opening, also by applying a square and a rule.
We check the resulting rectangle along the 1st edge
If everything is smooth, you can relax a little. If not, we repeat the procedure and/or look where we made a mistake.
Briefly the main thing
In the interior, it is often necessary to place right angles under furniture or plumbing equipment.
Using a tape measure, you can check a 90-degree turn in three ways: the sides are equal to 3/4/5 parts, if the connecting segment between meter walls is 141.4 cm, applying the Pythagorean theorem.
Also, a tape measure is enough to form three angles of 30, 45 and 60 degrees.
Additionally, you may only need a calculator and a pencil for marking.
Ratings 0
How to measure an angle using a tape measure
You can make your own square for measuring angles:
- We connect two slats, one perpendicular to the other.
- We measure 60 cm on one rail, 80 cm on the other, cut off the excess.
- We nail the third rail to one mark.
- We measure the hypotenuse and nail the strip to the second mark.
- We check the dimensions again and, if necessary, fix them in several more places.
- Trim off the excess ends.
As you can see, knowledge of a few simple school theorems can help in both construction and repair. Knowing a few simple tricks, you can always easily create or check a right angle.
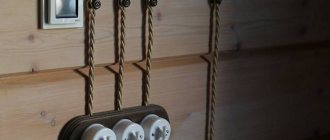
A construction tape measure for an electrician is as essential a tool as a voltage indicator. Even those professionals who have axle builders and laser rangefinders in their tool kits always have an ordinary tape measure in their pouch.
You can’t do without it either when marking electrical wiring routes or when installing socket boxes. However, not everyone is familiar with all the secrets and additional features when using a construction tape measure.
What is a level?
A laser level (level) is a device that allows you to build vertical and horizontal planes. This is an indispensable assistant when building a house and during interior decoration.
The level consists of LEDs and prisms that create visible vertical and horizontal lines. With its help, you can both build smooth walls and level beacons, level the floor, ceiling and all other surfaces, quickly and evenly lay tiles, laminate and do many other works.
How to make markings when plastering
The accuracy of obtaining a right internal angle depends on the quality of the wall layout; to perform the work it is necessary:
- Using a plumb line or level, determine the deviation of the mating walls from the vertical position. To improve the quality of marking, you should use a laser level.
- Draw lines on the floor and ceiling corresponding to the virtual vertical surface. When using a laser device, it is necessary to draw lines along the beam path.
- Secure metal beacons using quick-drying plaster and drywall spacers. The supports should be spaced every 500-600 mm, the profile should not sag when the rule is moved or move away from the attachment points.
- Using a similar scheme, remove the adjacent wall, and then begin plastering work. At the initial stage, it is necessary to seal the cracks by laying a reinforcing mesh. Large gaps (for example, between slabs) can be filled with polyurethane foam, and the excess can be cut off after polymerization. If there are metal elements on the walls, they should be dismantled or covered with paint or anti-corrosion mastic. If the rule is violated, rust stains will appear on the plaster, which will transfer to the finish.
Some craftsmen use a different technique, determining wall distortions using cords stretched diagonally. After the area with the maximum protrusion has been found, they begin to install the profiles, which are aligned along the stretched twine. After marking is completed, the cord is removed, the surfaces are treated with plaster or covered with sheets of plasterboard, using the beacons as a base support.
Basic rules when applying gypsum plaster:
- Before carrying out work, the walls must be cleaned of dust and covered with primer. In damp areas, materials with antibacterial additives should be used.
- When processing, follow the manufacturer's recommendations for layer thickness, which should not exceed 50 mm. To level deep holes, you will need to apply several layers with intermediate drying.
- When dissolving, pour the dry mixture into water while simultaneously stirring the solution with a mixer. If you do not have the skills to prepare gypsum mortar, it is recommended to use ready-made plasters supplied in plastic buckets.
- You should not prepare a large portion of the solution, since the material has a limited shelf life and gradually loses its characteristics.
- Plaster applied to the walls must be quickly leveled - lumps formed on the surface impair the quality of the finish.
- Plastering work should not be carried out in rooms at air temperatures below +5°C or above +35°C.
- Applying the finishing touch (for example, wallpaper) is allowed 12-14 days after completion of the work. Otherwise, the moisture remaining in the plaster will damage the paper or vinyl wallpaper and cause the coating to peel off.
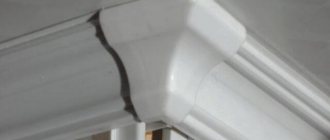
About the use of perforated corner
If you decide to level and finish the walls yourself, but have never done repair work before, then you simply need a perforated galvanized plaster corner. Every master knows that this small subtlety in work brings great results!
So, the corner is used in the following areas:
- for partitions and walls that need to be plastered and leveled;
- for corners (external, internal) that need to be made stronger;
- for arches, boxes, so that they are strong and even (not crumbled).
Since most partitions, arches, boxes, and trims are made of plasterboard, it becomes clear that it can crumble around the edges if it is not secured and plastered. You just need a corner for this.
There are two types of plaster corners:
- straight;
- arched.
Well, corners can already be used for many categories of interior finishing, but they all relate to plastering and puttying work.
Where you need a 90 degree angle between walls
Floor or ceiling tiles, pieces of furniture, and a classic bathroom have a strict rectangular geometric shape.
Installation of such items is usually carried out close to the walls. In the case of a plumbing room, additional steps must be taken to fill the discrepancies between the edge of the equipment and the vertical surface when the angle is not 90 degrees apart. Curvilinear gaps along the cabinet or tabletop force you to be careful in use, do not look aesthetically pleasing and attract unnecessary attention. The same applies to tiled layouts
At the same time, it will be impossible to hide the significant narrowing of the masonry even visually.
The way out of the situation involves only three solutions. This is visual camouflage with materials that fill the void, the manufacture of furniture to individual sizes with its overall increase in price, or the alignment of wall corners with wallpaper, tiles, panels, and objects. The last option is considered the most effective, since it is durable, greatly simplifies the choice regarding finishing and furnishings, and you don’t have to adjust or seal anything else.
Original masking of an uneven angle Source blogspot.com
Types of materials for performing work
The most common and effective leveling methods are those that use dry mixes and sheets of drywall. The method of eliminating defects using a perforated corner has also proven itself to be quite effective.
To find out which method will be effective in each specific case, you need to consider each of them in detail.
Using putty or plaster
to use high quality mixtures for the work . produced by trusted manufacturers.
Perhaps the price tag for these mixtures will be slightly higher than unknown brands, but there will be no doubt about the quality of the work done.
The most convenient way to work involves gypsum plaster or starting putty . This option will allow you to make corrections using the thinnest layers and without subsidence.
Using a contraschultz
The best solution when leveling corners is to use a counter-sharp - a perforated corner made of aluminum.
Necessary materials
- contraschultz;
- scissors for cutting metal;
- long rule;
- sandpaper;
- putty mixture.
Sequence of work
- Measure the required piece of aluminum corner and carefully cut it with special scissors, being careful not to bend the pliable metal.
- Apply a small amount of gypsum plaster to the joint of the walls and apply the counter-shoulder, slightly pressing it with a rule. Remove excess mortar with a spatula, moving away from the joint using smoothing movements.
- After the putty has dried, go over the surface with sandpaper. If there are small irregularities, apply another thin layer of putty.
Perforated corners for alignment
Leveling angles are the optimal solution for repairs. They are perforated products with an aluminum base. They can be used to seal both external and internal corners. The design of the product will protect the surface from various damages.
The procedure for such alignment consists of the following steps:
- After purchase, the structure is cut to the specified length.
- The plaster solution is prepared until a homogeneous mass is created.
- The mixture is applied to the corner. When aligning the internal corners, the composition is distributed along the entire length. For external treatment, the amount of solution is adjusted according to requirements.
- The corner is being installed; you will need to carefully monitor the evenness of the installation.
- Excess mixture is removed using a spatula.
- After installing the corners, they will need to be aligned with the wall.
Installation of corner aluminum structures To ensure that the corners do not stand out against the background of the wall, it is necessary to apply the solution at a distance of about 50 or 80 cm from the corner. The entire mixture should be evenly distributed and smoothed over the surface using a wide spatula. After the solution has dried, the wall is primed. For greater efficiency, you need to use putty, which will hide all defects. You can see the aluminum structures in the following photo.
Content:
When starting to work with a new tool for the first time, not everything is completely clear. It would seem that I looked in the instructions to see which button is needed for what, and that’s enough. But this attitude often becomes the cause of disappointment in the result of work.
A typical example: the user did not know how to properly level the laser level before projecting the markings onto the wall, or did not want to do so. He simply placed the device on the table, turned on the laser in vertical line projection mode, and began drilling holes along it in the wall for attaching a metal profile. It later turned out that the line was not projected strictly perpendicular to the floor. I had to redo the work. But this is an extra waste of time, effort, working materials...
This is far from the only example of how neglect of basic rules for operating measuring instruments spoils the final result. We will dispel misconceptions that can cause serious mistakes made by a beginner. Let's start in order...
Video description
This video shows in detail the installation of beacons without plaster:
Alignment of walls along the support strips is carried out in at least two stages, regardless of the thickness of the layer. First, pour the solution into the formed void and remove the excess using the rule. Additional application of plaster may be necessary to fill significant differences. The solution settles under its own weight, and due to the rough structure, voids, scratches, and holes are formed. Therefore, when the applied mass begins to set, the sagging is cut off as a rule, and defects are corrected with a thick solution.
Plastering on beacons Source ivd.ru
Forming an internal corner
It is more convenient to start leveling the inner corner of the wall after forming the main plane. This approach extends the completion time for repairs by 1-2 days, but the result is of higher quality, especially if the area of the room is large/inconvenient (small) or the project is being implemented by a novice master.
The walls are leveled using a proven vertical level and rules for forming a plane. A frame is installed under the drywall, and beacons are installed under the plaster. When the wall is ready, you can begin to apply markings for subsequent work with adjacent surfaces.
With any leveling material, the process begins from the bottom up, as this is more convenient. Therefore, the markings are applied to the floor.
Marking using a plumb line Source tekhelit.ru
Necessary tools and equipment.
Plastering internal corners requires a standard set of tools and supplies. Some of them can be replaced, others cannot.
Lighthouses.
A steel profile is the best option: metal elements are not “afraid” of water, are easily strengthened, and are perfectly smooth. But they are not suitable for economical, minimal repairs.
Wooden beacons are slats of small cross-section (2.5x3cm and thinner). The difficulty of using them lies in a whole set of disadvantages:
- Curvatures. It is difficult to choose reliably even slats, because the wood is constantly deformed, absorbing moisture from the air and giving it away.
- Swelling. Wood increases in size and swells. In relation to lighthouses, this drawback is most relevant, because plastering is a “wet” job.
- Dismantling of galvanized steel beacons is considered optional. Wooden slats must be removed before leveling the corners with plaster. The resulting voids and furrows are filled with solution and leveled. This requires additional effort and time.
However, plank guides are much cheaper than metal ones and are sometimes used when the budget allocated for the renovation of the premises is tight.
Beacons made of mortar are fragments of the mixture applied to the wall at a convenient step for working with. Such landmarks have the advantage: they do not need to be removed, and they are free. But working with them is not convenient, and it is quite difficult to align. This method is acceptable for small walls and is used mostly by experienced specialists.
How to carry out preparatory work when plastering the outer and inner corners of walls
Before plastering the corners of the walls, you must:
- Remove furniture and interior items from the room or cover things with thick cellophane film.
- Carefully clean the surfaces of old finishing materials, remove areas with a loose structure, wash off grease stains and remove traces of mold or rust from the fittings.
- Apply notches to improve adhesion on the concrete base or embroider joints on brick walls.
- Cut out fittings and other metal elements located close to the surface. It is possible to paint over areas with oil paint, but a layer of synthetic material impairs the adhesion of the plaster.
- Remove fine dust and saturate the surfaces with primer with antibacterial additives.
- Fill large potholes with gypsum mortar and then re-soak the walls with soil.
- Mark the surface and begin reinforcing the wall (with a synthetic fiber mesh) or installing beacons and a perforated corner made of steel tape.
These measures can increase the strength of the finish and reduce the risk of saturation of the base with moisture. The durability of the gypsum layer, which will withstand changes in humidity and temperature in the room without peeling off from the surface of the partitions, depends on the correct preparation. Impregnation with antibacterial compounds reduces the risk of the appearance of mold and fungi, which cause an unpleasant odor in the premises and worsen the appearance of the apartment or house.
Aligning wall corners with plasterboard
When leveling the corners of walls with plasterboard, you can use two methods of its installation - frameless and frame. The choice of method depends on the curvature of the walls; if this indicator is within 4-7 mm, then the frameless method can be used. If the curvature is more than 20 mm, then it is better to use the frame method.
With the frame method, better sound insulation indicators are observed, the possibility of organizing good thermal insulation and, in general, the structure is much stronger. And the frameless method is simpler and faster, since the drywall is fastened using polyurethane foam. But it is also suitable in simpler cases.
First, we will look at the frameless method, and then we will dwell in more detail on the frame method.
The first thing after cleaning the surface is to prime it properly. A deep penetration primer works best. You can find it at any hardware store.
After the surface to be treated has dried, you need to cut a sheet of drywall that will meet all the required dimensions, attach it to the surface, and finally adjust the dimensions
This is important to ensure that the connections are seamless.
The next step is to apply a layer of polyurethane foam to a sheet of drywall, then apply it to the wall, lightly press it and remove it. As a result of this action, a little foam will remain on the wall. This is done for better grip.
Now you need to apply another layer of foam and let it dry a little (5 minutes) and then apply the sheet to the wall.
The last stage is leveling the structure with a profile or a regular straight lath. A level wouldn't hurt either. You can also adjust the angle using pre-installed inserts of the required size (pieces of ordinary foam plastic) attached to the base walls of the corner.
After the foam has dried, any excess that has come out must be removed with a knife without damaging the drywall.
Now let’s move on to considering the frame method, which is more complicated than the frameless method, but is better suited for high ceilings and alignment of corners with large deviations from the base walls. In addition, the corner will be stronger and more durable.
When aligning external and internal corners of walls using the frame method, there are some peculiarities, so we will consider them separately.
How to level an internal corner with drywall
To level the internal corner with plasterboard using the frame method, you need to build a frame.
For this purpose, PS rack profiles are used. They are connected by crossbars using metal screws, every 20-30 cm. For internal corners, the frame is mounted separately, and then attached to the base surfaces. Working right away in a corner is difficult - there is little room for maneuver.
It is important that the frame is mounted only on a flat surface. Drywall itself is perfect for this purpose - its sheets are just large and even.
True, they are easy to damage in the process, so be careful, or take extra drywall.
Having assembled one side, we attach the next row of profiles perpendicularly (or at another selected angle). And we also connect them with crossbars
It is important to ensure that all the sharp ends of the screws are directed towards the walls or along them, and on the inside of the corner of the frame there is an even lattice on both sides formed by the planes of the profiles - we will attach drywall to them
As a result, we get a kind of hard angle. This corner will need to be attached to a perimental profile fixed to the wall along the floor and ceiling. And with high ceiling heights - in the middle too. This is done directly, or with the help of crossbars, in places where the frame departs greatly from the base walls.
Only after this entire preparatory stage will you be able to begin assembling the innermost corner from plasterboard, the installation of which on the frame is carried out with the same metal screws. The heads of the screws are slightly recessed into the sheet of drywall and subsequently puttied.
And here it should be noted that under the influence of ubiquitous moisture vapor, self-tapping screws can rust over time. And rust can show through the finish. Therefore, it is advisable to insulate the caps before puttingty. For example, apply nitro paint, nail polish, BF glue or something like that - not water-based.
And you don't need to let them dry out. When dry, these substances form smooth surfaces to which putty does not adhere well. Therefore, you need to putty immediately - when wet. Then the grip will be good and there will be no rust.
How to properly plaster smooth corners of a wall with plaster
The walls of residential or office premises can intersect at different angles, but during the repair process it is necessary to ensure an even vertical line where the planes meet.
Applying gypsum or cement based plaster requires preliminary preparation of surfaces and adherence to technology when processing surfaces. If the requirements are not met, the hardened material cracks or crumbles; to increase the mechanical strength, a reinforcing synthetic mesh is placed in the gypsum layer.
To create smooth joints, several methods are used:
- Using wooden or metal beacons, which are then removed or left in the thickness of the finishing material.
- Using a metal or plastic profile with planes located perpendicularly. Suitable for applying plaster up to 10 mm thick, providing increased edge strength.
- Cutting corners using a removable board and a spatula, the resulting edge does not have high mechanical strength.
- Shaped design of lines connecting surfaces using a special pattern. The method is used to produce decorative cornices, requires high qualifications and is performed by hired workers.
- Manual removal using finishing putty and a shaped spatula. The technology requires the master to have the skills to perform plastering work.
Before starting plastering work, it is necessary to clear the room of furniture and foreign objects (for example, remove it or install it in the center of the room, covering it with plastic wrap). If you plan to replace the electrical wiring in the room, then you should cut grooves and lay the power cables in accordance with the developed diagram. After sealing the wires, it is necessary to make final markings to align the walls.
To level surfaces at home, gypsum plasters are used, which harden within 24-48 hours. The dry mixture is combined with water using an electric mixer or a small concrete mixer.
The solution should have a thick consistency, adhere firmly to the walls and not slide down under its own weight. Small fragments of the dry mixture are not allowed, which would not allow for accurate removal of external or internal corners.
Summarize
Now that you know what mistakes ignorant users most often make when working with a laser level, you won’t repeat them yourself. You will find more detailed instructions and subtleties of using your device in the instructions supplied with it. By following what is written there, you can avoid problems when applying markings and, undoubtedly, get a high-quality result. Perhaps, for the first time, studying the instructions and preparatory work before measurements will take you a lot of time. But it’s worth it, because, having mastered the correct algorithm of actions, you can later bring it to automaticity and make even markings in just a few minutes.
Source