Crooked corners are a common phenomenon that occurs not only in old apartments, but also in new buildings. If small unevenness in the walls can be masked using wallpaper or decorative elements, then defects in the corners after finishing with wallpaper or tiles will be even more noticeable. Aligning external and internal corners can be part of the process of finishing the walls with finishing plaster and putty, or can be done separately if the condition of the wall surface does not require serious intervention. Let's find out how to align the corners of walls using different methods.
Alignment by beacons
This method is used only when working with the entire surface of the walls.
Necessary materials
- beacons - metal or wooden slats;
- screws or dowels;
- rule;
- plumb line;
- gypsum plaster;
- spatulas - straight and angular.
Sequence of work
- Attach the beacons to the surface of the walls using fasteners at a distance equal to the length of the rule. The distance from the corner is 5–7 cm.
- Using a plumb line, determine deviations from the vertical, make marks on the floor and ceiling, and place wedges in the right places as necessary.
- Start applying plaster on one side. Fill the space between the beacons, distribute the solution as a rule. After the layer has dried, move on to the second wall.
Important! Make sure that a large amount of mixture does not accumulate at the junction. To remove excess after drying, use a spatula.
- To form an even joint, use an angled spatula moistened with water.
- After the plaster has dried, remove the beacons and fill the voids with the same composition.
Ideal angle: how to measure skew and achieve 90º?
Sometimes it’s worth thinking about – is it so important to bring wall joints to perfection? To answer this question, you need to understand how important it is in this case to clearly set the corner joints at 90º.
In some cases, when only cosmetic renovation of the interior space is planned and no additional costs are expected, alignment of wall joints may not be done.
In other cases, setting 90º is an integral stage of repair work , since some modern furniture and appliances require only such a base.
Once the decision on alignment has been made, it is necessary to carefully measure the angular misalignment.
To determine the vertical distortion, it is enough to place a ruler or rule vertically in the corner.
Next, you should lean a spirit level against the ruler, which will help you visually determine the value of the distortion along the wall. After the work has been done, you need to use a ruler to measure the maximum distortion from the vertical of a corner or wall - the result will be the desired value.
In the same way, you can measure the deviation from an even angle in the horizontal plane , but in this case you need a longer ruler or profile: horizontal distortions, as a rule, have a smaller value, so a larger distance will be needed to measure them.
In cases where it is impossible to visually determine the distortion, you will need a profile at least two meters long.
You may be interested in an article about the features of applying liquid wallpaper to the wall.
Using a contraschultz
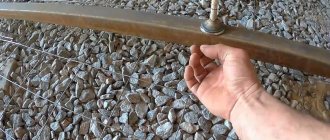
The best solution when leveling corners is to use a counter-sharp - a perforated corner made of aluminum.
Necessary materials
- contraschultz;
- scissors for cutting metal;
- long rule;
- sandpaper;
- putty mixture.
Sequence of work
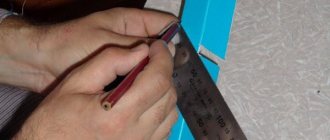
- Measure the required piece of aluminum corner and carefully cut it with special scissors, being careful not to bend the pliable metal.
- Apply a small amount of gypsum plaster to the joint of the walls and apply the counter-shoulder, slightly pressing it with a rule. Remove excess mortar with a spatula, moving away from the joint using smoothing movements.
- After the putty has dried, go over the surface with sandpaper. If there are small irregularities, apply another thin layer of putty.
Ways to align corners
Even if the alignment of corners is quite difficult to perform, after a detailed acquaintance with the technology of work, a person without experience can carry it out. Initially, you need to choose the optimal method for yourself, which is influenced by the level of curvature, the skills of the master and some features of the room.
The main methods for aligning corners include the following:
- Plaster. This method is in most cases preferred when all the walls in the room are treated with the mixture. The method itself is quite labor-intensive, which means that during the work carried out you have to spend a significant amount of time and put in considerable effort. The main and often most often used material in this situation is ordinary cement-based plaster. In addition to it, dry gypsum mixtures are very often used, since they are more comfortable, but at the same time their cost is noticeably higher.
- Drywall. When using it, it is possible to significantly reduce the number of “wet” processes, thereby increasing the speed of work and reducing the amount of dirt. In this case, plasterboard sheets are mounted on a rough base, allowing the surface to be perfectly even. Installation of the material is carried out using 2 methods. In the first case, it is glued using adhesives, and in the second, it is secured to a pre-constructed frame, often made of a metal profile. The latter option is much easier to implement, but by giving it preference, some space in the room is lost (about 5 cm from the side of each wall where the structure is being erected). As in the previous situation with the use of plaster mixtures, sheathing the corners with plasterboard is carried out simultaneously with the process of leveling the walls.
- By means of a mark. In this way, internal corners are often aligned. In this case, a mark is applied to one of the walls using a plumb line or a building level, and then this area is opened with plaster, which is mainly used as starting putty. Application of the composition is carried out using a long spatula. After the mixture has set, the second wall of the corner is treated in the same way. Preference for this method is mainly given when carrying out local repair work, when it is not necessary to bring the 90° angle to maximum evenness: it is important that it appears visually level.
- Perforated corner. This element is often used when carrying out plastering and painting work, acting as a kind of beacon, which is mounted on the very top of the internal or external corner along a plumb line: its edges indicate the direction for the mixture on both sides.
For this task, it is most convenient to use gypsum-based starting plasters, since in comparison with cement mixtures they have greater elasticity and require less time to harden.
Method using serpyanka
How to level the corner of a wall if there are no plans to carry out large-scale work on plastering and puttying the entire surface of the walls? In this situation, a wide sickle tape will help out.
Necessary materials
- reinforcing sickle tape;
- wooden rectangular block 50-60 cm long;
- gypsum putty.
Sequence of work
- Apply a small amount of solution to the joint of the walls and to the surface adjacent to the corner. The width of the applied putty strip will be 10 cm on each side.
- Apply the reinforcing tape to the top of the corner and carefully unwind the roll so that the sickle does not move to the side.
- Pressing the block against the joint, give the corner the correct shape. If the tape becomes wrinkled during the process, level it with a spatula and remove excess putty, moving away from the joint.
Important! The movements of the spatula should be careful not to disturb the position of the tape. At the same time, you cannot wait for the mixture to dry, as this will deprive you of the opportunity to adjust the position of the serpyanka.
Why do you need to align corners?
In any living room of an apartment (house) you can count at least 4 internal and 6 external corners. These are 4 joints of conjugate walls and 6, three per door and window opening, external connections of the wall with the slope. The quality of the finish largely depends on how the corner is laid out.
If flaws on the wall can still be hidden with some tricks, then this does not work with an angle. And here you should be very clear about what quality is required from the corner: ideally straight (90 degrees) - necessary when installing modern furniture, household appliances or wall cladding with ceramic (porcelain) tiles (kitchen, bathroom, toilet) or an even connecting seam for wallpaper (painting).
Checking an internal angle for a right angle.
Here, everyone who does the work themselves should remember: you can get a direct articulation of the walls only in the process of leveling them . This means that if, when plastering the surface of the walls or installing drywall, the master (owner) forgot to set the angle to 90 degrees, no technical tricks will help correct the mistake - everything must be redone.
You can create an even connecting seam at any time in several ways. What does this mean? If the house is a panel house or the walls were leveled with plaster without putting counters (a special metal or plastic perforated corner) into the corners, the junction of adjacent walls turns out to be slightly zigzag, which is clearly visible under the wallpaper or paint. Using special technological techniques, the problem can be eliminated.
Perforated corner (contra-schultz).
Alignment method without counterswitch
To align the external joint of the walls using this method, you will need:
- gypsum plaster;
- spatulas;
- rule;
- a perfectly flat board or plank wrapped in tape;
- fine-grained sandpaper.
Sequence of work
- Knock down large protrusions and fill large gaps with plaster.
- Place a strip on the surface of the wall where it touches the joint. Do this in such a way that it protrudes around the corner by a distance equal to the thickness of the required plaster layer. Attach it to the floor and ceiling; if the length is correctly selected, it can be inserted as a spacer.
- Apply the mixture, spreading it with a general motion towards the joint with a slight downward slope. If necessary, repeat the procedure after the layer has dried.
- After two or three days, remove the plank and attach it to the ledge on the other, already plastered, side and repeat the above steps.
- After drying, sand the surface.
Selection of plaster
When purchasing a plaster mixture, you need to consider the following factors:
- For outdoor use or in rooms with high dampness, it is advisable to treat surfaces with mixtures based on cement, lime or a polymer solution. Gypsum plasters do not tolerate these conditions well, which is why they get wet and crumble.
- In addition to the above materials, finishing of dry rooms can also be done with gypsum-based starting mixtures.
You need to purchase ready-made compounds exclusively from manufacturers who have proven themselves in the market. The material should be stored only in dry rooms, which is why it is not advisable to buy mixtures at a market or other similar place. Basically, packages of plasters indicate the approximate consumption per 1 square meter. m of surface depending on the thickness of the applied coating, making it much easier to independently calculate the required amount of material for future work.
Forming an external corner using a contra-sharp
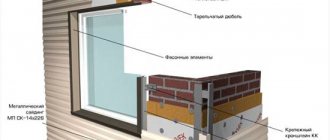
Using a profile will not only simplify the alignment process, but will also reliably protect the outer corner from damage.
Necessary materials
- contraschultz;
- gypsum mixture;
- rule;
- putty knife;
- level;
- fine grain sandpaper.
Sequence of work
- Apply the prepared solution to the surfaces adjacent to the joint of the walls.
- Fasten the counterpiece cut to the required length at the joint, using the rule to prevent deformation of the aluminum corner.
- Remove excess mixture with a spatula, check with a level that the corner is attached correctly, and adjust its position if necessary.
- Once dry, sand the surface using fine-grit sandpaper.
- The final leveling is carried out together with the application of putty to the remaining surface of the walls.
Leveling corners with plaster or putty is a more familiar method for many, but it is also quite “dirty” and labor-intensive. It is worth resorting to this method if the curvature is minimal. In case of significant curvatures of walls and corners, it would be more appropriate to use plasterboard sheets.
External corner of walls - how to achieve an even joint?
Drywall is not used for external leveling work . Only dry building mixtures are suitable for external corners.
- First you need to check the outer corners for evenness. All protruding irregularities must be removed with a hammer.
- The next step is to prime the walls using special deep impregnation compounds.
- To strengthen external corner joints, it is necessary to use perforated metal corners , which will strengthen the joint and help avoid damage. They are pressed into the gypsum solution and subsequently leveled with putty.
- Excess mixture must be removed using a spatula. Then you need to make sure that the metal profile is installed accurately vertically.
- Using gypsum beacons on both sides, the corner is leveled and puttied.
Different ways to align external corners are discussed in the video below:
How to putty corners: do it yourself
How to putty corners? Puttying surfaces is a preparatory operation before their final finishing, which allows you to make the walls even and smooth. This finishing is necessary before whitewashing or painting the surface. This article will tell you how to putty corners with your own hands.
Features of puttying corners
When carrying out repair work in a residential building or apartment, the need to align the corners inevitably arises:
- External.
- Internal.
In this case, it is very important to choose the correct composition of the mixture, which may vary in:
- The amount of binding material . The solution can be:
- cement, has excellent moisture resistance, well suited for kitchen and bathroom renovations. The disadvantage of the material is the likelihood of small cracks forming during drying;
- gypsum (see Gypsum putty: its advantages and problems of use), used in residential premises;
Advice: Do not use gypsum putty to finish building facades.
- Degrees of readiness . The mixture is:
- dry, its price is low, quite simple to use, but you will need to make it yourself;
- ready to eat.
- Purpose . Compositions can be:
- specialized, used according to manufacturers' recommendations;
- leveling, used for preliminary leveling of surfaces;
- finishing (see Finishing putty: how to apply it efficiently), used to level areas with unevenness heights of up to one millimeter;
- universal, used as above;
- decorative, with their help you can give the walls different textures.
Tip: When purchasing material for puttying corners, you should be sure to check the size of the grains of the mixture, which affects the quality of the surface finish; the smaller they are, the thinner the coating layer will be.
Before you properly putty the corners of the walls, you need to purchase:
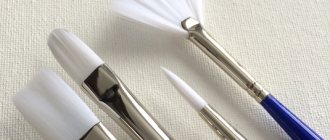
- A corner spatula that will be used to level the internal and external corners of the room. Its difference from the usual one is that the trowel handle is attached inside and outside the corner, as in the photo.
- Long construction level.
- Perforated corners, metal or plastic.
- Metal spatulas, narrow and wide.
How to form an outer corner using overlays
Leveling walls with putty is not complete without shaping the joints of the planes, most often at right angles.
Before filling the outer corners, a special overlay is installed on the edge of the wall, which can be:
- Metal. For its manufacture, aluminum or fairly thin galvanized steel is used. To reduce the weight of the part and make it possible to completely drown it in the leveling solution, perforations are made on the sides. The disadvantage of the product is that the material is slightly prone to corrosion in places where the galvanization has been damaged - on bends, scratches.
Tip: This part should not be confused with the corner overlay for plastering. They are similar in appearance, but the putty overlay is made thinner.
- Plastic. Its shape is almost the same as a metal one, but the part does not oxidize and does not collapse over time. It is advisable to use such overlays on walls that are not too smooth due to the significant thickness of the sides, which leads to the need to hide the part with a fairly large layer of putty - more than two millimeters.
- Flexible parts. Such elements are used when:
- forming edges in arched openings of the room;
- finishing of curved sections on suspended ceilings made of gypsum plasterboard.
The special shape of the corner makes it possible to bend it to the desired radius, without deforming the edge of the product.
Tip: Overlays are used only when the planes meet at an angle of 90°. Obtuse corners can be puttied without additional equipment.
Instructions for performing the work:
- A small layer of putty is evenly distributed along the entire length of the corner to be finished.
- A perforated plate is applied, which is then embedded in the solution.
- The part is leveled, and if necessary, a solution is added under its base.
- After it has set, final processing can begin.
Advice: Before plastering the corner of the wall, you should once again check the vertical installation of the beacon - due to shrinkage of the composition, it may be displaced.
The overlay is processed in the following sequence:
- A small amount of mortar is scooped onto a spatula and applied to the wall on one side.
- The operation is repeated on the other side, at the same time the excess mortar protruding above the overlay is cut off.
- Using longitudinal movements, the mixture is leveled, while trying not to leave furrows.
- The operations are repeated until the entire area to be finished has been processed.
- After the solution has dried, the corner is sanded, impregnated with a penetrating primer, and finishing putty is applied, if necessary.
- Sanding is repeated in such a way that the sandpaper does not remove the putty layer and does not expose areas of the corner trim.
Budget option - plaster mixture
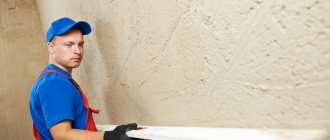
The most budget-friendly and simplest option for any type of corner is to use a plaster mixture. We admit that the work is quite dusty and dirty, but it has a number of significant advantages over other methods:
- perfect for small spaces,
- the plaster mixture has good strength of the finished base,
- the surface will be an excellent base for painting, decorative plaster, wallpaper, tiles,
- the mixture is compatible with various types of surfaces, with the exception of wooden bases.
Craftsmen recommend using plaster mixture for small rooms, so if you decide to update the corners in the hallway, bathroom or kitchen, then it’s just a matter of choosing the material!
Rules for plastering corners and walls
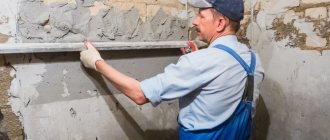
Plastered corners in a room have an aesthetic appearance only when the walls are straight and do not require additional leveling. Curvature of corners can have a detrimental effect on the overall appearance of the room. Therefore, it is important to figure out how to properly plaster walls and corners so that the room looks beautiful and tidy.
Reference! A little terminology: the husks are the internal corners, and the usenki are the external ones.
If you ignore the rules and technology of plastering, then eventually the coating in the husks begins to crack, and in the husks it cracks and crumbles. To ensure that the coating lays evenly and efficiently when plastering, beacons are used.
Methods for drawing out an angle when plastering:
- For thick-layer leveling, plastering of the corners is carried out along the beacons. Beacons are more widely used when plastering husks, and the procedure is similar to the usual leveling of walls;
- Use of squares. They are used in cases where the plaster has a small thickness. The leveling technology is simple: the solution is applied to the corner itself, after which it fits tightly to the corner and is pressed down. In the future, you need to check the evenness of the structure using a level;
- External corners can be plastered using a wooden board;
- If you plan to make decorative cornices, then it is best to leave such work to a professional, because the process is quite complex and time-consuming;
- As a last resort, the corner can be constructed using a corner spatula.
These are the basic methods and rules on how to correctly create an even angle so that the quality of the design is at its best.
Plastering window slopes
When completely plastering the walls, even plastering of the window slopes will be required. How to do this and achieve a 90 degree angle?
Tools and materials
To plaster slopes you will need:
- Putty knife;
- Rule;
- Level;
- Plaster;
- Drill mixer.
After preparing the tools, they begin to work.
Plastering slopes at a 90 degree angle
When plastering slopes, it is important to achieve an even right angle. How? Algorithm of actions:
- The base is cleaned of old coating, dirt and dust;
- Windows and window sills are covered with cellophane;
- Mount corners or beacon system;
- A bar is attached to limit thicknesses;
- The mixture is poured over the work area;
- The rule is to remove excess solution;
- After initial setting, additional leveling is carried out;
- Grouting the surface.
This is how window slopes are plastered.
Important! In order to create a perfectly right angle, you need to use a corner trowel.
Puttying drywall corners
Drywall is puttied in order to achieve a perfectly flat surface.
Paper lining is not ideal, and it is also easy to damage during transportation. And if we want to paint the surface, especially with glossy paint, in some lighting the unevenness will be visible, which will not add beauty to the room, but, on the contrary, will take it away. Attention! According to Knauf technical documentation, the entire surface is puttied before painting. If you prefer finishing with wallpaper or tiles, you can get by with putty only on the screw heads and joints. It is not necessary to putty the corners; it depends on whether you want the corners of your rooms to be symmetrical and you can save money on this.
Finishing corners with putty is not an easy task for novice builders. This activity requires utmost diligence and attention. Read below about the technique for creating a perfectly smooth base for future finishing. Most often you have to putty the internal corners.
Putty on internal corners
To apply putty to the inner corners, use a special spatula with a 90º angle. Such corners are much more difficult to align than external ones, because there is little room for maneuver. In addition, if the angle is < 90º, you will have to use flat spatulas.
Puttying of internal corners is done in 3 stages:
- applying the starting layer - the amount of work in the future depends on the quality of this stage;
- applying the finishing layer;
- sanding - for a good fit with wallpaper or perfect painting.
First, the starting putty is applied, from the joint towards you, for this a regular spatula is used. During the process, a level is used to check for evenness.
To find out when the putty will dry, you need to consider a number of factors:
- temperature;
- air humidity;
- type of putty;
- layer thickness.
The minimum temperature for finishing work is +10º C, otherwise the putty will fly off when it hardens. If the surface unevenness is very deep and a thick layer of putty is applied, complete drying will occur in a few days. In the case of drywall, this takes a day.
The type of putty depends on the purpose of the room being finished. For the kitchen and bathroom, cement is suitable, which is not damaged by high humidity. Dries in 1-2 hours. Gypsum is used for finishing interior spaces, except for the bathroom, because there it will eventually fall behind the wall. Plaster dries in 2 hours. There is also a mixture of lime and cement for finishing the facade, which can withstand any weather conditions. It also takes 1-2 hours to dry.
When the start has dried, you can begin to apply the finishing layer; again we use a regular spatula. Roll out the finish around the perimeter as thinly as possible. When it dries a little, acquiring plasticity, we level it with a special corner spatula.
After a day, we polish the remaining small roughness and roundness:
- the embrasive is fixed on a grater;
- a spotlight and a stepladder are installed;
- obvious lumps are removed with a spatula;
- the wall is processed from the top of the corner in a circular motion.
Remember that the corners are processed after sanding the entire wall. This is done before applying the primer.
You can do without sanding if the previous work was carried out by an experienced craftsman who did not leave behind splashes or streaks from the movement of the spatula (which happens very rarely). And also, if in the future you use thick vinyl or non-woven wallpaper for decoration, small mistakes under them will not be so noticeable. The use of paint will highlight them. Also, if sanding for paint is done on all surfaces, and for wallpaper - in places where roughness is detected.
In order not to miss any unevenness, use a spotlight or flashlight directed at the wall at an angle of 45º.
Before the grinding process, wear a mask, gloves, and safety glasses, as required by the safety instructions. Otherwise, fine dust will harm your body. Next you need to select a tool. To repair a small room, it is irrational to buy an expensive grinding machine; you can use a manual sanding float with attachments for a mesh or sandpaper.
- dust does not remain on the instrument;
- wear resistance;
Sandpaper is more familiar to our builders because it costs less. Its significant drawback is that it quickly becomes clogged with dust; in addition, if a piece of putty gets stuck there, it will scratch the entire surface.
When purchasing, pay attention to the grain size: the starting layer is processed with a sheet with a large grain (P60 - P80), the finishing layer is processed with a fine-grained sheet (P100 and above).
Also, to sand corners you need a sanding sponge with beveled edges; if you don’t have one, fold a fine-grain sandpaper in half and use it.
There is a simpler method for leveling internal corners, which consists of attaching a plastic corner to the drywall with a stapler, followed by puttying the adjacent areas.
Putty external corners
Knowledge of puttying technology at joints and corners will prevent cracking of the coating. In this regard, the alignment of the outer corners is more difficult - you need to overlap the corners (for the inner ones, it is enough to use a serpyanka).
Drywall sheets are fragile and susceptible to damage; be careful when handling them. First, apply a perforated metal or plastic perforated corner - it will create an even angle and protect the drywall from damage.
Aligning an outside corner
For this task, you need an aluminum perforated corner with a serpyanka on the sides. In addition to the comfort of use in the future, it provides additional protection for the outer corner, which is an order of magnitude more likely than other places to be subject to mechanical stress. If you do not resort to such measures, then with a strong impact the corner can even fall off.
The process of aligning the outer corner must be carried out as follows:
- Preparatory work. The first step is to remove the old finishing material from the walls and remove all concrete bulges present on their surface. After cleaning, the base should be treated with a primer.
- Installation of the corner. The most important stage of work, on the correct implementation of which the quality of the entire finish depends. The difficulty of the task lies in the need to align the perforated corner vertically and the height of the leveling coating. It is most comfortable to place the product on alabaster, checking its vertical position using a plumb line. The height of the fastening must be determined visually, but it is recommended that the thickness of the applied layer of solution should not be more than 10 mm.
- Applying plaster. It is most convenient to start leveling from the bottom of the corner on both sides at the same time (to avoid shifting of the perforated corner, it can be additionally screwed using self-tapping screws). The finished plaster, which must first be prepared in the previously described manner, must be thrown onto the wall and then pulled off using a rule or a wide spatula.
In addition, the mixture can be applied to the tool itself used during the work and the surface can be pulled from the bottom up. There are no significant differences when applying the solution in this way, so you can perform the treatment at your discretion using one of them. After plastering the lower part on one side, you should immediately proceed to the second. The concentration of excess mixture mainly occurs at the top of the corner. It must be removed using a spatula and used during further processing. After completing the application of the solution at the bottom of the corner, you should move upward. To carry out work at the top of the wall, you need to use a stepladder or a construction sawhorse of optimal dimensions.
After finishing the corner, you need to wait for it to dry completely, and after that you can apply another coating to eliminate the remaining minor defects. For this task, the best option is to use finishing putty.
Why is markup needed?
There are legally defined standards regulating the distances between buildings, boundary fences, your own and neighbors’ buildings, roads and driveways. They must be observed, but this will not be possible unless the foundation is tied to the terrain. Also, with the help of markings, the building is given exact dimensions - and most importantly, you can control the squareness of the corners before construction begins. If the building has a regular shape in plan (square, rectangle), the easiest way to do this is by comparing the lengths of the diagonals. If they are the same, then the markings are done correctly.
Even to simply remove the fertile layer of soil, markings are needed
Main problem
Almost everyone who has encountered renovations in an old apartment, especially when it comes to the so-called “Khrushchev” and “Brezhnev” buildings, has probably encountered the problem of leveling crooked walls. However, houses of more modern construction also, unfortunately, do not have high quality finishes. It is for this reason that it becomes necessary to take some measures to correct the situation. How to align the corners of the walls, especially if this is necessary in order to properly hang wallpaper? What needs to be taken into account, since angles, as you know, can be both external and internal?
Even if you have never done this, then it is quite possible to do all the work yourself. The main thing is to strictly follow the instructions.
In order to have a more detailed understanding of leveling, let's look at the most commonly used methods and materials that are used. In total, there are 2 main materials used when carrying out work of this kind: drywall and plaster.