Installing interior doors on drywall does not require extensive experience in construction. If you have a detailed description of the work in front of you, follow all the advice and work carefully, then there is no need to involve professional builders, everything can be done with your own hands.
Tools and materials for the job are widespread and used at most stages of repair or construction:
- roulette;
- level or plumb line;
- hammer;
- screwdriver;
- self-tapping screws;
- polyurethane foam.
Assembling the frame for the partition
When creating a partition with your own hands, follow the following sequence of actions:
- Use a tape measure to mark the location of the future partition on the floor. Using a level, continue it on the walls and ceiling.
- Based on the markings, attach the uw guide profiles to the floor and then to the ceiling and walls, which will serve as support for the vertical posts. Depending on the coating material, you will need dowel nails or self-tapping screws for fastening, the pitch between which will be 30–50 cm.
- Cut the supporting profiles to size, insert them into the lower and upper guides around the perimeter of the entire partition and secure them firmly with self-tapping screws. There should be 3 racks per sheet of drywall: if the width of the drywall is 120 centimeters, the step between the profiles will be 60 cm.
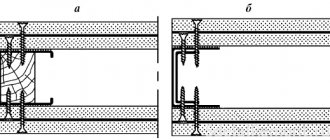
To increase the strength of the structure, a plasterboard doorway requires a gypsum board joint in the center, and not along the edge, so we begin the installation of load-bearing profiles with two racks that limit it. To further strengthen the opening, wooden beams need to be inserted into these outer posts.
Important! The plasterboard doorway should be 2 cm wider than the door frame. In a strictly horizontal position, install the upper lintel from the guide profile above the opening, which should be 1–1.5 cm above the edge of the future door block
The approximate height of its location will be 2.1 m
In a strictly horizontal position, install the upper lintel from the guide profile above the opening, which should be 1–1.5 cm above the edge of the future door block. The approximate height of its location will be 2.1 m.
To join the gypsum boards, install a piece of vertical supporting profile in the desired location above the opening.
Advice: in order for the installation of a door in a plasterboard partition to be successful with your own hands, you need to prevent the structure from skewing. When installing each frame element, do not forget to control its position with a level and plumb line, and check the correct angles with a square.
Tools needed when installing a door into a plasterboard partition
The structure of a plasterboard partition.
In addition to the door frame itself and the door leaf, you need to prepare:
- platbands;
- door fittings;
- loops;
- saw and chisel;
- water level and miter box;
- screwdriver, electric drill and all necessary attachments;
- tape measure and a simple pencil;
- mounting foam;
- fasteners.
Assembly of the structure
After marking, installation of the frame begins:
Damper tape is glued to the sides of the guides adjacent to the wall, after which they are fixed to the floor and ceiling with dowels in increments of 60–80 cm.
- Holes for dowels are drilled along the dot marks on the wall and direct hangers are attached.
- Vertical posts are cut 1–2 mm shorter than the height of the room and inserted into the guides. They are attached to them using a cutter or metal screws. Their location in one plane is controlled by a level and fixed using hangers. To do this, they are attached to the racks with screws, screwed into suitable holes. The protruding parts are bent with your hands towards the wall.
The horizontal jumpers are cut off with a margin of 1–2 cm. The side shelves are cut off at the edges, after which these peculiar “tongues” are secured with screws to the racks.
After completing these operations, you can sheathe the frame with sheets of plasterboard.
Operating procedure
The first thing you need to do before starting work is to calculate all the dimensions and, if possible, draw up a very accurate and detailed drawing of the future structure. This is a necessary condition for installing a regular partition, and for installing a door, the drawing is simply vital. Calculate the height of the guide to have an accurate idea of the location of the future door, and the size of the opening so as not to mount a frame that will not be suitable for the construction.
Next, mount the partition frame. Already at this stage you will need a drawing so as not to miscalculate the size and location of the profiles.
There is one detail that makes the metal frame more durable. The walls of the frame, in order to increase the rigidity of the structure, must be connected to each other with special jumpers, which are also made of metal. In this design, these jumpers are installed without fail. But here a problem arises. As mentioned earlier, there should be no obstacles in the path of the sliding door, so this structural element must be placed so that they do not interfere with movement. But how to do that? Instead of the usual strengthening, you will have to take a slightly different route. It is necessary to install double vertical posts. This is done in this way: one profile is inserted into another so that a rectangular section is formed. The profiles are connected using ordinary metal screws. You can see the frame with double vertical posts in the photo below.
The next step will be the installation of door guides, which have already been shown in picture No. 1. Also, you need to install door travel limiters. This is a very important detail that is often forgotten when installing a sliding door, but in vain. Door stops are needed to prevent damage to the wall, as well as the hinges and the door itself, when opening the latter. These parts set the maximum distance to which the sliding mechanism can advance. Often people who have neglected such a detail regret it very much when they repaint a recently purchased door that has suffered from impacts.
The frame is covered with plasterboard sheets. The structure is sheathed on both sides and in two layers. The two-layer lining of the partition is not only a prerequisite for installing a sliding door, but also a guarantor of the reliability and long service life of the structure. In addition, only double sheathing with plasterboard sheets can provide the desired sound insulation and thermal insulation. Then the clean floor is laid. And only after that it’s time to tackle the door itself.
It's time to hang the door leaf directly. After this, you need to install the platbands. There is a small nuance associated with these details that needs to be taken into account in the layout.
The width of the doorway in our partition is, for example, nine hundred millimeters. It is necessary to take into account the size of the platbands when calculating the width. We calculate twenty millimeters and get the required width of eight hundred and eighty millimeters. It is important to remember that the height of the opening always corresponds to the height of the door itself.
Particular care must be taken to correctly install the lintels located directly above the opening and in the direction from the opening into which the future door will slide. All of them must be located in the same plane, and the plane itself must be strictly horizontal. It is very important to correctly calculate the height from them to the subfloor. This height is selected equal to the sum of the following indicators.
- The thickness of the coating covering the floor;
- Six millimeters as the size of the gap, which is located between the floor and the door;
- The size of the bottom guide is fifteen millimeters;
- Door height. Let’s take roughly two thousand one hundred millimeters;
- The size of the pins located between the rollers and the door is about fifty millimeters;
- Guide height;
- The size of the timber is fifty by seventy millimeters.
Advantages and disadvantages of plasterboard partitions
More recently, partitions in residential premises were made of heavy material, which also required complex installation work. But modern interiors have become more sophisticated and attractive, thanks to the appearance of plasterboard on the construction market. Let us note its positive properties:
- GKL partitions have excellent sound insulation and are perfectly combined with different types of thermal insulation material;
- the sheets are very light, which reduces the load on the floors;
- the material has a smooth surface, which allows it to be used as a basis for wallpapering, plaster or paint;
- does not apply to flammable materials;
- GCR is hygroscopic. The material perfectly absorbs moisture and allows air to pass through;
- an important parameter is ease of installation, which will allow you to change the interior in the shortest possible time;
- The sheets contain natural ingredients that are safe for health.
Arch design option for zoning space
The disadvantages include low strength compared to concrete, stone or brick structures. In addition, gypsum board is not very resistant to moisture.
Materials for canvas
The leaves of sliding doors, as well as swing doors, can be panel or paneled. Panel panels have a flat surface, panel panels consist of a rectangular or shaped frame, and panel inserts made of glass, polycarbonate, MDF, wood, etc. The base of the sash for retractable doors is made of the following materials:
- Metallic profile. Aluminum frames are most often used. They are a frame for canvases made entirely or partially of glass.
Glass door in metal profile
- Solid wood. Paneled door panels made from solid valuable wood are decorated with milling, and panel panels are varnished. The base of the panel door is made from inexpensive wood, such as pine, and then covered with natural veneer made from expensive wood.
- Chipboard. The cheapest material from which you can make a panel board or a rectangular frame for a paneled one. The disadvantage of chipboard is the presence of harmful substances in its composition. They stand out in a small amount, but if you have a choice, it is better to make the door from a different material. The ends of chipboard products are finished with an edge.
- MDF. This stove is slightly more expensive, but has a higher level of environmental safety. Another advantage compared to chipboard is the ability to make curved parts. Due to this, it is possible to make from MDF both a flat panel or a frame of a geometrically strict shape, and a shaped base for a paneled door with milling. For covering chipboard and MDF they use:
- natural veneer,
- laminating films (chipboard only),
- PVC films,
- eco-veneer (film imitating the texture and color of natural wood),
- plastic,
- paints (MDF only).
Profile
A plasterboard sheathed wall with a retractable door has a profile frame. The metal profile for its installation is made of galvanized steel. Its types:
guide - for the base of the frame,
- rack-mount - inserted into the guide,
- corner - for decorating corners after sheathing.
Profile dimensions:
- width - 50, 65, 75, 100 mm,
- height - 37 or 40 mm,
- length - 2750, 3000, 3500 or 4000 mm.
The choice of profile size depends on the height of the partition, the number of layers of sheathing, the size, thickness and weight of the plasterboard sheet. The heavier the gypsum plasterboard cladding, the more powerful the profile is needed. Attach it to the wall using dowels and self-tapping screws. The guides and rack profiles are fastened together with galvanized screws and non-pressed washers. The pitch between profiles is 600 mm. If you need a stronger wall, you can install the rack profile more often.
ProfileDoor and window openings
If you plan to make partitions with a door, then you need to attach a horizontal profile along the height of the upper edge of the door frame. The vertical posts and horizontal lintel are secured so that the solid side of the beam profile faces the inside of the opening. It is better not to install the lower base in place of the door, so that later you do not have to make a threshold.
The frame for the arched opening is made from a standard profile. To bend the profile, cuts are made on its sides with great frequency.
The drywall is attached to the frame with self-tapping screws in fine increments directly through the sheet without preliminary holes. The screws are placed evenly at a distance of about 30 cm from each other.
Electrical cables are laid inside the partition at the stage of constructing the frame. If necessary, holes are made in the profile for the cable.
Puttying drywall is necessary to hide installation defects and seal seams. Paint or wallpaper is applied over the finishing putty. Fastening panels and tiles is done in the same way as on other surfaces.
Features of modifications of partitions between rooms
It is worth understanding that installation features in each specific case depend on the selected model configuration. In particular, if we are talking about simple stationary systems, it is enough to choose the right place, fix the brackets on the support blocks, and then hang the canvas or several components on them.
If you choose a system with movable mechanisms, for example, a sliding partition, the procedure will be more complicated. Such designs consist of several key components:
- guide rail;
- roller carriages for sashes;
- the paintings themselves.
The rail can be located both in the ceiling and in the lower part. This depends on the total mass of the structure and a number of other parameters. The rollers are installed in a special groove, after which they will move along a clearly defined path. It is also necessary to provide for the installation of stops and limiters. They will be responsible for stopping the sash at the extreme opening point. All this takes some time and requires special tools. But our craftsmen have everything they need to quickly and successfully complete the project.
Types of materials
The price of installing interior partitions practically does not depend on the chosen material, but it is worth understanding that some types of raw materials require additional reinforcement. For example, if you prefer an all-glass structure, it will not be able to maintain a vertical position without a hidden profile built into the wall. The process is quite painstaking and will require some additional costs.
You can also identify more common and popular analogues in the domestic market:
- wooden,
- plastic,
- aluminum structures.
During their manufacture, the supporting elements and the further installation process are thought through. Therefore, when arriving at an object, the performer knows exactly in what sequence to act.
Installation at various sites
Another important circumstance concerns the scope of application of the interior partition. After all, it is not always used at home
On the contrary, such designs can be found much more often in a commercial environment. This could be a modern office of a large company with a large set of square meters, or a sales area divided into many departments. Banks, airport and train station terminals, administrative and service companies actively use these zoning techniques. Installation of interior partitions here is fraught with various difficulties. However, for our experts this will not be a reason for failure to fulfill their duties.
Do-it-yourself cassette door installation
Before you start making a pencil case for a sliding door, determine the width of the opening. The design of the entire system will depend on this parameter. There are two types of cassette coupes:
- Single leaf. Door blocks are designed for standard narrow passages to the bedroom, kitchen, and bathroom.
- Bivalve. Door blocks are designed for wide passages. Often such openings are installed in the living room or when combining rooms. The design consists of two separate cassettes installed on opposite sides of the aisle. The result is combined single-leaf systems, where each leaf rolls back in the opposite direction.
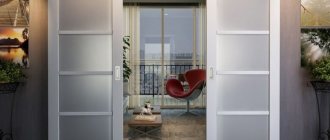
When making a pencil case for sliding doors with your own hands, take into account the type of wall. The usual non-load-bearing interior partition is completely dismantled. In its place, a structure with a niche is being erected. A sliding door with a plasterboard partition forms a false wall, which is a cassette. The construction of a new wall allows you to save useful space by maintaining the original thickness.
A load-bearing wall cannot be dismantled. The frame of the pencil case will have to be attached to the surface, and covered with plasterboard on top. The result will be a double thickening of the wall and a reduction in space, but there is no other way out.
The cassette compartment door is installed after the finished floor has been installed. By this time, the final leveling should be completed, and the thickness of the floor covering should be taken into account.
Installation procedure
- In order for the design of an interior compartment door to be made without errors when you make it yourself, you will need to draw a drawing and then transfer it to the wall. Using markings, they determine which areas need to be dismantled.
- When drawing up a drawing, you need to calculate the dimensions of the sliding door cabinet. Measurement starts from the sash. Its width is multiplied by 2, which determines the length of the guide rail. The height of the racks of the pencil case is calculated taking into account the thickness of the jumper, the guide, as well as gaps of about 5 mm at the top and bottom of the end of the canvas. The pencil case is made 2 cm wider than the sash. The depth of the cassette is usually limited to 8 cm.
- After performing the calculations, the dimensions of all elements are indicated in the drawing. To make a false wall, a profile is prepared. If the pencil case is mounted on a load-bearing wall, then you will need one row of racks. When assembling a false wall, instead of the removed pier, two rows of supports are installed to form a niche. The length of the racks is equal to the distance from the floor to the ceiling, since profiles are attached in these places.
- An upper jumper is installed inside the niche, and a guide is fixed to it. A similar element is mounted to the floor. It is advisable to place a rubber band under the rail to dampen the sound of moving rollers.
- The assembly of the sliding system depends on its type. Rollers can be on both sides of the sash or only on the upper end of the leaf, and a guide knife is attached to the bottom. After installing the roller mechanism and fittings, the sash is hung on the rail. There should be a gap of 5 mm between the ends of the blade and the guide element.
They try to roll the hung door on rollers. The movement should be smooth, easy, without rumble or jumps
It is important not to forget about the limiters that serve as a stop for the sliding sash
After successful testing of the sliding structure, the niche frame is sheathed with sheets of plasterboard. Further actions are aimed at decorative finishing of the false wall and framing the ends of the cassette, forming the door frame.
Features of insulation
Since interior partitions made of plasterboard sheets are hollow inside, they can be insulated with your own hands using modern materials. Rolled varieties, such as ecowool, are best suited. You can also use sheet insulation. Isolon, polystyrene foam, polystyrene and polyurethane foam are especially popular today.
To perform insulation with your own hands, you need to fill the space between the profiles after covering one side with plasterboard. After this, you can sheathe the second side. If you plan to hide communications in the wall or install a sliding door, you should leave the corresponding space without insulation.
To insulate a plasterboard partition, it is necessary to fill the space between the profiles with heat-insulating material
Sheathing
To begin with, the canvases are cut out. They are cut using a regular painting knife and a straight strip. A cut is made along the drawn line along which the canvas is folded. Next, cut the cardboard on the second side. The edges are not very smooth, but this is first removed with a plane or knife (significant protrusions are scraped off), and during the puttying process it is covered with a paint corner.
The resulting canvases are screwed to a metal frame using wood screws. The caps are recessed into the drywall in increments of 25 mm. For rigidity, they are screwed not only around the perimeter, but also to the profile located inside. If you plan to additionally insulate or soundproof, then this is done when the sheathing is done on one side. Mineral wool is recommended as insulation, which is inserted into the frame, after which the other side is sewn up.
Installation
Installation of a sliding door into a wall or plasterboard partition is carried out in the following order:
- Measure the wall, floor and ceiling of the room in which the partition will be installed.
- Draw up a diagram of the installation of the frame and a sketch of the finished structure with the door. Select materials, type of mechanism, additional devices.
- Calculate the required amount of profile, drywall and other materials.
- Make an outline of the location of the frame on the wall or ceiling and floor. Secure the guide profiles. Stick them into their racks and secure them too.
- Cover the frame with plasterboard.
- Install the mechanism and door leaf with embedded handles.
- Cover the drywall with your chosen finishing material.
Installing a door that slides into a plasterboard structure will help solve many of the difficulties of room planning, while requiring little investment in time and money.
How does a cassette sliding system work?
According to the principle of operation, cassette interior doors are no different from designs that require the door to be rolled back behind the wall. The mechanism consists of rollers and guide rails. The main difference is the ability to hide the door leaf inside the wall. This design is called a cassette or pencil case. It is made in the form of a flat box, replacing part of the wall. In addition to the sash, guide rails and a roller system are hidden inside the cassette.
The benefit of a pencil case for sliding doors is the creation of free space inside the wall; the door that rolls back into the cassette does not interfere with installing furniture close to the interior partition. The pencil case protects the door leaf from dirt, scratching by pets and other damage.
For normal operation of a sliding door, a wall thickness corresponding to the parameters of the cassette is required. The structure should form a niche that does not protrude beyond the plane of the pier. In the sliding system, the thickness of the sash and the side posts of the pencil case, as well as the gaps between the elements for the free movement of the canvas, are taken into account. The width of the cassette is always made twice as large as the doorway. The half, intended for rolling back the canvas, is hidden behind a false plasterboard wall.
How to build a plasterboard wall
The availability of the necessary materials and ease of installation make it possible to make a partition from plasterboard in a day. Following the step-by-step instructions described below, the master can easily mount the wall in an apartment or house.
The first step is a kit of materials
There are three categories of plasterboard sheets:
- Ordinary;
- moisture resistant;
- fireproof sheet.
Next, they decide on the type of frame - metal or wood. Currently, wooden blocks are not used so often when installing plasterboard partitions. Metal profiles are more in demand; they are not as heavy as wooden frames. In addition, it is a modern lightweight and reliable material.
When constructing a metal frame, guide profiles marked PN and rack-mount PS are used. Guide strips are needed to assemble a metal frame around the perimeter of the room.
Rack profiles are mounted inside the assembled frame at a certain vertical distance. Also, rack-mount metal profiles are additionally mounted vertically inside the frame, according to the drawing.
The standard cross-section of guide profiles is 50x40, 75x40. The thickness of the racks is 50x50, 75x50. The dimensions of the product are selected according to the height of the ceilings, possible loads, and adjustable sound insulation.
For living rooms, ordinary sheets of plasterboard are used. For rooms with high humidity - in the bathroom or kitchen, use moisture-resistant material. GKL has a thickness of 12.5 cm. This section is sufficient for installing partitions. If shelves will be attached to it, it is advisable to cover the wall with a second layer of plasterboard. Construction supermarkets offer sheets of different sizes. The greatest demand is plasterboard 125x250 cm.
The thickness of the erected wall is determined by the following parameters:
- Selected gypsum board thickness;
- multi-layer cladding;
- section of the guide metal profile.
Second step - tools
The basic installation kit includes the following tools:
- Impact drill or hammer drill;
- laser level;
- putty knife;
- screwdriver;
- dowels;
- metal scissors;
- edge plane;
- self-tapping screws;
- roughing plane.
Pro Tip: Allow drywall sheets to dry for 24 hours before starting work. Ideally, three days. They should remove moisture that may have entered the material during storage in unheated warehouses. Otherwise, this can lead to drying out and deformation of the material.
Third step. Marking
The floor and side surfaces of the wall in the selected locations for future installation of the frame must be cleaned of dust and leveled. Next, markings are outlined, following which the installation of plasterboard partitions will be carried out.
Marking begins from the floor surface with a gradual transition to the ceiling and wall.
For professional installation, maintaining right angles is an important point. A laser level copes with this task perfectly, creating beams simultaneously in several planes.
Fourth step. Construction of the frame
Installation begins with laying horizontal guide profiles on the surface of the ceiling and floor. According to technical regulations, the step fastening is 0.5 meters. Next, the rack profile is attached to the wall. Based on the drawing, the total number of vertical slats in the frame is calculated. The planks adjacent to the surfaces are glued with professional sealing tape. Its main functions are sound insulation and vibration resistance.
After installing the frame, you can begin to secure the rack metal strips. They are mounted vertically; for impeccable measurement quality, a special level should be used.
The first metal profiles are mounted close to the side walls. The following planks are attached at a distance of 60 cm. This distance is regulated by the width of the sheet; their joints must coincide with the rack profile. Then the profiles are fixed with self-tapping screws. To give greater rigidity to the created structure, it is permissible to install several transverse profiles.
You can trim off excess frame elements with electric scissors or an angle grinder. The work requires extreme care from the master. Burrs from cutting with scissors and inaccurately protruding screw heads can contribute to surface unevenness. Plastering such surfaces is not recommended, and putty will only hide small holes. You will have to completely putty the entire wall, which will increase the work time.
Why drywall?
Typically, the designs of plasterboard walls, regardless of where and for what purposes they are used, are similar. Inside there is the main part - a metal frame . Sometimes it is made of wood, but this design is outdated and almost never used.
The only acceptable wooden part is a beam, which is placed at the point where the doorway is planned.
In addition to the frame and insulation, the design uses, as the name suggests, plasterboard sheets. They cover the frame. It's convenient, environmentally friendly, and inexpensive. Also, the material is immediately ready for the final stage of finishing .
The advantages of such partitions
- Properties of the materials used. Metal profiles, which are used to create frames of any shape and purpose, are excellent for mounting gypsum boards on it .
- Easy to install and doesn't take much time.
- Communications can be laid in the partition cavity : electricity, pipelines, sewerage.
- Low cost.
Galvanized metal does not react to humidity, due to its low weight, it does not in any way affect the load-bearing floors. There are also different types of drywall: fireproof, with increased moisture resistance.
Minuses
- Drywall is a rather fragile material and in terms of strength cannot be compared with materials for capital works, such as brick or concrete.
- Low moisture resistance. This property must be taken into account even when purchasing special gypsum boards with a special coating.
- Lack of possibility of fastening massive furniture or other interior elements. It is believed that if mounted on a frame, a linear meter of the structure will support no more than 70 kg. The plasterboard sheet itself will not support a weight exceeding 15 kg.
Find out more about the types of plasterboard sheets for walls and partitions by following the link.
Straight frame construction
More labor-intensive is the construction of a partition from scratch. Such a wall made of plasterboard sheets with a doorway must be designed in advance. The plan outlines the exact position of the door and the necessary parameters for the opening
It is important to take into account that the structure needs to be built somewhat smaller in size, since after finishing part of the area is hidden
In order to do everything yourself, you will need a larger number of profiles than for the previous type of work. First of all, mark directly on the floor and walls. Here you need to outline the position of the vertical posts and the dimensions of the doorway.
Scheme of the frame structure for a partition made of aluminum profile
After this, you need to install horizontal profiles on the floor and ceiling, the rack strips will be driven into them. Additionally, the structure can be strengthened with horizontal profiles in places where you plan to hang a cabinet, TV or other interior items. The sheets are screwed in the manner already described. Insulation is placed inside the partition. An additional protective corner is placed on the corners.
Drywall sheets are attached to the frame using self-tapping screws
You can make not only standard doorways from plasterboard, but also more interesting decorative designs. We're talking about arches. In order to make them with your own hands, you need to give the building materials a specific shape.
Using drywall you can create an arched structure of almost any configuration:
- direct portal;
- ellipse;
- round extended;
- non-standard asymmetrical;
- etc.
Interesting options for arched openings
The frame is erected in a standard way with one difference: the profiles are bent to suit a given project. To do this, they are cut with metal scissors. In order to bend the drywall, you need to go over it with a needle roller, then lightly wet it with water to make it more pliable and fix it in the required position. Make sure that the cardboard does not soften, otherwise the plaster will crumble and crumble in the future.
Stages of installation of a simple arched plasterboard structure
Tools and accessories
For all installation work, you will only need very simple tools and equipment. If you don’t want to spend extra, then you don’t have to buy any of the tools, but you can rent them at any large supermarket in the city.
To make a plasterboard partition for installing a door you will need:
- Screwdriver.
- Hammer.
- Grinder/metal scissors.
- Building level.
- Roulette.
- Plumb.
- Electric drill.
- Pliers.
- Bucket.
- Putty knife.
- Ruler.
- Roller.
- Rule.
As you can see, there is nothing non-standard; you will probably have all of the specified tools available.
Installation
Installation of a sliding door into a wall or plasterboard partition is carried out in the following order:
- Measure the wall, floor and ceiling of the room in which the partition will be installed.
- Draw up a diagram of the installation of the frame and a sketch of the finished structure with the door. Select materials, type of mechanism, additional accessories.
- Calculate the required amount of profile, drywall and other materials.
- Make an outline of the location of the frame on the wall or ceiling and floor. Secure the guide profiles. Insert the racks into them and secure them too.
- Cover the frame with plasterboard.
- Install the mechanism and door leaf with embedded handles.
- Cover the drywall with the selected finishing material.
Installing a door that slides into a plasterboard structure will help solve many room planning problems, while requiring a small investment of time and money.
Mechanism and accessories
The door sliding mechanism consists of the following parts:
- upper guide - the canvas moves along it;
- lower guide - prevents the door from rolling;
- rollers on the carriage - ensure movement of the sash;
- mounting plates for installing rollers - their shape and size must correspond to the thickness of the web;
- bottom roller;
- stoppers - limit the movement of the sash.
Sliding mechanism kit
If the door has two leaves, in addition to the usual mechanism, it is possible to use a telescopic one. Door leaves with a simple mechanism are installed in one line. Telescopic doors have leaves installed parallel to each other. They can move in different directions or move into the same wall.
Telescopic mechanism
You can purchase and install a mechanism with a synchronizer. When you move one of the doors, the second one will move automatically synchronously.
Another useful addition that can be installed on sliding partitions is a door closer. It will ensure smooth opening and closing of the canvas. By moving or pushing the door halfway, you can release it. She herself will finish moving in the right direction.
To conveniently pull out the leaf from the wall, you can install a pusher (Push-to-open mechanism) for sliding doors. When you lightly press the end of the door pushed into the partition, it springs back and automatically slides out.
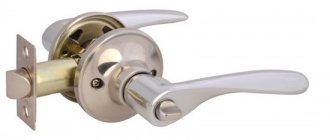
To ensure smooth sliding of the door into the plasterboard partition, specially shaped handles are installed on the canvas. They are recessed deep into the sash. There are a large number of options for such handles on sale: round, oval, rectangular, square and others.
Handles for sliding doors
The nuances of installation and construction of an interior wall
The installation of the partition, which according to the plan should have a door, is carried out in several stages.
- Marking. The easiest way to do this is to use a level and tape measure directly along the floor and wall. This will also help you get a better idea of what the partition will look like.
- Assembling a metal frame.
- Placement of insulation.
- Laying communications.
- Installation of gypsum boards.
Guide profiles
The first thing to do is to mount the guide profile on the ceiling. They place it on the marking line and drill holes in it.
Afterwards, holes with the same step are made in the ceiling. Fasteners should be at a distance of 40-50 cm. The outermost hole should be within 5-7 cm from the wall.
An important detail is that a sound insulation element must be laid under the top profile, otherwise the sound from the movement of the doors will spread throughout the building. The profile is attached to the ceiling using metal dowels or screws that are screwed into plastic dowels.
It happens that one solid profile is not enough to cover the ceiling line, then it needs to be extended.
Before working on the floor profile, you should determine where exactly the doorway will be located:
- A door against a wall is a frame element that is mounted on the floor and lies on one side to the edge of the opening.
- Door in the middle - two elements of the required length are cut, which are installed from different walls to the opening. They are mounted in the same way as a ceiling profile.
Rack profiles
Vertical posts are made from the same metal profile. Two are screwed to the walls. Two more are needed to form the doorway; they are attached to the ceiling and floor guide profile. Other racks located in the gap are also attached using the same principle.
IMPORTANT: The rack profiles are located at the same distance. In our case, everything is determined by the width of the plasterboard sheet, which in the standard version is 120 cm
Based on the fact that the sheet is laid so that there are three profile elements underneath it: two at the edges and one in the middle, the distance between the posts should be 60 cm
In our case, everything is determined by the width of the plasterboard sheet, which in the standard version is 120 cm. Based on the fact that the sheet is laid so that there are three profile elements under it: two at the edges and one in the middle, the distance between the posts should be 60 cm .
Cross members in the frame
Thanks to them, the strength of the frame is achieved. Sections of PS, the length of which is 80 cm. They are bent in such a way that a U-shaped element emerges, where the length of the back will be 60 cm, and the shelves will be 10 each.
Corner cuts are made at a distance of 10 cm from the edges of the segment. This allows you to bend the ends of the element along the back.
Such crossbars must be installed along the entire partition between the racks. Their step in the horizontal plane should be half a meter.
If the partition consists of several separate sheets, the crossbar should be located at their junction. Rack elements, by the way, are mounted according to a similar principle.
The design must also have a special cross member, which is needed to determine the height of the future doorway. Its length is equal to the width of the opening and another 10 cm for shelves
It is important not to confuse this element - this element is installed with the back facing down.
Gain
The door is a fairly heavy element and it creates a load on the racks. They need to be strengthened, otherwise the entire partition will not last long. This is done in two ways:
- A wooden strip secured with self-tapping screws.
- Using two reinforced profiles at once.
Installation of gypsum boards
This is the last stage. First, the sheets are laid. The screws should be at a distance of 10-15 cm, and at a distance from the edge within 1.5-2 cm. They are screwed into the sheet to a depth of half a centimeter.
IMPORTANT: When using one layer of plasterboard, self-tapping screws of 2.5 cm are required, for double-layer installation - 4 cm. In any case, you must ensure that the self-tapping screw penetrates the metal profile to a depth of at least one centimeter
If necessary, the sheets are trimmed with a sharp special construction knife. The technique is this: after marking, you need to make a cut, completely cutting through the cardboard layer and cutting a little into the gypsum layer. Then the sheet is laid with a cut line on the rail and broken.
Finishing touches
When one side is already covered with plasterboard sheets, you can start laying insulation. It is chosen depending on the purpose - sound insulation or heat preservation. Usually a universal material is taken - modern high-quality glass wool.
All communications are laid according to plan. Drywall is screwed on the other side. A fastening tape is placed on the sheets, and a layer of putty solution is placed on top of it. Next comes sanding and final finishing.
Important installation rules
To install a sliding door, you will definitely need to have an interior wall containing two layers of plasterboard. This is very important, since the movement of the door leaf will require not only a sufficiently wide gap, but also two thicknesses of the metal profile and two thicknesses of the plasterboard sheet.
Before you figure out how to install a sliding door in a plasterboard partition, we recommend that you familiarize yourself with the materials that will be required during the installation process.
Before starting installation, it would not hurt to remember a few nuances that may create difficulties in the future if you do not know them.
There should be no elements inside the plasterboard partition located in the path of movement of the compartment door. Even if the obstacle is a direct part of the structure.
The metal frame must be fastened strictly in accordance with the level. There should be no distortions under any circumstances. This is very important for working with metal profiles and the entire installation of a partition with a door.
A very important point! People often try to install wiring into plasterboard partitions, install sockets, switches, and lamps, but in the case of a sliding door, installing such internal elements, and indeed wiring in the partition in general, is extremely undesirable. Many people make this mistake during installation, so if you were planning to install something else in the partition, it is better to find a more reliable method.
If the room uses floor coverings, special attention should be paid to such elements as the lower door guides. If you put a carpet in your room, lint from it can get caught in the mechanism, then this can create problems in the future. If you use linoleum, then with friction, the mechanism can easily tear it apart, which will lead to the floor looking unpresentable.
Assembling the frame and guides
The production of all types of structures is carried out in 3 stages.
Stage 1
It consists of marking the design position of sliding structures using a laser level and a fender cord on the floor, walls and ceiling. Consumables and tools:
- For rigidity, a metal profile of type UW and CW is used.
- The decorative element is gypsum board with applied wallpaper.
- Mineral wool is used for thermal insulation and sound insulation of the partition.
- Fastening elements - screws, washers, dowels.
- Finishing materials - serpyanka reinforcing tape, gypsum plaster mixtures.
- Tools: building level, tape measure, screwdriver, grinder, drywall knife, spatulas, trowel, hammer. Elements and materials for partitions
- A set of metal structures (upper fixed and upper movable guides), a set of mechanisms with rolling rollers and motion locks, a set of sealing rubber bands, hinges and latches, door handles.
Stage 2
The main task is to install guides for moving partitions. The plan shows a breakdown of the movement of ceiling-mounted sashes. The required size and number of partition flaps is determined. The upper fixed part of the guides is secured with anchor bolts at the same level. Soundproofing tape is glued to the upper fixed guide. Then the lower moving part of the guides is attached to the level using adjusting bolts and a nut.
Installation of guides for moving the partition Previously made partition panels with fixed rollers and connected by hinges are suspended on the upper movable part of the guides. With several types of mechanisms with upper guides and main rollers, it allows you to solve any technical problems. Preserve floor coverings and reduce noise when door leaves move.
The design of the movement mechanisms is designed for loads from leaves or doors up to 120 kg and a guide length of up to 6 m. Fittings are used in the form of handles, locks, rollers for sliding wardrobes, mechanisms for sliding doors, soft closing mechanisms for doors, door closers, etc. . Will decorate any sliding partition well.
Example of a partition frame Rubber seals, locks, latches and door handles are installed in the partition, according to the project. This problem can be solved quickly if one partition is required in the bedroom. It is more difficult to complete the task if you need to make guides for several partitions in one room with one panel storage.
Stage 3
It consists of an assembly of metal structures of a partition panel with rolling mechanisms. Step by step process:
- The location of the guide UW profiles and rack-mount CW profiles of the partition relative to the upper movable guide is marked. The size of the partition with rollers should be 20 mm less than the height of the room;
- On a flat horizontal surface, the partition panel is assembled from profiles cut with metal scissors. The height of the racks should be 10 mm less than the marked one;
- On each panel, install two horizontal stiffeners at equal distances;
- Secure the jumper and posts with 9 x 3.5 mm screws;
- All corner connections of profiles should be made with a 10 cm bend of the profile onto the stand with a notch; Distance between partition frame posts
- Install an intermediate post between the upper jumpers;
- Install rolling mechanisms. The racks are made of two profiles. The rigidity of the panel is ensured by diagonal profiles, according to the working design. Each frame leaf moves on a carriage along a guide that rotates along a vertical axis. The sashes have a vertical roller. The sashes, connected by hinges, fold completely.
Main types of transforming partitions:
- folding frames with soft and rigid construction;
- sliding one-piece and composite.
Mechanism for a sliding partition The mechanical part of the transformation is provided by rollers moving along factory supplied profile guide rails. It is allowed to install out-of-plane movement limiters.
If you need to hide the partition doors, then create a niche of the appropriate size and thickness in the plasterboard wall. According to this principle, “shops are created to place two or three rows of partitions or doors indoors. For all options, the use of wood is allowed, but provided it does not compromise strength.
