SHARE ON SOCIAL NETWORKS
FacebookTwitterOkGoogle+PinterestVk
Standard locks that are installed on interior doors often need to be replaced for various reasons. In addition, the finished canvas can be sold without a locking mechanism. Installing a door lock is a rather complicated operation that requires an understanding of the design of the device and knowledge of the nuances of its operation. The main factor determining installation features is the type of locking mechanism.
The type of installation of a lock on an interior door depends on the type of locking mechanism
Installing a lock on a door: choosing the type of locking mechanism
Design features are the main factor by which all locking devices used in interior walls are classified. Let's look at the most popular devices installed in interior doors.
Installing a mortise lock requires precision, but the mechanism is reliable and durable
Latch (regular). This type of locking device is the most widespread. Conventional latches are used everywhere in interior walls. Installing a lock on an interior door in this case is not difficult, which often attracts buyers. The peculiarity of this device is that its design includes a cylinder and a locking tongue controlled by a special mechanism. Most often, such locks are sold complete with a handle. Thus, in order to avoid mistakes during the installation process, it is necessary to study the instructions, which will answer the question of how to insert the handle into an interior door.
Latch with lock. The mechanisms that belong to this group are an improved modification of the previous type of locking devices. Their design has one more element - a latch. Its function is to hold the lock closed. Such products are ideal for interior doors.
Helpful information! Today you can find two types of latches equipped with a lock: push-button and lever. For use at home, it is recommended to pay attention to the second option.
Mortise mechanism. It is the second most popular among interior door locks. Installation into the canvas requires precision and care. Mortise devices are reliable and have a long service life. They are most often used for doors in personal offices and bedrooms. Unlike the previous type, these devices are opened using a key.
The process of installing a magnetic lock is quite complicated, so if you don’t have the skills, it’s better to turn to professionals
There are two types of mortise mechanisms. The first option provides the ability to unlock the door from both sides (key-key). In the second case, a combination is used that consists of a key and a turntable. In this situation, a separate insertion of the handle into the interior door is required. How to perform this operation? There are special step-by-step instructions for this.
Padlock. From an installation point of view, this option is the most acceptable. However, overhead devices do not meet modern safety standards. They can be easily damaged by mechanical action.
Magnetic lock. The cost of such devices is higher than the price of standard types of locking mechanisms. Their main advantage is quiet operation. That is why they are most often mounted on interior doors, which are intended for bedrooms and children's rooms. It is quite difficult to fit a lock into an interior door on your own. The cost of installing magnetic mechanisms depends on their design features and the type of door.
Level device. Such devices can provide good protection for the premises. They are opened with a key and are used not only for interior, but also for entrance panels.
Lever locks are quite reliable, so they are installed on both interior and exterior doors
Selecting a suitable lock
To choose a suitable lock for an interior door, you need to clearly define the requirements for it. The emphasis when choosing is on:
- quality;
- unique design;
- color;
- noiselessness;
- key lock;
- latch functionality.
In order for the door to open and close well, it is very important to embed the lock correctly.
For an interior door, a handle is a must, but a lock is not always necessary. The product is selected according to this principle. For the bathroom and toilet, a lock is required, but for the bedroom, an ordinary latch is enough. There are 3 types of mortise locks:
- WC type. This type of lock allows the user to close it on one side only, without using a key.
- Patent type. The most popular type of lock. Allows you to close the door with a key that fits all locks of a certain product model.
- Yale-type. Equipped with a Eurocylinder system, the uniqueness of the key depends on the secrecy of the lock. Such products are installed in the doors of a room to which access is limited, for example, in an office.
- Pen lock. This type of lock does not restrict access; it only makes it possible to close the door tightly.
Advice! If there are small children in the house, install locks with a child safety feature or a locking device.
Naturally, you can combine some requirements, but when you go to the store to buy a product, you should have a rough idea of what it will look like. The color of the lock is selected to match the door or, conversely, so that it contrasts against its background. When purchasing a lock, you should pay special attention to the appearance of the product. Any scratch or dent is a sign of mechanical damage. You always have the right to refuse such an item before purchasing. Carefully examine all moving mechanisms. The springs must return the tongue and handle of the lock to the starting position without delay. Check the quality of the assembly: when the handle is turned, the tongue should be completely hidden inside the product. If you do not follow this procedure, you will not be able to open the door. Also make sure that your door leaf matches the thickness of the structure. And try opening/closing the lock (if you have one) several times to make sure it works without unnecessary squeaks or crackles.
Installing a door lock: flat and round devices
Most often, interior doors are equipped with locks that are most suitable for use in such conditions. These include flat and round mechanisms, which differ from each other in the shape of the case.
Flat interior locking devices are expensive. Their independent installation is accompanied by certain difficulties due to the design. However, such devices have one serious advantage: they provide a high degree of protection against intrusion by unauthorized persons.
It is worth noting one important feature of flat mechanisms: their installation weakens the door and frame. Before embedding a lock into a wooden door, it is necessary to determine its compatibility with the door leaf. Experts recommend installing flat products in existing doors. Canvases made from MDF are not suitable for installing full-fledged flat mechanisms. As a rule, shortened versions of devices are embedded in them.
Helpful information! When installing a flat mechanism in a door made of MDF, it is necessary to take into account that the thickness of the tongues should not be more than 15 mm. And also in this case, the restriction also applies to the end plate of the locking device. Its width should not exceed 24 mm.
Round locks are the most suitable option for interior doors
Round locking mechanisms are the best option for installation at home. Therefore, they are most often found in interior doors. You do not need to have special skills to install a lock on a wooden door. The main advantage of such devices is their compatibility with any type of fabric. Most often, two types of handles are used for such mechanisms: halyard and knob. The second type of product is considered the most suitable. Knob handles are recommended for installation at home, as they are reliable and convenient.
Installing a door lock on interior doors: necessary tools
In order to independently install the locking mechanism, you need to prepare the appropriate tools. Installation of such devices does not require a large number of devices and accessories. The minimum set includes the following elements:
- pencil (for marking);
- measuring tape;
- drill;
- screwdriver;
- construction knife;
- chisels (10 and 20 mm);
- set of drills;
- masking tape.
Before starting installation, it is recommended to study the step-by-step instructions that will help you figure out how to install a lock on an interior door. It is worth noting that currently on sale you can find special kits that are used to insert locking mechanisms into panels made of various materials.
In order to install a lock with your own hands, you need to have all the necessary tools.
Kits for inserting locking devices, as a rule, include a feather drill with a cross-sectional index of 22 mm. This part is not suitable for organizing a hole for a latch. In this case, it is recommended to use a chisel.
Tool
It's even more important to get the right tool. Some standard samples may need to be modified to accommodate locks, see below.
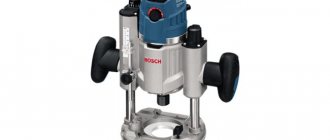
If you are going to work on doors and locks professionally and you expect a lot of orders, it is advisable to immediately acquire a plunge-cutting wood milling machine (on the left in the figure), its cost will be recouped by the speed and quality of the work.
Wood plunge router and lock template
As a rule, in addition to the carriage, plunge-cutting routers are supplied with templates, with the help of which you can carry out a full cycle of work on installing the door, see the story:
Video: installing a door with a lock mortise
For a beginner, in this case, the most important thing is not to make a mistake in choosing a rather expensive tool, so we offer a selection of videos:
Video: how to choose a wood milling machine
Video: what cutters a beginner should buy for it
Video: how to determine the quality of a cutter when purchasing
If orders for inserting locks are expected in the meantime, then the router will completely replace the proprietary template for inserting a lock with complete core drills. Its advantage is that many kits allow you to immediately accurately mark and install the mating part of the tongue (eyelet). This is the most difficult operation for inserting a lock, see below. Disadvantage – the template is only suitable for manufacturer’s locks. A possible solution is to install your own lock (bought by a master); owners of lock templates are often given discounts. The owners seem to have a good time: they don’t have to go shopping and struggle with the choice, and a small markup doesn’t hurt their pockets. But in a big city this is hardly an option - where is the guarantee that an unfamiliar master has not made duplicate keys for himself in advance?
Note: the template(s) for inserting a branded lock/locks according to his/their dimensional drawings can be made with your own hands, see next. video:
Video: a simple template for marking a door
For manual work
A one-time insertion of a lock with your own hands for yourself will have to be done manually according to the markings: it will take 3-4 hours to make the simplest template, and without it, standing in place, the greenest, but not armless, “teapot” will insert the lock in an hour. A more or less experienced home craftsman - in half an hour. For an electrified tool, you will need a drill or screwdriver with a power of 170 W or more, because... For a flat lock you will have to drill deep holes, and for a round lock, wide ones.
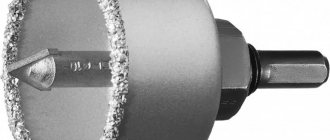
In addition to the usual household tools, you will need, firstly, a feather drill and, for a round lock, a core drill for wood, pos. 1 in Fig. There are no problems with crowns: the required diameters (50 or 54 mm) are standard. But the nib for a round lock needs 23 mm. This is non-standard; these do not exist in regular sets (item 2). This means you need to either look for it separately, or adjust it to 25 mm manually, for example. on a surface grinding machine – grinder. It is not advisable to turn: you can screw up the drill, the cutter, and the machine itself. The best option is a tabletop drilling machine (you can use a drill): a 25 mm pen is clamped into the chuck, turn on the drill and use an emery block to bring it to 23 mm; Micron precision is not needed here.
Hand tool for lock mortise
It is easier to select a chisel/chisels (item 3): it is used to select a recess under the end plate of the lock. Its width for most locks corresponds to the standard sizes of chisels. If the legs of the lining are rounded (nowadays they are rarely done), the chisel will need a joint knife (like a shoemaker's knife) with a hard blade, see below. A mounting knife will not work!
Finally, if you are installing a lock on an old wooden door, it is highly advisable to purchase a hand crank, pos. 4. This simple and not particularly expensive tool is generally very useful for working with old wood. Unlike a power tool, a rotator allows your hands to feel the resistance of the material - the likelihood of chipping, cracking and generally damaging the part is much less with it.
How to work manually
Inserting a lock into a door is a rather delicate matter: from the holes for the lock and tongue catcher to the outer surface of the door leaf (possibly with an expensive finish), no more than 10-12 mm of wood remains; usually 5-7 mm. Therefore, you need to work with the lock manually carefully and correctly: one awkward movement - and the door is damaged.
First, do not drill right through the door with a crown for a round lock, pos. 1 in Fig. The likelihood of ruining the finish is very high. You need to drill with a crown until the guide drill appears on the other side, and drill further from there. The hole will have a slight ledge inside, but it does not affect the quality of this work in any way.
Incorrect and correct techniques for working with hand tools when inserting a lock into a door
Secondly, do not drill with a pen immediately following the markings, especially when working while standing in weight, pos. 2. First you need to drill a pioneer (guide) hole with a diameter of 3-4 mm. Achieving its deviation from the perpendicular to the part by 2 degrees or less with a twist drill is easy for a beginner, but with a pen it is difficult for an experienced one. Moreover, since the guide tooth of the pen describes, while rotating, a conical surface, it will not initially feel the bevel of the pioneer hole; it will stand perpendicular. And when the feather wings enter the tree approx. 1/3 of the height, then the entire drill will become self-guided.
If the door is wooden, then you need to select the end plate with a chisel, holding it with the bevel of the blade towards the wood, pos. 3 – this way the tool will not crash into the tree and split it. If the door is made of MDF (homogeneous material), then the chisel is held, on the contrary, with the bevel outward. This way the decorative coating will come off as shavings (item 4), but if it’s the other way around, a long flake may come off.
Note: if the end plate tabs are rounded, resp. Parts of the markings, melted under them before being removed with a chisel, are cut with a jamb knife to a depth equal to the thickness of the end plate (2-3 mm). On MDF doors this is much simpler - the thickness of the decorative coating corresponds to the thickness of the linings, and the difference in the cutting force of the coating and the base material (it is harder) is very well felt by the hand.
About markup
Most of the marking operations when inserting a lock are carried out using templates or parts of the lock applied locally. It is better to make markings with a needle or a sharp awl, then you can process directly along the contour. If you use a pencil, then when processing you will have to take into account the width of the stroke and the indentation of the lead from the template/part, which is not easy for a good craftsman. But you cannot replace the awl/needle with a metal scriber: it is sharpened in such a way that it gives an indentation even greater than the stylus, and the scratch from it does not erase.
Inserting a lock into an interior door: preparatory stage
The final result of self-installation of the locking mechanism depends on many factors. First of all, the degree of installation complexity is influenced by the type of door and the design of the lock itself. Experts advise drawing up a preliminary drawing of the device. It should contain information about the location of future holes required for fastening elements, handles, etc.
Note! If you are replacing an old mechanism with a new one, then it is recommended to study the instructions, which will allow you to understand how to disassemble an interior door lock with a handle.
The more detailed the drawing was drawn up, the less likely it is to make certain installation errors. Before starting installation, it is necessary to prepare the door for installation. The preparatory stage includes marking the canvas. This is the method that will allow you to correctly insert the lock into the interior door.
You will need masking tape when installing the door lock.
First of all, you need to determine the height of the lock above the floor. The standard value at which the locking mechanisms of interior doors are located is 1 m. If desired, you can reduce or increase the distance from the floor by 10 cm. The price of installing a lock on an interior door ranges from 1000 to 2500 rubles. The final cost depends on the type of lock and the nature of the work. Repair of locking mechanisms can cost approximately 1,500 rubles.
After determining the desired height of the device, it is necessary to seal the place where installation will be carried out with masking tape. Most often, a ready-made template is sold complete with locking mechanisms, which allows you to make precise markings for a specific model. It must be applied to the end and flat surface of the door.
How to insert a lock into an interior door: markings without a stencil
You can mark all the necessary points at which holes will be made for installing fasteners without using a template. To do this, there are instructions that you need to pay attention to. Marking is done using a pencil or chalk.
First of all, you need to measure a distance of 1 m from the floor. A horizontal mark is made at the desired point. Next you need to draw a vertical line. The intersection point of the two lines is the center of installation of the locking mechanism. The preparatory stage of inserting a lock into an interior door with your own hands requires special care. After marking the place where the locking device will be located, the points corresponding to the holes of the latch (on the end surface) and the door handle are determined.
If you don’t have a stencil, you can use a tape measure and a pencil
Then you need to attach the body of the locking mechanism to the lines and mark the bottom edge of the device. Next you need to separate the planks. The distance in this case corresponds to the thickness of the lock. After the wiring, two parallel lines are marked, which should be located perpendicular to the horizontal lines at a distance of 5 cm.
Note! The accuracy of the measurements affects the correct installation of the lock and handle in the interior door. Errors in markings lead to various problems that interfere with the normal operation of the locking device. The lock is installed on the end side of the door leaf. In this case, it is necessary to clearly outline the central point.
Next, you need to mark the positions where the latch and handle will be located. After this, the counter hole located on the door frame is marked.
How to embed a lock into a wooden door: organizing holes for the handle and lock mechanism
The next stage, which follows the marking of the door leaf, involves making holes for the handle and the locking mechanism. This process is also divided into several stages.
To make a hole for the handle and lock, you will need a screwdriver with a wood bit.
First you need to prepare the tool that will be used to make the holes. The easiest way to do this work is with a screwdriver and a special attachment (wood bit). The hole for the locking mechanism is made on the flat surface of the door leaf. Moreover, you should first make a recess on the outside, and then on the inside. This procedure will prevent damage to the electronic screwdriver.
The crown is used to create holes for the core and handle. The locking mechanism is installed on the door using another attachment - a feather drill. It is used to make a hole for the latch on the end side of the blade. It is important to remember that the drill must be immersed into the wood at a right angle.
Then you need to take out the tool and use a construction knife to remove the outer layer of wood in accordance with the marked lines. After this, you need to use a chisel to create a groove for the crossbar. Its depth should not exceed the width of the crossbar frame. At the end, the latch is installed and secured using self-tapping screws.
Installation of a flat type lock
When installing this type of lock on a solid wood door, you can vary the height as desired. An MDF door has an area suitable for inserting fittings at a level of 1 m. You can quickly install a lock by pre-drilling holes with a feather-type drill, the diameter of which should be 1-3 mm greater than the thickness of the lock structure. Drilling is recommended to be done with single holes in 2 passes. After this, a socket is arranged using a chisel, according to the instructions, the contour of the groove is marked when inserting the lock and the hole for the groove is selected.
The recess for mounting the cylinder is made as follows:
- A round recess of slightly larger diameter is drilled for the cylinder.
- A round hole of smaller diameter is made to install the bottom of the cassette and pins.
- Remains are removed with a chisel.
Once these steps are completed, the lock is ready for installation. Remove the cylinder and handle from it, insert it into the socket, and then return all parts to their original positions. The unlocked lock assembly has 1 mm of play on all sides.
The next stage is identifying and marking the screw points. After marking is applied, holes for self-tapping screws are drilled. Once they are fully screwed in and the lock is secured to the door, install the handle on the locking mechanism as well as the tab cover.
The handle of the lock can be round or L-shaped. To install this element, you must perform the following steps:
- Decorative overlays must be attached to self-tapping screws on the front and back sides of the canvas.
- Insert and secure the handle mounting rod.
- Cover the canvas and make a mark on the box corresponding to the position of the tongue.
- Using a ruler, measure the length of the tongue and make the corresponding marks on the box.
- Place the overlay on the marks and trace.
- Along the boundary of the contour line you need to make holes with a drill, the shape of which is adjusted to the desired shape using a chisel.
- At the last stage, a tab is installed in the lock structure and fixed with hardware.
After installation, be sure to check the smoothness and accuracy of the lock. If an error is identified, the location of the tongue can be changed.
Inserting a lock into an interior door: cutter for installation
The simplest way to install the locking mechanism involves the use of a milling device. The milling cutter is a vertical machine that is small in size and quite easy to use. In order to install a lock in the interior door using a milling device, you must first remove the door from its hinges and place it perpendicular to the floor (on its side).
The milling machine is easy to use and can be used to quickly install a lock.
Next, you will need to take measurements and set marks corresponding to the location of the mechanism tongue. The next step in installing a lock on an interior door with your own hands is to transfer the device parameters to the canvas. To do this, you need to place the lock on the surface of the door and trace its body with a pencil.
Note! In order to eliminate the possibility of making mistakes, it is recommended to study video materials that will help answer the question of how to embed a lock into an interior door. Videos and photos allow you to study all the nuances of the process in more detail.
Then you need to draw straight lines on the side of the canvas. After this, using the machine you need to make a recess for the lock. The next step involves changing the attachment on the milling machine and making a socket for the lock body. Exact execution of these instructions helps to correctly organize the opening for the locking mechanism. To check the correct operation, you need to check the device with the place prepared for it.
Related article:
Lock for interior doors: how to choose a reliable and durable mechanism
Types of devices for interior doors. Latch locks, magnetic, electronic. Mortise and mounted devices. Tips for selection and installation.
How to install a lock on an interior door without using a cutter? The seat for the locking mechanism can be prepared without the use of special electrical equipment. Regular hand tools may also be useful for this job. It is important to remember that this method is not suitable in all cases. For example, installing a lock with a latch is impossible without the use of milling equipment.
To install a lock using a router, the door must be removed and placed perpendicularly
Standing or lying down?
You need to know how your lock is disassembled and installed even before you approach the door with the tool. But let's get back to the topic. The first issue that is important for the quality of work that needs to be resolved is to remove the door from the hinges to insert the lock (to insert it “lying down”) and work in place (“standing”).
Experienced craftsmen, for whom time is money, who own power tools (see below), always work lying down. Those who are also experienced, but who do mortise locks manually from time to time, also prefer to work while lying down. In both cases, the speed, quality and stability of the work results more than pays for the time spent removing and re-hinging the door, see for example. video:
Video: inserting a door lock while lying down
A novice locksmith who intends to make money/earn extra money by cutting locks must also immediately get used to working while lying down, otherwise you won’t be able to fend off customer complaints. For the home craftsman, the “lying” method will be more convenient, firstly, when completely replacing a door with a jamb. Secondly, in the process of arranging and finishing a new house/apartment, because... The most tedious task of removing old doors is eliminated. But it is better to do a one-time manual insertion of a lock into an existing door while standing, see the video:
Video: inserting a door lock while standing
Installing a locking mechanism with a cylinder: step-by-step instructions
Mechanisms that include a core (larva) are used in cases where the leaf is already equipped with a door handle. Such locking devices have a rectangular shape. The design features of these devices influence the degree of complexity of their installation. A person who does not have special skills in this area is recommended to study the installation instructions very carefully.
In this case, installing a door handle on the interior door is not required. This simplifies the workflow somewhat. First of all, to install the locking mechanism with the cylinder, you need to select the location of the device. It can be positioned above or below the handle.
Once the installation location has been selected, you must strictly follow the installation instructions. First, you need to make markings; to do this, draw a center line at the end of the canvas. Next, the standard procedure is carried out, which consists of transferring the outline of the lock to the door. After this, you need to make holes on the center line that have a small distance from each other. Using a drill, excess blade material is removed (between the holes). The result should be a socket for the locking mechanism.
The most suitable area for installing the device is under the door handle. Installation on an interior door can be done using hand-held devices. The next stage of installation is the insertion of the mechanism with the cylinder into the opening that was made earlier. The device is fixed using self-tapping screws.
It is necessary to select a place for installation and make markings
Then you need to mark the perimeter of the locking plate. A construction knife is suitable for this job. Using a chisel, excess material is removed. The hole for the plate must exactly match its dimensions.
Note! If you plan not only to install a locking device, but also to install a door handle, you must read the instructions for replacing it.
After marking and selecting the lock plate, you should attach the locking device to the surface of the leaf and transfer the contours of the cylinder to the door. It is important to remember that this operation is performed both on the outside and on the inside of the door. Using a drill you need to make a hole for the secretion (larva). To freely position the mechanism inside the recess, it is recommended to make it slightly wider than the dimensions of the secret.
At the last stage, the mechanism is installed in a pre-prepared socket for it. The locking device is fixed using self-tapping screws. After installation, you need to check the correct operation of the device. Finally, you can decorate the surface of the door at the place where the lock is installed with special linings, which are secured with self-tapping screws.
The lock mechanism is mounted in a pre-prepared socket and fixed with self-tapping screws
How to make a cut using a router
A household milling machine can be purchased or rented to accurately select the opening for installation of the lock mechanism. This device is easy to use even for a novice master. When working with a router, the following nuances may arise:
- In order for the sampling to be even, before starting work it is necessary to fix the device frame using the slipway that comes with the kit.
- Before connecting the device to the network, you need to make sure that the cutting edge of the movable cutter exactly matches the pre-applied markings.
- The thickness of the cutter cannot be greater than the dimensions of the bolt, as there is a risk of poor fixation of the lock, which will lead to operational problems.
- If it is not possible to select a cutter of the required thickness, the craftsman can subsequently refine the edges with a chisel or file.
Rice. 8. Selecting the seat with a router
It should be remembered that the milling cutter is a tool, when working with which it is necessary to observe safety precautions in order to avoid health problems. Before starting work, you need to make sure that both the device itself and the working part - the cutter - are securely fixed.
How to embed a lock into an interior door: installing the counter part
In order for the door to be locked, it is necessary to install a strike plate on the door frame with a hole for the lock tongue. Installation of this element is quite simple.
The price of inserting a lock into an interior door depends on the type of mechanism. In any case, self-installation allows you to save money. The first step is to mark the area in which the striker will be located. This area must correspond to the latch parameters of the locking device. To do this, you need to close the door leaf and draw two lines on the lid, indicating the boundaries of the latch. It is also recommended to measure the distance between the upper edge of the latch and the corner of the door leaf. The obtained parameters should be transferred to the doorway.
Before starting work, you should check the accuracy of the installation of a door handle with a latch or other type of locking mechanism. The device must be level. Otherwise, there may be problems with opening and closing the door leaf.
Helpful information! As an alternative to mechanisms that have a standard latch, you can purchase a magnetic lock. It is characterized by operational reliability and noiselessness. Installing a magnetic lock on an interior door has its own characteristics, but if you follow the instructions, it can be done by a beginner.
Installing the lock strike plate is simple and takes minimal time
After marking the area corresponding to the latch, you need to attach the striker to the door frame. There is one important rule that will help to carry out proper installation of the response element. If the part will be recessed in the material of the boat, then in this case you need to outline its outline both on the inside and on the outside. In turn, if the striker will be located directly on the surface, then you should limit yourself to marking the internal contour.
After marking the striker plate, you need to make holes for the tongue and fasteners (screws). After this, you can begin installing the strike plate. At the end of the work, you need to close the door and check the size of the gap. If necessary, excess play can be eliminated very simply. All you need to do is bend the lock tongue on the strike plate.
How to disassemble the door handle of a round type interior door
The method of dismantling round door handles for interior doors may differ depending on the design features of the fittings. The most convenient are products that have two tightening screws. In this case, it is easiest to dismantle it yourself. To do this, you need to unscrew the fixing elements and remove the mechanism.
However, there are situations that require great effort. Mechanisms that are more complex from a constructive point of view are dismantled in several stages. On modern interior doors, round parts equipped with a button and various decorative elements are quite often found. The function of such covers is to hide the mounting screws. How to remove the handle from the interior door in this case?
To remove the round handle, you must first remove the outer part of the device
In order to dismantle the handle with the button and decorative overlays, it is first necessary to remove the outer part of the mechanism, which is attached using a special button. Next, you need to eliminate the linings that hide the retaining elements.
Note! It is important to know that the buttons that help secure the outer part of the mechanism can also have a different design.
If the handle is damaged, it can be repaired. How to repair an interior door handle? First of all, you need to find out the nature of the damage. Based on this information, the necessary instructions are selected and the mechanism is rehabilitated. It is recommended that before dismantling the old handle, you determine its type and study the design features. To eliminate the round handle mechanism, experts advise reading the more detailed instructions.
How to disassemble the handle of a push-type interior door
Lever handles for interior paintings are a more common option for fittings. They are found everywhere and are easy to install and operate. The design of pressure products includes two main elements (external and internal), which are attached to the central rod.
To remove the push-type handle, you first need to unscrew the screws
The operating principle of the push handles is based on a simple mechanism. Such fittings have a latch, which is located in the recess of the strike plate when the door is closed. In order to open the door leaf, you need to press the lever on either side of the door. Dismantling such mechanisms also includes several stages, as in the case of round analogues. How to disassemble the door handle of a push-type interior door?
In order to remove such a piece of hardware, you must follow the instructions. Such work can be done by any person who does not have special knowledge. First of all, you need to unscrew the screws, the function of which is to fix the decorative trim. This will allow access to the axial element. In such fittings it has four sides. On the Internet you can find a lot of materials that can answer the question of how to remove the handle from an interior door. Video and photographic materials allow for quick and competent dismantling of this element of fittings.
The next step is to remove the remaining part of the handle. After this, you can begin to dismantle the lining on the other side of the door leaf. The second fragment must be removed in the same way as the first. In this way, the push handle used in interior doors is dismantled.
Stationary handle-latch mechanism
To install such fittings, they do not use the insertion of elements into the door leaf; they are installed using an overhead method. In this case, the handle can be equipped with a roller-type lock. This mechanism is used if for some reason it is impossible to install a hidden mortise locking system for the door leaf.
Stationary latch handle included
How to remove the door handle of an interior door (round with a button): detailed instructions
To dismantle such a round door handle, you first need to find the button. It is located on the inside. In some cases the button is below the level of the hole. It is worth noting that access to this element sometimes requires twisting the fittings. How to remove the round door handle of an interior door? The main thing you need to do at the initial stage is to gain access to the button. After this, you should press it with any suitable object, for example, a screwdriver. Then you can proceed directly to removing the door handle mechanism.
In order to remove the round handle you need to find the button located on the inside
Note! In some cases, it takes a lot of force to press the button.
Then the decorative element should be dismantled. Any metal element that has a small thickness, for example, a knife or a construction ruler, is suitable for this task. Using such an object you need to pry the cover and remove it. It is worth noting that some decorative elements have a special recess, which is used for quick removal.
In order to answer the question of how to disassemble the round handle of an interior door, it is recommended to study video materials on this topic. After removing the cover, access to the locking elements opens. They need to be unscrewed. This is how the round handle with the button is dismantled.
How to install a handle on an interior door: push model
First of all, before installing the push handle on the interior door, you need to determine the size of the internal hole. To do this, you will need to lean the locking mechanism against the end surface of the blade. It is very important that the decorative strip and the side surface of the door are in the same plane. Next, you need to transfer the outline of the product to the surface using a pencil. After this, all that remains is to connect the lines at the end using a construction corner.
In order to make a recess for the mechanism, use a chisel and a hammer
When installing a handle on an interior door with your own hands, do not forget that the hole is made with a special drill called a chisel drill. The recess is made using a chisel and a regular hammer. In turn, the area in which the front cover will be located is organized by using a chisel.
In order to answer the question of how to install a handle on an interior door, you need to carefully watch video materials on this topic. It is important to understand that installation features depend on the door material, as well as the type of handle and set of tools.
At the next stage of installation of the pressure product, the zone is marked in which a square will be installed for the door handles and the locking mechanism well. Next, you need to use a drill and make holes for the retaining elements. Recesses are arranged on both sides of the canvas.
After making the holes, you need to clean them from sawdust and dust. Then the locking device is installed in the canvas. The mechanism is fixed using a lining and self-tapping screws. Next, handles are installed on the squares, and self-tapping screws are used to secure them.
When the hole is completely ready, the locking mechanism is installed
After this, for an interior door with a latch, you need to mount a decorative ring. There are special flange holes for this purpose.
The final stage of installation, as in previous cases, involves installing the striker plate on the door frame. It is worth remembering that it is installed only after making a hole for the tongue and screws.
Types and functions of door latches
First, let's look at the function and properties of the latch itself. Why is it so necessary? This door hardware is intended, first of all, to fix the door in a closed position, preventing it from opening in the event of drafts or slight pressure on the door leaf.
There are three main types of latch locks on the market, as they are commonly called “knobs”:
- stationary;
- rotary;
- push.
Stationary ones do not have a main locking system. Rotary have a rounded shape, and the movement of the tongue causes it to turn clockwise.
Push - one of the standard variations of latch handles on interior doors, where the lock operates by pressing the handle down.
A pretty good option for a push-type latch handle with a lock for an interior door, which has a metal tongue in the interior mechanism
One of the most common latch handles with a rotary opening for an interior door, but in terms of stability it is slightly inferior to a push handle
The latches themselves are also divided into several types:
- with metal tongue;
- with plastic;
- magnetic - fixing the door due to the adhesion of magnets;
- roller - the door opens due to slight pressure.
The main advantage of the plastic tongue is the low noise level when opening/closing.
Standard interior door latch mechanism with metal tongue. Has increased wear resistance and a standard noise level when closing
In the picture: 1. Interior latch handle mechanism with magnetic reeds. It is characterized as a silent locking device, but with slight pressure on the door it opens easily. 2. Interior latch handle mechanism with ball tongue. Accompanied by smooth operation, reduced noise level when opening/closing doors