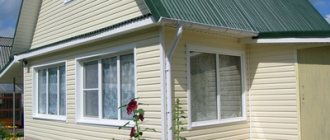
Siding is a relatively inexpensive and uncomplicated finishing operation that can be done with your own hands.
For wooden houses, this method is most convenient, since plastering wood is a complex and unreliable task.
In addition, the possibility of forming a ventilated facade, which protects wooden walls from getting wet and rotting, is very important, since it helps to increase the service life of the house.
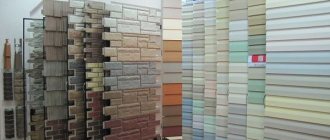
Types of siding
The manufacture of siding began about half a century ago with wooden cladding panels similar to horizontal lining. Since then, the range has expanded significantly.
Today there are the following types of material:
- Wood.
- Metal.
- Plastic.
- Fiber cement.
At the same time, each type of material has its own varieties, composition and other manufacturing options.
In addition, siding has different design options.
Popular profile types:
- Ship's
- Under the beam.
- Under a log.
- "Herringbone."
- Under the brick.
- Under a stone.
A wide selection of profiles and colors creates ample opportunities for finishing houses in different styles and color combinations , while essentially doing the same job.
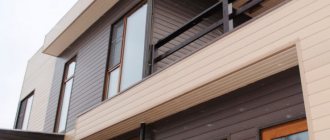
PVC products
Today, this material is most popular due to its appearance and variety of imitations.
Siding for a log house made of plastic will successfully pass off unpresentable timber as noble wood. But the raw materials have serious disadvantages:
- It does not tolerate sudden changes in temperature - heat followed by cold will have a detrimental effect on its structure - cracking, fractures.
- The material has no environmental value.
- For façade cladding, only light colors are suitable due to their ability to fade under sunlight.
Independent work is simple - all elements have special connections, allowing you to do without a large amount of metal fasteners.
From what has been written, it becomes clear that for a long-term coating, the option that is closest to the main structure, that is, wooden, is suitable. At least from the point of view of experienced craftsmen. However, this does not mean that owners are not free to choose - a thorough cladding process, following all stages, can have a beneficial effect on the service life of any material.
What siding is best for a wooden house?
The most successful choice of siding for cladding a wooden house is determined by the specific characteristics of the wall material and the cladding itself.
Wood must be able to dry, protected from fire or the appearance of insects, rodents, mold or mildew. Such requirements are more fully met by metal and vinyl siding .
These types are the most common, easy to install and require virtually no maintenance.
They differ from each other in the amount of thermal expansion (it is greater for vinyl siding), the characteristics of the material (metal can bend, vinyl often breaks due to this), elasticity (metal panels retain dents, and vinyl ones return to their original shape).
Experts recommend using metal siding, but it is on average twice as expensive as vinyl, which somewhat weakens its position.
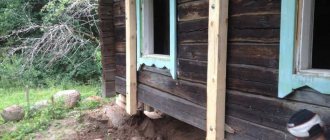
Preparation
Let's look at how to properly install siding on a wooden house. First you will need to do a number of preparatory work:
- Completely remove the old cladding, clean the surfaces from dirt and dust.
- All areas affected by rot or mold must be cut off and cleaned. Please note that even a small affected area will grow to a huge size after a short period of time.
- All walls must be treated generously with antiseptics.
- When the impregnation has dried, you need to cover the walls with a waterproofing, vapor-permeable membrane.
It is worth noting that if there is plaster on the house and it is in good condition, then you should not knock it down.
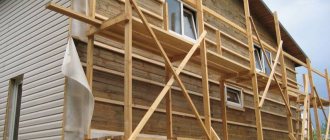
Choosing lathing - which is better for a wooden house, wooden or metal?
Lathing serves to solve several problems:
- Support for siding panels.
- Providing a ventilation gap.
- Mechanical support of external insulation.
To simultaneously perform these functions, two layers of sheathing are required:
- The first - the sheathing itself - is installed directly on the wall surface coaxially with the siding panels; insulation boards are attached between the sheathing strips. The thickness of the sheathing strips should correspond to the thickness of the insulation (or be slightly larger).
- The second layer - the counter-lattice - is installed across the first. It creates a ventilation gap, while at the same time serving as a support for the siding panels.
NOTE!
If external insulation of the house is not needed, then one layer of sheathing is installed, perpendicular to the panels.
The materials used for sheathing are::
- Wooden bars.
- Metal guides for gypsum boards.
The use of wooden blocks is traditional; they are easiest to attach to wooden walls, but the characteristics of the material are largely unsatisfactory . Wood is difficult to adjust its plane, changes its dimensions when it shrinks or swells, and is susceptible to rotting and warping.
Until recently, wooden blocks were much cheaper than metal guides, but today this difference has practically disappeared.
The properties of metal planks are significantly superior to wooden ones - they are almost perfectly straight, easy to adjust the plane and do not change their properties over time.
The speed of installation and adjustment of the plane when using metal guides is much higher, and the result is much better than when installing wooden sheathing.
Finally, metal strips do not burn, which is important for wooden walls, for which the fire danger is much more real than for stone buildings.
Facade maintenance
As previously mentioned, there is practically no care for PVC panels; you just need to avoid contact with strong detergents that can damage the surface.
Our advice:
- Use a mobile power washer or a regular garden hose with medium water pressure to remove all dirt from the surface.
- Use soft brushes and rags that will not scratch the thin layer of polyvinyl chloride.
Wooden siding is another matter, which will require investment in its maintenance. People often ask if there are any options to avoid surface repairs?
- Firstly, you can purchase more expensive paint that will last not 5-6 years, but more than 8 years, but this will significantly reduce the budget.
When painting, a very important element is the tool: the brush or roller must be of high quality
- Secondly, use siding that dries to 18% moisture content, thereby reducing the harmful effects of precipitation.
- Thirdly, treat not only the facade of the house, but also the area from various pests.
It may seem that covering a log house with siding is a rather labor-intensive process, especially after listening to those who have never done it before, but have thought about it. The main thing is to treat the above information correctly, use it for its intended purpose, and then you can enjoy a high-quality result.
Installation of the selected sheathing
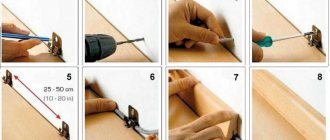
First of all, you should mark the area of the walls, mark the axes of the planks in accordance with the pitch of the sheathing. Direct hangers for drywall are attached along the marked axes . The distance between them is about 60 cm; for metal siding, the number of supports can be increased.
Installation of the sheathing begins with the installation of two extreme strips . Their position is carefully adjusted according to the building level or plumb line, after which cords are pulled between them to adjust the plane during installation of the intermediate strips.
Intermediate strips are installed in previously prepared suspensions, their position is adjusted using stretched cords.
Window openings are also decorated with sheathing strips . If the windows are installed in a single plane with the wall, then you only need to frame the opening around the perimeter with slats (usually a double row); if the opening depth is more than 20 cm, it is also necessary to install slats along the slopes, controlling their plane.
IMPORTANT!
If the walls are insulated, then the plane must be ensured on the first, main layer of the lathing, so that the installation of the counter-lattice strips is carried out on a prepared system and does not require adjustment.
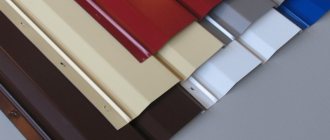
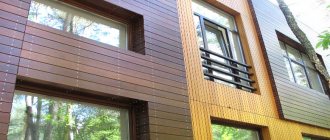
Features of metal siding for logs
Wood-imitation metal siding
Metal siding is designed to create a ventilated facade, so its installation has a number of features.
Usually, lathing, insulation and waterproofing are installed under the material. However, the installation of insulation may not be carried out if the house is located in a region with constantly positive temperatures.
Lathing is also not always required - more detail will be given below.
The characteristics of the material include the composition of its design. So, it is a structure of the following elements:
- Metal siding panels;
- Start and finish bars;
- External and internal corner strips;
- Elements for finishing around door and window openings.
This composition of the cladding kit allows you to create a complete composition, which is also very strongly protected from external influences. Some accessories may not be used, using scraps of the main panels instead, but in this case the technological properties of the cladding may be reduced.
Insulation, vapor barrier and waterproofing
Wooden walls have good thermal insulation properties, but the joints between logs or beams are a source of penetration of cold outside air . Often, before installing siding, the walls are insulated, thereby reducing heating costs and improving the microclimate of the room.
For external insulation of a wooden house, the best option would be to use mineral wool, and of soft varieties. This choice is dictated by the surface features of wooden buildings, the walls of which have many irregularities and differences.
The soft structure of the insulation will ensure a tight fit of the material to the wall, eliminating the formation of voids or gaps . For tighter contact, it is recommended to use thin rolled mineral wool in several layers, this will make it easier to press the material against the wall and fix it to the surface.
Vapor barrier of insulation in this case is irrelevant, since the atmospheric air does not have sufficient vapor pressure, and the steam coming from inside must be effectively removed outside.
In this case, effective waterproofing will be required to prevent moisture from penetrating into the insulation from the outside. This could be rainwater seeping under the casing, fog, etc.
The best option is to install a waterproof membrane (a film with specially sized holes that allows vapor to pass in one direction, but prevents moisture from entering in the opposite direction). This coating will allow steam to escape, dry the insulation and protect it from contact with external humidity.
Thermal insulation
When the walls are caulked, you can proceed to installing a thermal insulation layer. Do it like this:
- A sheathing is made, which in this case will also serve as the basis for laying the heat insulator. To do this, take slats or blocks of wood measuring 4x4 cm and install them on prepared walls, the distance between adjacent slats is 25-30 cm. The bars must first be impregnated with an antiseptic.
- Insulation is placed on the finished sheathing, directly into the formed cells. It is usually used as mineral wool, glass wool or slab foam. When choosing insulation, take into account its density coefficient - it should be at least 35 kg per cubic meter. Moreover, the higher the building, the greater the density of the thermal insulation should be.
- A layer of vapor barrier is placed on top of the insulation, which prevents condensation from settling on the walls and destroying them. To make a vapor barrier layer, a special membrane film with micropores is suitable, through which excess moisture will escape from inside the structure. The film is attached to the sheathing with a stapler.
At this point the preparatory stage ends - you can begin cladding the facade.
Installation of the starting bar
The starting strip serves as the lower support of the siding sheet, ensuring the locking of the first row of panels. With its installation, the installation of siding on the prepared sheathing begins.
Procedure:
- The lowest point (edge) of the sheathing sheet is determined. This may be the top cut of the base or another height.
- 40 mm is marked upward from it and a horizontal line is drawn along the perimeter of the house. The horizontal line is checked by level, errors are not allowed .
- The starting bar is leaned against the drawn line with its upper edge and secured with self-tapping screws. The first strip is installed at a distance of the width of the corner profile flange plus 6 mm from the corner. It is recommended to keep the distance between the screws within 20-30 cm ; under no circumstances should you screw them all the way.
- The starting bar should move freely thanks to the oval mounting holes, for which the screws are screwed in exactly in the middle. This condition applies to all siding elements, since it is necessary to ensure compensation for thermal expansion of the material . This is especially important for vinyl siding, the expansion coefficient of which is higher than that of metal siding. For the same reason, the next starting strip should not be attached end-to-end; a gap of 6-12 mm is made.
The use of a J-profile as a starting strip is not recommended, since rainwater accumulates in the recess, and the shape of the profile does not provide reliable fixation of the panel lock . With a strong gust of wind, such a panel can be torn off, which creates a danger for the entire skin.
Material calculation
Before covering a wooden house with siding with your own hands, you should calculate the number of panels for work. This allows you to immediately purchase the required number of parts, so as not to waste time purchasing different elements during the work process.
The calculation is based on the parameters of the structure itself
For cladding, it is important to consider the height of the structure and its area. Two methods for calculating parts for cladding can be used:
- the area of the walls that need to be lined is determined, and from it the area of all existing openings must be subtracted, then the resulting amount must be divided by the area of 1 panel;
- a drawing is formed, according to which the required number of parts that will be attached from the outside to the walls is determined piece by piece, and the locations of the scraps are also marked.
In addition to the siding itself, it is important to purchase components for its installation. Insulation and elements are purchased to form a frame to which the panels will be attached
It is important to choose only high-quality elements, since the durability and reliability of the cladding depends on them.
The main components include:
- external corners, thanks to which the corners of the house are properly designed;
- ebb tides designed for each window;
- starting bar, the length of which is determined by the perimeter of the structure;
- strips located next to the openings;
- strips called finishing strips and used for attaching eaves located on the roof to the walls;
- profiles for forming a frame.
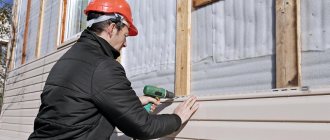
How is siding attached?
- Fastening siding does not require any additional operations (drilling holes, using separate fasteners) except for adjusting the length or trimming the top panels for installation into the finishing strips. All connections are made with standard locks or fixed on the sheathing using holes in the nail strips of the elements . In this case, important conditions must be observed:
- Self-tapping screws are screwed strictly perpendicular to the surface and exactly in the middle of the oblong hole to allow some movement in one direction or another.
- The screw caps must be at least 1 cm in diameter and do not press the elements tightly. All siding should “dangle” slightly and be able to move with thermal expansion . Failure to comply with this condition will lead to swelling of the surface of the canvas or partial destruction of the panels.
This is most relevant for vinyl panels; their expansion (or contraction) is most pronounced. For this reason, it is not recommended to use dark-colored siding.
Installation of internal corner strips
Installation of internal corners is carried out immediately after installing the starting strips (simultaneously with external corners and the profile). The corner strip is attached 4-6 mm lower than the edge of the starting strip .
To ensure that the nail strip does not stick out from below, it is trimmed by 4-6 mm . A temperature gap of 1-3 mm is left on top between the corner strip and the soffit . If the corner strip rests on the plinth, then a gap of 4-6 mm .
The upper self-tapping screw is screwed along the upper cut of the nail bar hole, preventing the element from going down. The remaining screws are screwed in the usual order, in the middle of the holes.
Installation of external corner strips
Installation of external corner strips is carried out in the same way as internal ones; it is necessary to ensure the same clearances and tolerances.
If the height of the wall exceeds the length of the corner strip, they should be connected with an overlap of 25 mm , for which the nail strips of the upper profile should be cut to the required height, taking into account the temperature gap. The connection is made in the direction of water flow - the upper profile on the lower one.
H-profile assembly
The H-profile allows you to neatly join the panels in the longitudinal direction. Its installation is completely similar to the installation of corner profiles.
The choice of location for H-profiles is dictated by the aesthetic considerations of the owner - they can be installed symmetrically, ensuring the same length of panels, or use some entire panels, trimming another span.
Installation of row panels
Siding panels are usually installed from the bottom up (although sometimes it happens the other way around). The first panel is inserted into the sockets of the corner and H-profiles (or two corners), snaps into the lock of the starting strip from below and is secured with self-tapping screws along the upper nail strip .
CAREFULLY!
A 6mm temperature gap must be left on each side; tight installation is prohibited.
The next row of panels is installed in a similar way - from below it is snapped into the lock of the previous panel, from above - fixed with self-tapping screws . This way the entire canvas is installed to the top.
How to go around windows and doorways with siding
The order of design of window and door openings depends on the depth of their installation relative to the plane of the wall (on the width of the external slopes).
In the absence of slopes, i.e. when a window or door block is installed flush with the plane of the wall, ordinary platbands are used to form the opening around the perimeter (for doors - on three sides) .
If the installation depth does not exceed 20 cm, a J-profile is used, and for slopes greater than 20 cm, a set of cut pieces of the main panel is made, repeating the wall cladding along the slopes.
In such cases, an external corner strip is installed along the outer perimeter, and a finishing strip is installed along the window (door) frame . This type of cladding resembles finishing a narrow section of a wall.
Equipment
A set of siding panels for cladding the facade of a house should be selected depending on their width and wall area.
The complete set of wall siding includes:
- panels directly;
- internal as well as external corners;
- the starting profile located first from the base;
- J-, H-, or T-profile;
- J-chamfer;
- casing 75, 89 mm;
- solid soffit;
- window profile;
- low tide;
- finishing profile.
Additional decorative elements help make the outside of the house look complete and beautiful.
Installing the finishing strip
The finishing strip is installed before installing the top siding panel. It is usually placed close to the cornice or soffit; the top siding panel is cut along the nail strip and placed under the curl of the finishing strip profile .
From below, the top panel snaps into the lock of the previous panel in a standard manner, thus completing the installation of the section of the canvas.