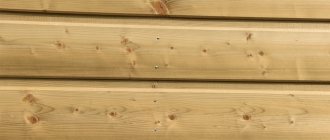
Veneer is sheets or strips of wood up to 10–12 mm thick. When glued to furniture made from cheap material, they improve the appearance of the product and give it additional strength. Covering parts with veneer or gluing it to a base is called veneering. Sometimes those who are interested in how to glue veneer at home call this process “veneering,” but there is no such word in explanatory dictionaries.
Useful tips and tricks
To ensure that the user is pleased with the result of self-gluing veneer, you need to follow the advice of professionals:
- veneer textures allow you to create interesting patterns; you can even join different types of wood on one sheet;
- Pre-grinding of the blade begins with sandpaper with a coarser grain and ends with “zero” sandpaper;
- sanding is carried out only along the wood fibers;
- when ironing the material with an iron, apply a layer of cotton fabric on top;
- You cannot stop while ironing; you must continuously move the iron over the surface, otherwise scorch marks will quickly appear on the veneer;
- if black marks do appear, they can be carefully removed with a sharp knife;
- It is most convenient to heat the corners and edges of the veneer with a soldering iron (if the hot gluing method is used).
Immediately after finishing the lining of the canvas, it must be covered with a layer of varnish.
The fact is that new veneer strongly absorbs moisture, it is important to protect it from excessive swelling. This will help the product serve faithfully for many years.
: quality lumber at competitive prices
offers panels veneered with oak, walnut, cherry, beech, ash, maple, sapele, makore, anegri and other valuable wood species. We offer several types of panels from European and Russian manufacturers. Standard panel sizes:
- 2800x2070 mm;
- 3050x1220 mm;
- 2800x1032 mm;
- 2440x910 mm.
The cost of the panels can be found in the price list published on our website.
We not only sell finished products: we also offer services for veneering MDF panels with custom-made veneer. You can choose absolutely any lumber from our range, including fine-line, and indicate the dimensions of the finished product you require. We will fulfill your order quickly, efficiently and professionally.
We also provide services for edge veneering and varnishing of parts. Veneering is carried out by hot pressing on an MDF base.
You can purchase ready-made veneered panels or place an order for veneered MDF using the contacts provided on the website. We sell and manufacture panels in different cities and regions of Russia. Branches, in addition to Moscow and the Moscow region, are also located in St. Petersburg, Kazan, Rostov-on-Don, Ulyanovsk, Yekaterinburg, Kovrov. You can contact any of the representative offices of our company, and you will be provided with a wide range of quality services.
Also, using the contacts provided on our company’s website, you can check the availability of products in stock.
Your furniture could still serve, but over the years it has lost its presentability due to scratches, reminiscent of repeated rearrangements after renovation? Has a comfortable sofa or favorite table become a favorite scratching post for pets? Do not rush to throw away the set - veneer will help correct the situation.
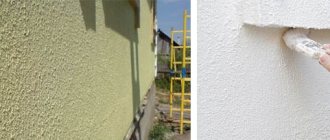
Currently, such a coating is in demand, providing a variety of shades, structures, and serves as an indispensable finishing material due to its aesthetics and excellent strength properties in the furniture industry and in interior design.
Veneer finishing allows you to turn any old piece of furniture or table or cabinet made from inexpensive wood into a neat product without scuffs, scratches and give it a decent appearance.
In addition, decorating with valuable wood veneer is used in the manufacture of furniture from simple non-laminated chipboard or plywood. The product finished in this way looks noble and elegant.
Despite the fact that veneering is a more labor-intensive task compared to finishing with self-adhesive tape, textured paper or fabric, after such a procedure the finished surface takes on a much better appearance.
How to glue correctly at home
To achieve a strong and reliable fixation, you must properly prepare the surface and strictly follow the technology for applying the substance.
Surface preparation
Fixing veneer is considered a simple process that requires strict adherence to instructions. Otherwise, the lining may come off. First, the surface must be carefully prepared. It is worth considering that the material is not glued to untreated canvas.
To prepare a door or other product, it is recommended to perform the following steps:
- Remove the fabric from the loops. This is done using a screwdriver or pry bar.
- Place the product on the floor.
- Remove fittings - decorative elements and handles.
- Remove the old coating with a sharp spatula. It can be heated with an iron or a hair dryer.
- Sand the coating with sandpaper or a special machine.
- Cover holes and defects with a special putty designed for wood.
- Apply wood glue.
How to prepare and cut the material
To carry out the work you will need the required amount of material. Veneer is usually sold by the meter. The purchased material needs to be cut. First, the rolls should be straightened to level the veneer. Thanks to this, it will take on a natural shape.
It is recommended to carefully measure the canvas. After this it is permissible to cut it. There should be 5 centimeters of allowance left on each side. This will prevent problems due to erroneous measurements. To cut the material, you should use a plywood knife or plunge-cut saw. It is recommended to use a professional electric tool. This will help you get accurate and beautiful cuts. Scissors cannot be used. They will lead to the formation of cracks in the material. It is recommended to select veneer in the form of boards or strips according to the pattern. After this, you need to glue the sheets with glue. This is done along perpendicular lines and joints.
Gluing methods
When using two-component glue, it is necessary to mix the components. The fixation can then be carried out in the optimal way.
Cold contact method
This is a rather complicated method. To carry out the procedure, you need contact adhesive designed for veneer. This product is characterized by a minimum exposure time, which helps the glue to set quickly. This method is not suitable for inexperienced craftsmen, since it does not allow them to correct errors in their work.
Hot gluing
This is an easier way. First, both surfaces are treated with a layer of glue, which should dry for a quarter of an hour. Then the veneer is applied to the main sheet and ironed with a hot iron. It is also permissible to use a lapping hammer.
The device helps to heat the adhesive layer. Thanks to this, it melts and ensures reliable fixation of the veneer and base. In addition, during the procedure all air bubbles are released. This helps increase the quality of the coupling. This method will require thick glue. If the surface dries too quickly, the base should be lightly sprinkled with water. Large swellings are carefully pierced or incised. Then they should be ironed again.
Cold gluing with pressing
For this type of procedure, it is worth using the Titebond adhesive composition. They should treat both surfaces and level them with a spatula. After this, it is recommended to attach the veneer to the base. Then carefully adjust the position of the material and secure it with a clamp. The fixing elements must remain until the glue has completely dried. After which they should be removed and the reliability of the fixation assessed.
Scope of application of veneer
Finishing doors with veneer will be a compromise option that allows you to hide surface imperfections and refine this item, avoiding the high costs of a complete replacement. A door treated, for example, with oak imitation material will look no worse than one made from solid oak.
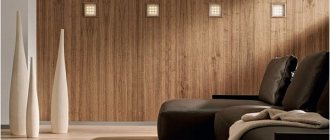
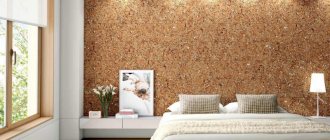
It’s not that difficult to give a decent look to a table made from pine boards by turning it into maple using veneer. Many people prefer wall decoration with veneer, a stylish, eco-friendly material.
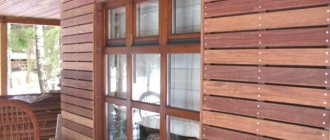
Natural veneer wall panels are installed in office spaces, cafes, restaurants, hotel lobbies, theater lobbies - the surface becomes smooth, and the hall or room is modern and elegant.
Veneer sheets and panels are used for interior decoration in apartments and houses. The veneer on the walls harmonizes perfectly with decorative glass elements and transparent partitions.
To increase the service life and improve the appearance, veneer is used to cover the facades of furniture sets, the elements of which are made of plywood and chipboard. Veneered countertops do not lose their shape or dry out over time.
Floor coverings made using veneer have improved consumer properties.
Veneering: types
There are several main types of veneering, let's take a brief look at them.
— Hot veneering. With this method, the veneer is glued to the base using adhesives. The most accessible method for home conditions, it will be discussed in the article.
— Cold veneering. Here the veneer is pressed onto the base. We are talking about pressing machines or screw clamps, which not every home owner has.
— Membrane veneering. An industrial method used for veneering complex surfaces. Membrane veneering is based on vacuum joining of veneer and boards - both smooth and textured.
Which glue is better?
It is very easy to get confused among the variety of adhesive solutions. What glue is best for gluing veneer to plywood or other similar material (see photo). Very often, when gluing sheets tightly, ordinary PVA glue is used. But it is only suitable for flat surfaces. More complex elements can only be made using more reliable compounds, for example, Titebond adhesive solution for wooden surfaces. But it is worth noting that it does not cost that little. In addition to the above compounds, veneer can also be glued using polyurethane, epoxy, as well as soluble hide or liquid hide glue.
It is best to start sanding the base for veneer with fine construction sandpaper and finish with fine sandpaper.
The color of the veneer sheets must be selected so that they harmoniously combine with wallpaper, furniture, etc.
The patterns left from sheets made from various types of wood are very interesting.
With the cold dyeing method, the coating of sheets at home turns out to be more uniform and stable.
After staining the veneer, it must be washed under running water and then dried in a warm place, but away from direct sunlight.
In simple terms, veneering is gluing thin plates of wood with a beautiful structure (actually) onto a wooden base - be it a table, wall or door - of lower decorative qualities. It turns out that veneering furniture means dressing it in beautiful clothes.
Veneering is more correctly called veneering
. But it just so happens that the slang word “veneer” is more familiar to the average person’s ear than “veneer.”
Veneer manufacturing process
To obtain veneer, the log is cut into boards with a circular saw or chain saw. The length of the board for peeling is 1.3–2.5 m, for cutting - 2–7 m. Longitudinal division depends on the type of wood and its pattern.
These are simple divisions, halves, quarters and paired prisms for larger diameters. Radial layers are cut from prisms.
- The produced veneer layers must be dried, as they have high humidity. Dried in roller or belt dryers. Some types dry naturally indoors at normal temperatures.
- The dried ones are sorted into defect-free layers, defective and unformatted pieces. Defects are eliminated by gluing cracks or gluing patches. Shapeless pieces of veneer are given the shape of a rectangle.
- Planed layers of veneer are stacked into bundles. They are stored without access to daylight, so they do not change color due to ultraviolet radiation. Veneer sheets are stacked on top of each other without alternation.
The back side of the veneer is the area of the veneer that touches the knife when peeling or cutting, and often develops longitudinal cracks and torn grains.
It has a lower quality and a rougher surface. The veneer face is the area of the veneer that touches the press bar of the machine for slicing or peeling (pressing).
It is of higher quality and has better surface roughness. A pack of veneer blanks is a semi-finished product that is created by dividing a pack of veneer into the dimensions necessary to form joints.
Pasting methods
The base on which the sheets will be glued must be degreased, after which it is covered with glue for gluing the veneer. The most popular method of gluing sheets is tightly. The glue for it is made thick and applied hot. You need to make sure that it dries on the base, because otherwise the adhesive solution may appear on the surface, especially if the veneer is very thin. After the contact adhesive for the veneer has started to set, it’s time to lap the sheets. This is done using a special lapping hammer, which is constantly moved in the direction of the fibers.
The grinding process begins in the middle of the sheet, gradually moving the tool heated to 85°C to the edges, while removing excess glue. It is advisable to moisten the veneer with warm water during operation. This is done so that the adhesive solution does not have time to dry too quickly. If it happens that not the entire base was covered with veneer glue, bubbles may form, to eliminate which you will have to cut the sheet with a blade and introduce a small amount of adhesive underneath it. After this, the veneer is processed again with a lapping hammer or a warm iron. Thus, you can quite easily glue veneer at home.
Veneered MDF panels
Let's figure out what veneer and MDF are. Veneer is a thin section of wood. It is obtained by sawing or peeling timber, most often elite varieties, for example, oak, elm, maple, walnut and others. In appearance, veneered MDF is very similar to the wood of valuable varieties of trees. However, the cost of such furniture is much lower than furniture made from solid boards. The primer and varnish with which the veneer is coated reliably protects the material from mechanical damage, and also makes the furniture more noble in appearance.
Designers love veneer for its wide possibilities for implementing creative ideas, as well as for the natural origin of furniture and interior design in general.
There are several types of coatings for veneered products, for example, polyurethane varnishes applied by spraying, or acrylic varnishes applied by a roller method. Such paints and varnishes not only make the product more aesthetically pleasing, but also form an ideal surface. Also, veneer can be painted during the varnishing process, which is not applicable for already manufactured synthetic finishing materials. After varnishing, the furniture becomes matte or glossy. Complex geometric patterns can be applied to the veneer surface. If damage occurs on the furniture, it can be quickly removed. However, the main positive difference between veneer and other finishing materials is its high level of environmental friendliness.
The disadvantages include the rather high cost, but it fully reflects the high quality of the material.
The MDF board itself is made from fine wood chips, which are pressed at elevated temperatures and under high pressure. No additional materials are used to glue the particles. At high temperatures, lignin is released from wood - this compound is completely organic and does not pose a danger to human health.
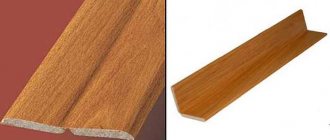
What can be made from such material, besides furniture? Various veneered products are perfect as finishing materials. Construction supermarkets sell a variety of profiles, panels, and skirting boards that will be an excellent addition or even the main accent of the interior of your apartment.
With the help of such panels, you can finish all the walls and ceiling, or you can do this partially.
Often, from all profiles of this type, cornices, baguettes, as well as veneered MDF plinths for the floor or ceiling are used. They combine well with other finishing materials, for example, decorative plaster, stucco, wallpaper or laminate.
Walls finished with veneer will become the highlight of any interior. Today this type of finishing is very popular. Veneer is valued primarily for its versatility. The scope of use of veneer is very extensive. It is used for finishing walls, flooring, creating furniture and doors. In addition, this material is often used on yachts, terraces, offices and even the interiors of expensive cars.
The second advantage is environmental friendliness. Natural finishing materials do not pose a risk to human health, they do not cause allergies. Wood motifs always look expensive and elegant.
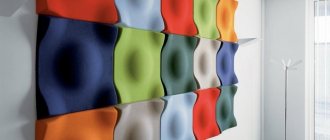
There are a huge number of shades and textures of veneer panels. Unique panels, mosaics, and inlays are made from veneers of different types of timber.
The advantages of veneer also include:
- easy care. You just need to wipe the veneered elements with a napkin without using detergents or cleaning agents.
- light weight. Such materials are much lighter than similar ones made from solid boards
- rational use of natural materials. Much less wood is used to make veneered furniture. Therefore, by buying such furniture, you are saving the forest.
What is veneer and what types does it come in?
Veneer refers to thin sheets of wood, the thickness of which is from 0.5 cm to 1 cm. They are glued to a base material, for example, wood or MDF. This process is called veneering.
Veneer is divided into several types according to cutting and manufacturing methods, and the use of wood species.
By cutting methods
- Tangential - the tree trunk is sawn at a certain distance from the core to obtain an individual blade pattern and texture;
- Radical - the cut passes clearly in the middle of the trunk, and allows you to obtain a high-quality homogeneous blade that is resistant to various influences.
By processing method
- Planed fabric is made on a horizontal machine using a running knife. At the same time, the tree trunk is securely fixed, and the canvas turns out to be very thin. Furniture and facades are decorated with this veneer.
- Sawn - made on a machine with high precision and 20 saw blades. The sheets are smooth and have high wear resistance. The material obtained by sawing is used to decorate multi-layer doors and parquet.
- Peeled - when making canvases, a special machine is used that peels short pieces of wood. The resulting sheets are used for cladding and veneering. Special knives allow you to get an original design.
How to cover walls with veneer: instructions
To perform decorative finishing, you first need to remove the old facing layer. It is best to clean the surface to the base (log house, bricks, blocks or plasterboard). It is recommended to draw out the installation diagram in advance, determine the number of non-solid parts, reflect their number and dimensions, so that the cutting is clear.
Next, the walls are cleaned of debris, left to dry, visible defects are eliminated and the process is repeated. When the base is smooth and intact, proceed to marking and cutting the material to size. It is recommended to prime the surfaces in two layers before starting work, since installation will be carried out using glue.
Special glutinous glue, otherwise called animal glue, will help to firmly install the panels, as it is made on the basis of gelatin obtained as a result of processing the remains of animals after their butchering. If this method is not applicable in specific conditions, there are two more ways to solve the problem - assembling the frame or installing connecting strips.
Veneer blanks on the frame
When choosing installation on a lathing, the frame is assembled from metal profiles, which are fixed to the main surface using self-tapping screws, after drilling holes and driving in dowels. This method is convenient, allows you to quickly complete the finishing and at the same time level the walls even with strong deviations.
Connecting strips with grooves are used to connect the covering elements together with a slight indentation. You can use the products as independent decoration or to create a three-dimensional effect.
Gluing methods
Before starting work, you need to mix the glue if it is two-component. Next, you can carry out gluing using the chosen method.
Cold contact method
This technique is much more difficult. To implement this, you will need contact adhesive for veneer, which sets very quickly due to the minimum exposure time. This technique is not suitable for beginners, because there will be almost no opportunity to correct inaccuracies in the work. After applying the product to the base, you need to firmly press the veneer onto it.
What is important is a strong clamping force in the first seconds, which allows you not to use the press in the future. Typically, the technique is used for gluing small products.
Hot gluing
Veneering is easier this way. First, a thin layer of glue is applied to both surfaces, which dries within 10-15 minutes. Then the veneer is applied to the main sheet, melted with a hot iron, or a lapping hammer is used. Since the tool heats the adhesive layer, the latter melts and tightly grips the veneer to the base. In addition, all accumulations of air bubbles are released, and the quality of adhesion improves.
For this technique, it is important to use glue with a thick texture. If it is noticed that it dries too quickly, the base is first sprayed with a little water.
Large swellings will have to be carefully pierced, cut, and then ironed over them again.
Cold gluing with pressing
For this method of veneering, Titebond glue is most often used. It is applied to both surfaces, leveled with a spatula, and the veneer is applied to the base. Afterwards, carefully adjust the position of the material and fix it with a clamp (clamp). Do not remove the clamps until the glue has completely dried, then remove them and check the strength of the connection at the ends of the canvas.
Refinement of this device.
When massively cutting slats of the same width, I was tired of measuring their “overhang”, so I made an addition (in fact, a second cutter, more compact):
Here a ruler is added, the gap between it and the iron guide strip is set once and then you just need to move the veneer, cut, move (changing the paper. But I practiced tearing it off after removing the strip). In this way you can get many identical veneer slats. On the right you can see my favorite veneer knife, fixed with a bolt, iron guides.
Gluing methods
After the canvas has been prepared, the material has been cut to size, and the glue has been selected, you need to learn how to glue veneer at home. There are three ways to do this.
Cold contact method
It is considered the most difficult method of gluing wood to a treated surface. Involves the use of contact adhesive. The difficulty is that the binder sets quickly. This will make it extremely difficult to correct inaccuracies when mating surfaces are placed incorrectly.
In order for the gluing to be reliable, it is necessary to create a strong pressing force in the first seconds of contact between the materials (press with your hand or a weight). Experts do not recommend using it for gluing large surfaces.
Hot gluing
A layer of glue is applied to the surfaces to be glued, which must dry for a certain period of time. After this, it is necessary to attach a sheet of veneer exactly to the dimensions. Using an iron, the sheet begins to be smoothed from the center to the edges. The adhesive composition melts under the influence of high temperature and glues the two materials together.
For the contact hot gluing method to work, it is necessary to use an adhesive with a thick consistency. To prevent the glue from drying out too quickly when using an iron, you need to moisten the veneer surface with warm water. In places where there are swellings, punctures or cuts must be made to release the air.
Cold gluing with pressing
A classic gluing method that requires securing clamps to the glued surfaces. The holding time is indicated on the packaging of the composition used. After drying, it is necessary to remove the clamps and check the condition of the door ends.
Now you know how to glue veneer
In order for the work to proceed without difficulty, it is necessary to take into account the recommendations and advice of the veneerers:
- When using veneer made from expensive wood species (oak, ash), it is necessary to apply a layer of cotton fabric to the canvas.
- The new surface can only be sanded along the grain with sandpaper.
- Since the new coating absorbs water well, immediately after gluing it must be covered with a layer of varnish.
- When using an iron, you need to constantly move it across the work surface. It is forbidden to hold a heated metal surface in one place. If scorching occurs, it is necessary to remove the blackness with a sharp knife or blade.
- To secure a long strip of veneer to an edge, you need to secure one of the edges using an iron or hair dryer. It is convenient to use a soldering iron to secure edges and corners.
- Covering radius doors should be entrusted to old furniture veneerers.
- Joint veneer panels made from different types of wood look unusual.
- At the ends located at the bottom and top of the blade, it is necessary to cut off 2 mm chamfers on both sides. The sash will not cling to the frame after gluing the new wooden covering.
- When cutting a sheet with a knife, it is recommended to do so across the grain. If the sheet is cut lengthwise, it is necessary to make several movements with the blade. Otherwise, the cutting part of the knife will slip and ruin the sheet.
By following the basic rules, you can carry out the work without difficulty.
The skill of veneering can be useful not only for restoring door panels. With the help of new wood sheets you can change the design of wooden furniture. It can be coated with any color of paint for wooden surfaces. The main thing is to apply varnish or plastic film to protect the veneer from the damaging effects of moisture.
Using veneered MDF
What are panels and profiles made of?
From the phrase it is clear that the product consists of two materials, where the base is a modified board and the decorative coating is wood veneer.
Let's start from the foundation:
- the basis of such products is Medium Density Fiberboard
, hence the abbreviation MDF; - but the abbreviation in Cyrillic is MDF, this is already a transliteration
, since in translation it sounds like Medium Density Fiberboard; - such boards are made from fine wood chips
, which are pressed at high temperature and under high pressure, as required by the instructions; - It is noteworthy that the binding material here is lignin
- this is a substance found in algae, which means it is a purely organic substance that is absolutely harmless to the human body.
Table of technical parameters of MDF from "APSHERONSK"
Note. The other manufacturers of veneered MDF have approximately the same indicators.
Now let's move on to the decorative finishing:
- in the original, in German, the word veneer (spane) sounds like wood chips, but it is a thin sheet of wood that can have a thickness from 0.1 mm to 10 mm;
- such material is usually used as a glued coating - most often it is glued to fiberboard or MDF;
- such products are obtained in three ways: peeling, planing and sawing - the product itself is named after the method of extraction;
- in addition, it can be natural, that is, it is cut into thin sheets from solid wood and has the same color;
- it can also be colored if it is painted and stained;
- as well as fine-line - this is when peeled material is pressed into blocks, and then sheets of different sizes, colors and textures are made from it (this material has the lowest price).
Cabinet furniture and facades
Oak veneered MDF – “Chestnut Oak” kitchen
Veneered MDF facades, which can have a wide variety of colors and imitate various solid wood species, are very widely used in the furniture industry, as well as by small enterprises. At first it was synthetics - paper on which the structure of various types of wood was drawn.
This technology has been used for more than 50 years. This is an automated process, but such furniture “does not last long”, since paper still remains paper.
Furniture that uses natural veneered MDF, chipboard or even cheap wood is much more expensive than regular furniture that uses paper. Here, veneer plates are used, obtained by peeling or sawing, that is, the two most natural and expensive methods, especially since valuable species are used for this.
For production, such species as oak, ash, maple, alder, walnut, cherry, apple tree, and sometimes even mahogany or ebony, olive, beech and so on are used.
In the photo - the kitchen and natural veneered facades
Of course, various cabinets, tables, and kitchens made from natural veneered MDF are more expensive than synthetics, but, as they say, there is an underlined nobility and class here. Of course, for grace, the surface is treated with a primer or varnish.
This gives the furniture a matte or glossy finish. However, in addition to beauty, there is also a technical side to the issue, since this is some kind of protection against light mechanical damage. In most cases, polyurethane and acrylic varnishes are used, which are applied by spraying or roller method.
Different profiles
Furniture is furniture, and now let's talk about what you can make from such material with your own hands. I mean any repair and finishing work around the house. The fact is that there are various profiles available on sale that can be an excellent addition or even the main part of your home or apartment.
MDF plinth with natural veneer
But most often of all profiles of this type, cornices, baguettes, ceiling and floor veneered plinths made of MDF are used. They are combined with other finishing materials - decorative plaster, stucco, wallpaper, laminate and other materials.
Bonding methods
The quality of the veneer material and its strength directly depend on how carefully and accurately the veneer is glued to the plywood blank. There are 3 types of veneer fastening methods.
Cold contact method
This is considered to be the most difficult method of gluing veneer. To implement it, an adhesive composition is used that can quickly polymerize. This rate of hardening has its pros and cons. The fact is that due to rapid adhesion, defects in the location of veneer on the workpiece may not be noticed and corrected in time, and after polymerization it is no longer possible to change anything.
For this purpose, the workpiece is placed under a special clamping press, or pressing is performed manually. In this way, it is recommended to process workpieces that are small in size.
Hot gluing method
The essence of this method is that the surface of the workpiece and the surface of the veneer are separately treated with glue. The adhesive composition should dry a little, after which the veneer is applied to the workpiece. Next, the veneered surface is treated with a hot press or iron if the work is done at home. In order not to spoil the finish, you need to iron the veneer through a layer of clean paper. At this time, under the influence of high temperature, the adhesive composition will melt and create high adhesion.
To perform this finishing method, a thick adhesive composition is used. If air bubbles or irregularities appear during gluing of materials, the situation can be corrected. The adhesive composition, which in the form of excess has gone beyond the workpiece, is removed with a damp cloth.
Cold joining method with pressing
The method is based on the use of compression devices called clamps. Compression of the bonded surfaces is carried out until the glue is completely polymerized.
When choosing one or another type of veneering, it is important to complete the subsequent stages of work. After the glue has dried, I sand the workpiece a little and coat it with a clear, quick-drying varnish.
Already 24 hours after veneering, the product can be used.
Veneering (Working with veneer)
I started this section to avoid repetition in different articles. I veneer various products quite often, and instead of describing the veneering process in each master class, I will simply provide a link to this article. The section will be updated and supplemented as photos (and possibly video) of material become available. And of course, as you use other methods of veneering and working with veneer.
Veneer can be sawn or peeled. Sawn veneer, as a rule, has a thickness of 3 mm. Peeled veneer - less than 1 mm. I’ll talk about rotary-cut veneer for now, partly because I use it more often, and veneering with rotary-cut veneer is more common. I’ll return to the conversation about sawn veneer a little later, when I have enough material for publication and work experience.
Typically, natural peeled veneer is not very wide - only 100-140 mm, with rare exceptions it is slightly wider. The length of the knoli (pack) of veneer can be different. From one and a half to three meters.
I’ll start my story with simple operations - veneering a workpiece (plane) with natural peeled veneer 0.6 mm thick.
In order to veneer (cover) a workpiece of larger width with such veneer, strips of veneer must be “jacketed” (joined together). Since the strips themselves do not have an ideal edge when purchased, you first need to trim this edge. Otherwise, after assembling (connecting) the strips together, there will be a gap between them. There are many ways to straighten the edges of veneer, one of which is to joint the edges.
Edge jointing.
To start, I usually make two blocks of pine needles. The bars must be smooth in all planes and have an angle of 90 degrees. Between these blocks I crimp the veneer strips using lever clamps, if the width of the veneer strips allows for installation. In the case of jointing wide strips, you can use a beam with a strong curvature and turn it so as to increase the pressure on the middle.
Then I fugue the veneer strips, along with the bars. If you look at the surface during the jointing process, you will see that the edge of the veneer is aligned with other, tightly pressed sheets.
You need to strive for almost complete surface uniformity. At the same time, it is important not to overdo it, because if we joint for too long, we can “fill up” the corner, which will again lead to unnecessary cracks, or disrupt the intended design.
Next, we lay out the veneer, turning the strips over and matching the “native” sides. We check the quality of the edges by folding and pulling the strips together. The method of making a veneer shirt can be absolutely any. Traditionally, veneer is assembled using a “book”, that is, the “native” sides of the strips are combined—in a mirror image.
Another way to process veneer edges before setting them into a “shirt” is to trim with a razor.
Cutting veneer with a razor.
Trimming is done with a very simple device. Essentially, this is a homemade cutter for cutting veneer. A simple razor pressed together with two pieces of any slab material or wood. In my case, these are two pieces of MDF 16 or 19 mm. The cutting edge of the razor protrudes slightly, literally by 1mm. , that is, it does not significantly exceed the thickness of the veneer used in the work. As for the razor itself, it can be any simple razor, the only thing that I liked more than domestically produced razors. "Sputnik" or "Neva". In my opinion, imported razors are a little thinner, last less time and the cut itself is not always good. Before assembling the two halves of the body of our veneer cutter, it is better to secure the razor to one of the halves with simple masking tape. This will greatly simplify the further cutting process.
First I cut the veneer to the required length. Usually, I make the “shirt” longer and wider than the workpiece by about 10 mm. (5 mm on each side). “Overhangs” (protruding veneer) larger than 5 mm will be difficult to remove accurately. I described in more detail the cutting of “overhangs” and the device for working with edges after veneering in the article Homemade edge trimmer. As a working surface, I usually use a strip of MDF. On it, if there are a lot of blanks, I make markings and cut the veneer to the required size. Many of my colleagues like to use plywood in the same way - the razor will be less dull. At the same time, I use a piece of MDF with an angle of 90 degrees as a stop for the cutter. The cut is made on both sides so as not to damage the veneer at the exit. Pressing the fence tightly against the surface of the veneer, I make a cut on one side, and then, turning the cutter over, I cut through the entire strip. For this operation, you can use a simple office cutter. If there are a lot of blanks of the same length, you can press many strips of veneer at once between two sheets of board material and trim them using a miter saw or a hand router.
Next, using the same MDF as a base, we place a second strip of MDF on top, securing it with clamps at the end. We mark the intended cut. In the future, placing a strip of veneer between strips of MDF, we use the top strip as a stop. Pressing it with one hand, we cut the veneer along its entire length. If the veneer strip “walks” a little and moves during the cutting process, you can stick pieces of abrasive onto the top strip from the inside. In rare cases when this is necessary, I glue the abrasive onto double-sided tape - this makes it easier to remove later. The abrasive tightly fixes the veneer strip, does not allow it to move, and the seam between the strips when the veneer is assembled into a “shirt” turns out to be impeccable.
It is important that the MDF strip used as a stop is wide and even. Otherwise, it will be difficult to join two strips of veneer, three will be extremely difficult, and further installation will require subsequent trimming of the outer curved edges.
When cutting through the veneer, the razor leaves a cut on the base (bottom strip) and becomes a little dull. The subsequent cut follows exactly the “knurled track” and does not cause serious changes in the blade of the razor. The razor gets dull quite quickly just on the veneer, because as soon as the cut becomes less than perfect and the hand begins to feel how the razor is cutting through the fibers of the veneer texture, it is turned over. Thus, each razor can be turned over 4 times.
Set of shirts for Gumirka.
One of the ways to glue veneer when “setting shirts” is to use gummed tape (“Gumirka”). It is usually sold in the same stores as veneer. For work, we also need a sponge (or a piece of foam rubber), slightly moistened with water and a plastic card. A credit card or discount card will do just fine... unless, of course, you don’t mind it. I cut the tape into small pieces, about 40-50 mm long, although it is more convenient for others.
Pieces of humirka are dipped in a sponge with water and laid out side by side on the table to dry. A lipstick moistened with water has adhesive properties - it sticks. Next, we place the drying lipstick on the seam, pulling up the edges and rubbing it in with plastic. It is important to apply Gumirka exactly at the moment when it is still sticky, but not very wet, otherwise it sticks worse and wets the veneer a little more with water, which is also not very good. It is not very difficult, it is easy to master by selecting it experimentally.
Well, that’s all, our “shirt” is complete. There is an opinion that when Gumirka dries, it slightly tightens the veneer strips towards each other and the seam becomes better. But either I’m just unlucky, or I come across some kind of humirka that’s not quite right... In a word, no matter how hard I tried, I didn’t notice such an effect. Gumirka is excellent and almost irreplaceable when it comes to marquetry. Thanks to the reverse effect (it can be slightly moistened and carefully removed from the surface), marketers create amazing works. But if your set is a simple “shirt” in one direction, then it will be easier for you to work with masking tape.
Set of shirts on tape.
You can splice veneer strips not only by using gummed tape.
You can use special tape or simple masking tape to splice veneer. In one of the workshops where I was lucky enough to work, I came across a similar method. Scotch tape is a blue or light brown tape, not very sticky, but quite enough for gluing veneer. The sticker principle is exactly the same as when using a lipstick. Apply it to the seam in small sections, pulling the veneer strips together with your other hand. Some people lightly “grab” the strips with sparse pieces of tape, then glue the entire seam. Some people don't glue the seam. I usually stick tape with a slight overlap on the previous section. This makes it easier for me to remove the tape from the workpiece after veneering.
Using tape, of course, allows you to increase the speed of typing shirts, but this technique has one significant drawback. I was strongly advised not to try to sand the tape after veneering with a sanding machine, explaining that traces of the tape (glue) may remain and appear after varnishing.
The adhesive tape must be removed, and the glue comes off along with the tape, leaving almost no traces on the workpiece. I tried using simple masking tape for the same purposes, it seemed stickier to me. When removing it from the workpiece, it strives to tear out the veneer fibers from the junction of the strips. In the case of colored tape, this effect was also present, but in a much less pronounced form.
Thus, the process of setting the veneer into a shirt took me approximately the same time as when using the gumirka, only I glued the gumirka longer, and when using adhesive tape I spent time removing it. A simple iron will help you avoid spending a lot of time removing the tape. If you heat it up to a temperature that is warm, but not hot - when your hand does not burn, I place it directly on the veneered workpiece and, moving it, remove the tape. In this case, you can pick it up with a scraper or a blunt chisel and pull. With stronger heating, you can get by with one cycle, but stronger heating is not desirable for the workpiece, and besides, you can overheat the tape, then the effect will be the opposite.
Joining veneer with a manual machine.
There is another way to splice veneer when “setting in a shirt” - use a manual veneer splicing machine. We resort to it when there is a larger volume of workpieces or when the operation needs to be done quickly. Separately, I would like to note that I still like working with gummer or adhesive tape more and it turns out better. The machine, of course, gives greater speed, but if you get better at it, I think the quality won’t be much different.
So, the machine is a spool of special threads coated with glue (it is a consumable material), placed on top of a simple structure that runs on mains power. The thread is passed through a heating element and becomes sticky. The heating “proboscis”, through which the thread is passed, makes a zigzag movement when the machine moves, applying the thread to the surface of the veneer. And the roller, which is also one of the wheels of the machine, tightly rolls the heated thread, pressing it to the surface.
There are also a great variety of machines for splicing veneer strips, the purchase of which may make sense for large volumes of veneering. I don’t have much experience working with such equipment, or even with a manual machine for splicing veneer, and, in general, I don’t have any desire to purchase them. For my tasks, the “shirt set” with masking tape is what suits me best so far.
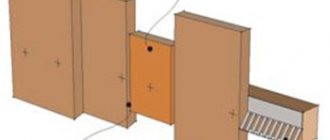
Gluing the workpiece with clamps.
Since not every workshop has a heavy press, I will describe one of the gluing methods - veneering with clamps. A pre-prepared beam (45x140x600mm), in the amount of 4-5 pieces, is placed on the work table, on which a sheet of slab material is placed, in our case it is a sheet of chipboard (40x620x1800mm.) The bars (45x70x600mm.) are prepared in the amount of 10-12 pieces. I usually lay newspaper or other paper over a sheet of chipboard. I try to avoid using a lot of paper, one or two layers is enough. The paper is needed to prevent excess glue from getting onto the surface of our improvised press and sticking the workpiece to it. The paper also absorbs excess moisture and allows the workpieces to seal a little faster than in the case of linoleum or film.
So, evenly apply glue (in our case it’s regular PVA) onto the surface of the workpiece using a roller. There is no need to pour a lot of glue, this can have a bad effect on the quality of gluing or, if the glue is too runny, it can simply “break through the veneer” - the glue can come out on the front sides of the veneer surface, penetrating through the pores of the wood. The workpiece, if it is lined on both sides, can be placed on a special device. This will allow you to apply glue to both sides of the workpiece before placing it in the press. It is important that the time between applying the glue and placing the workpiece under pressure is as short as possible. Otherwise, if water-based glue is used, it will weather and lose its adhesive properties.
Next, on a previously spread layer of paper, we spread the “shirt” with Gumirka or threads in the direction opposite to the one being glued. That is, out. Thus, the adhesive thread or gummed tape ends up on the front sides of the product. We place our blank coated with glue on the veneer, cover it with another “shirt”, lay down a layer of paper and place another sheet of slab material on top. Next, we crimp both sheets, with the inserted workpiece, using bars and quick-clamping clamps. In this case, the bars act as a distribution of compression over the entire surface of the sheet, and not just along the edges. The remaining free space between the bars can be compressed with whatever is at hand, but there is no particular need for this.
The workpiece is usually under pressure for at least 25 minutes, and is usually left for 30-40 minutes. If an industrial press is used, the drying time can be significantly shorter. This method is quite cheap, but very long. It is only suitable for you if you need to veneer several pieces, and if it is not possible to use a vacuum, pneumatic or hydraulic press.
Veneering in the press.
It happens in exactly the same way as when veneering with clamps, only much faster and with less labor. In the workshop where fate brought this cold, homemade pneumatic press. The press was described in detail in the article - Homemade pneumatic press for a carpentry workshop. Linoleum is spread on the surface of the press, then polyethylene - so as not to spoil the linoleum and not to spend a lot of time cleaning it from glue. When using polyurethane adhesives, polyethylene is required; removing drops of glue from linoleum is extremely difficult. Next, the blanks are covered with another sheet of polyethylene and linoleum.
The holding time in the blank press can be reduced if a heating film is used. I can’t say exactly the heating temperature, I haven’t measured it... warm, but not hot. The film came to the rescue when the low temperature in the workshop did not allow veneering at all. The glue was heated with warm air and this film was used for veneering.
For veneering I most often use kleiberit 303.0 glue and usually d3. If you didn’t have time to veneer all the blanks, and some of the work is left for tomorrow, and you’re too lazy to dry the roller in the morning, you can simply wrap it in stretch. This way, the glue will not dry out overnight and the roller will not be damaged. In addition, 300-400 grams of glue always disappear on the roller, which is also not very pleasant.
Finishing the surface of the workpiece with “Deck”
As promised, I will continue to edit and add to the section.
I often come across the fact that covering the surface of a product with “Deck” (solid strips, more than 2-3mm thick) is often equated to working with veneer. Experienced craftsmen and carpenters often correct me when I call material 2-3mm thick “deck”. and insist that it is just thick veneer. I won't argue, but I'm used to it. Both in this article and in other articles on this Internet resource, I call a deck a strip of thick veneer from 2.5 mm, usually sawn veneer.
Selection of material.
I believe that the main advantage of “deck” cladding is the ability to select exactly the material that the artisan considers appropriate for his product. That is, this method gives more opportunities, but one cannot ignore that labor costs, the amount of material, and therefore the cost of the product will be significantly higher than when working with thin (peeled) veneer.
The second significant advantage is the finishing of the product. When tinting, thin, peeled veneer and solid wood give different shades. With a “dull” enamel color, this does not matter, but when working with stains or tinting, the difference is quite noticeable, and can greatly ruin the appearance of the product.
Another compelling argument in favor of a deck or thick veneer is wear resistance and the possibility of further restoration. Deck is often used on stair treads, chair seats, tabletops, window sill surfaces and shelves. In general, anywhere where the surface may experience heavy loads or wear.
To count the material before selection, you need to determine the width of the strips. I was guided by my capabilities. The maximum possible cut of my circular saw, with a disk in stock, is 60mm. That is, if you cut in two passes, turning the workpiece over - approximately 118-120mm. Thus, I took the width of the tabletop - 500mm, with a small allowance - 520mm. and divided by 120mm. It turns out 4.3 stripes, that is, five. But since the workpiece has two sides (and I wanted to be sure that after pressing the workpiece would remain flat and not warp), I decided to cover both sides with a deck of the same thickness - 10 strips.
I decided to play it safe in case I couldn’t match the color perfectly and use stripes with a width that is a multiple of the width of the tabletop. Otherwise, if a difference in color appears after sanding, stripes of different widths on the tabletop will not look beautiful. That is, the width of our stripes, after all calculations, will be 110mm. (520mm. Divide by 5 = 104mm. and give a small allowance for jointing.
And so, we get the most convenient deck width for this product - 110mm. On average, I get 4-5 deck strips from one piece of board. I don’t like to depend on chance, and again I calmly give the quantity in reserve and cut 3 pieces of board. This is approximately 12-15 deck strips. The stock makes it possible to select more beautiful stripes and avoid accidents during further processing. Considering the length of the table top is 1000 mm, I had to use more than one board, because with a finished size of 1000 mm, I need a deck approximately 1150 mm long. In further processing (reimus), I will need a margin for the cut. My thickness planer makes a “step” as it enters and exits the workpiece.
Board 30mm thick. I spent quite some time choosing the one for the dresser top. There was quite a lot of material and it was an unedged board, with knots, sapwood and wane. Finding a decent board and understanding that this particular board will suit is quite difficult - on a dirty board, the fibers are almost invisible and the color is unclear. In order to select one board, I had to take several boards into work, namely 4 boards. The first selection is not done by chance. Large twist, very strong curvature of the board, large knots are rejected at the initial stage, the rest can be rejected after jointing.Making a “deck”
After cutting and jointing on both sides, it becomes clear whether the board is suitable for this product or not. At this stage, you can cull based on color. If the job may require more than one board, it may be important that all stripes are similar in color. I sawed off the wane from the boards and the sapwood. In this case, the selected board was sawn to a size of approximately 120 mm. After jointing, I selected the best board, and set aside the remaining boards for other elements and products. So, after cleaning the board and rejecting it, we are left with three pieces of board measuring approximately 28x120x1150 mm, which we joint on all four sides and saw to a size of 110 mm.
Next, the prepared bars “bloom” into strips. If the final thickness of our “deck” is, for example, 3 mm, then the thickness of the strips that we saw should be approximately 3.5-4 mm. I make a cut to the middle of the workpiece, turn it over, and cut again. The same thing happens on the other side of our workpiece. This way we get two sawn strips of 3.5-4 mm. and the remainder, which is jointed again. If we want to get 5 stripes from a 30 mm board. it is necessary to joint only partially and the thickness of the strips at the exit from the sawing machine is 3-3.5 mm.
The operation is quite traumatic and dangerous. You need to work carefully, using a pusher and glasses. If you do not have basic experience using power tools and a table saw, this method can easily disable you. During work, the workpiece must be limited on all sides by stops, combs and clamps.
For further work I used a simple device. A piece of board material, in my case plywood. The block on the front side is needed to prevent the device from being pulled into the machine along with the workpiece. This device is needed in order to be able to process workpieces of smaller thickness than the design of the thickness planer provides.Our strips are processed in a thicknesser on both sides. I paid attention to how I fed the workpiece into the machine and tried to feed it “along the grain” and not “against the grain” so that there would be fewer chips. If chips cannot be completely avoided, strips with large chips are rejected, and the remaining chips are eliminated by grinding and putty.
The sharpening angle of the knives of a thickness planer has a great effect on the quality of gouging. The sharper the sharpening angle, the more explosions and chips there will be. This is purely my observation; many may disagree with it.
At the exit from the thickness planer, a “step” remains on the workpieces, approximately 60-65mm. from the edge of the workpiece. This is due to poor adjustment of the machine's pressure rollers. I just make the blanks 150-160mm longer. and I cut off this “tail” by trimming.
The strips are crimped with bars and jointed in a “package” until complete homogeneity is achieved. Afterwards the entire stack is turned over, crimped again and the second edge of the strips is jointed. During the work, it is necessary to take into account that the bars slightly lose the correct angle of 90 degrees and they need to be corrected. Also pay special attention to the position of the clamps, otherwise both the clamps and the knives of the jointing machine may be damaged.
A set of decks “with a jacket” is similar to a set of “shirts” using simple (peeled) veneer. Only if earlier in our work we used masking tape or gummer, now, when working with the “deck” we use simple tape. The strips are pressed tightly against each other, pulled together with tape, with a slight stretch. The tape tightly pulls the strips together, eliminating any major curvature, if any. Next, I glue the entire seam lengthwise. It is better to remove the adhesive tape immediately after pressing. I've heard that many woodworkers glue strips together. I don’t do this, it seems that so far everything is not bad.
Pressing the workpiece with a “deck”
For pressing, you can use clamps or a press, if possible. But in any case, it must be taken into account that lining the workpiece with a “deck” will require significantly more pressure than veneering. I have recently had experience with a vacuum press, and find this option to be the most convenient for beginners.
After pressing, excess deck (overhangs) protruding beyond the workpiece are removed with a milling cutter with a bearing or cut off. It is better to remove the adhesive tape immediately, as it will be more difficult to remove later. Glue and tape residues are removed by scraping and sanding.
It is possible to make a deck yourself, but you must take into account that it takes a very long time, much longer than it is done in production conditions. This only makes sense if the amount of work is not large. If you need to make a tabletop for a chest of drawers, a table or a seat for stools. For a large volume of work, sawing a deck yourself is not profitable and takes a very long time; of course, I would prefer to purchase a ready-made one.
To clarify the above, we made a short video about the veneering process. “Set of shirts” and gluing of blanks in a vacuum press. Also a little about how best to remove masking tape after veneering.
OK it's all over Now. I will supplement and update the section with new photos and video material. Thank you for your attention. I hope it was interesting.
The need for veneer finishing
Plywood is a type of laminated lumber made from natural wood. But, despite its natural origin, the raw materials for the production of plywood are inexpensive wood species with an inexpressive fiber texture and an insufficiently attractive color.
In order to refine inexpensive material, rare or even valuable species are glued on top. As a result, the price of lumber increases slightly, while the aesthetic design improves significantly.
Finished veneered plywood and products made from it look as if they were made entirely from rare wood. However, along with a more attractive and solid appearance, as a result of veneer finishing, plywood acquires improved technical and operational properties.
Features of MDF veneering
Veneering MDF using veneer is a rather complex process. During this process, glue is applied directly to the panel, and then lumber is placed on top of the resulting film. After this, the product is subjected to hot pressing and subsequent finishing, in particular, varnishing.
Veneered MDF is practically no different in appearance from solid wood. In addition, the product has a large number of optimal performance properties, including:
- resistance to moisture,
- long period of use,
- versatility of use,
- acceptable price,
- environmental Safety.
Veneered MDF is used in the manufacture of high-quality furniture, decorative panels and interior doors. Veneered material can also be used in the production of parquet.
Lumber made from valuable wood species is used for cladding the panels. It can be planed, sawn, peeled. Veneer is obtained by cutting wood, as a result of which it acquires a texture characteristic of a particular species.
Main types of veneer
Veneer is a thin layer of wood. The substance is an absolutely natural material, which has several varieties:
- Standard - made from oak, cherry, walnut. Other types of wood can also be used.
- Special – made from rare and valuable wood species.
- Root cuts of interesting species - this material is not suitable for furniture production, but it has an interesting texture. This category includes myrtle or eucalyptus.
- Exclusive – characterized by an unusual texture and non-standard sizes.
The material may also differ in the cutting method and processing methods. Most often it is used in the furniture industry. Often the substance is glued to wall or facade panels. Veneer doors look trendy. This substance is characterized by excellent appearance. It can be fixed on various wooden surfaces. Moreover, the substance has an affordable price. Therefore, it is often used to decorate the interiors of residential premises. The main advantages of veneer include the following:
- long period of operation;
- moisture resistance;
- environmental friendliness;
- high strength.
By cutting method
Depending on the cutting method, veneer can be radial or tangential. Each option has certain features.
Tangential
This material is obtained by planing the trunk parallel to the center. This helps create a ring effect on the surface.
Radial
This coating is obtained by planing at an angle of 90 degrees to the growth rings.
By processing method
Depending on the processing method, veneer has several varieties. Each of them has a number of features.
Peeled
This type of veneer is obtained by rotating logs. During the procedure, a thin strip is cut from them. The saw of a special machine cuts the wood parallel to the grain. This material is obtained from oak and alder. Pine and birch are also used for its production.
sawn
This veneer is made from coniferous trees. These include Siberian cedar and fir. As a result, it is possible to obtain boards with a thickness of up to 12 millimeters. The material is usually used to make musical instruments. It is sometimes used in the furniture industry. This type of veneer is considered the most valuable.
Planed
This material is made exclusively from hard wood. It can be obtained from oak or mahogany. It is distinguished from other types of veneer by the method of cutting wood. First, the trunk must be cut into bars. After which its layers are cut off. This is done perpendicular to the fibers.
General information about veneer
Veneer finishing technology was first used in Ancient Egypt. Production on an industrial scale began in 1806, after the advent of the planing machine. A new decoration method began to be used in the furniture industry, especially in the production of interior doors. Veneer is classified according to the production method and type of material.
Types of veneer:
- Oak. Strength, hardness and the ability to tint are the main positive qualities. Preserves the texture of natural wood and does not contain harmful substances. The disadvantages include the high price.
- Ash. It is inferior in strength to oak, but its flexibility to mechanical stress improves processing speed. Ash reacts sensitively to humidity, so it is necessary to install interior doors from this species in rooms with a constant dry climate.
- Pine. The structure of wood is porous, so the surface interacts with any protective coating. Pine is a soft wood with low wear resistance. If not properly cared for, mold will appear on the surface.
- Nut. Combines strength and ease of processing. The noble texture of walnut suits a classic interior.
- Wenge. The material is used to create entrance and interior doors. It is resistant to temperature fluctuations, high humidity, and mechanical stress. Even after long-term use, the canvas does not change its configuration.
Fine-line technology opens up new prospects for the production of finishing surfaces with original textures. Veneer has high manufacturing precision; control at every stage of production eliminates defects. The fabric is obtained by pressing and gluing. Negative qualities include increased fragility.