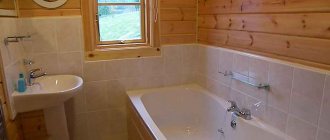
Not so long ago, almost the only material for finishing a bathroom was ceramic tiles. The construction industry does not stand still; new materials are constantly emerging. Many people use siding in the bathroom to decorate walls and ceilings, this is explained by its practicality, durability and low price.
Bathroom finished with siding.
Performance properties of siding
Modern PVC panels (also called siding or lining) help create a different style in any room, but are most often used to decorate the bathroom. High moisture resistance, correct geometric shape, simple and reliable connection make it possible to finish a bathroom with siding without extra time and special skills.
There are several types of such material:
- Rack and pinion. Most often they are used to decorate the ceiling, but the slats are also suitable for cladding walls. The width of the slats is 100-125 mm, and the length is 3 m. The slats are connected to each other using a locking connection, which can be wide or narrow. Plain colors or colors imitating wood or other materials are common.
- Standard. In this case, the width of the panels is 250-370 mm, and the length is 2.6-3 m. Tongue-and-tongue locking connections allow for quick and reliable installation. The coating can be plain, imitate other materials, or have a pattern or photo printed on it.
- Sheet. The width of the lamella is 203 mm, and the length is 4.05 m. Finishing with such sheets is done end-to-end, then the seams are filled with sealant in the color of the material. They are most often mounted on a flat surface using glue, but they can also be installed on the sheathing.
Depending on the connection method, the panels are:
- Seamless. Most often they are used to decorate the ceiling. The tight fit of the panels to each other ensures minimal seams.
- With chamfer. Their difference is that there is a chamfer at the junction. They are used for finishing walls and ceilings.
- With decorative surface. Externally, such panels resemble natural lining, but cost more than previous options.
Finishing the bathroom with white siding.
Conclusion
Installing siding is much easier than, for example, laying ceramic tiles on a wall. At the same time, the finish is beautiful, practical and durable. The only thing is that the work must be done carefully and carefully so that the walls are smooth and strong enough.
You can learn more about how siding is installed from the video in this article. If any points are unclear to you or difficulties arise during the work process, ask questions in the comments, and I will be happy to answer you.
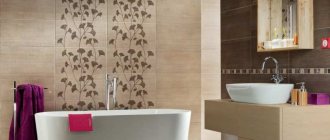
If previously, mainly tiles were used to decorate walls in bathrooms, today the choice of materials is varied.
Bathroom finishing with plastic
If you want to make repairs quickly and inexpensively, you should consider the option of finishing the bathroom with plastic.
Advantages and disadvantages of cladding
Siding for bathroom interior decoration is made of polyvinyl chloride, which provides it with high resistance to high humidity.
In addition, this finishing material has the following advantages:
- low cost (anyone can buy it);
- a large selection of colors (this allows you to choose the material to suit any interior);
- long service life (mold and mildew do not form on it);
- high heat and sound insulation characteristics (when installing the frame, it is possible to lay an additional layer of insulation and further increase these indicators);
- environmental friendliness (the materials and technologies used in production make such material completely safe for humans);
- simplicity and speed of installation (this does not require special tools or special skills - even a beginner can cope with the work);
- ease of use and maintenance (just wipe the panels with a sponge dipped in soapy water).
Like any building material, siding also has some disadvantages:
- fire hazard (although the panels do not support open fire, they emit toxic smoke when burning);
- deformation (at sub-zero temperatures);
- reducing the space of the room (when installed on a frame);
- relatively low strength.
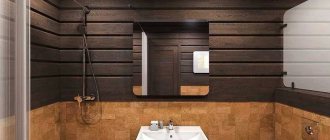
Bathroom finishing.
Types of materials
Siding is usually called structures made of PVC or steel, fixed to each other using special locking mechanisms. Plastic products in stores are presented in several versions:
- ordinary, unstable to mechanical stress;
- reinforced, made to look like stone;
- steel.
Steel panels have increased strength and are produced in the form of a formed sheet, which is suitable not only for external cladding, but also for interior finishing of non-residential premises. Although the price of metal siding is much higher, this is compensated by its long service life, but it is not practical to use it for interior decoration.
Plastic panels are characterized by increased moisture resistance and are not subject to fire, which has ensured their widespread use in the decoration of corridors, kitchens and bathrooms. They are easy to care for and are resistant to fading, dampness and detergents. The choice of design options in stores is not so wide, but every buyer has the opportunity to purchase custom-made siding. Although its production will take some time, but after waiting, the buyer will be able to get an original design.
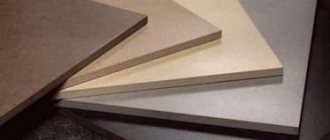
MDF panels and lining do not tolerate dampness, so it is not advisable to use them for finishing basements, toilets and bathrooms. You can make wooden lining more resistant to moisture by treating it with special compounds, but it is worth remembering that this will be an additional cost, and you can always purchase material that is more suitable for a room with a similar regime.
When choosing options for wall cladding, you should take into account their features, cost and the amount of material that will be required to complete the finishing. In large construction stores, experienced consultants and designers will always come to the aid of customers and perform all calculations for free.
Wide range of possibilities in interior design
Siding is a universal material, so it is used to decorate any room indoors:
- Bathroom. Due to its availability and ease of installation, siding has replaced such a popular finishing material as ceramic tiles. A bathroom decorated with it not only looks beautiful, but is also inexpensive. In this case, all the work can be done independently. The result is a practical coating that does not accumulate dust and dirt.
- Balcony or loggia. Here, this material not only gives the room an attractive appearance and practicality, but also improves the heat and sound insulation characteristics of the surfaces on which it is installed.
- Corridor. Siding is used to cover the walls completely or half their height. Finishing the corridor with such material makes it presentable and practical. In addition, it makes cleaning easier because... There is always more dirt and dust in the hallway than in other rooms of the house.
- Ceiling. This material can be used in any room. In addition to high aesthetic qualities, siding allows you to hide existing communications (electrical wiring, pipes, etc.).
How much will it cost: price comparison
Cost is a very important issue. Siding is an inexpensive facing material, and there are a lot of manufacturers on the market (for every taste and budget). HAUBERK facade tiles are in the same price category. The final cost of a cladding system with HAUBERK facade tiles is slightly higher than the average cost of vinyl siding. However, in terms of quality, HAUBERK façade tiles clearly win.
To summarize, we can say that HAUBERK facade tiles are a good alternative to the usual vinyl siding and successfully compete with it in terms of price/quality ratio
When choosing a material for finishing a country house, it is important to “weigh” the pros and cons of each of them, taking into account that durability largely depends on the composition of the raw materials and compliance with production technologies. A quality product cannot be cheap
Bathroom installation options
Before finishing a bathroom with siding, you need to calculate the required material. To do this, multiply the width by the length and determine the surface area on which the work will be performed, adding a 10% margin.
If the repair is carried out without removing the plumbing, then cover the bathtub, washbasin, pipes, etc. with film. When installing the panels, the wooden frame, as well as the surface of the walls and ceiling, must be treated with antifungal agents. Old finishing material is removed from the walls. If the siding is installed on a frame, then there is no need to prepare them additionally.
The following techniques will help to visually increase the area of a small bathroom and make its design beautiful and unusual:
- The main surface of the walls is finished with light-colored plastic, and darker colors are used in the corners.
- They focus on one of the walls - for this purpose it is decorated in a brighter color.
- Dark-colored panels are installed in places where mirrors and other accessories are installed.
- Light-colored siding is used to decorate a small bathroom.
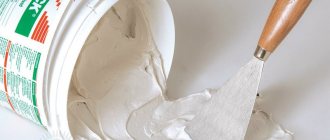
Using an adhesive composition
If the walls in the bathroom are almost flat, then it is easier to install the siding using glue. The surface is first cleaned of dust, then sanded to ensure good adhesion of the materials, and primed. This solution allows for quick installation and does not take up free space, making it suitable for small spaces.
Frame method
If there are irregularities on the walls, it is better to choose installation on a frame. Although installing the sheathing requires additional time, effort and money, it does not require leveling the walls, which compensates for these inconveniences. Installation is carried out on both wooden and metal sheathing.
The disadvantage of this method is that the size of the room is slightly reduced, but if the bathroom has sufficient area, then it can be ignored.
Plastic for finishing
If you are choosing a finish for the bathroom, then preference should be given to materials that have the following properties:
- Resistant to moisture and water vapor. The bathroom is a place where water is used every day, so splashes on the walls are almost inevitable.
- Strength. The material must be resistant to mechanical stress.
- Hygiene. The wall covering in the bathroom should be easy to wash and clean.
- Durability. It is clear that no one wants to make repairs every year, so you should choose materials that can last even a year.
Selection of plastic panels
An important stage of the work is the purchase of materials.
To purchase high-quality panels, you need to pay attention to the following points:
- The more stiffening ribs there are in the siding, the stronger and more reliable it is.
- You cannot buy material if the locks or lintels on it are deformed.
- The coloring should be evenly applied to the entire surface, the design should be clear and unblurred.
- The image when joining the panels should turn out beautiful, undisplaced.
- There should be no bubbles, cracks or other defects over the entire surface of the plastic.
- Locks must provide a reliable and durable connection (gaps are not allowed).
- The dimensions of the panels must strictly correspond to the parameters declared by the manufacturer, otherwise there will be problems during their installation.
Be sure to request a quality certificate to ensure that the siding you purchase is intended for interior use and is safe for humans.
Plastic panels for the bathroom.
Paint instead of tiles
The bathroom is a rather special room because it is where there is both high humidity and frequent temperature fluctuations. Tiles seem to be the most practical in such spaces. However, this is not entirely true... You can replace it with modern paints that are resistant to water, abrasion and detergents. These paints have a number of advantages that make them superior to ceramic tiles in some respects.
Paint can be quickly applied to the wall with your own hands. When choosing tiles, we most often use the services of a tiler, which significantly increases the cost of repairs. The benefits of paint may also include the fact that if you change your mind about the color, you can change it quickly and inexpensively. However, you cannot use the same paint to paint the walls as you would in the living room. Most often used: latex - acrylic, ceramics. In industrial stores they are called kitchen and bathroom paints.
Instructions for tiling a bathroom
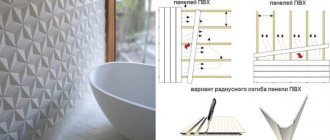
Installation of PVC panels is not difficult, so you can do this work yourself. If you decide to cover the entire room with siding, you should first install it on the ceiling, and then move on to finishing the walls.
Installing siding with glue
It is necessary to prepare the following materials and tools:
- antiseptic primer;
- roller and tray;
- glue;
- hacksaw and construction knife;
- tape measure and pencil;
- building level.
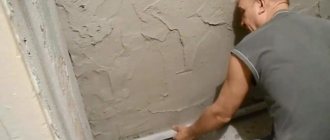
After cleaning the walls from the old coating, they must be properly leveled, wait until the putty dries, and cover them with a primer. On the ceiling, siding is most often mounted on a frame to hide the communications there (cable, pipes, etc.).
Work on gluing the panels begins with the installation of starting profiles (do this in the corners of the bathroom). The verticality of their installation is controlled using a level or plumb line. You can do the work without starting rails, then the joints should be closed using decorative corners.
They mark and trim the panels, which are mounted vertically, so they are cut to height.
One of the finishing options.
Further work is performed in this order:
- evenly coat the first panel with glue;
- insert it into the starting element and press it against the wall over the entire surface;
- smear the next panel with glue, insert its groove into the tenon of the previous one and press it against the wall;
- the last element is cut to width from the groove side and, slightly bent, inserted into the opposite starting profile;
- The joints with the bathroom are taped with a special tape or a border is installed, and a plinth is installed.
It is necessary to remove the protective film from the panels only after installation is complete, otherwise they may be damaged.
Frame installation
This method allows you to hide all the irregularities on the wall and does not require additional preparation.
You will need the following materials and tools:
- metal profiles, brackets, etc.;
- wooden blocks (they must fit into the metal profile);
- primer;
- metal scissors;
- hacksaw;
- tape measure and pencil;
- screwdriver
Creating a frame is similar to what is prepared for drywall (only the profile is installed horizontally), and consists of the following steps:
- Guide profiles are installed in the corners.
- Places for mounting horizontal elements are marked on the walls and brackets are attached.
- The profile is inserted into the guide elements and fixed using brackets.
- In places where shelves or other furniture are installed, the profiles are reinforced with wooden blocks.
- Mark the panels and cut them to size.
- The profiles are mounted in the same way as in the previous case, only instead of glue to the frame they are fixed with self-tapping screws.
The popularity of siding when covering bathroom walls is explained by the fact that its installation is much easier and faster than ceramic tiles. If everything is done correctly, the result is a smooth, beautiful and practical surface.
Vinyl tile adhesive
To install ordinary vinyl tiles, you need a good adhesive, because to hold the product on the wall you need excellent adhesive ability. Acrylic glue is best suited for this procedure, because its mixture is similar to the contents of the finish.
Liquid nails are also suitable. Adhesive for PVC tiles on the wall is applied in a thin layer to the underside of the tiles. If it is necessary to cut or trim material, it is time to do this with ordinary, reliable scissors.
Considering that the corners in rooms can be uneven, in order to avoid visible distortions, experts advise starting to glue the material from the middle of the room wall and further into the circle. After laying all the tiles, you will need to roll them with a roller and wipe off excess glue. Walls can be washed two days after gluing.
Siding for the bathroom: finishing work, technology + Photos and Videos from the masters
Siding for the bathroom: finishing work, technology + Photo. The bathroom is a room that has a high level of humidity, so during renovation work you should choose moisture-resistant and durable materials. There is a huge amount of building materials on the modern construction market. Bathroom siding has become one of the most popular, best and budget materials that can be used to decorate the ceiling and walls.
Siding refers to plastic panels that are used for finishing surfaces. They can be used in all rooms, but most often they are chosen for decorating the ceiling and walls in rooms with high humidity, namely in the kitchen or bathroom.
Short description
Such panels have many advantages, which is why they have become so widespread:
- Light weight, easy to transport.
- High-strength, steam-resistant, moisture-resistant, can withstand even hot steam.
- There are many designs, there is siding with imitation stone, tile and wood.
- Ease of installation.
- You can hide pipes (electricity, drain) under it, which do not decorate the room in any way.
- They are easy to care for; to clean the surfaces, just walk over them with a damp cloth.
- Relatively inexpensive material compared to other finishing elements.
Siding comes in different textures, but for use in the bathroom it is recommended to use smooth sheets because they are easy to maintain. In addition, mold or mildew almost never forms on smooth siding surfaces in the bathroom.
When choosing a material, keep in mind that it can be used for both exterior and interior decoration. The exterior finishing material contains additional components that help provide protection from UV rays and negative environmental influences. Because of this, the cost of the material will be higher.
Installation
...on glue
In order to finish a bathroom with siding with your own hands, there are several ways, one of which is installation with an adhesive composition. This method is used less frequently than installation on the lathing and this is due to the fact that several conditions will have to be met for gluing.
The first and most important thing is to create perfectly smooth walls, and secondly, there should not be a high level of humidity in the room.
If you carry out a major renovation with leveling the wall, replacing all communications and plumbing fixtures, you will need to take into account three nuances:
- Before installing the material, all wiring for switches and electrical outlets should be removed.
- If you install the material with adhesive, you will still have to create a sheathing around the drain and pipes to disguise them.
- When laying panels on the ceiling, you will need to immediately determine the location of the lamps; it is advisable to choose low-power spotlights so that the siding does not melt in the future when using lighting.
And a little more about lighting. If you need to create additional lighting, you can install sconces or lights on the mirror and shelves. Siding is a durable material, but it deteriorates at high temperatures since it is plastic.
Tools and accessories
Before you start work, you should prepare the material and tools that you will use when installing siding on the walls:
- Siding panels.
- Adhesive composition for mounting PVC panels on the wall.
- A utility knife so that you can trim the panels if necessary.
- Trowel (it will be convenient for them to apply glue to the material).
- Old rags to wipe the material and remove excess glue.
If you need to use hardware, then you will have to stock up on a screwdriver or drill.
Please note that trimming the panels is required before starting work. Drilling or cutting must be done from the outside, as otherwise the plastic will have burrs.
Selection of glue
For siding panels, there are several types of glue that can be used to install the material:
- Vegetable.
- Mineral.
- Animal.
- Liquid Nails.
- Universal polymer adhesive.
When choosing an adhesive composition, pay attention to the functions. For example, some compositions can protect from ultraviolet radiation, are moisture resistant, etc.
You should choose glue according to your needs. If you want to buy formulations with a natural base, be prepared to pay more, but you will be completely sure that they are hypoallergenic and harmless. For the ceiling it is better to use a universal polymer composition.
Important! If there are small errors on the walls, then the best option would be to use liquid nails, which have high elasticity. Due to this, you will be able to visually level the wall and prevent the material from deforming.
Preparing the surfaces
The main condition is to make the surface smooth. It is impossible to install siding on curved walls, as it can deteriorate, become deformed, and then the appearance of the room will not be what you expected.
Before you start decorating your bathroom with siding, you will need:
- Clean the walls from dust, debris, grease stains and other contaminants.
- After this, the walls need to be putty and unevenness removed. After the material has dried, the base needs to be primed. This is required to increase the adhesion of the mounting adhesive to the wall.
- Before installing the panels, you need to additionally go through and treat the walls with an antiseptic solution so that it is protected from fungus and mold.
These three simple steps will help you maintain your finished result for a long time.
Progress
Once you have calculated the amount of material that will be needed, the main surface is ready and the siding is cut, you can begin. Start applying the adhesive to the wall or to the back of the panel. Experienced builders recommend applying glue only to the panel to avoid overuse and glue running down the wall.
When everything is done, the panel should be carefully applied to the wall and pressed evenly for a few seconds. When the panels are completely dry, the work is considered completely completed. Drying time depends on which manufacturer made the glue, as well as on the room temperature and humidity level. It is not recommended to use the premises for your needs until the panels are completely dry. Changing temperature and steam conditions can negatively affect a wet surface.
...on the frame
The second and more common option for installing siding panels is to mount them on the sheathing. This means the preliminary installation of the frame on the main surface, and then the panels are mounted on the frame. This method is often used in the bathroom, especially if the walls are uneven. Making a screed is expensive, and the worse the surface, the more material and money will be spent on leveling.
When installing sheathing, you will not need to level the walls, and you can save money.
Unlike installing drywall, siding can be installed on any wall, since it does not require additional reinforcement due to its low weight. The frame comes in two types - made of a metal profile or wooden.
You can also find special plastic profiles for installing lining on sale.
If you decide to make the sheathing from wood, it should be treated in advance with antiseptic agents so that it does not mold or rot in the future due to high humidity. Wood is a natural material, so it is susceptible to mold and mildew.
Frame manufacturing
The frame is used only when the surface is uneven. Before installing the sheathing, the walls should be treated with various compounds and antiseptics. The frame should be installed perpendicular to the installation of siding. It turns out that if you lay the siding vertically, then the profiles - horizontally, and vice versa. Corners should be installed along all openings, into which the sheathing will then be installed.
Installation
How to install siding in a bathroom? Each panel of material has a groove, i.e. fastening part. When installed on the sheathing, the panels are fastened between the frame and the profile using self-tapping screws. There is nothing complicated about this, so even a beginner can cope with this task. Finishing a bathroom with panels does not take much time, and thanks to this, renovation work can be completed within a few days.
The advantage of the lathing is that no adhesive is needed, which means drying is also not required.
In the end, we note that siding panels are one of the most popular materials for finishing non-residential and residential premises. It is relatively inexpensive, easy to install, has a long service life and looks great. It is used to decorate the toilet, bathroom, work wall in the kitchen and other rooms.
Conclusion
Due to the wide range of colors and textures, you can choose panels with imitation wood, stone and other materials. Previously, it was believed that the cheapest material was lining, but there were several types. Today, the construction market has many types of panels, with the use of which you can make inexpensive, but durable, beautiful and durable repairs.
Furunculosis - treatment
A boil (popular name boil) is a purulent inflammation of the hair follicle, which affects the surrounding tissue. The appearance of many boils at different stages of development is called furunculosis.
Furunculosis: contagious or not?
The most common cause of furunculosis is a staphylococcal infection. About 40% of the population are its passive carriers, but if the body is weakened, the infection can become more active, causing single or multiple purulent inflammations. In addition, the disease can recur, becoming chronic. In the latter case, it is quite difficult to get rid of furunculosis forever, since it is necessary to cure all boils and carry out additional treatment to prevent re-infection of the body.
Considering that staphylococcus spreads easily, furunculosis can be classified as a conditionally infectious disease. That is, this bacterial infection is quite easy to become infected through household means, but furunculosis does not always develop. With good, strong immunity, a person becomes a passive carrier of infection, sometimes without even knowing it.
How to cure furunculosis?
Treatment of furunculosis can be divided into two areas: local, aimed directly at treating abscesses, and general, to combat the infection and the causes that caused it.
First, let's look at how to treat furunculosis at home.
In this case, treatment is aimed at accelerating the maturation and rupture of the abscess, as well as preventing the spread of infection:
- Lubricate each boil with an antiseptic 3-4 times a day. For wiping, you can use regular or salicylic alcohol, and you need to wipe the skin carefully, in a circle, from the edges to the center of the inflammation, to avoid the spread of infection. After this, it is advisable to lubricate the ripening boil with brilliant green or iodine.
- Apply warm, dry compresses to the inflamed area to help speed up the maturation of the abscess.
- After the abscess has opened, you need to treat it with an antiseptic and apply a sterile bandage.
- Under no circumstances should you open or squeeze out boils yourself; this can lead to the spread of infection into deeper layers of tissue, and, as a result, blood poisoning.
- Bandages with pulling ointments (Vishnevsky) are used only after opening the abscess to speed up the removal of the purulent “core”.
Antibiotics for furunculosis
Antibiotics for furunculosis can be used in several ways.
- Local blockade (especially effective at the initial stage of the disease). It involves injecting the area of inflammation with a mixture of an antibiotic and an anesthetic.
- Taking antibiotic tablets.
- Intravenous antibiotics (usually used for severe infections with a wide area affected).
- The list of antibiotics used in the treatment of furunculosis includes penicillin and its synthetic analogues, drugs such as kefzol, augmentin, cephalexin, chloramphenicol, oxacillin, lincomycin, rifampin. In the case of chronic furunculosis, in addition to antibiotics, a large number of vitamin preparations and agents that strengthen the immune system are additionally prescribed.
Blood transfusion for furunculosis
Previously, the method of autohemotherapy was widely used in the treatment of furunculosis. It consists of subcutaneous or intramuscular injection of the patient’s own blood taken from a vein. Today, this method of treatment has been completely replaced by the use of antibiotics and antibacterial drugs. And blood transfusion (donor) is carried out only in case of development of general sepsis (blood poisoning) against the background of furunculosis.
Prevention of furunculosis
If you are prone to boils, then taking the following preventive measures is absolutely necessary:
- Careful personal hygiene.
- If any microtrauma occurs on the skin, immediately treat it with an antiseptic.
- Taking medications that strengthen the immune system - vitamin supplements, mineral supplements and immunomodulators.
1. Use only galvanized screws
The result: the fasteners will not corrode, so there will be no rust stains on the skin.
A common mistake: using non-galvanized screws and nails.
Galvanized self-tapping screws with press washer
If you do not pay attention to what screws are used to install the siding, then after a while you may get an unpleasant surprise. Self-tapping screws that are not galvanized will rust, and rust will ruin the appearance of the facade. Unsightly stains will appear on the PVC plates. To prevent this from happening, make sure that the panels are fastened with galvanized screws.
Reviews about the procedure
I was faced with a problem like acne and tried a lot of medications, which, unfortunately, turned out to be ineffective, but autohemotherapy helped me a lot, and the effect was obvious!
Natalia Ivanova
I have long struggled with disorders of the immune reactivity of my body, and one of the treatments that helped me was the method of autohemotherapy. I would never have thought that this method was effective.
Peter Kulchytsky
The problem of acne began to bother me since adolescence, and at the age of 23 I could not deal with it. Luckily, I came across this method and it helped me a lot. Anastasia Uvarova