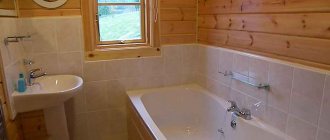
Polyvinyl chloride panels are a practical, lightweight and inexpensive material for indoor wall cladding. A large number of decor options, as well as ease of installation, made them a popular solution for renovation. Due to their resistance to humidity and temperature changes, it is permissible to install them in bathrooms, showers and swimming pools. And due to their low mass, they can be attached directly. How to attach PVC panels to the wall in the bathroom.
Installation methods
Methods for installing wall and ceiling plastic panels
Plastic can be installed on bathroom walls in two ways. The selection criteria are the level of humidity and the presence or absence of defects on the ceiling and walls.
- With the frameless method, PVC sheets are attached directly to the ceiling;
- If it is not possible to level the surface, a base frame is first erected for installation. The material can be wooden beams, metal or plastic slats.
Cladding with lathing
Installation of the base for the wall slab is required at high relative humidity levels, or if there are a large number of irregularities. Also, the frame is used when it is necessary to install additional lighting, or insulation or soundproofing composition. The base is made of durable profiles.
PVC lathing
On glue without frame sheathing
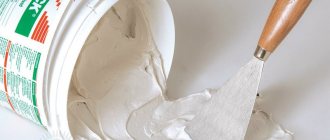
It is permissible to install with liquid nails or adhesive only if there are no uneven walls. In this case, it is undesirable to allow high levels of humidity. The mixture is applied with a notched trowel or a specialized gun. In the latter case, it is advisable to apply the glue in lines or serpentine.
Installation without sheathing
When using the frameless method, construction costs are lower. However, you will need to purchase liquid nails. It is also not possible to mount the lamps on the ceiling.
Installation methods
Wall covering with plastic panels is done in several ways. Step-by-step instructions will help you learn the intricacies of the installation process.
Frameless
When using this method, the panels are fixed to the surface with glue. The method is suitable for cladding smooth walls. Therefore, the base is pre-plastered. The corners need to be treated especially carefully. They should not have unevenness or concrete burrs. Plasterboard walls do not require preliminary preparation.
Fastening panels with glue.
Frame
Installing a metal frame allows you to align the slats regardless of the condition of the wall. Bathroom renovation is done like this:
- The locations of the guides are marked on the surface. The distance between them is no more than 0.5 m.
- The hangers are secured with dowels. If the drill hits the reinforcement while forming holes in concrete, the work is stopped. Damage to metal elements negatively affects the load-bearing capacity of a reinforced concrete structure. The hole is shifted, this does not impair the quality of the sheathing.
- Bearing profiles are cut. You need to calculate their number in advance.
- Install load-bearing elements. They are given a vertical position based on the holes in the hangers. For precise installation of the sheathing, the guides can be bent. The load-bearing characteristics of the frame do not deteriorate from this. Profiles and hangers are fastened with self-tapping screws.
- Finishing material is placed. The elements are fixed with self-tapping screws and press washers.
On the walls with glue
Neoprene glue is used to attach the finishing material. The inorganic base of the composition is resistant to moisture. The use of universal types of glue is allowed. Before gluing the lamellas, mark the wall. Glue is most often applied to plastic, but sometimes additional treatment of the walls is required. Having lubricated the part with the composition, it is inserted into the profile, shifted and pressed. The work is completed by sealing the joints and installing additional elements. You can see how to install the panels yourself in the video.
Attaching the sheathing.
Attaching the sheathing, or frame, onto which we will subsequently attach PVC sheets, is the most labor-intensive process. The success of further work depends on the correctness of its implementation. Frame profiles can be selected from either wood or metal.
Many craftsmen recommend using wooden profiles; they live long enough, and they will certainly last you a lifetime, while metal ones can last hundreds of years, but are they needed? Believe me, we need it. It is better to use metal profiles, even though they are more expensive, since in the future you will never have problems with the possible appearance of rot under the panels, which then causes a lot of problems. Moreover, such metal frames can be used in the future if any PVC panel cracks or becomes unusable.
Why do you need a frame if you can mount the panels on the wall? The fact is that the frame is an excellent opportunity to soundproof the walls, since inside the frame you can put mineral wool or any other soundproofing material. In addition, only perfectly flat walls are suitable for attaching panels, or a perfectly flat frame, so most craftsmen do not spend money on leveling the wall, but immediately work with the frame.
How to replace drywall. Alternative to drywall
So, drywall can be replaced:
Chipboard or chipboard - this material is perfect for the construction of interior partitions and finishing work; the material is easy to process and is perfect as an alternative to drywall. Its advantage also lies in the fact that it is quite cheap, easy to install and is distinguished by its durability.
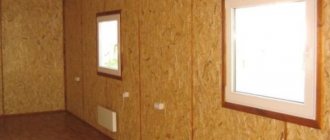
Chipboard can also be replaced by OSB or MDF - boards that have similar properties, but it must be remembered that they have good susceptibility to moisture (therefore this material cannot be used in bathrooms), and the boards will require a well-prepared surface before installation.
Analogue to moisture-resistant drywall
LSU or glass-magnesite sheets are an excellent analogue to moisture-resistant plasterboard, since such sheets line walls well and are suitable for creating partitions. Perfect for wallpapering, painting, tiling, etc.
This material is also quite easy to install, and most importantly, it is not afraid of water, fire and frost, is quite environmentally friendly and durable. Disadvantages include possible thermal expansion.
GGP or tongue-and-groove slabs are very similar in structure to plasterboard, making them its most common substitute. They can be full-bodied or hollow. Their positive characteristics include strength and reliability, quick assembly due to the presence of special grooves, the ability to retain heat and not let sounds through.
It is thanks to these qualities that PGP is recognized as the best material, as an analogue of drywall, capable of completely replacing drywall. True, such plates have a small drawback. They are too sensitive to high humidity.
However, there are two types of GWP - regular and with enhanced moisture resistance.
Thus, it is clear that the question of how to replace drywall is quite realistic, and to solve it there are many different building materials. There are materials with very similar properties and even more improved characteristics than gypsum plasterboard.
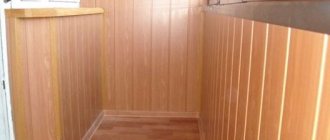
Wooden lining for exterior use
Preparation and calculation
Before starting repairs, preparatory measures will be required. This stage should be approached responsibly, since the service life of the plastic panels depends on the preparation. Before installing wall and ceiling products yourself, you will need to prepare the base.
The process consists of the following steps:
- All dust deposits and dirt must be removed from the base. The seams are thoroughly cleaned using a spatula or other tools. Then the base will need to be treated with antifungal and bactericidal mixtures. The entire surface needs to be treated.
- You will also need to apply the mixture to the seams and corners. Due to such actions, the profile and the wall will not be subject to the formation of various types of fungi. After treatment, you need to allow the surface to dry. Excess moisture on the walls and ceiling is not allowed.
- To ensure that cladding with plastic panels is not accompanied by difficulties, you should cut the material before work and measure plumbing fixtures in order to calculate the required dimensions of the products. Accurate calculations are necessary for the economy option, when there is no extra money to purchase additional materials.
Before installation, you will need to clarify how much finishing material you need to purchase. To do this, you need to know the area of the walls and the dimensions of the panels. The surface area is calculated simply by multiplying the height and width of the walls. The cladding material is offered by manufacturers in standard sizes, according to which the width is 0.25 meters and the length is 3 meters. For example, if the bathroom is 2 meters wide, then only 8 panels are needed for the cladding.
Design ideas
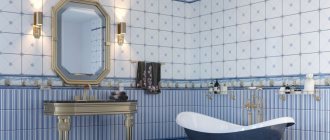
In this section we will look at the various possibilities for decorating a bathroom with PVC panels. It is worth noting that the choice of light colors will significantly increase the space at the visual level. If you lay the lamellas on the walls vertically, the room will appear taller, and if horizontally, it will appear wider. The beauty of decorating bathroom walls with plastic panels will be successfully emphasized by a mirror or slatted ceiling, creating the effect of a stylish environment.
Plastic panels with a pattern
A monochromatic bathroom design may seem boring, especially when the room is quite spacious. In this case, drawings will come to the rescue, adding variety to a boring environment and taking part in zoning. The design on the panel can be applied with paints or using the modern photo printing method. You can use paintings to decorate the wall above the font, sink, or create real masterpieces called murals.
Pasting with film and stickers
Another way to add variety to the interior of the bathroom is to cover the plastic panels with a picture-film or use vinyl stickers, which can be purchased on sale or made to order. Decorating the walls in this way is quite simple - you can do it yourself without involving specialists. The correct choice of a suitable design will support the overall design style. If you want to change the design concept, the pasted images can be easily removed from the surface and new ones can be applied.
Color combination
If the images on the panels are not included in the design scenario, the emptiness of the interior can be diluted with a combination of different colors and shades of the panels. This method is good both for decorating a space and for zoning it.
It is important to combine palettes correctly here. For example, the blue color harmonizes perfectly with white, black and its own shades - this design is ideal for a Mediterranean style or a Provence bathroom
Beige and brown are combined with a yellow and sand palette - these colors are often used to decorate classic interiors. Red shades themselves are quite contrasting - it is better to dilute them with white or cream elements. Gray metallic finish is characteristic of modern minimalism and high-tech style. A wonderful tandem will be obtained in a combination of gray with white and black. The green color of the panels in the bathroom will evoke reminders of nature and will merge in the ensemble with a brown and golden palette.
Imitation of wood and decorative stone
Panels designed to resemble wood will be an excellent option for decorating a rustic-style bathroom. The overall picture can be complemented by rough wooden furniture, combined with cotton curtains with floral patterns. PVC panels with imitation bamboo will perfectly fit into the ethnic style.
Imitation of decorative stone is typical for luxurious interiors. The pattern can imitate various types of natural stones: malachite, marble, topaz and others, while having a smooth or embossed surface. This design is often used for classic-style bathrooms.
Tile panels
Those who remain committed to the aesthetic beauty of tiled finishing can opt for panels that imitate it. The choice of such material is quite large, and the cost is much less. Today you can choose a wide variety of PVC fabrics for the bathroom, including those with patterns and prints. Imitation mosaic masonry is perfect for a Mediterranean style or oriental theme.
Glass and metal decor
The combination of simple plastic panels with decorative elements made of chromed metal and mirror surfaces is inherent in modern minimalism. There is no need to rack your brains over the choice of parts - the role of metal will be successfully performed by plumbing fixtures (faucets, hoses, taps, etc.), selected to match the style, and mirrors themselves are an integral part of any bathroom.
How to calculate the number of panels and additional elements
Working with PVC panels in the bathroom begins with calculating their number and additional components. We take into account the specifics of this room: different transitions, an abundance of corners, etc. The more there are, the more unused waste is generated, especially when working with panels with decorative images or asymmetrical patterns.
For other models, we increase their number by 15% of the working surface area.
For an accurate calculation, we take measurements of the total length:
- external and internal corners,
- ceiling and floor plinths.
Solving dilemmas with profiles:
- How much starting product will be needed?
- Will a linking view be needed?
- What components will be used to finish the corners: simple or complex?
Advice
If you have experience working with similar panels, use simple corners; if you don’t have the skills, use complex options. They hide cutting imperfections or sizing errors.
When calculating the slats and mounting strips, we take into account the required distance between them - a maximum of 50 cm. We fasten them in areas where the floor and the flow meet, bringing them as close as possible to all corners and openings. We place the slats here regardless of the positions of the final row.
It is never possible to carefully calculate clamps or screws. We immediately purchase them in large quantities.
Where to start repairs
It is best to decide before the renovation where the communications will go, after which they will disappear under the panels and it will be much more difficult to carry out any work. It is also necessary to take care of expanding the bathroom; the sheathing along with the panels hides part of the space. How to prepare a bathroom for finishing with plastic panels with your own hands can be seen in the training video.
Expansion of space
Where to start with DIY paneling using PVC panels for the bathroom? Before starting repairs, it is recommended to remove the old layer of plaster from the walls. This will not add extra centimeters, but will allow you to equalize the ratio of the thickness of the walls - the panels together with the sheathing will take up about the same amount of space as plaster together with the old finish.
Space savings depend on the thickness of the plaster layer. Taking into account one wall, this seems like too little of an achievement, but when moved to the entire area of the bathroom, there may be enough free space for a narrow cabinet or hanging shelf. Considering the dimensions of the premises in houses built during the Soviet period, even a few extra centimeters are important.
In Khrushchev-era buildings, the plaster is often made from sand and lime, so removing it from the walls will be quite easy. Dust will become a much bigger problem during the repair process, but you can save yourself from it by using a respirator and safety glasses during your work. In order not to stain the bathtub, it is better to cover it with film.
Pipe replacement
Before installing plastic panels in the bathroom, it is better to completely replace the old pipes. Why is this needed:
- An old, rusty pipeline can leak at any time. If the pipes are hidden behind the panels, in the event of an accident it will be more difficult to fix the problem; you will have to dismantle part of the wall, and this takes time, effort and money.
- It is better to replace the old ones with plastic or metal-plastic pipes. They don't rust.
- Since old pipes are already at least a few centimeters away from the walls, the thickness of the sheathing for plastic panels will be greater. As a result, the bathroom area will be noticeably reduced, which is unlikely to have a positive effect on comfort.
In addition, new pipes will last much longer than old ones, and modern materials are more wear-resistant.
Wiring
Modern bathrooms cannot do without sockets; they are necessary for a washing machine, shower stalls with electronic filling, hair dryer, electric razor, etc. Switches will also be required, especially if there are several levels of lighting. Therefore, even before covering the bathroom with plastic panels, you need to determine exactly where the wires will come out.
But the process of installing sockets and switches in PVC plates is no different from the same on drywall. To better understand how to install wiring under plastic panels in the bathroom and install everything you need during renovation, you can watch the video with instructions.
https://youtube.com/watch?v=yKRbGKGd74c
Step-by-step instructions for attaching bathroom panels with your own hands
If you have decided to carry out a long-planned renovation of a toilet or bathroom, then you, of course, know that the work of professionals will be quite expensive. Therefore, many people opt for DIY repairs. Having a great desire and financial capabilities, you can choose the option with plastic panels. In addition, the installation of PVC panels in the bathroom can be done by a person who has never encountered repair work. Especially if you know how to attach the panels in the bathroom with your own hands step by step and what is needed for this.
Preparatory stage
Experts recommend starting repairs by preparing the surface where the frame or plastic materials will be attached. This primarily applies to old plaster, which can slightly expand the space between the wall and the panel. In addition, with a frameless fastening method, the walls will need to be treated with plaster to eliminate possible unevenness, and if the presence of small depressions is not prohibited, then large bulges are unacceptable.
With any method of do-it-yourself fastening, the walls must be treated with special solutions with an antifungal effect.
The better the walls of the room are treated, the less likely it is that fungus or mold will form on them. Therefore, you should not save on them; it is better if you go to a hardware store to purchase them.
If the bathroom has not been renovated for a long time, then right now you need to start replacing metal communication pipes. If your renovation involves replacing or installing sockets in the bathroom, then before attaching the material, take care of supplying electricity to them.
Before installing panels in the bathroom, you will first need to get rid of the old plaster. It is better to replace metal pipes in the bathroom with plastic ones
All detected defects are repaired with putty.
Methods for installing panels in the bathroom and types of frames
Plastic panels can be installed with your own hands using two fastening methods:
- frame;
- frameless.
To make it easier to figure out which fastening method to give preference to, here are a few differences between the two fastening methods:
- the metal frame takes up quite a lot of useful space, which is so critical for a toilet or bathroom;
- the metal frame consists of separate profiles, so the installed plastic has voids underneath that are easy to push through;
- in the case of the frame fastening method, there will be a void between the wall and the plastic in which various microorganisms will develop;
- to make a frame for plastic panels, you will need to purchase metal profiles and various fasteners, while for the frameless method, you will only need glue and liquid nails.
The most common methods of fastening plastic panels
Panel mounting options
Tools and materials
For frame cladding you will need:
- bathroom cladding panels;
- guide rails for sheathing;
- finishing profiles made of plastic;
- plastic corners;
- ceiling and floor plinth for the bathroom;
- hacksaw;
- self-tapping screws;
- dowels;
- perforator;
- Phillips screwdriver or screwdriver.
Tools for installing PVC panels
For cladding using a frameless method you need to prepare:
- glue for PVC panels in the bathroom;
- facing panels;
- ceiling and floor plinth;
- standard set of tools.
Variety of colors and patterns of PVC panels Types of moldings and corners for plastic lining
Installation of panels using the frameless method, step by step
If you decide to do the tiling of a toilet or bathroom with your own hands using a frameless fastening method, in addition to preparing liquid nails with glue, you need to do some preparatory work. The most important point when performing this work is preparing the foundation.
In this case, we are not talking about a perfectly flat wall surface; differences of up to 3 mm are allowed. There should be no hills at all, but shallow depressions are allowed. To correct visible defects in the wall, it is plastered or puttied.
The next important point in the frameless fastening method is working with the corners of the room. Most city apartments have slightly rounded corners; in the case of plastic, such corners will create additional difficulties when installing panels. To correct these shortcomings, you can use a hammer drill and make the corners more expressive.
This is interesting: Is it possible to install a suspended ceiling in the bathroom: pros and cons
All that remains is to prime the surfaces of the walls and you can begin to attach the panels. For these works you will need to stock up on liquid nail glue. Having calculated the area of the toilet and bathroom, calculate how much liquid nail glue you will need if its consumption, on average, is 1 bottle per 5 sq. m.
Having prepared the panel of the required size, you need to apply liquid nails to it pointwise, placing the glue areas in a checkerboard pattern. Liquid nails are not applied close to the edges, since when the panel is applied to the wall, excess glue will come out, smearing the front side of the coating.
We fasten with liquid nails in tubes. Glue must be applied to the PVC panel
The smeared side of the panel is applied to the wall and pressed with the palm over the entire area. Then the material is torn off the wall and the liquid nail glue is allowed to dry for about 5-7 minutes. After 5-7 minutes, the strip is returned to the wall and pressed over the entire surface. This installation technology is not an invention of builders, but the specifics of working with liquid nails glue. If you ignore this technology, the installed panels can easily move and the installation process will be disrupted.
Particular attention in this work is paid to fastening the first panel. To do this correctly, you need to use a level. And in order to avoid shifting of the strip while laying the remaining strips, dowels or screws are driven in at the bottom and top. In the finished version, their installation sites will not be visible, since they are usually covered with ceiling and floor plinths.
Fastening panels with glue directly to the walls without using lathing
Don't forget about starting strips and corner joints. It is recommended to install them in those places where they are really needed. If the toilet or bathroom room is equipped with a floor plinth, then there is no need to think about the starting profile.
The plinth well reinforces the fastening of the panel at the bottom, and the frame strengthens the ceiling at the top, so it is not recommended to start repairs with cladding elements from the ceiling.
Installation by frame method
You can mount plastic panels with your own hands using a frame method. The work begins with the installation of horizontal plastic guide rails along the entire perimeter of the wall. To do this, you need to apply markings on the walls to install metal profiles. Using a hammer drill, drill holes in the places on the markings, hammer in dowels there and, placing the guides against the wall, attach them using self-tapping screws.
Metal hangers for lathing
Materials for mounting a metal frame
At the same time, it is not recommended to use wooden panels, since ideal joints cannot be achieved, which will lead to the destruction of the wooden frame due to constant humidity. The frequency of horizontal slats depends on how strong you want to make the cladding, but in general, it is customary to use the following distances:
- when facing the ceiling - 30-40 cm;
- when facing walls - 40-50 cm.
In this case, the distance of the first and last slats from the floor surface should be about 5-7 cm. And the end parts of the profiles should fit exactly into the corners of the room. The slats of the future frame must be attached perpendicular to the panels being installed. In most cases, the panels are placed vertically, which means that the slats should be perpendicular to them and parallel to the floor. The vertical arrangement of the panels not only visually increases the height of the ceilings, but also better removes accumulated moisture, since drops of water will flow down, and with horizontally installed panels, water will linger on them.
Stages of installation using the frame method
Having completed the frame, you can start attaching the panels, but how to do this correctly? The panels must be mounted on the frame using self-tapping screws, which can be easily screwed into them. In this case, you need to start from the corner farthest from the front door. To avoid moisture getting between the panels, it is recommended to seal their joints with sealant.
In order for the panels to fit beautifully in the corners of the room, it is necessary to use a device such as an external and internal profile, which in appearance resembles the English letter L. You can use a plinth at the junction with the floor, then an additional profile will not be required.
Ready metal frame
Having installed the side profile, one panel is inserted into it and secured to the frame rail. The remaining panels are inserted into the gaps of the previous one, very tightly. If you have provided an outlet on the wall of the toilet or bathroom, then you need to cut a suitable hole on the panel to be installed and install it to the wall.
To give the room a more complete look, after installing the panels, attach floor and ceiling skirting boards; in addition to the aesthetic function, they will also perform a practical one, hiding minor defects.
Insulation is placed under the panels
The frame slats should be mounted perpendicular to the location of the plastic panels
Expert advice
To make the work go quickly, you should listen to the advice of experts:
- if the toilet or bathroom is small in size, then it is recommended to carry out renovations with cladding in light colors in order to visually increase its area;
- If you want the renovation of your toilet or bathroom to look spectacular and unique, use panels of various sizes or colors for cladding. For decoration, you can take panels with drawings, but the main thing here is to fit them together harmoniously;
- before you start tiling the room with your own hands, take the purchased panels into the bathroom and leave them there for about an hour to avoid their deformation;
- you need to fasten the material from the farthest corner from the front door, in this case you can complete the most visible places without errors or flaws;
- Before making repairs yourself, look at all problem areas where pipes or plumbing are located, this will help you install the frame and plastic panels faster. For the frame, we usually make markings, observing the horizontal and vertical lines along which you will attach the sheathing;
- To disguise water and drain pipes in the toilet, it is recommended to make a fake panel, which will only improve the interior design.
Sources
https://sovety-vannoy.ru/delaem-remont/steny/otdelka-vannoj-pvh-panelyami.html https://bezremont.ru/vannaya-komnata/otdelka-vannoj-komnaty-plastikovymi-panelyami-svoimi-rukami -po-etapno https://vannayasovety.ru/nastennaya-otdelka/paneli-v-vannoj-svoimi-rukami.html
Beautiful examples in the interior
- The finishing with wall panels harmonizes perfectly with the slatted ceiling, which has built-in LED lights with the ability to change the lighting angle. In this case, the design of some sections of the walls may include multi-colored glass and mirror components in the form of inserts into a pattern or pattern. In this case, the angle of inclination of the light beam can be directed into such inserts, achieving certain lighting effects, for example, a waterfall effect.
- The combination of wall panel cladding and plaster stylized as wood or stone, as well as with glass panels, looks very original.
To learn how to install wall panels for bathrooms, see the following video.
Assortment for gypsum boards
There are several types of adhesive compositions that are used for gluing plasterboard sheets (GKL) to walls:
- "Ceresit SM 11" is an adhesive for tiles, but is also suitable for gluing plasterboard sheets.
- Perflix is perfect for gluing drywall to brick walls. A simple and relatively cheap version of the adhesive composition that can be used at home.
- “Fugenfüller” - in the form of putty, which must be diluted with water, requires manual mixing, the applied layer must be thin.
- Silicone glue will glue ceramic tiles or mirror surfaces with gypsum plasterboard well.
- "Knauf Fugen" (putty) is suitable for gluing sheets to smooth wall surfaces. The mixture is plastic due to the polymer additives included in its composition. Must be applied in a thin layer.
- Foam adhesive for drywall or assembly adhesive is convenient, easy to use, and inexpensive. Ideal for home use, for this reason this composition is most often recommended for gluing plasterboard sheets to the wall.
Finishing the bathroom with plastic
Plastic of various colors is affordable for every consumer, so when wanting to update the design of a bathroom and comparing the prices of different finishing materials, it is usually preferred. When deciding how to cover a bathroom with plastic panels, you should first take care of purchasing the necessary tools and, of course, materials. To qualitatively transform a bathtub, you will need, in addition to answering the question of how to panel a bathtub, the following material components:
- the plastic panels themselves;
- corners and baseboards made of plastic;
- wooden slats, metal or plastic profile;
- glue, clamps or screws;
- screwdriver;
- building level;
- drill or hammer drill;
- dowel-nails;
- hacksaw;
- sealant for reliable protection of joints.
When deciding how to panel a bathroom, you must immediately determine the method of fastening - with self-tapping screws, clamps or glue. A lot will depend on this. Each option has its own characteristics:
Adhesive fitting of the panels will lead to difficulties in the future if they need to be dismantled during repairs. Also, this option can only be used with smooth walls.
- Having chosen self-tapping screws, you should understand how to finish the bathroom with panels and that it will take time to tighten them. You can't do without a screwdriver here. It is better to use wooden slats for the frame, having previously treated them with an antiseptic.
- You can fasten with clamps. This is the name given to special brackets that wedge into the frame and securely hold the panels.
Selection of plastic panels
Bathrooms and bathrooms are characterized by excess humidity, noticeable temperature changes, as well as the formation of significant amounts of steam, so the selected plastic panels must have the following set of qualities:
- finishing elements must have smooth edges, facilitating their high-quality and very reliable connection to each other;
- a significant number of stiffeners allows you to extend the service life of the finished cladding, and is also responsible for the stability of the finishing material;
- manufactured in full compliance with the technology, the elements have uniform coloring on the front side and a complete absence of defects on the panel surface;
- Plastic panels made from low-quality recycled materials are distinguished by the presence of stains or noticeable irregularities on the reverse side.
The cladding of walls and ceiling surfaces in the bathroom can be made of different types of finishing plastic panels.
It should be noted that high-quality plastic finishing panels that have a manufacturer’s warranty cannot be too cheap.
Moisture-resistant plasterboard for tiles in the bathroom: finishing nuances
GVL, which is suitable for laying tiles in the bathroom, is not difficult to distinguish from other brands of drywall. When sold, drywall sheets are green or blue. Sometimes manufacturers may label this product in a different way.
Using moisture-resistant plasterboard, you can level the walls in the bathroom for laying tiles
Moisture-resistant plasterboard in the bathroom under the tiles fits perfectly. Other building materials can also be laid on it, and a ceiling can also be made from it. But for the ceiling it is better to use ceiling moisture-resistant plasterboard.
The plasterboard sheet is based on the building material gypsum, which is very sensitive to moisture, but due to the fact that the plasterboard sheet is impregnated with a special composition that repels moisture, the sheet is not afraid of moisture. However, if the plasterboard wall covering is done incorrectly, your walls may collapse.
Nuances that affect the quality and durability of a plasterboard wall:
- The tile must be perfect. Elements with chips, cracks and uneven edges cannot be laid on the wall.
- The tile should be marked on the back side, by which one can judge its purpose. If there are no markings, then the tiles are not of high quality and it is dangerous to lay them.
- The pattern on the tile should be of the same type, clear and not blurry. A faded and blurry pattern indicates the disgusting quality of the product.
- Tap the tile with a hard object. High-quality tiles should produce a ringing, distinct sound. If the knock sounds dull, it means the quality of the product is low.
- Choose only high-quality glue for laying tiles on drywall. When finished, it should look like sour cream. Failure to seal the space under the tiles will entail repairs to the entire wall.
- Don't lay tiles in one day. The maximum number is 5 rows, after which you must wait at least an hour before you begin laying the next 5 rows. This way the bottom rows do not deform under load.
A day after laying, the tile seams must be treated with a high-quality fugue. This will protect your wall from moisture penetration.
Ceiling methods
There are several ways to properly sew a ceiling with plastic.
Installation of panels on a rough ceiling
The rough ceiling does not require special preparation. The finishing elements are laid as follows:
- Treat the surface.
- Antiseptic compounds are applied to the base and left until dry.
- It is recommended to install a waterproofing material, such as polyethylene film.
- The joints are taped.
Measure the distances between walls located opposite each other. The skirting boards are cut so that when two parts are combined, an angle of 45° is formed. It is not recommended to fasten the part with self-tapping screws. When installed on an uneven surface, the additional element will sag.
- Panels are cut. The element fits into the plinth by 2 cm. Having measured the distance between the walls, add 1.5 cm to the resulting value. The remaining 0.5 cm makes installation easier.
- Re-measure the ceiling. If there are minor errors, they are eliminated by changing the size of the gaps between the lamellas. It is recommended to align the panels in hidden places. Open areas must have smooth joints.
- The end of the lamella is inserted into one plinth. The element is slightly bent and the second end is inserted into the opposite profile. The long side is inserted into the third plinth.
- Pressing the lamellas tightly against each other, they are fixed with staples. The more tightly the elements are installed, the stronger the connections will be. When fixing on an uneven ceiling, pieces of plastic are placed under the end of the panel. This will help prevent cracks from appearing.
- After installing the entire elements, measure the width of the uncovered part of the ceiling. Taking into account the obtained value, the material is cut using the previously selected method.
- The lamella is inserted into 2 skirting boards. One edge is connected into a lock, the second is secured separately. The element is fixed with liquid nails or self-tapping screws.
- The fourth plinth is removed from the base part. The remaining part is treated with glue and installed on the wall.
Installation of panels to the ceiling on a metal frame
This method is used when finishing an uneven ceiling yourself. The work is carried out as follows:
- Mark the installation locations of the supporting profiles. The parts are placed in increments of 0.5 m. If there are pronounced irregularities, hangers are used. They are mounted in the same way as on the walls.
- 3 skirting boards are glued using liquid nails. If there are no right angles, the cuts will have to be adjusted. The plinth is attached both to the wall and to the metal frame. After applying the plastic element, it is removed for 2-3 minutes. After reinstallation, the correct position is checked with a level. The corners are sealed with sealant.
- The ends of the lamellas are inserted into the baseboards. The finishing material is laid along the long side of the ceiling. This reduces the number of cuts and waste. The plastic sheathing is attached to the profiles with self-tapping screws.
Equipment and additional elements
PVC panels in the bathroom are installed normally if they are fully equipped. It should contain the following components:
- Corner 1: universal. Externally, it is a plate bent at a right angle. Used in finishing external and internal corners.
- Skirting for floor and ceiling. We partially place it under the panels. The outer part masks surface defects.
- Corner 2: external. The width of the inner part is greater than the width of the outer part. Hides uneven areas of the outer corner well.
- Corner 3: internal. We place its wide side under the slats. And the narrow one on the outside hides uneven places in the inner corners.
- Profile 1: connecting. Thanks to it, we make a lockless connection between the panels. This is true when their length is not enough for finishing work.
- Profile 2: initial and finishing. We install at the beginning and at the end.
- Profile 3: F-shaped. We put it in the junction areas, we can use it as a platband.
- Mounting sheathing strip. This load-bearing frame component. Its material: plastic or metal profile.
- Klyammer. A metal element that presses the panel to the bar. Thanks to it, we dismantle products without compromising factory characteristics.
Depending on the method of fixing the panels, you must have:
- self-tapping screws with a press washer,
- staples,
- stapler,
- liquid nails.
The scheme for using the components is as follows:
What tools will you need for the job?
Any man has an idea of how to cover a bathroom with plastic coating, and also knows what tools may be needed for finishing work. The list of necessary tools includes:
- plastic panels;
- drill;
- screwdriver, screws and dowels;
- hacksaw;
- pencil, triangle, tape measure;
- ceiling plinth;
- plastic moldings;
- glue, sealant.
The required volume of materials is calculated taking into account the total area of the room and its individual configuration. All other tools should be prepared in advance and checked for functionality.
How to choose the right one
There are several important rules that will help you buy PVC panels for the bathroom:
For high strength of the material, it is necessary to select panels with a large number of jumpers. The more stiffening ribs, the less possibility of the panel breaking. And be sure to check each individual part for defects.
Try to connect the two parts; there should be no gaps between them in the locking system.
If the tile does not correspond to the size stated on it, you should think about whether to buy this product. It is possible that all products will not be of adequate quality and other difficulties may be encountered during the installation process.
Basic recommendations
- For a small bathroom, it is appropriate to choose light shades, thus increasing the visual volume of the room;
- An interesting solution is the arrangement of plastic panels of different sizes and designs. For example, you can combine contrasting tones;
- The wooden texture will allow you to decorate the room in an ethno style;
- You should not combine polyvinyl chloride cladding with expensive materials, such as marble. In this case, the interior will turn out tasteless;
- If desired, you can choose plastic panels for tiles. Thus, the decoration of the bathroom can be done in a classic or neoclassical version - with columns, friezes and borders;
- Photo printing allows you to create an individual design, thanks to modern paint application technologies;
- Sheathed walls go well with slatted ceilings.
Dimensions
If the room has a non-standard height or layout, you need to pay special attention to these parameters. The length of the panels is usually 2.5–3 m
If you need to cover only the upper or lower part of the wall with them, you can select the elements so that a minimum of waste remains when cutting. The thickness of the products is usually 5–12 mm, and the width ranges from 100 to 500 mm. For a bathroom, it is better to choose the widest ones: the fewer joints, the less likely it is that moisture will accumulate in the seams. But if the room is small or has a non-standard shape, in order to save money, it is more advisable to choose narrow stripes. Calculating their number is simple: the length of each wall must be divided by the width of the selected panel. It is better to consider the element to be cut as a whole, without planning to use the remaining part elsewhere.
Useful tips
Sometimes it’s not enough to watch video tutorials on decorating a bathroom with plastic panels. There are a number of nuances that should be observed to ensure that the result of the repair is pleasing to the eye. Here are some simple tips:
- To diversify the cladding, use slabs of different widths. You can also alternate plain and patterned panels or select several colors for decoration at once.
- Fingerprints and water splashes are more noticeable on gloss.
- You should not install panels that have just been brought from the store. They should lie in the bathroom for at least an hour to gradually get used to the new conditions. If you rush, the repair you just made will be ruined due to deformation of the skin.
- The cladding should start from the most visible corner, then you won’t have to cut the plates, and the finish will look most attractive.
- In corners, protrusions, niches, etc., the most careful measurements and high-quality markings are required; in these places it is necessary to correctly cut the panels to the nearest millimeter to avoid unsightly gaps.
- If the water meter is installed in the bathroom, it should always be freely accessible. Therefore, in this area it is worth using a false panel to match the finish.
And of course, you should take the selection of material for the frame seriously and choose colors and textures wisely.
Covering bathroom walls with plastic panels is done relatively quickly; preparatory work and lathing take much more time. The principle of fastening such slabs differs little from plasterboard, however, PVC does not require further decoration.
Why choose PVC panels for the bathroom?
There are many reasons why PVC panels are preferred over other types of bathroom finishing (and above all traditional ceramic tiles).
This includes a lower price of the material, and the ability to perform work in a short time and even without special preparation of the base in the form of a plaster layer.
In some cases, this cladding option can even be considered temporary, for example, in new houses in which the shrinkage process continues. But, whatever the reasons, this material has undeniable advantages, including:
- relatively low cost of material;
- ease of installation work, which even a novice builder can handle;
- beautiful appearance that lasts throughout the entire service life, ranging from 5 to 10-15 years;
- decorative variety: you can choose panels of almost any color, with or without a pattern, with imitation of natural and artificial materials;
- Finishing a bathroom with PVC panels is considered a hygienic type of cladding, due to the fact that they are easy to care for. In addition, they are inert to many chemicals, which makes cleaning easier. But it is not recommended to use compositions containing abrasives that create an attractive environment for the appearance of fungi and other microorganisms;
- this type of cladding has high moisture resistance;
- able to withstand changes in temperature and humidity, including exposure to hot water and steam;
- are an additional heat and sound insulation layer, in some cases it is even possible to use moisture-resistant insulation;
- the panels are not flammable (at least, only fire-resistant products should be chosen for finishing the house).
When choosing PVC panels for cladding a bathroom, you need to pay attention to the possibility of a hidden method of installing all the necessary communications, while, if necessary, they are provided with free access for repair work or inspection.
In addition, the requirements for the condition of the wall surface are quite low: the walls do not require special leveling or plastering; it is only sufficient to eliminate significant defects, such as cracks and crumbling surfaces.
Pros and cons of using plastic panels
The main advantage of plastic, in addition to its low cost, is practicality:
- The material is moisture-resistant and does not become stained if drops of water fall on it.
- High-quality plastic does not absorb or emit odors.
- The panels are undemanding in maintenance.
- Repairs in a bathroom with PVC panels are carried out literally in a day, after which the room can be used immediately.
- The installation features of plastic wall structures make it possible to hide utility lines behind them.
- Plastic has a variety of designs and looks impressive in modern-style interiors; it is suitable for the design of a small bathroom.
The disadvantages include:
- Fragility. A strong blow or impact with a sharp object threatens the appearance of cracks or through holes, and when pressed with a finger, dents are easily formed.
- PVC products can hardly be called environmentally friendly, although high-quality plastic does not emit toxins.
- Condensation is inevitable if you use plastic panels in the bathroom. Good ventilation is necessary to prevent mold from appearing on the walls.
How to choose high-quality PVC panels
The first thing you should pay attention to when buying plastic panels is their price. Products that are truly strong, durable and do not pose a health hazard cannot be cheap.
The panels must be smooth - without waves or bends, with intact, undamaged edges, otherwise a perfect joint will not work and water will seep into the cracks. It’s not hard to guess what this means in the bathroom.
Products with good strength characteristics should have a thickness of 1 cm or more, as well as the maximum number of stiffeners.
To make the bathroom decoration with plastic panels pleasing to the eye, you also need to evaluate the design of the material. The profiles must be from the same batch, otherwise some copies will differ in color or pattern.
For a small room, it is better to choose light panels without relief or texture. Glossy types of plastic are preferable to matte ones.
When decorating a spacious bathroom with PVC panels, plastic profiles with a pattern or ornament are suitable.
Three ways to install plastic panels
Plastic finishing of a bathroom can be done in three ways:
Fastening to the sheathing. In this case, the panels are fixed to a wooden or metal frame using a stapler or ordinary nails. A convenient option that allows you to hide uneven walls and water pipes, which are sewn into a separate box. Bathroom design benefits significantly from the absence of visible communications.
Fastening with mounting clamps. In this case, the panels are “fastened” to the sheathing of plastic slats with special “locks”, which significantly speed up installation. It is also much easier to disassemble such a structure if necessary. The use of a frame when decorating a bathroom with PVC panels is justified if the room has a large area. A few extra centimeters “eaten up” by the overhead strips will not be noticeable.
Glue method. The panels are attached directly to the wall using liquid nails, and are additionally secured with dowels along the top and bottom edges. Other types of adhesive solutions are also used. The instructions usually indicate whether a particular mixture is suitable for plastic. The gluing method is energy-intensive, but quite justified when it comes to small spaces.
Preparatory work
The quality of the entire installation of plastic panels depends on the correct implementation of the preparatory stage. Preparation of the surface of the walls and ceiling depends on the installation method:
- With adhesive technology, a special requirement is placed on surface leveling. First, all previous coatings are removed. Then, it is necessary to putty all obvious defects (dents, cracks, etc.). The next stage is plastering. It is applied to level the surface, and it is necessary to ensure not only a flat plane, but also to remove deviations from the vertical and horizontal. Finally, improved adhesion of the adhesive composition is ensured. For this, a deep penetration primer is used. Before installation, the surface must be thoroughly dried. The panels can only be glued to a completely dry wall.
- Frame technology does not require perfect surface leveling. Only pronounced defects are puttied to eliminate the risk of further destruction of the walls. The surface is cleaned only from old coatings that do not have sufficient strength. It is important to eliminate areas with mold and mildew. To do this, they are treated with special antiseptics. Most often, a solution of copper sulfate is used.
At the stage of preparation for cladding using frame technology, the condition of the pipes should be carefully checked. It is best to replace metal pipes with plastic or composite ones.
Attention! You cannot install plastic after it has been left for a long time at temperatures below 10 °C. In this case, the panels must be kept at room temperature for at least 24 hours.
How to cover a bathroom with plastic
Finishing the bathroom with plastic panels occurs in stages. The main thing is to initially determine what method of installation will be carried out. You can cover a bathroom in two standard ways:
- frame, using self-tapping screws - suitable for spacious rooms, allows you to achieve smooth surfaces;
- frameless (adhesive) - requires alignment of the walls, but at the same time the installation itself is carried out with the least amount of time.
Wall preparation and marking
For each of the selected installation methods, it is necessary to prepare the walls and make markings. If the walls are finished using the frame method, the primary decorative coating is removed and the surface is partially leveled at the points where the guides are attached.
If the installation of plastic wall panels is carried out using glue, then you should take care of perfect evenness. Otherwise, all the flaws in the walls will be noticeable. After applying the leveling mixture, wait until it dries and treat it with an antifungal compound.
When marking, special attention is paid to areas near the shower - you need to avoid plastic gaps where water could get in. For those bathrooms that have partitions, the master must take into account all the nuances of the design in order to create a complete coating
Installation of sheathing with plastic fittings
The panels are fastened to plastic fittings. Mounting elements on such a frame is much simpler and more reliable, and in the case of wooden slats, they may become deformed due to moisture.
At the initial stage of work, a guide rail with dimensions of 40 * 25 mm is installed under the ceiling and on the floor. The remaining frame elements are located perpendicular to the plastic panels at a distance of 30-40 cm from each other. The slats are attached to the wall with self-tapping screws.
Fastening panels
You can fasten the plastic panels to the frame with self-tapping screws or a construction stapler with staples. Installation of plastic panels on walls begins from the corner farthest to the entrance. The first panel is inserted into the profile guides and fixed in place.
Its correct position is checked with a building level, after which the ridge is attached to the sheathing.
The second lamella is inserted into the guides and brought to the first. They are secured to each other using a standard tongue-and-groove locking system. Using a similar technology, further work is carried out in apartments with large bathrooms.
Fastening corners and moldings
In order for the decoration of the bathroom with modern plastic panels to have an attractive appearance, you must also take care of purchasing special corners and moldings designed to complete the assembled row of lamellas, as well as to disguise the guide under the ceiling.
An L-shaped profile is used as internal and external corners that provide fastening for the beginning and end of the row. Its installation is carried out in the corners of the room, as well as near doors, shower stalls and other joints.
Moldings allow you to secure the panels at the top and hide the guide. In appearance, they look like ceiling plinths, with the help of which the wall decoration becomes perfect.
Installation of panels on the ceiling
Attention! This topic has already been discussed in detail here.
Plastic panels on the ceiling are usually mounted using a frame method. This is due to the difficulty of holding the elements before gluing and the need to ensure increased fastening strength. The panels can be mounted similarly to wall panels, i.e. the frame is attached to the ceiling, and plastic is fixed to it. However, more often, suspended ceilings are installed, which make it possible to create a spot lighting system.
The difference in installing a suspended ceiling is that a gap of up to 10 cm is formed between the main ceiling and the false ceiling. To do this, the frame profiles are moved away from the ceiling surface and secured with hangers. Installation is carried out in the following order:
- At a distance of 8–10 cm from the ceiling surface, a support profile is fixed along the entire perimeter of the room.
- Suspensions are fixed to the ceiling in increments of 30–50 cm.
- The ends of the plasterboard profiles are fixed in the support profiles and mounted in parallel on the ceiling. They are fixed to hangers using self-tapping screws.
The technology for fastening plastic panels is no different from the technology for installing them on a wall frame. Holes are cut in this ceiling for installing lamps. Electrical wiring is located in the gap above the false ceiling.