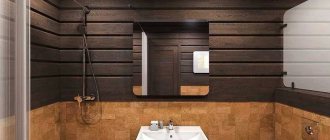
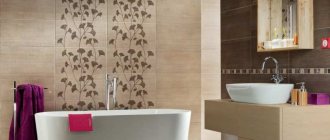
Any dwelling, be it multi-storey panel houses, private wooden, brick, must be protected from moisture. Waterproofing must be carried out not only from the outside, but also in rooms such as the kitchen, bathroom, toilet. This stage of work is necessary; if you ignore it or do something incorrectly, mold and mildew may appear. Gradually, this can deform the walls, and the structure will not be as strong as before, which will subsequently lead to destruction.
By doing major waterproofing, you can avoid many problems. This is especially true for the bathroom. There it is necessary to waterproof not only the walls, but also the floor. As a rule, it is much more difficult to waterproof wooden walls than brick and panel walls.
Any room must be insulated from moisture
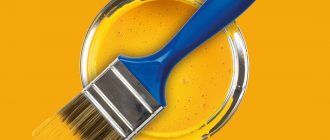
What waterproofing materials are there?
The most common methods of waterproofing are pasting and coating. The first has its advantages and disadvantages - you can continue working after 24 hours, but pasting is a painstaking job in itself. You can apply both well-known roofing felt and roofing felt, as well as more advanced materials - Ecoflex, Isoflex or some other. Among them, there are adhesive ones - the protective layer is simply removed from them, and the material is ready for use, and weld-on ones - the adhesive layer that they have must first be heated. A gas burner is used for this. You just need to remember that this type of waterproofing will add 5 millimeters to the main floor height.
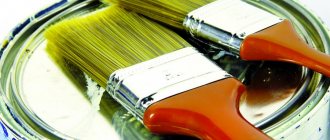
The second method – coating – is a simpler option. The materials used adhere perfectly to any surface and can withstand high temperatures. Coating materials are divided into several types.
The simplest waterproofing option is coating. It easily sticks to any surface
| Bitumen. | They are applied to the surface in two ways - cold and hot. But the first option has a disadvantage - it does not fit on a concrete base. The second option uses heating of 160 degrees. |
| Bitumen-polymer. | It does not require heating and is suitable for all surfaces, including concrete. They create a soft, but at the same time highly reliable layer. |
| Polymer-cement. | The waterproofing layer is quite plastic, excellent connection with the surface. |
| Acrylic. | The most advanced type of waterproofing. Ecologically pure. Produced as a water-based emulsion. Creates an elastic and very strong layer. |
Nowadays there are many different waterproofing materials in stores, they are divided by type: painted, glued, impregnated. The first includes mastics and emulsions. They allow you to create a reliable waterproof layer. Apply to the surface in layers after a certain time. The second group is a film or roll material made on a polymer or bitumen basis. To glue it onto a plane, you will need cold or hot mastic. It is better to overlap the material so that moisture does not penetrate into the seams, and to use cement-based, moisture-resistant compounds for filling.
The third group includes all materials, which include moisture-repellent cement, chemicals, and crushed sand. It is not advisable to use this type in residential buildings. For waterproofing in the bathroom, the first and second groups are mainly used. They can be combined with each other.
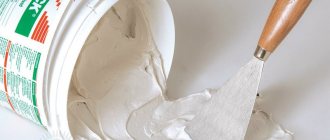
Mastic will create a reliable waterproof layer
How to apply waterproofing material correctly?
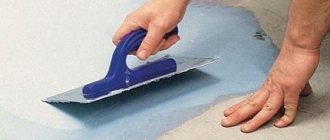
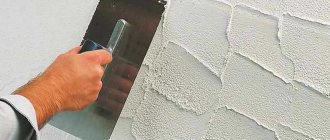
As with any repair work, before waterproofing the surface must be cleaned of dirt and dust and primed. After the primer has dried, you need to pour bitumen mastic in one layer, especially carefully sealing the cracks in the corners and in those places where communications pass. It is important to remember that while the mastic is drying, it is forbidden to dust. After 24 hours, a layer of sheets can be applied. This should be done with an overlap of about 10 cm.
Canvases should be overlapped by 10 cm
An important point is that it is better to make the floor in this room lower than in other rooms. This is recommended so that in the event of an unexpected pipe burst or faucet leak, water will not escape outside the bathroom and flood the entire house. With high-quality waterproofing, water will not get into the basement. Among other things, your home will be reliably protected from dampness, because prolonged exposure to moisture on a building material such as wood can have a detrimental effect on it. In addition, properly carried out work will prevent the appearance of mold and rot and will save you from many problems.
The floor in the bathroom should be lower than in other rooms
Features of working with wood
Wood, as a natural material, has exceptional properties - it absorbs excess moisture and releases it when there is a shortage. Because there is a lot of excess moisture in the bathroom, not every wood is suitable for construction work and flooring in this room. The material must have the property of being resistant to water absorption. Even if you have carried out high-quality waterproofing, it is better to use the following types of wood for work:
- Thermowood. It appeared on the construction market not so long ago, but has already proven itself only on the positive side, and is popular. The material received this name because the wood is treated with steam at high temperatures. After this procedure, the wood becomes resistant to mold and mildew and is almost impervious to liquid. It has only one drawback - high cost.
- Larch. The most acceptable material for construction work. Has great resistance to moisture. Average price equivalent.
- Cork tree. High resistance to moisture, the material is quite strong and durable.
- Teak. This material will make the coating strong and non-slip. Since the structure of wood contains a lot of essential oils, it does not allow moisture to pass through. It's quite expensive. But, as they say, the price matches the quality.
Even if wood is highly resistant to moisture, waterproofing work should be carried out efficiently.
Thermowood has only advantages, but the cost of such material is quite high
Ventilation
The interior decoration of a bathroom in a wooden house does not end with the installation of multi-layer waterproofing and installation of decorative materials. The most important stage, without which the adoption of water procedures can be dangerous to human health and the finishing of the cottage, is the installation of a ventilation unit. It is recommended to install ventilation in the attic, observing a number of rules.
- Ventilation equipment should not come into contact with wood - pipes and other elements are mounted on steel brackets.
- The ventilation duct must be made of non-combustible materials and fasteners.
- The ventilation duct is laid only through compensation holes, which prevents the shaft from moving during the process of slow shrinkage of the frame.
- The ventilation duct is equipped with fire dampers to block air flow in the event of a fire.
To eliminate the effect of air stagnation and activate the natural flow of oxygen, you can use a supply ventilation valve. A small device is mounted directly in the wall of the room intended for the bathroom. Street air circulates in the bathroom and is removed through the hood, providing constant air exchange and removing excess moisture and odors from the hygienic room.
Important points of waterproofing in the bathroom
As a rule, the materials used for waterproofing do not allow liquid to enter from the outside. There are those that can allow air to pass through due to their tiny pores. The main thing is that you need to carefully waterproof in the corners and in those places where communications are located - this is where there are many cracks and cracks, they must be carefully sealed. If you have applied mastic to the floor, it is important to prevent dust and various contaminants from getting on the floor. The remaining work is carried out when the mastic is completely dry - after 24 hours.
If you use rolled materials, they should be overlapped by 10-15 cm. The floor must be made lower than in other rooms. Such a recess will not allow the entire room to flood. If this is not possible, then you need to install a high threshold - it will prevent water leakage. Another important point is a competent approach to choosing a tree.
Rolled waterproofing should be overlapped by 10-15 cm
Before you decide how you will waterproof it, it is important to consider some features:
- what material is the ceiling made of? its preliminary condition;
- how long will it take to carry out all the necessary work; what floor is the bathroom on?
- will it be necessary to reduce the height of the room, its area;
- how difficult is the shape of the room;
- what tools may be needed;
- your financial capabilities;
- Can you do the work yourself or will you have to turn to specialists?
Before you start work, it’s worth calculating everything down to the smallest detail.
Why butyl tape
The material is based on butyl rubber - a universal waterproofing material that:
- protects against moisture;
- allows steam to pass through - prevents the formation of condensation in the bathroom;
- has excellent adhesion to many building materials, including wood;
- has high elasticity along the entire length of the tape;
- maintains stickiness and plasticity over a wide temperature range (up to −40 °C);
- does not change performance characteristics for 10–15 years;
- is not afraid of punctures and cuts, as it has a self-sealing effect after gluing;
- does not require additional heating during installation, unlike bitumen materials, if the air temperature is not lower than +5 °C.
Butyl rubber tape was used in the USSR for waterproofing critical seams
Waterproofing wooden walls in the bathroom
Before starting waterproofing work, the surface must be thoroughly prepared. All existing cracks and cracks must be covered or filled with a special product that will provide protection from moisture. To avoid liquid penetration deep into the wood, wax should be applied to the surface. If you use rolled materials as waterproofing, it is better to treat the joints with mastic - this will better protect the wood from moisture, because tiles are not always laid to the ceiling. And in order to stick it, it is important that the walls are smooth. If this is not the case, you need to level them, that is, plaster them using a building level.
After the walls are leveled, we use a polymer-cement composition as waterproofing. In areas around the sink and behind the bathtub, it should be applied in three layers. Before applying the next layer, it is necessary that the previous one is completely dry, but not too dry. Only then can you lay the tiles, starting from the floor.
Before starting waterproofing work, the surface must be thoroughly prepared.
Preparation for waterproofing work
Before laying waterproofing materials, it is necessary to remove the previous flooring, cladding, all dirt, dust, debris, wash the walls and floor, and allow the wood to dry. Then the wood needs to be treated with an antiseptic, the necessary moisture-repellent agents, and the surface thoroughly leveled. Existing cracks and crevices are covered with special means.
Before starting work, you need to remove the previous materials and clean the walls and floor
The next stage of work will be to apply a primer to the floor and walls - this will promote good adhesion of the waterproofing to the base. Let it dry thoroughly. Waterproof tape is applied to the joints between the floor and the wall, the ceiling and the wall, in hard-to-reach places, and corners - it will not allow moisture to get into the joints between the bases. Not only walls, floors, but also ceilings need to be treated with waterproofing materials. The basement, located under the bathroom, also needs to be waterproofed.
Primer must be applied to walls and floors
Finishing the bathroom of a wooden house with varnish
FORUMHOUSE user nickname mixail50100 tiled one of the bathrooms in the log house, and finished the second one, with a shower stall, with varnish.
Finish scheme:
- coat all seams with acrylic sealant;
- treat the entire room with an antiseptic;
- paint with covering acrylic paint;
- apply two coats of varnish.
There are tiles on the floor and a suspended ceiling.
Work order
After you have prepared the room for further work, it must be thoroughly dried. Next, you can waterproof the wooden floor in the bathroom. Before work, decide whether you will do everything yourself or turn to specialists.
First of all, logs are mounted on the surface and insulation is laid. This can be polystyrene foam, mineral wool or expanded clay. It is covered with moisture-resistant plywood, which is secured with self-tapping screws. The next step will be preparing the waterproofing material - you prepare the composition or cut the rolls to the required length. Place the mixture on the base and glue the rolled strips. The material should extend onto the walls to a height of 15-20 cm to form a kind of “trough” that will hold liquid in case of leakage. Waterproofing is laid perpendicularly.
Upon completion of work, everything must be thoroughly dried. Then you can carry out the final finishing - laying tiles, gluing PVC panels or using any other material of your choice. It all depends on your financial capabilities.
After all the work is done, you should let the room dry
Preparatory stage
To reduce the consumption of the coating material, as well as enhance its properties, preparation should be carried out in several steps.
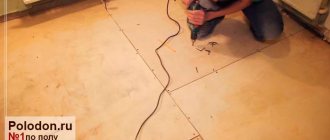
Step 1. Thoroughly clean the subfloor from dirt.
Step 2. Lay the sheathing from the bars.
Step 3. Insert polystyrene foam or mineral wool for insulation into the resulting cells:
- polystyrene foam after installation forms a smooth and durable surface, but the joints between it and the joists should be additionally treated with sealant;
- When using mineral wool, waterproof plywood must be laid on top.
Performing adhesive moisture protection
For adhesive waterproofing, film or roll materials are used. They are either glued or fused, usually applied in 2-3 layers. For work, bitumen-polymer, polymer, bitumen-containing materials are used. Mastic for gluing is used polymer, bitumen-rubber, bitumen, bitumen-polymer.
First of all, a thin layer of mastic is applied to the prepared surface, then the roll is rolled out, it needs to be secured, and the surface is again coated with mastic. This procedure must be carried out several times. The material is glued to the walls, starting from the floor. Which waterproofing method you choose will depend on your budget and how often the area is used.
Adhesive waterproofing is glued to mastic
Don't ignore waterproofing. After all, it will not only protect against mold and mildew, but will also increase the service life of the room.
Final stage
At this stage, the finishing coating is applied. It will not be possible to immediately lay the tiles on the surface of the waterproofing layer. Since the glue will not be able to properly adhere to the surface. Therefore, a concrete screed reinforced with reinforced mesh is placed on top of the waterproof layer. Then the tiles are glued. This method can reliably protect against moisture, so it is even used in waterproofing swimming pools.
The choice of waterproofing method depends on professional skills and budget. The main thing is not to neglect the quality of materials and strictly follow the application technology. Only in this case will it be possible to protect the wooden covering in the bathroom, as well as prevent the appearance of harmful fungus.