Even moisture-resistant ceramic tiles do not guarantee protection against mold and other effects of humid air. Microscopic seams, chips, cracks perfectly allow steam and splashes to pass through. In addition, the plumbing can fail at any moment and water will end up on the floor. Therefore, additional surface treatment is necessary. The first thing to start with is choosing good waterproofing for the bathroom.
What materials will you need - what to choose from
Based on the method of application, materials for waterproofing barriers can be divided into two groups:
- painting, coating and impregnation;
- roll and sheet.
There are also formulations for injection, but this method of application (more precisely, “implementation” into the structure) is not used in bathrooms.
As the name suggests, the first three types are liquid or paste-like substances that can create a seamless, waterproof coating.
Roll and sheet materials are glued to the surface in the form of thin sheets, overlapped or end-to-end, with welded, soldered or glued seams.
Typically, when creating a waterproof barrier, not one, but two or three materials are used in combination. And this set of tools is determined by the selected waterproofing scheme.
Price
It’s worth noting right away that the cost of waterproofing will not shock you, everything is quite affordable. There is a misconception that applying waterproofing is an unreasonable financial expense. Despite this, professional craftsmen insist on the need for such a product in modern bathroom renovations.
Speaking of cost, there are different types of insulating products available in the market. For example, the price of liquid waterproofing in 8 kg buckets will cost the buyer 2,200 rubles. The manufacturer also offers products in smaller containers, 4 kg, the cost of which is 1,400 rubles. A bucket weighing 4 kg is enough to treat an area of 3.5 square meters. It is supposed to be applied in two layers.
For most bathrooms (where only the “wet areas” and the floor are treated), an 8 kg bucket is sufficient.
In addition to the mastic itself, additional products will also be required, in the form of waterproofing tape, which is glued to the joints and corners. The price of a roll of tape 10 meters long is around 1,100 rubles. One roll is usually enough. The tape is needed because... It is almost impossible to properly process corners with ordinary mastic.
Where is waterproofing needed?
Waterproofing the floor is necessary not only on its entire surface. The peculiarities of using a bathroom are such that there are certain requirements even for the height of the threshold of the doorway (so that if water leaks, it does not get into other rooms). Therefore, the waterproof barrier is made in the form of a “trough” with the height of the sides along the perimeter of the walls at least 10 cm.
The waterproofing layer is applied to the entire protected surface Source pinterest.com
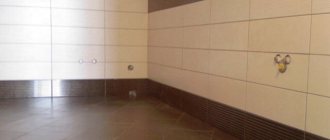
Unlike floors, bathroom wall waterproofing may not be “continuous.” With normal ventilation of the room, water vapor will be removed before it reaches the wall materials and will have a destructive effect on them. We must also take into account the finishing with tiles, which also serves as a good barrier to moist air.
Usually, only areas adjacent to the bathtub, shower stall and washbasin are treated - the so-called “wet zones.” That is, where direct contact of walls with water is possible when using plumbing fixtures.
The walls in the shower area must be completely protected from water Source pro100stroy.com
The selective approach is dictated by the cost of materials and labor. But if there are no financial restrictions, then coating or painting waterproofing the walls in the bathroom will not be completely unnecessary.
Floor waterproofing methods
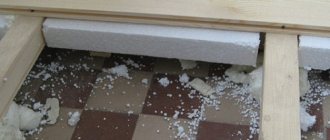
In conditions of possible water pressure, roll materials are considered the most reliable materials for waterproofing a bathroom.
Previously, they used paper as a reinforcing (bearing) layer, now preference is given to fiberglass or woven polyester. And water resistance is ensured by impregnation with modified bitumen.
Modern roll waterproofing is completely different from roofing felt Source 1000dosok.info
Attention. The nature of the bathroom operation does not allow the use of polymer films, as is done when waterproofing floors in residential premises. The durability of such material is much less than that of tiles, and floors can begin to leak long before the next major renovation.
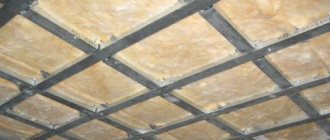
The next most reliable type is coating waterproofing. But it is also usually “reinforced” at corner joints with walls and partitions by gluing tapes made of rolled waterproof materials.
Waterproofness of corner joints is ensured by a double barrier Source vipvannaya.ru
See also: Catalog of companies that specialize in finishing materials and related work
Preparing the floor surface
The algorithm for preparing the base for applying waterproofing is standard:
- dismantle the old coating (if any);
- clean the surface from debris and dust;
- assess the condition of the ceiling and joints (between slabs and walls);
- prime the areas to be repaired and seal them with a repair compound;
- clean and restore the tightness of pipe passages in the ceiling.
This is what a bathroom floor looks like in layers: base, waterproofing, screed, tile Source ural.org
The second option is preferable if you then use rolled materials - the primer is not just a primer, but a product that works similarly to paint-based waterproofing.
Gluing roll insulation
The primer is applied to the overlap using a nylon brush or brush. Particular attention is paid to problem areas: joints of slabs and walls, pipe passages.
Attention. You need to work with the primer with the ventilation running.
Rolled waterproofing is rolled out in overlapping strips. The amount of overlap of stripes is at least 10 cm (recommended - 15 cm), the overlap on the walls is from 10 to 20 cm.
The optimal indoor air temperature is not lower than 20°C.
There are two types of rolls according to the method of “attachment”:
- Classic. Using a blowtorch (or an industrial hair dryer), heat the “wrong” side of the strip, moving from its beginning to its end, and at the same time pressing it to the floor surface.
- Self-adhesive materials.
The technology for gluing waterproofing strips is similar to working with wallpaper: the formation of air bubbles is not allowed - they are expelled by rolling the roller from the center to the edge.
The most difficult places are the intersection of outer corners of walls and floors, as well as places where pipelines pass. To ensure continuity of the waterproofing carpet, separate “patches” are cut and glued for these places.
Waterproofing is considered reliable if there are at least two layers and the seams between them do not match. All overlapping seams are additionally covered with bitumen mastic.
Although not “attractive”, it is reliable. And it will be beautiful after finishing Source ironflex.ru
Sequence of work
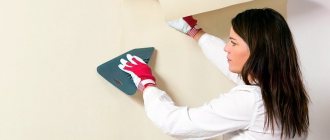
Any surface must be cleaned and degreased before applying a protective finish.
Preparatory stage
First of all, you will have to get rid of the trim. If you plan to apply waterproofing to the floor, the old screed will also have to be removed. It is probably dirty and cracked and it will be difficult to straighten it out. If you try to do this, you may raise the floor level, which is not recommended by building codes. It should always be lower than in the rest of the apartment to prevent water from entering other rooms during a flood.
Step-by-step instruction
- Dismantle the screed using a hammer drill, grinder or jackhammer. Less noisy and dusty methods are cutting or drilling.
- Mark the outlines of wet areas on the walls from which the trim needs to be removed. Next to the sink - 50 cm above the faucet. In a shower cabin or bathtub - 20 cm higher than the level at which the watering can will be located during water procedures.
- Clean these areas and the ceiling (if necessary).
- Pay special attention to the seams. If possible, groove them 2.5 cm in depth and width. Apply sealant and dry. After drying the main layer of insulation, fill the groove with repair solution.
- Using coarse sandpaper or a spatula, clean off any remaining roughness, splinters, or greasy stains.
- Remove all dust and mold from the corners. Treat with fungicidal impregnation.
- Fill any uneven areas and then prime the entire surface 2-3 times. Any deep penetration primer will do. It improves adhesion and reduces the consumption of liquid compounds.
- If only the floor will be processed, clean and prime the lower part of the wall (about 20 cm) so that you can make an allowance.
Instagram @efreet
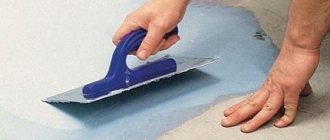
Application of coatings
- Prepare the surface. It should be perfectly clean and slightly damp.
- Cover all household items that remain in the room with film. As well as pipes and a heated towel rail.
- Mix the mastic or dilute the powder as indicated in the instructions. In the latter case, remember that the solution hardens quickly. Prepare it in small portions.
- Apply the mixture with a roller, brush or spatula. Carefully coat all areas near the pipes. Move in one direction at the same time.
- Wait until it dries or immediately glue the reinforcing mesh for greater reliability.
- Seal the joints of the slabs with wide waterproof tape so that no air remains under it. Run over it several times with a tightly pressed spatula or brush. You can smooth the edges with coating.
- After drying, immediately distribute the second part of the composition - perpendicular to the first.
- Protect the room from dust and dirt - they will worsen the waterproof effect.
Some pastes need to be sprayed periodically during the drying process to prevent them from cracking. This requirement is specified in the manufacturer's instructions.
Instagram @apartment_renovation_company
Instagram @apartment_renovation_company
Instagram @apartment_renovation_company
How to lay mortar with reinforcing mesh under wall decoration
- Attach the roll of mesh to the wall with a screw and wrap it.
- Start applying the first part of the coating.
- Unwind the mesh, press it to the surface and coat it with a second layer.
Impregnation
The principle of operation is the same as with conventional solutions. There are only minor differences. We continue to follow the principle of overlap onto adjacent slabs, but do not use reinforcing mesh and do not wait until the first portion of impregnation dries.
Step-by-step instruction
- Prepare the base. There should be clean floor slabs in front of you.
- Cover appliances and communications with film if they remain in the bathroom.
- Wet the concrete thoroughly with a broom or sprayer.
- Using a brush or notched trowel, spread the first layer of impregnation evenly.
- When it sets, but does not have time to dry, moisten the slabs again and apply a second layer - perpendicular to the first.
- Seal the corners with waterproofing tape before the impregnation has time to dry. There should be no bubbles under the tape. Iron it with a brush or spatula.
- After drying, proceed to laying tiles or other cladding. If finishing needs to be postponed, isolate the room from dust as much as possible.
Instagram @borodichservice
Instagram @borodichservice
See what gluing joints and corners looks like in practice.
Two coats are usually enough, but it is better to follow the manufacturer's instructions exactly. The approximate consumption of the mixture is 0.8-1 kg per square meter, depending on the smoothness of the base.
Pasting
- Prepare the base. Clean it and dry it well.
- Use a level to check if there are differences of more than two cm. If there are, level them.
- If possible, round the joints between the slabs so that the fabric does not tear during installation.
- Cut the canvas according to the dimensions of the room with the obligatory overlap of at least 10 cm at the joints. The pasting sections must also overlap each other, taking into account this 10 cm.
- If there are pipes in the area, cut holes slightly smaller than their diameter so that the fabric fits tightly around them.
- Roll out the roll and leave it for a day or overnight until it straightens out a little.
- Raise the edge of the canvas to the height of the allowance and begin to slowly remove the adhesive film. At the same time, press the roll against the surface. Take your time, act carefully.
- If it is not self-adhesive, first coat the back side and base with glue or mastic.
- Make sure there are no bubbles at the bottom. It is convenient to straighten them with a roller or a large brush.
- Coat all joints well with mastic and roll with a roller. Poorly stretchable fabric can be slightly heated with a hair dryer.
- Glue the overlaps by removing the protective film. Or apply glue or mastic under them. Press the fabric with a board and wait for gluing.
- Apply the coating to the area next to the communications.
- Make screed and tiling.
Instagram @izotexofficial
Instagram @izotexofficial
Instagram @izotexofficial
If you need thorough floor insulation, you can lay two materials.
Sequence of work with two materials
- Cleaning the surface, leveling with primer.
- Cutting and securing roll insulation.
- Creating a screed.
- Impregnation of concrete with penetrating solutions or coating with coating mixtures.
- Facing with tiles, linoleum, laminate.
Such protection will not allow moisture to pass through and will last for several decades, but a screed over the pasting must be done. The first part of this method is discussed in more detail in the video instructions for applying bitumen-polymer roll insulation.
Finishing a wooden ceiling can be made easier by attaching the fabric with a staple gun.
- Secure the roll to one side of the ceiling using screws or a long mop or board.
- Stretch it to the other end of the room and secure it with a stapler.
- Install the sheathing on top for the final finish.
Any of these methods will allow you to create reliable waterproofing of your bathroom with your own hands. It will protect the cladding from excessive moisture even with poor ventilation.
Video description
The whole process and possible nuances are clearly shown in the video:
The minimum number of layers is 2. Each next one is applied after the previous one has dried.
After completing the creation of the waterproofing layer, the floor is ready for pouring the screed and laying the finishing coating (tiles or self-leveling polymer floors).
Self-leveling 3D floors can be misleading Source pol-master.com
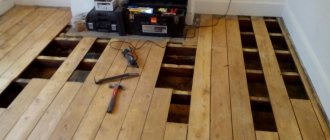
Waterproofing wooden floors
If the bathroom is located in a wooden house (or in a brick house, but with wooden floors), then the waterproofing technology for the bathroom differs from that described above.
When laying tiles or arranging self-leveling floors, it is necessary to take into account the features of the base and finishing coating.
The tree reacts to fluctuations in humidity, and practically does not change its size with temperature changes. Ceramics, mineral materials and polymers are completely opposite in nature - they do not respond to changes in humidity levels, but increase in size when the temperature rises (and vice versa).
Therefore, the preparatory stage looks like this:
- Sheets of moisture-resistant plywood are mounted to wooden floors (the usual format is cut into 4 parts, and the large one - into 8 parts). The rows are laid “staggered” with the transverse seams shifted. Gaps of 3-5 mm are left between the sheets. A damper gap of about 10 mm is left between the walls along the perimeter of the floor.
- An elastic tape is placed in the damper gap, and a sealant is applied between the plywood boards.
- All corner joints of the floor and walls are covered with waterproof tape.
- Apply 2-3 layers of waterproofing mastic with an exit to the walls 10-20 cm high.
If polymer-cement coating waterproofing is used, then the finishing coating can be immediately laid on it. A thin layer of screed reinforced with fiberglass mesh must be poured over the bitumen mastic.
Features of combating moisture in the bathroom
At all times, the only method of dealing with water was waterproofing. She also comes to the rescue in the bathroom. But there are several points that need to be considered in more detail.
1. Ideal waterproofing is a sealed bathtub with sides up to 30 cm high, extending onto the wall. Such protection allows you to maintain a continuous layer of water on the floor up to 2-3 cm thick (up to the height of the threshold) for an indefinite amount of time.
2. Waterproofing the floor is done according to two classic schemes:
- before pouring the floor screed - “floating screed”;
- along the screed, immediately before laying the floor covering - a “floating floor”.
For all rooms of the apartment, it makes no difference how the waterproofing is done. The bathroom is an exception. Here, waterproofing materials must be laid (applied) on the base of the floor, under the screed, since in this room it is necessary to additionally protect the screed itself from moisture from the bathroom from neighbors below. When there is no certainty about the presence of insulation under the screed, it is additionally performed in the “floating floor” version.
3. For ceramic tiles and linoleum, it makes no difference what material is used when waterproofing a bathroom under a screed. However, everything changes when the waterproofing material is laid directly under the floor covering. For linoleum, you can use all available types of insulation (the underlay for this floor covering eliminates the characteristics of each type of insulating material), and for tiles it is advisable to exclude bitumen coating, rolled materials, liquid glass and rubber.
The reason is that, being an intermediate gasket between the screed and the tile adhesive, these materials do not provide the required level of adhesion of the tiles to a solid base.
Attention: many online resources recommend sprinkling them with quartz sand or treating them with “Betonokontakt” to ensure adhesion of the glue to bitumen, rolled materials, liquid rubber and glass. Practice shows that waterproofing a bathroom floor under tiles using this technology leads to the destruction of the tile over time - it cracks and lags behind. Therefore, you should not take risks and it is better to immediately abandon the listed materials. Here we need completely different waterproofing agents, which will be discussed below.
4. The technology for applying waterproofing under “floating screed” and “floating floor” for each type of material, as well as under different floor coverings, is identical. Therefore, it makes no sense in this work to consider separately the waterproofing of floors under tiles and under linoleum.
5. Technologies for carrying out waterproofing work for a concrete base differ from waterproofing a plank base in a private house, and therefore will be considered separately.
Waterproofing walls
Of course, in this case you can use roll or sheet materials. But the walls of the bathroom are not a foundation on which groundwater presses. Here it is enough to apply one layer of coating waterproofing.
“Standard scheme” for waterproofing bathroom walls Source ettrilatspb.ru
Once again about the question “which is better”
What is good for horizontal planes is not suitable for vertical enclosing surfaces.
Bitumen mastics have good fluidity. This is a positive property for the floor - you can be sure that the pores and microcracks of the base will be filled with hydrophobic material. For walls, the fluidity of mastic is undesirable - over time, part of the mastic will begin to “slip”, and this may affect the integrity of the finishing layer. Therefore, polymer-cement compositions must be used for walls.
And this once again demonstrates that there is no clear solution when choosing which waterproofing is best for the bathroom. We can only answer that waterproofing must be comprehensive.
Video description
About mistakes when waterproofing premises in the video:
Stages of work
For walls there is also a preparatory stage, which has almost the same appearance as for the floor:
- cleaning of old coating;
- correction of surface defects;
- applying a primer with hydrophobic and antiseptic properties.
After the soil has dried, apply a waterproofing solution with a spatula or trowel and spread it evenly over the wall. And since this is not putty, a perfectly flat surface is not needed here - small unevenness and roughness is compensated by a layer of tile adhesive.
Even moisture-resistant drywall needs to be protected Source finkarus.ru
How to waterproof a bathroom
Construction stores sell many materials suitable for such purposes. To avoid confusion, read a brief overview of the main categories.
Coating mixtures
Dry compounds, mastics, pastes based on sand, cement, bitumen, rubber or polymers. Powders are diluted with clean water at room temperature or a polymer emulsion. Usually their shelf life is longer than that of ready-made mixtures. They harden faster and work with them will progress faster. Coating compounds are applied with a brush, spatula or roller, depending on their consistency.
The thickness of the layer of liquid mixtures is approximately 1 mm. For reliability, you need to make three such layers. Mastics and pastes are denser materials. They are applied in strokes at least 3 mm thick, which makes it possible to speed up repairs. Various acrylic, bitumen and cement coatings can be used on walls, floors, and ceilings with the same results.
Pros:
- Easy to apply.
- Large selection of formulations at different prices.
Minus:
- Duration of repair.
Instagram @caulkhawk
Pasting (roll) materials
Typically used for waterproofing floors. Attaching the coating to the ceiling and walls is problematic, and specific preparation of these surfaces will be required. The basis of such canvases can be fiberglass, bitumen, or polymers. They spread out easily and take the desired shape. They can be mounted in three ways.
Installation methods
- Self-tapping screws. This type of fastening is used least often, as it is labor-intensive and unreliable. The covering is laid on the insulated, drilled base and then secured.
- By fusing. The lower part of the canvas is melted with a gas torch or a construction hairdryer, and then evenly distributed over the concrete slab. The disadvantage of this method is that the heated material easily tears or liquefies too much. In addition, the reverse side can become toxic when heated - after repair, the smell can be felt for several days.
- By gluing. Modern coatings often have an adhesive back side. If it is not there, use glue or mastic.
It is most convenient to work in the third way, although it can be difficult without the appropriate skills. The fabric is firmly fixed to the floor and does not tear. In general, wrapping is a good method of moisture protection for a shower.
Pros:
- High vapor permeability.
- Elasticity. The canvases tolerate base movements well.
- There is no need to wait until the previous layer dries.
The first two qualities make it possible to successfully use the coating in a wooden house. Third, speed up renovations in the bathroom and avoid excess dirt (as far as possible with a rough finish).
Minuses:
- Labor intensive installation. It is often difficult to do everything with your own hands; in some cases you will have to remove the screed.
- A height difference of more than 2 cm is not allowed - leveling will be required.
- If the room is of an unusual shape or very small, it will also be difficult to work.
- Convenient to stick only under the floor covering.
Instagram @regiostroysnab
Impregnating solutions
These are sand-cement mixtures with the addition of special substances that penetrate to a depth of 12 cm even into very small cracks. After drying, the substances harden and turn into crystals. Thus, these solutions strengthen the concrete and completely protect it from moisture penetration.
Impregnations are applied like coating solutions - with a brush or roller, since they are quite liquid. The surface is pre-wetted to increase adhesion.
Pros:
- The mixtures do not peel off or crumble.
- The material underneath “breathes”.
- They are quite easy to apply.
- Suitable for finishing ceilings, floors, walls.
Minuses:
- High price.
- Not suitable for brick, cement, gypsum, lime plaster, FBS with low water resistance, as well as for bases with level 3 crack resistance.
Instagram @remont_easy23
Instagram @otdelkapro
What is better to choose: coating, impregnation or pasting
It is impossible to answer this question unequivocally. The choice depends on the time allocated for repairs, budget, construction skills, and room layout. The easiest way for beginners to deal with coating compounds. They are easily distributed over the base and protect well from steam and moisture. But you need to allow time for each layer to dry in advance.
In this case, the best option for interior spaces is considered to be polymer and cement mastic. Bitumen is easy to use, affordable, but toxic - especially when heated. For wood, gluing is considered the best option. It is not recommended to use polyethylene-based sheets as roll materials, as they have low vapor permeability.