The main option used for cladding the facade of the private sector is brick. Homeowners choose it because this material is characterized by high moisture absorption rates, resistance to adverse chemical and natural influences and sudden temperature changes, ease of maintenance and long service life.
Currently, the most in demand is torn brick, which in appearance resembles natural stone with a rough surface and chips along the edges. It gives the facade of the house the appearance of an ancient castle.
Features of torn brick
Torn brick is a stone that is produced by processing solid blanks, as a result of which they acquire an uneven texture on the outside. The inner side of this façade material has a smooth surface, making it easy to install.
The composition of such a brick includes the following components:
- Dolomite and marble flour.
- Cement.
- Shell rock.
- Limestone.
The technological process involves mixing all of the listed components and pressing them under high pressure with the further addition of coloring particles. The material is not subjected to turning or grinding.
In addition to its extraordinary appearance, torn type facing brick has the following advantages:
- Resistant to corrosion.
- Fire resistance.
- Light weight.
- Low thermal conductivity.
- High sound insulation.
- No negative impact on the environment and the human body.
To decorate the facade of a house, stone is used not only in a standard rectangular shape, but also in a rounded, trapezoidal and twisted shape. Non-standard shapes are especially popular when creating patterns.
The color range of the material is varied. The most common colors are grey, white, black, red and yellow.
Classification of pollution
There are two types of pollution.
- Mineral. They are formed due to the deposition of minerals from the air on the surface. These also include pollution from building materials: cement-sand mortar, sealants and sealants, polyurethane foam, etc. Rust and patina, salts on the surface of bricks (efflorescence), soot and soot are also mineral pollution.
Mineral contamination (efflorescence)
- Organic. The appearance of moss and mold on the surface. Over time, dust settles on surfaces, which serves as fertile soil for the growth of various microorganisms. The category of organic pollution also includes stains from fats and drying oils.
Organic pollution (moss removal)
When preparing to wash facades, you need to take into account not only the material of façade coverings, but also the nature of the contamination. These factors influence the choice of detergents, cleaning accessories and tools.
In addition to cleaning facades in order to improve their appearance, such work must be performed before cosmetic repairs. Due to this, the adhesion coefficient of new finishing coatings to facade surfaces is improved.
Features of finishing the front side of the house with torn stone
Laying torn type stone causes many difficulties, since the remnants of the hardened mortar are almost impossible to completely remove from the rough surface of the stone. In addition, the appearance features of this material require only identical and perfectly even seams.
There is a certain algorithm for facing the facade with this type of brick, which includes actions that we will discuss below.
Preparatory stage
- checking the walls to identify possible cracks on them that require elimination using a grinder and mortar;
- elimination of protrusions on the surface intended for finishing;
- getting rid of fungal infection;
- preparation of the necessary tools (level, grinder, trowel, twine).
Determining the masonry method
Torn brick can be laid using the following facing technologies:
- classic, based on laying with a spoon with each row offset by half a stone;
- cross, which provides for the alternation of spoon rows with butt rows using an offset of half a brick in every second row;
- Brandenburg, a feature which consists in the fact that in each row a bonded brick is laid after two spoon bricks, and the offset occurs by half the end of the stone;
- block, which is based on uniform alternation of bonded and spooned rows with a clear arrangement of seams in identical rows;
- chaotic, aimed at randomly replacing spoon bricks with butt bricks.
The simplest and most accessible are the classic and chaotic method. It is better for an amateur to use one of them, choosing chipped bricks of the same color and not using complex patterns. Professionals and specialized craftsmen can experiment with any of the listed masonry technologies, using different colors of the material.
Preparation of the solution
For cladding the facade of the private sector, a solution is used, which contains cement and sand, the quantitative indicators of which are in the ratio of one to three. The prepared mortar should be slightly thicker than when laying ordinary brick, since torn stone tends to have low water absorption.
Coloring agents are also added to the solution, but they cannot exceed six percent of the amount of cement. Otherwise, the solution will lose its original strength.
Direct installation
Initially, the material is laid without mortar in order to determine its required quantity. After this procedure, the required number of brick halves is prepared. The cladding process begins from the corners of the facade. In this case, the width of the seams should not exceed ten millimeters, and the thickness of the mortar layer should not exceed one and a half centimeters.
Laying every ten rows should be accompanied by a four-hour rest. This is done so that the solution has time to shrink evenly. No more than twenty rows can be made per day, otherwise the masonry will not withstand heavy loads.
After completion of the work, the lined part of the facade is covered with a dense layer of polyethylene to avoid the negative effects of weather. Drying of the solution can be accompanied by treatment with water repellents, which not only contribute to a more aesthetically pleasing appearance of the facade, but also increase the water resistance of the brick.
Installation Tips
As when working with any other finishing material, first of all you need to prepare the base itself, namely: level and clean the surface of the structure from any dirt, grease and old coating. All this is aimed at improving the adhesion of facing materials and surfaces. Further, much will depend on what kind of material you are going to finish the surfaces with. From the advice of specialists and people with experience, the following recommendations can be distinguished:
- Apply a primer to the walls - this will protect it from moisture absorption and further improve the adhesion of materials;
- If you use tiles, the seams between them should be filled with a special building compound, sold in the appropriate store. Choose a color for this mixture that will not look pretentious with your tiles;
- When laying facing ragged bricks, follow all traditional building codes. Apply the adhesive solution thoroughly and evenly, without leaving empty spaces - if you don’t do this, then these very places will become pockets of moisture. In the future, during frosts, the moisture will freeze, which will negatively affect the material;
- It is worth applying the solution not only to the walls, but also to the facing tiles or bricks themselves;
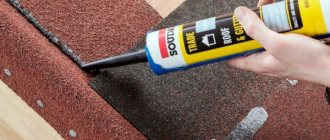
- If you filled the seams with glue, then let it harden completely (check the hardening time on its packaging). After this, it is recommended to grout the joints by applying the grout using a rubber float. Next, you can wash the entire tile with warm water and a sponge.
Most rough stone products can give any ordinary surface the appearance of a real piece of art with a touch of luxury. It’s up to you to decide what type of stone to choose and what advice to follow when attaching it to the walls. Remember the main condition: whatever type of stone you choose, it must be in harmony with the entire environment, organically blend into the overall style of your home and create a feeling of comfort.
Aesthetics plus benefits
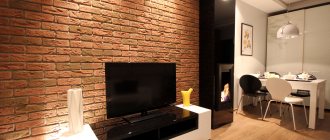
example of a house made of torn bricks
Each of us strives to have a truly unique facade : houses made of torn bricks, photos of which can be seen in the gallery below, prove this with a clear example. And besides this, you can choose such a facing material only for its obvious advantages:
- High energy saving. This brick retains heat for a very long time, which makes the atmosphere in the room more comfortable.
- Easy to use. In order to lay such a stone, you do not need to have special skills - laying torn bricks is easy for anyone to do.
- Strength and durability. These two concepts are so interconnected that having applied the material once, you can be calm about its condition for many decades.
- Resistance to external atmospheric temperature influences.
- Environmental friendliness of products. Torn decorative brick is made only from specially selected natural raw materials.
How to grout seams on decorative stone - choice of grout
Stone compositions, created artificially or extracted naturally, give the result - prestige and solidity of facades. The relevance of finishing does not decrease, which is facilitated by a wide range. Once results are achieved, it is important to eliminate the seams. This is a simple process if you familiarize yourself in advance with all the nuances that stone grout has.
Types of grout for stone
It is easy to do without additional solutions when finishing surfaces and decorating them. But offers for highly specialized compounds from construction stores still have not decreased. Such materials consist of many components and are available in packaging of several kg.
The basic element can be:
Plasticizer components on latex;
- Silicone;
- Rubber;
- Epoxy;
- Cement part;
- Gypsum additives;
- Polyurethane.
Dry and wet varieties of grout are available. The first option is useful in the case of serious volumes of work, the second is suitable for the opposite conditions.
The performance and technical properties of the original compositions are improved through the use of various additives. The use of pigments makes it easier to achieve specific colors when using decorative stone grout.
Which grout for artificial stone is better?
You should not try to make such mixtures yourself. But you may encounter some problems when purchasing ready-made options. White color is the most common among grouts that meet all requirements. Yellow and gray colors are also used, but less often. Clinker bricks were no exception.
Under all conditions, MQ 950 becomes a decorative grout that meets the requirements of experts. This is a certified composition, the main purpose of which remains the treatment of facades covered with artificially quarried stone materials. Reliable operation and a large number of colors are guaranteed.
Requirements for grouting for decorative artificial stone
Not every time, when laying tile and stone compositions, they form gaps that can no longer be used without filling. But usually giving up work is not expected. Before purchasing, you should consider various criteria:
- An interesting visual effect is achieved by the location of the grout above the facing surface;
- Is it worth making sure that the grout and cladding are on the same level?
- How much lower should the material be compared to the cladding? You also need to think about this when you take coarse-grained sandstone;
- Straight, convex or concave – you can choose any of the available shapes for the surface. The texture can be smooth, or imitating various materials, just rough.
Where can you use such beauty?
facing the facade of a house with torn bricks
Thanks to its stunning external features, this model has found its niche in the market for facade cladding offers. The excellent sale of torn brick is due to the fact that it can be used for:
- design of the appearance of office and residential premises;
- adding decoration to pillars and porches;
- imitation in interior decoration (interior partitions, fireplaces, etc.);
- use in rooms with high humidity under conditions of additional hydrophobic treatment. (read more about water-repellent impregnations for bricks at the link)
Briefly about the main thing
The fences trimmed with torn bricks are associated with fortress walls, and the facades with medieval castles. The cladding of fireplaces, arches, corners, columns indoors creates an atmosphere of reliability and peace.
Manufacturers of facing materials keep up with the times and offer customers a large selection of imitations of various shades, shapes and sizes.
Torn facing brick Source sorokainfo.com
What is this material?
The sizes of torn bricks can most often be standard. But due to the variety of forms, it is quite possible to choose something unique and different in all respects from the templates. Having decided that “there will be a similar finish,” the buyer usually goes to the seller of such a product. Here you should pay attention to some important nuances:
- Such products must be licensed.
- The torn stone brick can be a silicate analogue labeled M150.
- There are two types of such proposal - the appearance of each depends on the method in which it was received.
Scope of application
Torn brick is used for both external and internal cladding. Having a wide variety of species, it is difficult to imagine where it would find its application. Let's try to summarize the already compiled idea of its comprehensive use:
- most often, torn brick is used in facade cladding to give the building a beautiful, expressive look;
- the walls of houses do not have to be completely mounted with stone; they can be partially decorated, creating a figured frame for the basement or foundation;
- industry produces certain types of bricks for decorating pillars, porches, arches;
- door and window openings decorated with torn stone look impeccable;
- brick is used in landscape design to decorate benches, flower beds, gazebos, patios, and barbecue areas;
- it is often used in the design of fences, giving them an expensive, presentable look;
- inside the room they decorate one wall or a fragment of it, decorate fireplaces, columns, and install interior partitions from solid bricks.
How beauty is born
Guillotine for the production of torn crushed stone, block, brick
In the modern market, this beautiful material is usually presented in two types. Each of them will depend on the manufacturing method:
- In the first case, the usual stone cutting occurs on a guillotine . The split occurs in different ways - this creates a special relief of the pattern.
- The complex splitting method will already be performed on special equipment. Most often, special attachments are included with this machine. With their help, the necessary “pattern” is formed on one of the brick walls. The flat side is intended to lay the stone inward against the wall itself.
- If you look closely at the torn brick (photo below) , you will notice that a solid version is usually used - it is able to withstand such loads.
Video on making torn bricks:
Why is brick cut into tiles and how to do it correctly
Despite the large selection of modern finishing materials, brick remains unrivaled.
The one that is many years old is especially valued. With it you can create an antique or loft style interior. The prices for antique bricks are steep, so in order to replicate a similar interior at home, many resort to creating such material themselves or cutting it into tiles.
Important! The price of 1 antique brick tile is from 50 rubles. The cost of one red brick is 13 rubles. The final finishing price is cheaper.
» width=”770″ height=”380″ srcset=”https://freegameinfo.ru/wp-content/uploads/2019/12/Screenshot_3-53.jpg 770w, https://freegameinfo.ru/wp-content /uploads/2019/12/Screenshot_3-53-768×379.jpg 768w" sizes="(max-width: 770px) 100vw, 770px" />
How to cut brick correctly
You can cut this material:
- on a special stone-cutting machine;
- angle grinder;
- a knife for splitting bricks is suitable;
- You can modify the brick with a grinder.
You need to saw using a grinding machine with a large disc. Use diamond blades and water to reduce dust.
The workpiece is placed on a flat surface. The wire must be outside the work area. It is also necessary to work in protective gloves, glasses, and a respirator.
Cutting can also be done with a regular tile cutter.
Important! The main thing is to find a good brick, and making tiles from it is not so difficult.
Tiling
The surface for tiling must be carefully prepared.
- The old coating is eliminated.
- The surface is well cleaned or washed.
- Plaster or primer is applied.
The method of placing the elements can be any: staggered, seam-to-seam or any other option.
When finishing such tiles, ceramic adhesive is used.
Cladding stages
Tiling includes the following steps.
First, a thin line is drawn at the bottom, which serves as a guide for the first row.
The glue is applied to the tiles and a thick layer to the wall.
You need to lay the tiles from the corner.
To seal the distance between the bricks, you can use grout or glue, or you can leave them open.
Important! First, think over the design project of the room. Even a beautiful finish will look awkward with mismatched furniture. Antique brick goes well with metal, copper, and wood. You can paint it with white paint. This will make the room look more spacious.
Recommendations
- to ensure that the size of the horizontal seams is the same, use a plastic or wooden strip;
- You can also find plastic crosses for tiles on sale for these purposes;
- glue is applied both to the wall and to the tiles;
- the material is pressed tightly against the wall;
- When using adhesive mixtures, follow the manufacturers' instructions.
What style would this tile suit?
In the interior, brickwork looks very stylish.
It can be used in such directions as loft, Scandinavian style. Moreover, this can be done not only by the entire room, but also by brick inserts. You can also use it in country style.
Important! Brick tiles easily fit into hard-to-reach places, corners, ledges and so on. It tolerates temperature changes and humidity well, and insulates walls well.
Now you know how to create your own brick tiles and give your interior an unusual look.
Features of work
masonry of decorative torn bricks
The laying of such material is considered very easy, if only because it does not require complex tools for work. And the level and guides will not be needed at all, since the texture will hide all the differences and imperfections. Among the other “helpers” you need to prepare:
- spatula (can be replaced with a narrow trowel);
- a hammer with a rubber attachment (we nail the stone to the wall);
- grinder that will cut stone.
The work itself will take place in several stages . It is important to follow the following algorithm:
In cases of facade work, it is better to first lay a small strip foundation under the planned area. The measure is due to the fact that the wall will have weight, and such a base will not allow it to “float” down. It is very important that the future surface is pre-prepared. It is imperative to clean it from possible contamination. Next, you should make a primer; if necessary, you can plaster it (this will help level the wall). All cracks are carefully sealed. An example of torn brick laying:
Types of masonry
Types of facing bricks
Based on the location of the bricks in a row, there are several types of masonry:
- front (bed) - the brick is laid so that the widest side is visible;
- spoon - the long narrow side is visible from the outside;
- bonded - only the ends of the bricks are visible from the outside.
Types of masonry
In addition, masonry is divided into types according to decorativeness:
- “half-brick” masonry - the vertical seams of the spoon or bed masonry are shifted horizontally by half the length of the brick;
- stacked - vertical seams between bricks are located on the same line;
- Flemish - spoon and bonded masonry alternate in one row;
- “American” - spoon and butt masonry alternate in rows.
Decorative facing brick
If you have no experience, it is better to start with a standard half-brick spoon masonry, and as your skill improves, you can try other methods. It should be noted that stacked masonry is the most unstable, therefore it is used exclusively for decorative purposes.
How to work with torn bricks
decorative fence made of torn bricks
Installation of this material is really easy. All the properties of such a stone contribute to this. Everything will happen in the following way:
- A special adhesive solution is applied to the prepared and primed surface.
- The brick is pressed tightly to the surface.
- Each element is additionally “tapped” with a rubber hammer.
- All excess glue that has come out is removed.
- You can apply the next brick.
As is obvious from the above, such material can be applied even in a chaotic manner - this depends on the desire of the performer himself. However, experts still recommend maintaining order - this way the work will look more interesting and look finished.
Facing bricks have been in stable demand for a long time. All its varieties are widely used for finishing facades, building fences and small architectural forms, and are in demand in interior design. The most decorative brick has a textured cut on the front side, called “tattered brick”. What is its feature and how is the material installed?
Color
On the market, torn bricks are presented in completely different colors: from bright and poisonous to discreet classic ones. Most often, manufacturers prefer to paint chipped facing bricks in a more restrained palette, since it is in greatest demand among buyers.
What is torn brick
Torn brick looks like ordinary ceramic brick, on one side it seems to be chipped along its entire length. For its production, not firing is used, but a pressing method under very high pressure, as a result of which durable products are formed, whose characteristics are as close as possible to natural stone. They contain cement, limestone, shell rock, marble and dolomite flour, as well as dyes. Components such as clay and sand are not used in the production of torn bricks.
Brick pressing method
The presence of coloring pigments, which are added to the mass before pressing, makes it possible to achieve high-quality, uniform coloring throughout the entire thickness of the material, and molding in presses gives perfectly correct geometric shapes. Decorative chips like “wild stone” are created during the processing of products after pressing. To do this, two methods are used: cutting off the edges using a machine and mechanized decorative chopping.
Laying methods
Thin tiles or panels can be laid randomly; the longest dimension can be placed vertically
Tilers pay special attention to filling the gaps as much as possible. Between large pieces of flagstone, small fragments are placed, which are sometimes specially prepared
Although, when loading and unloading large masses of building materials, small fights often spontaneously form.
When laying thick bricks, bricks, and especially blocks, careful dressing of the seams is necessary. The longest pieces are placed horizontally. The cracks are well filled with the solution so that there are no air gaps at all.
Sometimes so-called dry masonry is used. So, for the sake of safety, very low fences are erected, for example, near paths in the garden. The stones are carefully adjusted to their shape so that they remain stable without the use of mortar.
Dry masonry
For laying large stones, especially those with smooth edges, ordinary masonry mortar based on Portland cement and lime can be used. For laying tiles and rubble stone, tile mixtures with high viscosity are used.
Types of torn bricks
This material is divided into types depending on the shape, structure and location of the textured cut.
- In addition to the standard rectangular shape, torn bricks are also produced in other modifications - wedge-shaped, twisted, trapezoidal, and with rounded edges. This variety of forms significantly expands the possibilities of decorative finishing of parapets, columns, window and door openings, stairs, and other structures. In addition, figured bricks are used to create ornaments on the facades of buildings.
Structure
The internal filling of torn bricks can be different:
- Hollow;
- Full-bodied.
The second type of product has a more dense structure, which ensures the reliability of the structure, which is regularly subjected to the pressure of a heavy load. Solid torn brick is used for finishing load-bearing walls, building stoves, fireplaces, and fences, since in addition to density, this type of material is characterized by good heat resistance.
Hollow torn brick has found its application in interior design and other structures that do not require heavy loads during operation.
Main characteristics of the material
In addition to its decorative appearance, torn brick has other advantages:
- the material contains no toxic additives, all components are of natural origin, which means that torn brick is environmentally friendly;
- the material compressed under enormous pressure can withstand heavy loads and is not destroyed by vibrations, shrinkage of the base, or direct mechanical impact;
- hyperpressed brick has a very low degree of water absorption, is not afraid of temperature fluctuations, and can withstand a large number of freezing and thawing cycles;
- the surface is resistant to abrasion, the color does not fade in the sun for a long time;
- the material is very durable, even after years it does not lose its visual appeal and retains all its characteristics.
There are several standard sizes of torn brick: standard, thin, base, narrow. Product parameters may vary slightly among different manufacturers. The material is delivered to the consumer packed in polyethylene on pallets of 1x0.75 m, and thin and base materials are additionally packed in thick paper in 30-35 pieces.
Brick sizes (standard, thin, base, narrow)
Advice. It is advisable to order bricks in full from the manufacturing plant, and not from intermediaries. While showing goods of excellent quality at the exhibition, some reseller companies, after ordering, bring the buyer illiquid goods mixed with normal bricks.
| Specifications | Values |
| Strength grade | M 150-300 |
| Moisture absorption | 4-11% |
| Frost resistance | F 50-200 |
| Weight | 2.85-3.6 kg |
| Length | 240-250 mm |
| Width | 65-120 mm |
| Height | 20-60 mm |
Torn brick also has disadvantages:
- the material has almost zero vapor permeability, which means that the walls will not breathe under such cladding. For this reason, air gaps should be left in the masonry;
- hyperpressed bricks are heavier than ceramic bricks, so a reliable and durable base is required for cladding. When finishing the facades of old houses, the foundation is usually first strengthened or additional tape is poured.
Marking
Facing bricks are marked using an alphanumeric designation. The larger the number in the product name, the better its characteristics:
| Options (brown, red) | Unit | Fas. M-100 products | M-125 | m-150 |
| Compressive strength limit | kgf/cm2 | 100-120 | 130-145 | 155-170 |
| Flexural strength limit | kgf/cm2 | 16-18,5 | 19-20,5 | 21-22,5 |
| Water absorption | % | 8,5-10,5 | 8,5-10,5 | |
| Average density | kg/m2 | 1100-1280 | 1180-1230 | |
| Thermal conductivity | W/(m-K) | 0,37 | 0,37 | |
| Frost resistance | cycle | 50-100 | 50-100 | |
| Emptiness | % | 36-38 | 36-38 | |
| Product weight | kg | 1,500-2,300 | 2,300-2,400 | |
| Dimensions | mm | 250x120(65)x65 | 250x120x65 | |
| Number of bricks on a pallet | PC. | 480 | 480 | |
| Dimensions of packaging | mm | 1000x1000 | 1000x1000 |
| Parameters (dark peach, light peach, cream) | Unit | Fas. M-100 products | M-200 | M-250 |
| Compressive strength limit | kgf/cm2 | 100-120 | 210-230 | 255-300 |
| Flexural strength limit | kgf/cm2 | 16-18,5 | 25-28,5 | 29-33 |
| Water absorption | % | 8,5-10,5 | 5,5-7,0 | |
| Average density | kg/m2 | 1100-1280 | 1255-1280 | |
| Thermal conductivity | W/(m-K) | 0,37 | 0,37 | |
| Frost resistance | cycle | 50-100 | 50-100 | |
| Emptiness | % | 36-38 | 36-38 | |
| Product weight | kg | 1,500-2,300 | 2,450-2,500 | |
| Dimensions | mm | 250x120(65)x65 | 250x120x65 | |
| Number of bricks on a pallet | PC. | 480 | 480 | |
| Dimensions of packaging | mm | 1000x1000 | 1000x1000 |
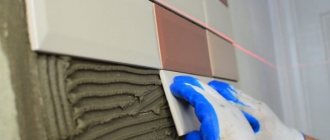
Features of facing with torn bricks
Any facing brick, and especially torn brick, requires more skill and care when laying than ordinary building brick. The textured surface is easily stained by the solution, and after drying it cannot be removed without leaving a trace. Each seam must be perfectly smooth, of the same thickness and depth, otherwise the cladding will look very sloppy. If you have no experience, you need to start with small structures or the least visible part of the facade. Do not take on a job if you are limited in time - rushing without skills and experience will not give the desired result.
Facade of a house made of torn bricks
Preparatory stage
First of all, you need to make sure that the base will support the weight of the cladding and check the condition of the walls of the building. To prevent the masonry from sagging and collapsing over time, the foundation strip must be monolithic, without cracks, and its width must correspond to the width of the facing brick or slightly exceed it. The foundation is carefully inspected along the entire perimeter, the cracks are opened with a grinder, cleaned and filled with fresh mortar. The same is done with exfoliated areas. If there are protrusions on the foundation, they need to be knocked down and the surface leveled.
Monolithic foundation strip
Next, check the quality of the walls. The first step is to eliminate cracks and through holes, clean off loose plaster, and treat areas affected by fungus. Torn brick is not susceptible to mold, and on the outside it perfectly masks such defects, but if the fungus is left on the walls, it will destroy them from the inside, at the same time having a negative impact on the inhabitants of the house.
Be sure to check the evenness of the load-bearing walls relative to the vertical. Minor differences do not play a role, so no additional measures are required, and differences of more than 2 cm will need to be taken into account when connecting the cladding and load-bearing walls. If a wooden façade is being clad, it should be treated with an antiseptic primer and wait until the surface dries.
Treating a wooden facade with an antiseptic primer
Prices for deep penetration primer
To work, you need to prepare tools: a trowel, a grinder for cutting bricks, a plastic template for applying mortar, strong threads or twine, a level. Additionally, you will need a bucket of clean water and a rag in case the solution gets on the front side of the brick.
Choosing a masonry method
Once everything is ready to go, you need to carefully consider what type of masonry to use. A certain arrangement of bricks allows you to form different patterns, and the decorative effect can be enhanced by using a material of two or three colors, as well as using a mortar that is contrasting in color.
The most popular types of masonry:
- path, or classic - bricks are laid with a spoon, and each next row is shifted relative to the previous one by half or a quarter of a brick. It is considered the easiest to implement;
- block - when laying, the bonded and treaded rows alternate, with the seams of identical rows located exactly above each other;
- cross - alternating spoon and butt rows is performed, with the seams shifted in every second row by half a brick;
- chaotic, or savage - in each row an irregular alternation of spoon and butt bricks is performed. This is also a fairly simple method of laying;
- Brandenburg - in a row after two spoons there is one butted brick, the rows are shifted by half the end of the brick. Such masonry requires skill and high precision.
Types of brickwork
If you have little experience in such matters, choose classic plain masonry - this will greatly simplify the work process. When using material of two or three colors, first draw a sketch and indicate the location of the bricks of each color in the rows to make it easier to navigate when doing the masonry. But it is better to entrust complex colored ornaments to specialists, since it is easy to make a mistake even with the diagram, and it will not be possible to correct the defect, except by completely painting the wall.
Preparation of the solution
Manufacturers of torn bricks recommend using cement-sand mortar for facing masonry in a ratio of 1 to 3. Cement should be used M400 and M500, and the sand should be sifted through the finest sieve. Due to the low water absorption of the material, the solution is made a little thicker than with standard masonry. To favorably emphasize the texture of the brick, you should add a coloring pigment to the solution, but it is very important to choose the right colors:
- torn yellow brick looks great with red, black and brown seams;
- red brick harmonizes perfectly with black and white seams;
- For brown brick, red and white joints are best;
- The gray brick is perfectly emphasized by white seams.
Cement M500 and M400
To get a white solution, take white cement and sand of the same color, a red solution is obtained by adding dry red lead, a black color is obtained from carbon black or ordinary soot. The brown color is formed when carbon black is added to a red solution. All these components are commercially available, so you won’t have any problems with coloring the solution.
Important! The mass fraction of coloring substances should be 3-6% by weight of cement. A higher content of pigments leads to a decrease in the strength characteristics of the solution.
Prices for cement and basic mixtures
Bricklaying
Step 1. Torn bricks without mortar are laid around the perimeter of the facade to determine how much material is needed and how many bricks need to be cut. Particular attention is paid to corners and openings, because this is where the most precise fit is required.
Step 2. Using a grinder, cut the required number of brick halves for the first 5-6 rows. This will save time during cladding; there will be no need to be distracted from the main process.
Cut the required amount of brick with a grinder
Step 3. Mix a thick solution. Since there is less water in it, setting occurs faster, and therefore batches should be small. The dye in the form of a dry powder must be sifted through a sieve to avoid lumps, and stirring is carried out until the solution becomes completely uniform in color.
Step 4. Laying begins from the corners. A layer of mortar not about 1-1.5 cm thick is applied to the base so that it does not reach the edge by 9-10 mm. Lay out the first corner brick, trim it, tapping it with a trowel on top. The second brick is fastened, having first applied the mortar to its end part. The seam width should be 8-10 mm. In the same way, lay out another 2-3 bricks of the bottom row on each side of the corner. During the laying process, check the horizontal and vertical positions of the laid elements with a bubble level.
We start laying bricks from the corner
Step 5 . Move to the second row. On a flat surface, several bricks are placed in a row, with the end part up. The bricks should be placed as close to each other as possible. Next, take a template for applying the mortar, apply it to the first row of masonry, and spread the mortar with a trowel. Carefully remove the template, after which the mixture is applied in the same way to the butt side of the bricks prepared for laying. Having removed the template, use a trowel to separate the bricks and place them one by one in the second row on the corner of the facade. Be sure to shift by half a brick on each side.
Let's move on to the second row
Step 6. The corner is laid out to a height of 4 rows, after which they begin to form the second corner. Everything is carried out according to the scheme described above, observing maximum care when applying the solution. If it accidentally gets on the front side of the brick, you need to immediately wipe it with a clean damp cloth.
Step 7. After building the corners to the required height, pull a thread between them at the level of the first row, distribute the mortar over the base and lay out the bricks as described above. There is only one difference: every 4 bricks, the vertical seam is left empty, without mortar, to ensure ventilation of the facade. As a rule, using a template, the seams are neat, of the same depth and width, so there is no need to make any special adjustments to the masonry.
Pull the thread at the level of the first row
Step 8. After the fourth row, it is necessary to reinforce the masonry and tie it to the load-bearing wall. Manufacturers do not recommend increasing this distance due to the large weight of the finishing material. For reinforcement, a metal mesh is used, and to tie the cladding to the facade, long anchors or metal rods with a diameter of at least 5 mm are used, which are buried into the wall at an angle of 45 degrees by approximately 80-100 mm. About 3-5 rods should be attached to each linear meter.
Reinforcement of brickwork
Step 9. Every 10 rows you need to take a break from work for about 4 hours. This is required for uniform shrinkage of the solution and maintaining the evenness of the seams. You can complete no more than 20 rows per day, otherwise the masonry will “float” under such weight. The covered areas must be covered from above with plastic film to protect them from precipitation. When the weather changes and air humidity increases, it is recommended to suspend work and cover the entire perimeter with polyethylene.
Thanks to precise geometric shapes and the use of a template, there is no need for seams. After completing the cladding, it is enough to sweep the masonry with a brush to remove small particles of mortar and dust. Many experts recommend treating the masonry with water repellents after the solution has completely dried, which increases the water-repellent properties and at the same time improves the appearance of the cladding. Such compositions are applied in two layers with an interval of 60 minutes. Treatment is carried out in dry, windless weather, at temperatures above +5 degrees.
Facing a house with torn bricks
Prices for angle grinders (grinders)
Connecting a brick partition to aerated concrete wall
When erecting brick partitions, you should first calculate the load on the floors. To reduce weight, it is optimal to use hollow bricks.
To connect the partitions to a load-bearing wall made of aerated concrete blocks, you can use reinforcement: one end of it is fixed in the wall, and the second is placed in a seam every 4-5 brick rows.
The brickwork itself is additionally reinforced: two metal rods with a diameter of 4-6 mm are systematically placed into the joint mortar, which are ultimately connected to those that knit the aerated concrete wall and the brick cladding.
- how to glue wallpaper on aerated concrete
- what wallpaper is suitable for aerated concrete
- interior plaster on aerated concrete
- what plaster to use for aerated concrete
- how to plaster aerated concrete outside
- how to attach siding to aerated concrete