The invention relates to systems of laser means of transmitting and measuring information and can be used in sea and river transport for guiding ships through complex fairways and safe navigation in the coastal zone, as well as in other fields of technology where it is necessary to remotely measure the range, coordinates and speed of an object . The technical result is to increase the safety of navigating ships through complex fairways in coastal areas. The laser beacon includes a multicolor laser target, a lens, a dividing plate, a built-in control unit, an optical system of a photodetector and a photodetector, pre-amplification and signal conditioning units, while a scanning semiconductor laser with electronic pumping is used as a radiation source, for which a scanning electron is introduced into the device - a beam tube with control of the scanning of the electron beam, for the control of which an electron beam control unit is introduced, to synchronize its operation with the introduced memory unit, which stores information consisting of sample numbers corresponding to the moment of arrival of pulses from the signal generation unit during an odd and even frame , a synchronization block has been introduced, from which a set of signals is supplied to another input of the memory block, and the same set of signals from the synchronization block is supplied to the electron beam control block, and a computer block has been introduced, which receives signals from the memory block and the built-in control block, where according to the program the parameters of one or more objects are calculated, in accordance with which the computer unit generates control signals supplied to the electronic beam control unit, which forms the dimensions of the modulated color zones, which makes it possible to control the color zones, changing their configuration depending on the conditions. 2 ill.
Types and purpose
The functions of the laser level are:
- Construction of a vertical plane (for example, for installing walls).
- Horizontal plane (laying the floor).
- Using a level as a plumb line (installing beacons for plaster).
All laser levels differ in functionality, purpose, adaptability to certain technological operations, type of alignment, accuracy, price and other characteristics, such as additional functions and devices, number of planes, laser power (projection range), power principle, and the presence of a signal amplifier.
According to functionality, laser levels are:
- Spot.
- Positional (linear).
- Rotary (rotating).
Spot levels allow you to set only the projection of one ray - a point. Positional ones imply a fixed installation for work, while rotary ones allow you to rotate the device around its axes during work, obtaining projections of planes onto all objects, and the angle can reach up to 360 degrees. In positional levels, the prisms are already installed at certain angles and cannot be moved.
Consequently, there is nothing to break there, and they are more reliable. Rotary prisms with different angles of rotation (they are called sweep angles) allow you to speed up some standard procedures for setting up and designing planes, but are naturally less reliable.
According to their purpose, laser levels can be divided into the following:
- For use in a small room (apartment).
- For use in industrial workshops and outdoors.
Expert opinion
Levin Dmitry Konstantinovich
For use in an apartment, as a rule, laser levels are cheaper, with a less powerful signal, shorter beam range, less accuracy, battery powered, and no amplifiers. Industrial - powered by a battery, have more power, a number of planes, receivers and amplifiers for recording the signal where it is no longer visible to the naked eye or in daylight on the street, perhaps special glasses.
Of all the operations that levels are suitable for, some are clearly better suited:
- For building a plane for plaster.
- Aligning the plane of the floor surface.
- Checking planes for laying tiles.
- An important operation is the type of laser level alignment.
There are levels:
- Manual
Which need to be adjusted using a bubble level.
- Automatic
The perpendicularity of which to gravity is adjusted automatically using a pendulum.
Manual laser levels can be intentionally set at an angle, but automatic ones cannot. Automatic levels have different types of notification that they are configured to work - sound, flashing or turning off.
The accuracy of laser levels ranges from 1 mm per 1 m projection for simple apartment levels to 0.1 mm per 1 m projection for expensive industrial levels. At the same time, you need to understand that without special equipment it is impossible to notice the difference - in an apartment there are no such distances at which it would become noticeable to the naked eye, and at distances of industrial laser levels, apartment laser levels do not work. In addition, accuracy depends on factory calibration and for cheap levels it can be checked at the point of purchase.
To do this, you need to line up a vertical plane on the wall, make marks on the wall on the projection line and rotate the plane 180 degrees. If the resulting new line passes through the marks left, the accuracy is ideal (you can’t achieve more manually). If there is a distance between the lines and it is greater than the distance from the level to the wall, multiplied by double the declared accuracy, then the device is poorly calibrated.
The price of laser levels depends on:
- Manufacturer, which is natural - products from Western manufacturers are more expensive than their Chinese counterparts.
- Intended use – laser levels for industrial use are more expensive.
- Number of additional functions and devices.
- Declared accuracy.
- Signal strength.
Expert opinion
Levin Dmitry Konstantinovich
When used in an apartment, if the work is not on stream, most likely the price will not play any role, since more expensive models are justified only for speeding up the work, but not for improving its quality.
Additional functions and devices can be turned on absolutely arbitrarily. All laser levels support the alignment of perpendicular planes - horizontal and vertical - and use as a plumb line. In this sense, additional functions are any additional points and planes to speed up the work. Some levels allow you to build diagonal bisectors, which is convenient for quickly checking the surface for tiles.
The level gauge can be equipped with a range finder. Additional devices are special glasses to improve the visibility of the laser projection, laser signal amplifiers for use at greater distances, floor and wall mounts, and remote controls.
What laser level do you use?
ManualAutomatic
Some laser tools are better suited to certain jobs, but the name indicates that the tool is intended for laying tiles. This usually means that it has additional functions that allow you to draw squares more accurately, and in additional functions it has diagonal projections. Laser levels for floors line up two planes at an angle, parallel to the floor and can be rotated 360 degrees.
The intersection line of the two planes is adjusted to the floor. If, when rotating, the line bifurcates in some place, it means there is a bulge or depression in the floor in that place. To quickly understand what we have when the lines bifurcate - a convexity or a depression, a target with marked marks is applied to the projected planes perpendicular to the floor, where the projections of the planes should be if the floor is horizontal. Deviation in one direction is a bulge, in the opposite direction is a depression.
Based on the power supply principle, laser levels are divided into battery-powered and battery-powered. The first are cheaper devices intended for home work, the second are for professionals working on industrial sites.
Thus, to select a model, you need to decide on two parameters - the frequency of use of the laser level - constantly, once a month, one object, and then, as it turns out, the type of object - apartments or industrial facilities.
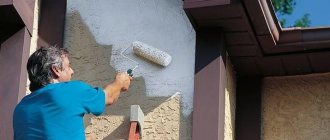
Plastering walls on beacons
The surface leveling procedure consists of several stages. The order is as follows:
- Preparing the plaster solution. The dry mixture and water are added to the bucket. Mix the composition thoroughly with a drill with a special attachment. The consistency of the first layer will be similar to sour cream, that is, quite liquid.
- Application procedure (spray). We take a plaster ladle and throw the prepared composition onto the wall. It is better to do this with force so that the solution sticks to the surface and fills all the recesses. Recommended thickness is 5 mm.
- Apply the base layer. We prepare the solution in a new way, so that the mass resembles dough. The second layer can be applied only after the first has dried. For work we use a ladle or trowel. Layer thickness – 5 mm.
Important! Application of several layers is allowed. But the final plaster layer should have a thickness of 5 to 7 cm, no more.
- Level the surface. As a rule, at this stage the solution already goes beyond the beacons. To align, we use a rule and draw it along the guides from bottom to top. The collected “excess” solution can be reused.
- We dismantle the beacons. To remove the guides, just pry them off with a spatula. In the case of aluminum products, they can be left in the wall.
- We cover the holes from the beacons. To fill the cracks, we use a plaster solution, which we apply with a spatula.
- Level the plaster in the corners. For this task you will need a special angled spatula.
- We install perforated corners. They are placed on all external corners and slopes. For ease of work, a level is useful.
- Apply the covering (finishing layer). For application we use plaster powder. The solution itself should have a creamy consistency. The operation is done with the aim of making the surface as smooth as possible.
- We rub down the plaster. After the covering has set, it is treated with a small circular motion with little effort.
Important! Gypsum plaster retains its qualities for about 20 - 30 minutes, so it is not recommended to immediately prepare a large portion. If the solution has set, it cannot be applied.
Adhering to the described technology, the surface of the walls will become almost perfectly smooth. Already at this stage, you can begin subsequent finishing: decorative plaster, liquid wallpaper and other similar materials.
Alignment by rule
Models for domestic use in an apartment
For infrequent use in an apartment, any cheap device will do. Let's consider the most suitable models.
FIT IT 18 605
A cheap laser level with quite decent characteristics. It has great accuracy and projection range, so it can also be used on construction sites. Powered by AA batteries. Can be mounted on a tripod. The downside is that it only produces one laser beam, so it won’t speed up work with tiles, screed and plaster. Cost from 600 rubles.
Laser LevelPro3
A good device that aligns two planes also has limited functionality. Range - 5.5 meters, tape measure included. The cost also starts from 600 rubles.
GLL 3-80 Professional from Bosch
If you move to a higher price range, then you can actually buy a model for 2000 rubles on sale. This is already a completely professional tool, providing the construction of three planes, 360-degree rotation and automatic alignment when deviating from the vertical up to 4 degrees. Range – 30 m, with receiver – up to 120 m.
Bosch PLT 2
In the same price range is a model that can be used for laying tiles on the floor or wall. To do this, the tool builds two perpendicular planes and is equipped with a wall mount.
RGK LP-103
A model with a tripod costs about 5,000 rubles; it builds two planes with a scan angle of 110 degrees at a distance of 30 meters. The accuracy of the constructions is 0.3 mm per meter. Powered by three AA batteries.
Models for professional work in small spaces
For professional work with apartments, you need more functional tools that work with a larger number of planes.
Bosch GSL 2 Professional
The model is well suited for checking the evenness of floors in professional quality apartments. The level gauge projects two planes at a distance of up to 20 m with a scanning angle of 360 degrees. The accuracy of the device is 0.3 mm per meter, the price of devices in this series is from 7,000 rubles.
ADA instruments ULTRALiner 360 4V Set
In addition to one horizontal line, the tool allows you to line up four vertical lines at a distance of up to 20 m, with a receiver - up to 70 m. The accuracy is 0.2 mm per meter. Price – from 20,000 rubles.
Stabila LAX 400
The model is suitable for professional tiling, electrical marking, and pipe installation. In addition to the horizontal, it provides two vertical planes with the ability to move horizontally without changing the installation. Accuracy – 0.2 mm per meter, distance – up to 20 m, with a receiver – up to 40 m. Price from 34,000 rubles.
Leica Lino L2P5
The model allows you to build two lines (horizontal and vertical) and five points (up-down-right-left-center of the cross) at a distance of up to 15 m, with receivers up to 30 m. Accuracy 0.3 mm per meter, price - from 25,000 rubles .
How to set markings for installation of beacons: 2 ways
Before fixing the beacons on the rough wall, you need to mark the surface. Determine its depressions and convexities, and also calculate the blockage of the wall (if any). After the markings have been made, it will be clear how many beacons will be needed for plastering work.
To perform markings, 3 methods are used, differing in their specificity and time spent.
Method I is the usual one.
- Measure 30 cm from the corners of the wall being prepared. 15 cm from the floor and ceiling.
- Using the obtained points, lines are drawn horizontally and vertically.
- At the points where the lines intersect, you need to make a hole and fix the screw.
- From the marked vertical lines the surface is marked into vertical stripes. The distance between them is 1 meter, maximum 130 cm.
- On the extreme vertical stripes you need to find the middle and mark it. Connect the dots. You will get a horizontal stripe in the middle of the plane.
- Next, plumb lines are attached to the upper screws. Also, the self-tapping screws in the corners must be connected diagonally with thread.
This way, all the unevenness on the wall is revealed, as well as the percentage of surface obstruction.
Method II – “spider”. The name comes from its resemblance to a spider's web. To apply markings you need:
- Retreat from adjacent walls 15 cm, and from the floor and ceiling 5 cm.
- Self-tapping screws are fixed at the intersection points of the horizontal and vertical lines. The caps protrude 2 cm above the surface.
- Plumb lines are hung on these screws. They are fixed below. The location is marked and self-tapping screws are also screwed into these places.
- Pull 2 vertical threads.
- Horizontal ropes are tied to these threads; they should move freely up and down.
- By moving the horizontal lines, the unevenness of the wall is affected, they are marked with a marker, and the collapse of the wall is also determined.
When marking vertical lines for beacons, an equal distance is noted from the outermost vertical lines. Let's say 1 meter on one side and the other. The remaining surface is also divided into equal parts of 120.130 cm.
After the markings have been made, the number of required guides for the beacons is calculated. They are cut 30 cm less than the height of the room.
On gypsum putty
Lighthouses are placed in different ways according to markings. One of them is gypsum putty. This method is used most often due to the ease of dismantling the profiles after creating a single plane.
Materials and tools
To attach the guides to the solution you will need:
- guides - beacon profiles;
- gypsum putty;
- clean water at room temperature;
- container for mixing the solution;
- construction mixer;
- trowel, spatula;
- level, rule.
Sequence of work
First you need to mix the solution. To do this, follow the instructions on the bag with the dry mixture. You shouldn't make a lot of solution because it hardens within an hour. Before applying the solution, the wall is cleaned of dust and moistened with plain water.
Installation begins from the first line from the corner. Place patches of mortar in the place for the beacon every 15-20 cm. The greater the collapse of the wall (deviation from the plane), the larger the patch should be.
Afterwards, a guide bar is installed on the solution. Its evenness must be corrected using a level and a rule. If the solution is not enough, it must be added. And if there is too much, carefully remove it on the sides with a trowel.
In the same way, the beacon is installed on the other side along the extreme markings. Only after installing the outer profiles, install intermediate guides.
Upon completion of all work, the beacons must be removed, and the place where they are fixed is covered with a solution.
How to set using self-tapping screws
This method has the advantage of reducing operating time. There is no need to wait until the solution sets or the evenness of the installed guide is disrupted if it is accidentally touched. These facts are important for beginning craftsmen.
Materials
To install beacons using screws, the following materials and tools are required:
- beacon profile;
- self-tapping screws with dowels;
- fastenings for profiles;
- perforator;
- screwdriver;
- level, rule.
In this method, it is important to maintain accuracy in performing the work.
Sequence of work
On the lines marked for the profiles, holes are made for the dowels in equal increments of 15-20 cm. Self-tapping screws are screwed into the dowels so that the caps are in the same plane. To do this, use a stretched thread.
After installing the beacons, plastering work begins.
Rubbed plaster beacons
This method is applicable for a flat surface with minimal deviations. In this case, the plaster must be gypsum based. If cement mortar is used, this method is not suitable.
Materials
For rubbed plaster beacons you will need:
- plaster based plaster;
- spatulas with different blade widths;
- Master OK;
- self-tapping screws;
- drill;
- profile;
- screwdriver;
- level, rule.
All tools must be clean and in good working order.
Models for one-time work on industrial facilities
For infrequent work on the street, laser levels with a long range and a scanning angle of 360 degrees are needed, while at the same time you can save on the amount of functionality. The following models belong to this group. It is advisable to have batteries as a power source, since batteries run out quickly when used for lasers of this power.
RGK PR_81
The model (the simplest of outdoor laser levels) allows you to build two planes at a distance of up to 80 with a receiver. Accuracy 0.2 mm per meter. Powered by AA batteries or rechargeable batteries. The pendulum compensator provides automatic alignment with vertical deviations of up to 4 degrees. Cost from 7000 rubles.
Condtrol Neo G220 Set
The budget model allows you to build a vertical and horizontal plane at a distance of up to 100 meters using a receiver, with an accuracy of 0.3 mm per meter. The sweep angle is 140 degrees. The battery operating time without recharging is up to 15 hours. Cost from 8000 rubles.
ADA 3D Liner 2V
Another simple option is the linear model level, which allows you to build one horizontal and up to four vertical planes at a distance of up to 50 meters. The auto-leveler works when the deviation from the vertical is up to 3 degrees. The cost of the device is from 10,000 rubles.
Bosch GLL 2-50 Professional
The simplest model for the street allows you to work at a distance of up to 20 meters, and with receivers - up to 50 m. Provides the construction of one vertical and one horizontal. Has an auto leveler. Accuracy 0.3 mm per meter, sweep angle – 110 degrees. The model uses battery power. Price – from 15,000 rubles.
Laser level for walls
All other screws are screwed in or out until the laser beam touches the pencil mark. Thanks to this, all the screws will occupy one vertical plane. The only untouched screw is located below, near the laser itself. Apply a bubble level to the outermost vertical lines.
Let's align the bottom screws so that the bubble inside the flask is in the center. Place the remaining screws under the bottom thread.
Now we drill holes in all vertical lines every centimeter. By resting the level against the upper and lower screws, we align the remaining screws.
Then you can place beacons. Thickly spread the gypsum plaster. Now it’s easy to install beacons. Next to each self-tapping screw we place a tubercle of plaster. Remove excess plaster with a spatula. As it turned out, installing beacons on walls is not a difficult job, but it is painstaking.
Models for professional work on industrial facilities and construction sites
For professional work at industrial sites, the requirements increase. For such instruments, the necessary conditions, in addition to a long beam projection range, are high accuracy and a 360-degree scanning angle.
Bosch GRL 250 HV
The simplest model in this class, it provides operation at a distance of up to 30 meters, even in bright light. With the help of a receiver, the range increases to 250 m. The accuracy is 0.1 mm per meter. Works in both linear and point mode. The self-leveling angle of the level is 5 degrees. Battery power allows you to work 40 hours without recharging. The cost of the model is from 50,000 rubles.
Geomax Zone20 H
The model is designed for work on construction sites. Range up to 900 meters, scanning angle 360 degrees. Auto-leveling deviation is 5 degrees. The tool is equipped with a remote control. The cost of the model is from 80,000 rubles.