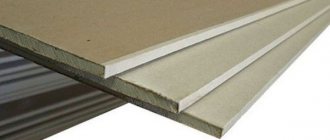
Inscriptions and markings on OSB
There are no generally accepted marking standards for marking OSB sheets. Each manufacturer decides for himself how and on which side to apply inscriptions to the OSB.
Sometimes in production there are inscriptions with orientation recommendations. On imported slabs there may be the mark “THIS SIDE DOWN”. This text can be translated as “this side from below.” Such an inscription is usually applied to the smooth side of the OSB sheet.
An inscription on the OSB that helps determine which side to mount the sheets on.
Manufacturers recommend that the sheet be oriented with the smooth side down to make it easier for people to move along the rough side. When laying roofs, installers do not slip on the rough side. This reduces the risk of people falling and getting injured.
On the logs
Installation of OSB on logs is carried out as follows:
- First, the distance is calculated and the joists are laid evenly so that the joints of adjacent OSB slabs rest on the support.
- Next, you should adjust the position of the joists so that any three of them are at the same level. To do this, linings are used, and for checking, a long rule is used.
- Installed logs must be securely fixed using screws on anchors or dowels. Only those logs that are made of dried wood and laid in a dry room are not secured.
- Laying OSB sheets is done in the same way as on a wooden floor, after which they are fixed with self-tapping screws every 30 cm.
For ease of installation, you can pre-mark the location of the logs on OSB boards.
In conclusion, we note that additional information can be gleaned from the video materials attached to this article. We wish you a successful repair.
Choosing the OSB side when installing sheets
When installing in places protected from moisture, the location of the OSB sides does not matter, since this does not affect their further operation.
Depending on the installation location of the slabs, there are recommendations for the orientation of the sheets with the front and back sides.
Which side to mount OSB sheets.
Which side to mount OSB sheets on walls outside the house
If the slabs need to be mounted on walls from the outside of the building, it is better to mount the OSB smooth, i.e. face side out . This orientation avoids the accumulation of water in surface irregularities, therefore, it will increase the durability of the slab.
Which side to mount OSB sheets on indoor walls
When OSB sheets are installed indoors, their orientation does not matter. The main destructive factor for OSB is water, and indoors the sheets are protected from water.
In wet rooms, it is better to cover OSB sheets with an additional protective layer. For example, glue tiles or ceramic tiles.
Which side should you put OSB on the floor?
When using OSB for flooring, the material is turned with its front side facing the ceiling. In this position, if water possibly gets on the floor, it does not penetrate deep into the sheet. Also, this water drains faster, evaporates and causes less damage to the structure of the slab.
Which side to attach OSB to the ceiling
For cases of installing OSB to the ceiling, there are no general recommendations on the orientation of the front and back sides. The fact is that the ceilings are protected from falling water, and, accordingly, both sheets are protected.
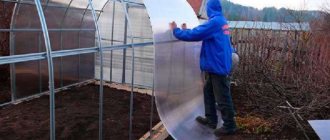
Which side should you put OSB on the roof?
When slabs are used in roofing, it is better when the rough side (wrong side) is oriented upward. Then it is safer to move on the roof during work.
When installing a roof.
Laying OSB on a concrete floor: how to lay OSB under linoleum without lag
| Properties | Unit | Specification | ||
| Density | Kg/m3 | 620/640 ±5% | ||
| Deviation tolerance length/width | mm | +0/-2 | ||
| Thickness tolerance (not ground) | mm | ±0,8 | ||
| Thickness tolerance (ground) | mm | ±0,3 | ||
| Side perpendicularity tolerance | Mmm | 3,0 | ||
| Straightforwardness | Mmm | 0,6 | ||
| Linear expansion (humidity 65-85%) | % | 0,15 | ||
| Specific thermal conductivity – value “k” | W/(mk) | 0,13 | ||
| Arson response (EN130501-1) | – | Class D | ||
| product name | Perimeter (mm) | Thickness (mm) | ||
| Sterling OSB2 (rectangular edge) | 2440×1220 | 8, 9, 10, 11, 12, 12, 15, 18, 22, 25 | ||
| "Sterling OSB3" (rectangular edge) | 2400×1220 | 8, 11, 15, 18 | ||
| 2440×1220 | 9, 10, 11, 12, 15, 18 | |||
| 2500×1250 | 9, 10, 11, 12, 15, 18 | |||
| "Sterling OSB3". Tongue joint - 2 edges | Size | |||
Expert opinion
Strebizh Viktor Fedorovich, leading construction foreman
If the housing is located in a region with a large minus in winter, which requires additional insulation of the cement screed using a layer of OSB or an artificial void using sheathing and a layer of insulation. If you want to clarify something, please contact me!
Nuances of processing different sides of OSB sheets
At the stage of delivery of the material from the manufacturer to the consumer, its surface is protected from moisture by covering it with paraffin. The latter reduces the adhesive properties of the surface of OSB sheets.
Both sides of OSB are coated with the same compound. Without additional surface preparation, both paint and plaster will peel and crack over time. Moisture will penetrate into the cracks, and the material will become unsuitable for further use.
For this reason, before applying the finish, the surface is cleaned of the factory coating and a layer of primer is applied. Acrylic primer is used for this.
Cleaning is done first with coarse-grain sandpaper (P80), and then with fine-grain sandpaper (P200 and more). OSB-3 and OSB-4 boards are most reliably varnished, so their cleaning must be done more carefully. When the top protective layer is removed, the finish easily penetrates into the structure of the material.
Particular attention should be paid to the edges. Their structure is porous, so the absorption of paints and varnishes is increased here. The edges and corners are pre-rounded, otherwise the paint at the joints will crack over time.
The seams between OSB boards and gaps must be treated - filled with acrylic-based sealant. It is better not to use silicone, since paints and varnishes do not adhere well to it. Some craftsmen prepare mixtures themselves, using casein, sawdust and gelatin.
The texture and appearance of OSB from different manufacturers is sometimes very different. There are slabs that are smooth and beautiful; the shavings in them seem to be covered in varnish. The surface is rough and matte. This is not a sign of poor quality. This OSB is the best for roofing work. Therefore, when selecting a material, you need, first of all, to calculate its thickness, select the correct class, and during installation not to confuse the sides.
Source
OSB floor
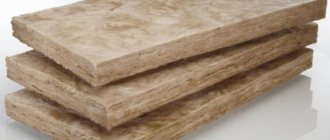
The role of OSB in frame construction and insulation of standard houses is very great. OSB is especially often used to form and level floor surfaces. OSB boards have increased mechanical strength and resistance to moisture, and are characterized by good thermal insulation and sound insulation. The advantages of the chosen solution include fairly simple installation.
The slabs are ideal for construction and leveling floors; they can withstand the load from furniture, equipment, and people’s movements. When leveling small floor defects, it is enough to use OSB boards 10 mm thick. If you are going to create a floor on logs, then the thickness of the OSB boards used should be at least 15-25 mm.
Installation of OSB boards on a concrete floor (cement screed)
The work must be carried out according to the following scheme. The concrete base must be absolutely clean, free of dust, to ensure good adhesion to the mounting adhesive. It is recommended to coat the base of the OSB board with a special adhesive primer Soppka.
Then you need to lay out the OSB boards on the surface and, if necessary, trim with a jigsaw or circular saw. Apply parquet glue to the reverse side of the OSB and glue the sheets to the concrete base. When laying between the slabs, be sure to leave seams 3-5 mm thick. Along the perimeter of the room, between the OSB and the wall, the seam should be 12 mm. It is recommended to fill the joints between the boards with a special putty for OSB joints SOPPKA SMART ELASTIK. Complete drying time is 24 hours.
Installation of OSB boards on plank flooring
Laying OSB over an old wooden floor helps level the surface and prepare it for the finishing coat. First, using a level, you need to determine the location of the unevenness of the boardwalk. Pull boards that “walk” or rise too high above the general level to the joists with dowels, recessing them into the material.
Lay OSB boards on the floor, staggering the seams of each next row. There should be no cross-shaped joints. It is imperative to leave gaps between the plates - 3-5 mm, along the perimeter of the walls - 12 mm. Drill holes in the slabs every 20-30 cm and tighten the OSB to the floor using self-tapping screws. You can make the floor even more durable by installing a similar second layer of OSB. The seams of the overlying and underlying layers should be laid with an offset of 20-30 cm.
Laying OSB on joists on a concrete base
If there is a concrete base (for example, a floor slab), installing joists and covering them allows you to create a level floor without the use of wet leveling screeds. And also incorporate insulating, moisture- and noise-insulating materials into the structure. Logs (wooden blocks) are fixed to the concrete floor using dowels or anchors. The distance between the logs is calculated depending on the thickness of the OSB boards. The thicker the slabs, the less often logs can be installed and vice versa.
Thanks to the logs, space is created between the OSB and the concrete floor. It can be put to good use by covering it with insulating material. For example, a heat insulator can be installed in the floors of the first floors: mineral wool, polystyrene foam, EPS. If there is a wet basement under the ceiling, the floor structure is often supplemented with vapor barrier films or membranes. OSB boards must be laid across the joists. The seams between adjacent slabs (widthwise) should run strictly in the middle of the log. During installation, it is also recommended to leave expansion gaps (3-5 mm between the slabs, 12 mm between the OSB and the wall, which can then be easily sealed with SOPPKA Smart Elastik). OSB boards are fixed to the joists with self-tapping screws or nails (spiral, ring). Spacing of fasteners: along the perimeter of the sheets - 15 mm, on intermediate (additional) supports - 30 mm.
Installation of OSB subfloor on joists
This technology is only appropriate with an existing columnar, pile, or foundation. Logs need to be installed on the foundation. The lag pitch must correspond to the thickness of the OSB boards used (the larger the pitch, the greater the thickness). Next, perform rough rolling of the floor. To do this, you need to nail retaining bars along the joists onto which OSB boards will be laid and secured. It is recommended to lay a layer of vapor barrier on top of the OSB, after which you need to cover the insulation with another layer of OSB. Fastening is carried out in the same way as when laying OSB on joists on an existing concrete base. At this point the work process is considered completed.
Preparation of OSB for finishing coatings
A strong, hard and smooth surface makes OSB a universal base for all modern types of finishing floor coverings. Here are some popular solutions:
In this case, OSB boards will act as finished floors, which will only require decorative finishing with paints and varnishes. OSB sheets do not require any additional preparation; it is enough to clean them from dust and apply 2-3 layers of varnish (paint) specially designed for OSB boards.
Roll materials - linoleum and carpet.
When laying rolled materials, it is necessary to ensure that the joints between OSB boards are located flush with the rest of the surface. It is advisable to remove all irregularities using sanding paper. Seal the joints between the plates using SOPPKA SMART ELASTIK. Smart seam.
In order for the tile to be held on the OSB base, it is necessary to ensure its immobility. To do this, logs are placed more often than required by the thickness of the sheets. It is also recommended to reduce the pitch between fastening elements. Glue the tiles onto OSB using a special adhesive suitable for the wooden surface and the tiles used. It is recommended to pre-treat the surface of the slab with SOPPKA for better adhesion to the tiles.
This coating is quite rigid, so there is no need to prepare OSB for laying the laminate. Minor irregularities that may exist at the joints of the plates are leveled out by the substrate.
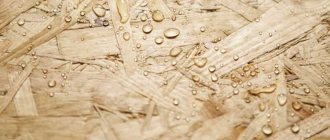
How to distinguish the front side of OSB from the back
Taking a closer look at the material, you can see that there are practically no roughnesses on one side. The veneer here is large, and the entire surface is slightly shiny. This is the front side.
The reverse side of OSB is not so smooth; it consists of small chips. They also produce laminated OSB boards. If lamination is not double-sided, then the front side is even easier to determine. For a tongue-and-groove OSB board, the front side is determined by the locking connection.
Types of edges of OSB sheets
In this case, there are only two types - straight edge and figured edge.
Direct is used as a base, rough material, base for further finishing. Sometimes a straight edge is used for the production of containers, boxes, etc. from OSB.
As for the curly edge, it is suitable for the final final cladding. It provides that the sheet will have grooves and bulges on different sides, due to which the most tight joining is possible. Accordingly, it will be possible to assemble a homogeneous plane from several sheets while maintaining maximum heat and moisture insulation.
Inscriptions and markings on OSB boards
There are no generally accepted marking standards for marking OSB sheets. Each manufacturer decides for himself how and on which side to apply inscriptions to the OSB.
Sometimes in production there are inscriptions with orientation recommendations. On imported slabs there may be the mark “THIS SIDE DOWN”. This text can be translated as “this side from below.” Such an inscription is usually applied to the smooth side of the OSB sheet.
Manufacturers recommend that the sheet be oriented with the smooth side down to make it easier for people to move along the rough side. When laying roofs, installers do not slip on the rough side. This reduces the risk of people falling and getting injured.
Installation of OSB boards on plank flooring
- The highest quality slabs produced by North American (Canadian, first of all) and European companies are considered. The slabs are produced in strict compliance with the requirements of modern norms and technologies; they comply with the requirements and standards (primarily E1), including environmental safety.
- For floors, OSB-3 boards are best suited - the most common option, which guarantees a reliable base structure due to a high level of protection from moisture and high density.
- Much depends on whether the slabs are laid on wooden joists or a concrete screed. Wood requires more massive sheets with a thickness of 15-18 millimeters in increments of up to half a meter or 22-25 millimeters in increments of up to 60 centimeters. For concrete, slabs up to 10 millimeters thick are suitable.
- The size of the slab according to the standard is 2.44x1.22 meters. The required number of slabs is calculated taking into account their location and attempts to leave as little waste as possible. The slabs can be easily cut to the required dimensions using a circular saw.
Nuances of processing different sides of OSB sheets
At the stage of delivery of the material from the manufacturer to the consumer, its surface is protected from moisture by covering it with paraffin. The latter reduces the adhesive properties of the surface of OSB sheets.
Both sides of OSB are coated with the same compound. Without additional surface preparation, both paint and plaster will peel and crack over time. Moisture will penetrate into the cracks, and the material will become unsuitable for further use.
For this reason, before applying the finish, the surface is cleaned of the factory coating and a layer of primer is applied. Acrylic primer is used for this.
Cleaning is done first with coarse-grain sandpaper (P80), and then with fine-grain sandpaper (P200 and more). OSB-3 and OSB-4 boards are most reliably varnished, so their cleaning must be done more carefully. When the top protective layer is removed, the finish easily penetrates into the structure of the material.
Particular attention should be paid to the edges. Their structure is porous, so the absorption of paints and varnishes is increased here. The edges and corners are pre-rounded, otherwise the paint at the joints will crack over time.
The seams between OSB boards and gaps must be treated - filled with acrylic-based sealant. It is better not to use silicone, since paints and varnishes do not adhere well to it. Some craftsmen prepare mixtures themselves, using casein, sawdust and gelatin.
The texture and appearance of OSB from different manufacturers is sometimes very different. There are slabs that are smooth and beautiful; the shavings in them seem to be covered in varnish. The surface is rough and matte. This is not a sign of poor quality. This OSB is the best for roofing work. Therefore, when selecting a material, you need, first of all, to calculate its thickness, select the correct class, and during installation not to confuse the sides.
Regulations
In the Russian Federation, the characteristics of OSB are regulated by GOST 32567-2013 , which you can familiarize yourself with at this link.
The basis of this document was the international standard EN 300:2006 “Oriented Strand Boards (OSB) – Definitions, classification and specifications”. Therefore, slabs that comply with GOST will also comply with the international standard.
The document applies only to the characteristics of the finished product, allowing the manufacturer to independently choose the most suitable technology. We talked about general technological aspects in the article OSB production as a business.
Where are the front and back sides of the OSB (OSB) boards, which side should they be laid on?
We bought OSB boards, but we can’t decide where the front and back sides of these boards are, which side to lay them on, or is there no difference?
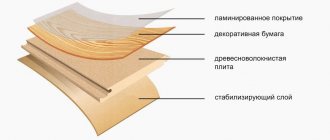
OSB (sometimes called OSB board, or OSB in the original), this abbreviation refers to oriented strand boards.
These slabs are made from wood chips, the wood chips are the basis of these slabs, and these wood chips are held together using a special adhesive composition under pressure.
In the manufacture of OSB, wood processing waste is used, the size of the chips (veneer) from which OSB is made varies.
Take a close look at both sides of the slab.
The side with larger chips is the front side, smaller chips are on the back side.
The front surface is smoother (it even shines a little), more even, in contrast to the rough side on the back.
If we are talking about frame construction and OSB slabs, the house is sheathed on the outside, then the front side of the slab should face “outside”, and the back side should face the inside of the building.
I laid OSB boards on the floors, with the front side of the board facing the ceiling (at the top) and the wrong side facing the floor.
There are quite a few types of OSB boards; laminated OSB is available for sale, in this case it is easier to decide on the front side (if it is not double-sided lamination).
The front side is laminated.
There are also tongue-and-groove OSB boards on sale (moisture-resistant, as a rule), this is what they look like.
By the tongue-and-groove locking connection you can determine where the front side is.
There is varnished OSB.
Here you can also focus on the size of the chips; larger chips are on the front side.
Source
Preparing the base
A correctly completed preparatory stage is more than half the success of floor leveling work. First, a thorough examination of the wooden surface is carried out. This is done using a bubble or laser level. All protruding and loose parts are marked, this will make it easier to strengthen them.
Some people recommend removing the old paint layer with a sander. You need to know that this is only necessary in areas where there are obvious blisters in the paintwork. In fact, the presence of old paint is not critical; you can lay slabs on it. In this case, it is necessary to remove all large contaminants.
Attention! The main part of the preparatory process is fixing the old wooden covering. It is this stage that should be given special attention.
Laying OSB on a wooden floor: types and characteristics, preparation and installation
To decide whether to lay the slabs yourself or hire craftsmen, you need to soberly assess your strengths. The following video will help with this, which clearly shows the installation process.
Expert opinion
Strebizh Viktor Fedorovich, leading construction foreman
Having decided to lay the floor in an apartment or country house without hiring craftsmen, you will have to rack your brains with choosing the appropriate material intended for such purposes. If you want to clarify something, please contact me!
Step-by-step instruction
OSB sheets can be laid directly on the concrete surface or simply laid on the joists. If you are laying the material on an old wooden floor, then you should level the surface in advance. The installation technology in a particular case will be individual. Next, we will study each option in more detail.
On an old wooden floor
Before starting this process, you should prepare carefully, taking into account some important requirements.
- When planning the installation of laminate, parquet, linoleum or tiles, such sheets should be placed so that the joints of the flooring products do not coincide with the joints of OSB boards.
- If you don’t want to calculate the location of the flooring parts, you can choose a transverse view of the flooring. In this case, the joints of the finishing flooring parts will be located at an angle of 90 degrees to the joints of the base slabs.
- You can also opt for a diagonal arrangement of the finishing coating at an angle of 45 degrees. This option is well suited for rooms with uneven walls, where it is planned to lay laminated boards in the future. This will hide the existing imperfections in the geometry of the room.
- Before screwing the material, you must check the corners for evenness. It is preferable to start the installation operation from the most even angle.
- Using a hammer and bolt, all nails on the floor surface should be driven deeper into the board. Uneven areas must be removed using a plane, achieving the smoothest, even surface possible.
- It is recommended to treat the old surface and the lower part of the sheet with an antiseptic.
- Install a special substrate under the stove to prevent condensation from forming on the sheets in order to prevent them from aging in the future. The insulation is fastened with glue or stapled.
- Mark and cut the slab for installation in a diagonal order to avoid distortions and inaccuracies in fixation. Trim those edges of the sheet material that will be adjacent to the walls.
- Secure the OSB boards with special wood screws. Screw in the hardware in rows, placing it in the middle of the underlying boards. To prevent the wood material from splitting along the grain, the nearby fastening elements should be slightly shifted in a checkerboard pattern. The distance from the edge of the sheet to the row of fasteners should be 5 cm, the step in the line should be 30 cm, and the interval between the rows should be within 40-65 cm.
- The holes for the screws are countersinked in advance to install them flush. This will help avoid damage to future finishing layers.
- If the coating is used as a subfloor, all seams must be filled with polyurethane foam, the protruding parts of which are removed after final fixation.
Laying OSB on logs
It is quite possible to build the structure yourself, without involving professionals. The most difficult part of such an operation is building a strong supporting frame. To make load-bearing logs, the timber must be of a certain thickness. Optimally - at least 5 cm. Their width, depending on the distance between them and the future load, should be 3 cm. Next step-by-step installation steps are performed:
- all wooden components that will be hidden under the floor covering must be treated with a special antiseptic solution;
- the logs should be level in a parallel direction to each other with a predetermined step;
- in the case of floor insulation, you need to take into account the width of the heat-insulating product, whether in a roll or in a slab;
- supports located along the edges should be laid at a distance of 15-20 cm from the walls;
- the slabs are placed on the logs for measuring and cutting, as well as for marking the lines of transverse joints between the workpieces;
- focusing on the lines, securely mount the transverse parts of the frame;
- the level of each part is adjusted using special pads made of plastic or wood chips;
- The appropriate insulation material is placed or filled into the recesses of the finished frame.