The technology for laying polycarbonate coverings has its own nuances and subtleties, for example, which side should the polycarbonate be placed on the sheathing, and is it worth it to be so meticulous in preparing the frame and sheathing of the greenhouse. Every summer resident or simply a future greenhouse owner, faced with the problem of how to properly attach polycarbonate to a greenhouse, tries to solve the problem at his own discretion and at the lowest cost, sometimes risking ruining everything and losing a lot of money. It is quite possible to save on polycarbonate fastener parts for a greenhouse, but you need to do this wisely.
Self-installation of polycarbonate - how to lay it correctly
To follow the manufacturers' instructions on how to properly lay polycarbonate on a canopy or other objects, you need to prepare:
- roofing material;
- profiles;
- drill;
- self-tapping screws;
- screwdriver;
- safety glasses and gloves.
The work is carried out in stages:
- The installation of polycarbonate on the roof begins with the sheets being placed relative to the parameters of the sheathing and the places of their attachment being marked.
- Holes are drilled for self-tapping screws and thermal washers. They should be located at a distance of 40 millimeters or more from the edge of the panels. The diameter of the hole is made 5 millimeters larger than that of the thermal washer.
- The material is cleared of chips.
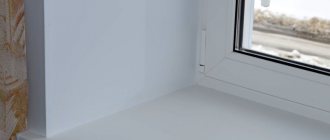
- The end part of the panels is sealed so that water and dirt do not collect in the polycarbonate honeycombs. You cannot seal cuts with tape. For this purpose, profiles made of aluminum or polycarbonate are used. The upper cut is closed completely, and space is left in the lower cut to remove moisture and condensation, for which holes with a diameter of 1.5-3 millimeters are drilled along the edge at intervals of 25-30 centimeters.
- The manufacturers' instructions describe how to install polycarbonate correctly. This must be done taking into account the thermal expansion of this material. If you ignore this recommendation, then at sub-zero temperatures it will begin to fall out of the fastenings, and in hot weather it will become deformed and then burst. To prevent this, gaps are left between the panels.
- Polycarbonate is laid and secured with self-tapping screws. To ensure reliable fixation, fasteners should be used together with special thermal washers. Their gaskets seal holes in the material and make the joint more durable. The diameter of the thermal washer must exceed this parameter of the self-tapping screw.
- Before laying polycarbonate on a canopy or other object, the panels must be oriented correctly. The side with UV protective film should be located on the outside of the roof.
- When the material is connected at right angles, corner profiles are used. If the panels are adjacent to the wall, use a wall profile. To install the ridge on the roof, a ridge element is used.
Why is it important to install polycarbonate correctly?
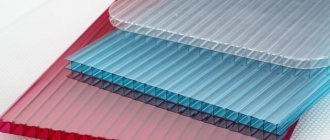
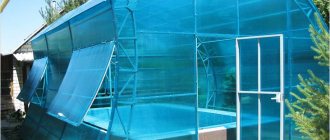
The product was named honeycomb for its visual similarity in cross-section to a honeycomb. The cellular polycarbonate in the slab consists of several polymer layers connected by longitudinal reinforcing bridges. The minimum number of sheets is two, the maximum is four.
The luminous flux passes through polycarbonate by 90% or more, and the strength of the synthetic material is a hundred times greater than that of glass. Polycarbonate bends well, remaining resistant to mechanical damage, for which it is often chosen for constructing arched canopies. When struck, it does not crack, so it is not afraid of even hail attacks.
Although polycarbonate is one of the most durable and reliable polymers, it can be damaged by sunlight. It happens that polymer plastic used as cladding for greenhouses, greenhouses, outdoor gazebos, verandas and similar open-type buildings quickly wears out.
Only a couple of years pass from the moment of installation, and the cladding is completely deprived of its original physical characteristics and declared qualities.
The presence of a protective layer against ultraviolet radiation is the most important quality of polycarbonate. If you attach a sheet with the treated layer inside, you can immediately reduce its service life by a whole decade. It is not difficult to determine the right side with resistance to the destructive effects of the sun: it is covered with packaging film with a list of data about the product and its parameters. There will be no markings on the back of the film.
There are several ways to apply UV protection.
- Spraying. A solution similar in appearance to industrial paint is applied to the polymer plastic in a thin layer. The considered method has significant disadvantages. When transporting and installing a polycarbonate sheet, the protective layer is damaged, which makes the polymer unsuitable for effective use. Spraying as a UV protection demonstrates instability to various atmospheric phenomena and does not tolerate mechanical impact from the outside.
- Extrusion protection method. At one of the production stages, a special layer is applied to the canvas to prevent the destruction of the polymer. It penetrates the surface of the polycarbonate material. The canvas becomes resistant to various types of damage, including mechanical stress. The difference with the previous method also lies in the service life of polycarbonate - at least 20 years.
The polycarbonate sheet is supplied to the customer in packaging film (on both sides). It must be removed upon completion of installation, otherwise, under the rays of the sun, the packaging will firmly stick to the sheet and cause it to turn yellow. It happens that the technician removes the film, forgetting to mark the surface with UV protection, which should be directed outward. Deciding on the right side is easy in this case as well. You need to take the polycarbonate sheet by the end and look through it at the sun. There will be purple highlights on the UV coated side. In principle, such a test can be omitted and replaced by a call to the supplier.
A competent specialist will help you figure out which side should be placed outward and which should “look” inward. Sellers probably know the technical characteristics of their product. Sheets of cellular polycarbonate have a film that prevents the destructive effects of ultraviolet radiation. Moreover, there is a coating on the outside of the canvas that transmits a certain part of the light spectrum. The maximum light flux enters through the coating with polarized mica particles, and harmful infrared radiation is reflected. In rooms glazed with polycarbonate, with intense lighting, the air heats up slightly, which improves the microclimate in hot weather. Such polycarbonate sheets are distinguished by their mother-of-pearl, pearl or golden hue.
Another type of polycarbonate is more suitable for installation on greenhouses. It lets in enough light for optimal vegetation growth while keeping damaging radiation out. The important thing here is which side to mount the polycarbonate on the greenhouse. When a leaf lies incorrectly, climatic conditions are created in the greenhouse that have a detrimental effect on the vegetation.
Another type of cellular polycarbonate is a material with high reflective qualities. The aluminum-coated coating resists the greenhouse effect and provides cool shade. The plates are produced in several color variations: silver, green and blue.
That's why it's so important to know the front side!
And it's very easy to do! In 100% of cases, modern world-famous manufacturers will paste instructions on the top side of the panel onto a protective film, where they will describe the installation process in detail, pay special attention to which edge is the front, and also advise sealing the edges with a special adhesive tape so that it does not get into the honeycombs. dust or insects (which can sometimes be seen in the photo). Plus, the general rule always says: the edge that has markings, instructions, logos, etc.
and so on. - and is the front one (as in the photo), and the other, where there is absolutely nothing except the protective film itself, will be the reverse one. Therefore, if you buy polycarbonate from a reputable manufacturer, then you will definitely not have problems with its correct installation
Plus, the general rule always says: the edge that has markings, instructions, logos, etc. and so on. - and is the front one (as in the photo), and the other, where there is absolutely nothing except the protective film itself, will be the reverse one. Therefore, if you buy polycarbonate from a reputable manufacturer, then you will definitely not have problems with its correct installation.
What if the manufacturer didn’t leave any hints on the polycarbonate?
This also sometimes happens that there is nothing except multi-colored films on different sides, or even both protective films are transparent. But there is a way out here too:
Option 1: Ask the seller. Why not, because the seller must know exactly where the front edge of this model is. Consult, it won’t hurt!
- Option 2: if the seller himself throws up his hands and shrugs his shoulders, then the World Wide Web will come to our aid. On the Internet, you will certainly find people on forums who already know about such problems and will tell you how to find out the correct position of the sides.
- Option 3: and even if there is no answer anywhere at all, look for clues on the polycarbonate itself. On the upper part, at a distance of approximately 70-80 cm, the manufacturer himself often makes laser notches so that during installation, customers can navigate where is top and where is bottom, even if all the films have already been removed. Look for such notches or other markings that will tell you where the top is located. Better yet, immediately when removing the films, mark for yourself where the top side is and where the bottom side is. And you won't have any problems!
As you can see, there is nothing complicated in determining the front edge of polycarbonate. Either the answer will already be described in detail in the instructions, which itself will be on the top part, or on the protective film there will be hints such as the inscriptions “Top side”. And even if everything is even more complicated, sellers, the Internet, and, in extreme cases, simple markings and laser notches will always come to the rescue.
And do not forget that it is important not only to correctly determine the front edge, but also not to lose it during the installation process. Otherwise you’ll cut off a piece of panel, and then you’ll wonder which edge is which.
To prevent this from happening, mark and remember in advance where the top is and where the bottom is. Or buy polycarbonate with symmetrical UV protection. Yes, its cost will be higher, but the likelihood of incorrect installation will simply disappear!
Happy installation and remember: identifying the face of carbonate is not as difficult as it seems!
Fasteners
Installation of polycarbonate can be carried out using various elements: screws, washers, special structures. They are selected based on the purpose of the future structure and the materials used to create the frame.
Washers and screws
How to fasten polycarbonate - different fasteners can be used for this. Carpentry or galvanized screws from 19 to 50 mm are popular. Their choice depends on the following factors:
- washer size – decorative models with a thickness of 3-15 mm, standard silicone models with a thickness of up to 5 mm;
- installation diagram - for wooden sheathing, fasteners are 50 mm, in fastenings without overlap, 19 mm screws are used, with an overlap - 25 mm;
- slab thickness - when using a window structure, the thickness of the side slabs is 6-8 mm, for the roof 10 mm, for a standard frame the thickness of the material is no more than 10 mm.
For the basic methods, a universal hexagonal self-tapping screw with a drill at the end is used. Designed for aluminum structures. Can also be used for wood, but strength characteristics are lost. On the opposite side, ordinary carpentry screws can be used.
Washers for fastening
The only type of fastener for all types of polycarbonate is a screw with a large washer made of durable plastic or a self-tapping screw. Screws with washer are used to create decorative structures. Not suitable for greenhouses due to the centering sleeve. The simplest option for tightly fastening sheets is provided by a snap-on split profile. The slabs are placed on the mounted profile and secured with an overlay film. Bolts with nuts can also be used, but using them is not very convenient - the work takes more time and you can destroy the slab by over-tightening the nut.
How to attach polycarbonate to a metal frame:
- Experts recommend using fasteners with washers and plugs that have an O-ring and convex washers.
- They are recessed into the holes with a leg.
- The panel is pressed tightly, harmonious in appearance, and moisture does not get inside.
Self-tapping screws or other similar elements must be purchased separately. Polycarbonate washers are produced in various colors, they are stronger, thermal washers are transparent.
Washers with plugs
Polypropylene washers consist of a plug, a cover (in different colors) and a seal. They have no UV protection, quickly fade and lose strength. Not recommended for use indoors or on shaded roofs. Their main advantage is the price.
Metal washers are used mainly for metal frames and large areas. They do not loosen and provide high-quality fastening. They are concave, a gasket is placed in the mold, fastened with bolts or screws. Washers with gaskets ensure maximum tightness and prevent moisture from penetrating into the fabric.
Metal washers
To fasten plastic under a canopy or indoors, you can use self-tapping screws with a gasket or a thin washer. In the most optimal cases, washers can be abandoned altogether. Be sure to wear an additional gasket under the washer for outdoor structures.
Profile
The connecting profile allows you to fasten the sheets to the frame and to each other.
The profile is made from identical sheet material and can have a thickness of 4-16 mm.
A thermal gap of 3 mm is left inside between the profile and the sheet.
During the installation process, perforated or sealing tape is used, which is attached to the ends.
Then the plastic is installed directly in the profile.
The profile itself comes in several types:
- connecting;
- one-piece;
- end;
- detachable.
All options have their own characteristics and characteristics that must be taken into account when choosing the type of design.
The boards can be mounted in aluminum, plastic or polycarbonate profiles. The profile itself has a different cross-section and is marked in Latin letters. The slabs installed in the grate can be secured with sealant. But in strong winds this will be a weak connection
It is important to choose a high-quality sealant that will retain its elasticity and strength for several years.
To know how to properly attach polycarbonate to a greenhouse, you need to remember several important rules:
- sealant is used only on the upper slopes;
- avoid any bending of the sheets when using thermal washers - this leads to the appearance of holes and loss of the tightness of the structure;
- arched structures are secured from below with perforated tape, which will protect against air escape, ruptures and damage to the sheets themselves;
- metal profile is used only for structures larger than 2 m;
- Aluminum is a good sealant and is the base, rubber seals.
What to consider before starting work
It is not enough to know how to properly cover a greenhouse with polycarbonate: this work is preceded by the construction of a frame, the strength and geometric parameters of which determine the reliability and durability of the entire structure. Therefore, before starting work directly related to laying the coating, it is necessary to make sure that there will be no problems with the supporting system.
To do this, the frame is strengthened, if necessary, by installing additional vertical or horizontal ribs or slopes. Then, using a square and a tape measure, they measure the main dimensions, make sure that the posts and veins correspond to the vertical and horizontal levels, and that the edges on which the joints will be parallel are parallel.
Even minor distortions can seriously complicate installation Source academdacha.ru
See also: Catalog of garden house projects
Since the air channels of the material are open in the cross section, they must be closed before installing the sheets. Otherwise, dust and debris will get into the cavity, and insects will crawl in. Therefore, the upper sections should be sealed using a special tape and end profile, and the lower ones should be glued with perforated tape, which will not prevent moisture condensing from draining from the cavities. That is, before you cover the greenhouse with polycarbonate with your own hands, you need to purchase both types of tapes. For arched structures that do not have upward-facing sections, only punched paper tape is sufficient.
For reference! These accessories solve another problem: by closing the air inside the channels, they do not allow it to suddenly heat up or cool down under the influence of external conditions. This process occurs more smoothly, which has a beneficial effect on both the condition of the plants and the integrity of the protective UV layer.
Gluing punched paper tape to the end Source i.ytimg.com
It is also recommended to purchase connecting profiles and fasteners, which will be discussed below.
Master Class. How to check whether polycarbonate is installed on the greenhouse the right way?
Imagine that the installers have fixed polycarbonate to the greenhouse, and you really want to check whether the polycarbonate is covered with a protective coating, which should reflect ultraviolet rays, towards the sun or inside the greenhouse. If polycarbonate is installed facing the inside of the greenhouse, then ultraviolet radiation will destroy the material twice: first, passing through the polycarbonate to the protective coating, then reflected from it and passing through the material a second time. If polycarbonate is installed correctly, then the UV rays will be reflected and will not harm the sheets. The thicker the coating, the longer the sheets will remain transparent.
Polycarbonate sheets are covered on both sides with shipping films to preserve their presentation. The outside has logos and has a lot of warnings "this is the front facing the sun", the other film is clear. To tear off the films you have to turn the polycarbonate over. When the films are peeled off the carbonate, the sheets are absolutely transparent and the beginner will be confused which side was the front.
Decent factories laser burn the name of the polycarbonate, the plant number (Carboglass has three factories in different regions) and the shift number, day and time of sheet production on the edge of the sheet. Thanks to the information, it is possible to determine the ingredients of the “test” and the equipment settings. You understand that if the inscription is read outside the greenhouse, then the sheets are laid correctly - with the front side facing the sun.
The photo contains the inscription “Carboglass US Premium 360 14-09-2017 13:05”.
Details: You need to know that Carboglass, in the fall of 2022, has sheets “especially for greenhouses” that have a coating of 25 microns, which is enough for 4-5 years; “Agro” sheets have a protective coating of 40 microns, the plant assures that this will be enough for 10 years of street use; and “Premium” sheets are protected by spraying 50 microns with sun protection for 20 years. Other factories spray a maximum of 25-30 microns, at least in the summer of 2022, a number of factories told us these numbers when calling. At the same time, other factories have premium polycarbonates with a density of 600-630 grams / square meter, and Carboglass has an average Agro with a density of 600 grams, and Premium has a density of 700 grams / meter - you understand, Carboglass is cooler. At the same time, in the whole country, only Carboglass has “reinforced” polycarbonate with an additional diagonal partition; there is no doubt that it is 25-30% warmer than the hollow polycarbonate honeycombs and stronger than materials from other factories. At the same time, Karboglass asks for the least amount of money per sheet, so Karboglass is the champion for now.
Factories that write that they have UV protection not on the outside of the sheet, but inside the sheet or inside the granules, or “the protective layer is produced by extrusion” are deceiving you. This is a murky way of saying - polycarbonate is intended for indoor use only and is not intended for greenhouses.
Look, let’s say you installed polycarbonate incorrectly - one sheet costs 2,350 rubles, you need to demand rework, for this you need to have a contract not only for the purchase and sale of the greenhouse, but also an agreement for the assembly of the greenhouses. You also need to have a receipt for payment.
Buy from the Plumber Store. Call 3412/ 56-50-60
Which side to attach polycarbonate to the greenhouse
Polycarbonate is widely used in the greenhouse business and in private greenhouse construction. It is lightweight, durable and you can install it yourself
But it is important to know which side to attach the sheets to the greenhouse
Tips on how to determine the correct side when attaching material:
- The color of the protective film and inner layer may vary;
- The instructions may indicate the manufacturer's advice on how he will designate the protective surface;
- A salesperson or other specialist can help.
The protective coating is only on one side of the material. But it is not always possible to correctly determine which one. But it is necessary to understand, because the quality of construction and the protection of plants from UV radiation depend on this.
The easiest way to determine the right side is to distinguish the colors of the coating. Usually the protective film is painted. The inner layer remains transparent.
The protective film may be distinguished by color or other marks. You can also purchase polycarbonate with double protection on both sides. Such a purchase will cost more, but will be stronger.
A specialist can easily determine the required side. This could be the seller or the person who installs the polycarbonate. The right sides can easily be confused. To prevent this from happening, it is necessary to carry out the work especially carefully.
Varieties
In addition to carrying out the appropriate calculations, you need to decide on the type of roofing material:
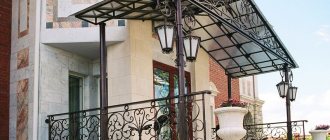
- Cellular polycarbonate . Suitable for the construction of translucent structures such as greenhouses and canopies, as well as for vertical surfaces.
- Monolithic polycarbonate . It is the best solution for arranging the roofs of buildings, since it has greater transparency and is able to withstand weather disturbances.
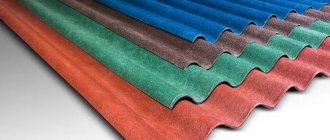
Today, polycarbonate is produced in a variety of colors. This material comes in transparent, blue, purple, green, bronze and other colors. The color of polycarbonate affects the scope of its use. For example, transparent material is ideal for building greenhouses and hotbeds, while turquoise or blue is ideal for swimming pools.
Before you put polycarbonate on a canopy or roof, when choosing this product, you need to pay attention to the country in which it is produced and the brand. Experts believe that the best translucent material is made in European countries and Israel.
Of course, it costs more, but high-quality raw materials are used to produce it, and the top is covered with a protective layer from the negative effects of ultraviolet radiation. In addition to polycarbonate sheets, you need to prepare tapes for the ends, sealing washers and self-tapping screws.
Aluminum fastening systems
An aluminum profile is ideal in terms of waterproofing, and can also act as a load-bearing base if the shape allows. Thanks to rubber seals, aluminum systems provide excellent protection against condensation and moisture. They have excellent thermal insulation, are very reliable, durable and look aesthetically pleasing.
Since any type of polycarbonate requires maintenance, do not forget to carry out seasonal maintenance to extend the life of the greenhouse. Do not use abrasive or other strong cleaning agents; clean water and a cloth will suffice. Well, remove the snow carefully so as not to damage the top layer of polycarbonate, which is responsible for ultraviolet protection. If you follow these simple rules, the greenhouse will serve you for many years.
Which side to lay polycarbonate on the greenhouse
It’s easy to understand which side of the polycarbonate is best attached to the sun by looking at the markings on the protective film. It is the marked side that provides maximum protection against UV radiation
What is very important is that the microclimate in it directly depends on which side the polycarbonate is laid on the greenhouse. This means the amount of harvest received
What rules must be followed when laying polycarbonate on a greenhouse?
In addition to the fact that it is important to consider which side to place polycarbonate on the greenhouse, a number of factors should be taken into account:
- choose the right material thickness;
- choose the correct light transmission. It is optimal to use transparent plastic and correctly determine which side of the cellular polycarbonate should be facing the sun;
- correctly orient the sheet: the channels should be placed parallel to the bend.
The procedure for installing sheets for a greenhouse on a frame
This procedure is simple:
- Decide which side to attach the polycarbonate to the greenhouse.
- Mark and cut sheets.
- Make holes in the places where the thermal washers are installed in increments of 40–50 mm.
- Secure the roofing material with self-tapping screws.
- Screw in the screws strictly perpendicular to the sheet.
- Cover the ends and connections with a profile.
But the basis of the entire installation is to correctly understand which side to lay polycarbonate on the roof. Otherwise, all the work will have to be redone, spending a lot of time and money.
What do you need to consider to ensure that the sheet is perfectly attached to the greenhouse?
A video from professional installers of structures based on this polymer fabric will help you get an answer on how best to lay polycarbonate with which side facing the sun.
Strictly following all the rules will protect you from mistakes during installation work and will help you understand how to correctly lay polycarbonate on a greenhouse, canopy, canopy or roof of a house.
In December 2022 passed all tests to confirm compliance with the requirements of the Technical Regulations “On...
Cellular polycarbonate POLYGAL produced has passed all inspections and tests in the AUTHORITY FOR...
Today, polycarbonate is a popular material, which is often used in the construction/arrangement of various objects: Households...
Polycarbonate is used for a wide variety of purposes. It can be used to make many structures, ranging from agricultural...
With the development of construction technologies, more and more practical new products are appearing on the market, allowing you to completely transform the external…
The production facility produces high-quality cellular polycarbonate building material. These products are in demand in the market...
Polycarbonate is used for a wide variety of purposes. It can be used to make many structures, ranging from agricultural...
“Polygal” is the best polycarbonate for greenhouses and greenhouses. The high quality of polycarbonate for greenhouses makes it...
Cellular polycarbonate is an effective solution for creating translucent structures Since its appearance, cellular polycarbonate...
Every owner of a private house and cottage tries to equip their home with maximum comfort and coziness. At…
Some useful tips
- Polycarbonate, with its advantages and characteristics, is plastic. And over time it ages, and cracks appear on the surface. Honeycomb sheets often have dirt and plants trapped inside. When the ends are not sealed, moss and insects are soon found inside. And you will have to fight them with antiseptics.
- When the polycarbonate in a greenhouse is not laid correctly towards the sun or a mistake is made, there is no need to disassemble the entire greenhouse. A simpler option is to cover the greenhouse with a protective film, which is used for restoring car paintwork.
- Monolithic polycarbonate is more reliable, but also more expensive. Small cracks easily appear on it due to sudden temperature changes. Over time, droplets of water and stains appear on the surface of the canvas. Cracks are removed with solution 646, which melts the surface.
- It is important to choose the right type of greenhouse and fastening elements, taking into account the characteristics of the region.
- In some regions, you will need not only a reinforced frame, but also strong fastening of polycarbonate sheets due to constant and strong winds.
- When using carpentry fasteners, it is recommended to first perform several screws on the scraps. This way you can correctly select the required force and tool speed.
It’s easy to figure out the correct installation of polycarbonate sheets. The manufacturers themselves inform the buyer with instructions on the packaging. If it is not there, then the data is decrypted. Polycarbonate is a fragile material and requires careful handling during installation. When you don’t have the skill to work with it, it’s better to hire a professional. But even with high-quality installation of polycarbonate in a greenhouse, it requires annual maintenance, which will ensure its durability.
How and with what to attach polycarbonate to metal and wood?
When all the preparatory work has been completed, you need to begin the process of installing the structure, which is the proper fastening of polycarbonate.
There are 2 common methods of fastening polycarbonate sheets:
- Using thermal washers
- Using profiles
Fastening polycarbonate with thermal washers
For thermal washers, you need to make holes in the polycarbonate sheets a couple of millimeters wider than the diameter of each thermal washer. The plastic structure on the short leg should fit tightly into the hole and snap into place. Its length is equal to the thickness of the panel.
The thermal washer must have a rubber seal, which allows for additional fixation and does not allow moisture and dust to pass through. This installation method can ensure that the polycarbonate is tightly held by washers, which will expand under thermal loads and prevent the sheets from changing their shape. This method of fastening is called point fastening.
Fastening polycarbonate using metal profiles
This installation assumes that polycarbonate sheets will be inserted into a metal profile, and then the finished structure will be installed where necessary. This method is convenient when panels are laid in several rows and need to be joined.
The edges of the panels in the profile must be secured with self-tapping screws or the same thermal washers. Most often, using profiles, you can fasten panels that should become the edges of the structure, and the middle can be mounted using point fastening.
The profile can be:
- Detachable
- One-piece
- Docking
- Special (it is necessary for connecting panels where the frame configuration changes)
- Corner
- Stenov
In all cases, polycarbonate sheets should extend into the profile by no more than 20 millimeters.
All of the methods described above for attaching polycarbonate are also commonly called dry. But the “wet” method assumes that the sheets must be attached to the frames or to each other using polymer putty. After which all joints from the inside are treated with sealant.
The method of fastening polycarbonate should be chosen based on what tasks are assigned to the structure and how easier it will be to install it. And if all the rules are followed, it should turn out strong and beautiful.
Video on how to attach cellular polycarbonate
Detailed video instructions for installing cellular polycarbonate.
How to properly attach polycarbonate to the greenhouse frame so that the coating does not crack, bend or burst. Which fasteners to choose for polycarbonate.
Connecting sheets
If you need to secure sheet material, then linear profiles are mainly used for this, which are divided into two types:
- detachable;
- one-piece.
When using a one-piece profile, the sheets are inserted into the grooves and secured with self-tapping screws. In this case, it is better to use thermal washers.
When using a split profile, the technology will be a little more complicated. One half of the profile is attached with screws to a flat surface (wooden plank). After this, the polycarbonate sheet is inserted into the grooves and the second half of the profile is attached to the first using a latch. After this, the base must be unscrewed from the bar.
Features of cutting and preparation for installation
Laying polycarbonate on a flat roof should be with a slope of 5–7 degrees. This will ensure good water drainage and ease of washing.
Since the material tends to expand and contract when exposed to high or low temperatures (on average plus or minus 5 mm per 1 m² of area), this must be taken into account during installation.
To do this, the diameter of the holes in the polycarbonate is made 3–4 mm larger than the size of the screw. Thus, leaving a margin of 1.5–2 mm near each fastener will prevent the material from warping in summer and cracking in winter.
Use silicone, Teflon, polyethylene and neoprene as a sealant.
To cut polycarbonate, use a band saw, circular saw or grinder. Carry out work on hard and level surfaces to avoid damage to the material.
Remove the protective film last - it will protect against scratches, chips or other particles on the front side and ends of the sheets.
Panel cutting
This material is easy to process. Cutting is no exception. In order to carry out this operation as efficiently as possible, the following conditions must be met:
- It is better to use circular saws with a stop and reinforced teeth that are not set apart;
- ensure reliable fastening of the material during cutting;
- remove chips from the inner surface of the material.
How to mount it correctly?
After purchasing polycarbonate, the buyer is often puzzled by the question of whether it is necessary to clean the plastic sheet from the film. The correct answer is the recommendation to remove the film immediately after installation to avoid problems in the future. This is a shipping film that covers the sheets during transport and storage, so it must be removed when subsequent transport is not planned.
Some summer residents mistake shipping film for a protective layer against UV. By leaving it on the panels, they expose the material to the destructive effects of the sun. It is worth knowing that the UV layer is invisible - it will not be possible to peel it off intentionally. Therefore, there is no need to be afraid of accidentally removing excess due to inexperience. If the film on the outside of the sheet remains unremoved, the dark areas of the inscriptions will firmly adhere to the top of the material, and after that it will simply be impossible to remove it. Moreover, the film on the outside of the canvas threatens the safety of the layer that protects from ultraviolet radiation. In winter, the film that has not been removed will trap snow.
When installing, it is also important to take into account the ability of polycarbonate to respond to temperature changes. In hot weather and cold, standard polycarbonate exhibits deviations from the original width of 1 cm or more
If the sheet is tightly fixed to the frame, the appearance of cracks and subsequent destruction of the material is inevitable. To prevent this from happening, the holes for the screws should be 3–4 mm larger in diameter than the screws themselves. This will prevent possible damage to the material when it changes during thermal expansion. It is important not to tighten the bolts too much, otherwise the sheet may be deformed.
Also, you cannot bend the material more than the prescribed norm. Each type of polycarbonate is characterized by a certain flexibility and specific minimum bending radius. If you bend the sheet more than permissible, rolling it up during transportation or laying it out on arched structures, the polycarbonate will burst during the first thermal expansion and the seal will be broken. Water will seep through the crack when it rains. This part of the structure will be unsuitable for further use and will have to be replaced. The maximum radius is determined by the thickness of the polycarbonate - the thinner, the more the sheet can be bent. To be on the safe side, you should check with the seller about these qualities.
If installed correctly and the installation procedure is followed, the constructed structure made of cellular polycarbonate will last for many years without problems.
How to correctly lay polycarbonate, see the following video.
Taking into account material characteristics
Greenhouse owners, captivated by the undeniable advantages of the now extremely popular plastic covering, should familiarize themselves with the structural and technical features of the material. Polycarbonate used in greenhouse construction is a flexible two-layer or sheet with a length of 6 or 12 m and a standard width of 2.1 m. Those wishing to use three- and four-layer material to cover greenhouses are rare, because enhanced structural strength is not required in this area.
Taking a closer look at the end section of the sheet, it is difficult not to notice the miniature plastic partitions dividing the body of the coating into unique channel-cells. They form a kind of longitudinal chambers, the ends of which are arranged in one row. Based on this, two-layer polycarbonate is also called single-chamber. The hollow channels are filled with air, thanks to which the greenhouse will perfectly retain accumulated heat.
However, it is cavities that sometimes cause trouble for the diligent home installer who uses excessive force when tightening fasteners.
The plastic covering is unstable. It tends to expand in the heat and return to its original size when the atmospheric temperature drops. The thermal ramp values are small. One meter of transparent or milky-matte polycarbonate representatives will expand/contract following temperature fluctuations by only 2.5-3 mm. But this fact cannot be ignored, otherwise, during the alternation of warm days with late spring and first autumn frosts, the greenhouse covering will simply warp.
Polycarbonate must be mounted on the frame in a strictly defined direction. It is not advisable to place sheets horizontally. Vertical installation is strongly recommended, ensuring unhindered drainage of condensate through longitudinal channels. The sheets must be installed so that the outer side, equipped with sprayed or co-extruded UV protection, “looks” out. The outer protective layer prevents premature deterioration of the material.
Let's summarize. In order to properly cover a greenhouse with polycarbonate, you need:
- correctly cut the material with an orientation towards the vertical arrangement of the channels;
- install the cut sheathing parts, making sure to turn them outwards with the side protected from UV attacks;
- do not tighten the fasteners so much that the coating becomes deformed;
- take technological measures to allow the material to move slightly due to periodic changes in linear dimensions;
- buy coating and specialized fasteners produced taking into account the technical specifics of polycarbonate.
Single-chamber polycarbonate with a thickness of 6 and 8 mm is actively in demand in private greenhouse construction. Polymer light-conducting material 4 mm thick is most often purchased for the construction of small greenhouses, 10 mm for “glazing” winter greenhouse structures. To securely fasten a 4mm thick plastic covering, you need 40 to 50cm between the fastening points. The maximum permissible distance between fixing points for 6 mm polycarbonate is 70 cm. Thicker polycarbonate can be fastened less frequently, but at least every meter, so that the sheets do not bend under the weight of precipitation.
The indicated limits are valid for a vertical mounting scheme. They are directly related to the installation step of greenhouse posts, arches, rafters - i.e. with what the polycarbonate sheets should be fixed to. This fact determines the choice of material or forces the improvement of the greenhouse structure by introducing additional structural elements.