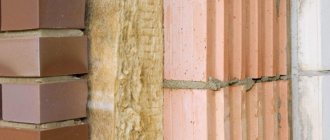
OSB (OSB) or OSB (oriented strand board) is a modern construction material that has become a serious alternative to plywood, chipboard and has found wide application in the construction of frame houses and the finishing of buildings and structures. OSB boards are used to cover interior and exterior walls, floors and roofs. Wall cladding with OSB boards takes place in frame construction, when the board acts as a structural material and serves to strengthen the walls of a building, or when it acts as a facade material for concrete, brick or wooden houses, which is caused by the low price and high strength and durability of the material. In this article we will look at the question: how to attach OSB boards to the wall from the outside.
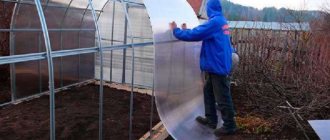
For cladding external walls, it is necessary to use OSB-3 boards, specially made for environments with high humidity. You can find out how different types of OSB sheets differ on the page: OSB sheets, their types, characteristics, sizes.
When installing OSB boards to external walls, sheathing is used for the following purposes:
- leveling the wall plane;
- creating a ventilation gap for insulation under the OSB board;
- preventing slab deformation caused by base movements, especially important for OSB slabs with a thickness of 9 mm or less.
How to distinguish the front side of OSB from the back
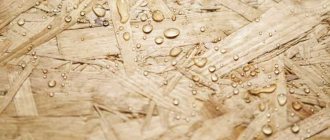
Taking a closer look at the material, you can see that there are practically no roughnesses on one side. The veneer here is large, and the entire surface is slightly shiny. This is the front side.
The reverse side of OSB is not so smooth; it consists of small chips. They also produce laminated OSB boards. If lamination is not double-sided, then the front side is even easier to determine. For a tongue-and-groove OSB board, the front side is determined by the locking connection.
Necessary materials
For frame
The slabs can be secured to a wooden or metal frame. But unlike plasterboard sheets, OSB boards are not subject to deformation under their own weight. And therefore, it is possible to prevent the appearance of cracks in the material or the pressing of fasteners during installation.
The lathing option is chosen according to your taste and capabilities. Although metal is more expensive, it will not deform due to changes in temperature and humidity. A wooden frame can “walk” during temperature fluctuations, although it is cheaper.
Fasteners (hardware)
When working with concrete and brick surfaces, dowels are used; fasteners on a wooden base are made exclusively with 45-50mm self-tapping screws. Fastening with self-tapping screws is much stronger than a nail fastening and is physically simpler, since using a screwdriver instead of a hammer greatly facilitates the work. But if necessary, dismantling can be easily done with a screwdriver.
Necessary tools
- for installing metal sheathing, metal scissors or a grinder;
- for marking - pencil, felt-tip pen or marker;
- measuring instruments (tape tape, laser level, plumb line);
- hacksaw;
- set of screwdrivers and screwdriver;
- when working with nails you will need a hammer;
- when attaching the frame to concrete or brick, a hammer drill with drills is required;
- You may need a drill (with chucks for metal or wood drills);
- jigsaw
This list of tools is optimal and allows you to perform the entire installation cycle with your own hands from the very beginning to the end.
It is best to collect and prepare the tools in advance in order to reduce the time of work and optimize it as much as possible.
Inscriptions and markings on OSB boards
There are no generally accepted marking standards for marking OSB sheets. Each manufacturer decides for himself how and on which side to apply inscriptions to the OSB.
Sometimes in production there are inscriptions with orientation recommendations. On imported slabs there may be the mark “THIS SIDE DOWN”. This text can be translated as “this side from below.” Such an inscription is usually applied to the smooth side of the OSB sheet.
Manufacturers recommend that the sheet be oriented with the smooth side down to make it easier for people to move along the rough side. When laying roofs, installers do not slip on the rough side. This reduces the risk of people falling and getting injured.
Self-tapping screws for plywood, OSB, chipboard
Installation of PVC windows- Covering the drain hole with your own hands
- How to lay flexible tiles on the roof?
Self-tapping screws for Plywood, OSB, Chipboard - screws for wood with a large thread pitch, having a partial thread, a special type of head, ensuring its easy recessing and reliable fixation in the material. The self-tapping screw has a yellow zinc coating.
Nuances of processing different sides of OSB sheets
At the stage of delivery of the material from the manufacturer to the consumer, its surface is protected from moisture by covering it with paraffin. The latter reduces the adhesive properties of the surface of OSB sheets.
Both sides of OSB are coated with the same compound. Without additional surface preparation, both paint and plaster will peel and crack over time. Moisture will penetrate into the cracks, and the material will become unsuitable for further use.
For this reason, before applying the finish, the surface is cleaned of the factory coating and a layer of primer is applied. Acrylic primer is used for this.
Cleaning is done first with coarse-grain sandpaper (P80), and then with fine-grain sandpaper (P200 and more). OSB-3 and OSB-4 boards are most reliably varnished, so their cleaning must be done more carefully. When the top protective layer is removed, the finish easily penetrates into the structure of the material.
Particular attention should be paid to the edges. Their structure is porous, so the absorption of paints and varnishes is increased here. The edges and corners are pre-rounded, otherwise the paint at the joints will crack over time.
The seams between OSB boards and gaps must be treated - filled with acrylic-based sealant. It is better not to use silicone, since paints and varnishes do not adhere well to it. Some craftsmen prepare mixtures themselves, using casein, sawdust and gelatin.
The texture and appearance of OSB from different manufacturers is sometimes very different. There are slabs that are smooth and beautiful; the shavings in them seem to be covered in varnish. The surface is rough and matte. This is not a sign of poor quality. This OSB is the best for roofing work. Therefore, when selecting a material, you need, first of all, to calculate its thickness, select the correct class, and during installation not to confuse the sides.
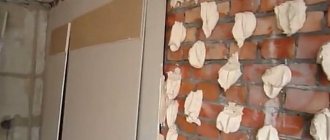
Protecting the wall from mice, birds and insects
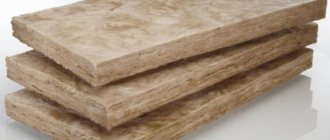
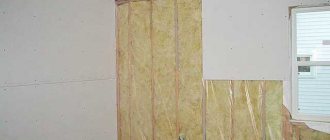
In most cases of installation of OSB sheets outside the house, a ventilation gap is provided. Air moves along it, which enters from the bottom of the wall from the surrounding space and exits from above back into the atmosphere. Blind sealing of ventilation gaps on any side is not acceptable. Otherwise, instead of a ventilation gap, you get a closed air cavity.
Wasps, mice, and small birds can enter the ventilation gap and build nests there, thereby violating the characteristics of the wall. Therefore, it is recommended to provide protection at the stage of its construction or repair.
There are several options for protecting the wall from rodents, birds and insects, let's look at them.
- Protection using metal mesh and sheet metal with small holes. It is better to use stainless metal that will not corrode. Mesh or strips of metal are attached to the bottom and top of the wall behind the OSB sheets so that they do not affect the appearance of the house.
- Painting mesh. Differs from the previous version in low price and less strength.
- Perforated facade material at the bottom and top of the wall. For example, in the case of siding, these are perforated soffits.
Grilles or meshes are mounted at the inlet and outlet of ventilation gaps.
After installing the OSB sheets, you can begin sealing the seams and further finishing. You can learn about how to properly seal gaps, what sealing material and in what cases to choose in a separate article: correct sealing of OSB joints.
Table of screw sizes for plywood, furniture board, fiberboard, chipboard, MDF, OSB
| L length, mm | ||||||||||||
| D diameter, mm | 30 | 35 | 40 | 45 | 50 | 55 | 60 | 70 | 80 | 90 | 100 | |
| 4 | + | + | + | + | + | + | + | + | ||||
| 4,5 | + | + | + | + | + | + | + | + | + | |||
| 5 | + | + | + | + | + | + | + | + | + | + | + | |
Taking into account the peculiarities of the operation of wood-based materials, a table is presented below that allows you to select the required self-tapping screw size.
Recommendations for choosing the size of self-tapping screws for fastening wood-based materials
| Plate thickness, mm | Plate material | Self-tapping length, mm | Self-tapping screw diameter, mm |
| OSB | |||
| 3 | pine, spruce | 30 | 4 — 4,5 |
| 6 | pine, spruce | 40 | 4 — 4,5 |
| 9 | pine, spruce | 45 | 4 — 4,5 |
| 12 | pine, spruce | 50 | 4 — 4,5 |
| 15 | pine, spruce | 55 | 4 — 4,5 |
| 18 | pine, spruce | 60 | 4 — 4,5 |
| Plywood FC, FSF, FBV, FBV-1, FBS, FBS-1A and FBS-1 | |||
| 3 | birch, pine, spruce | 30 | 4,5 |
| 6 | birch, pine, spruce | 35 | 4,5 |
| 9 | birch, pine, spruce | 40 | 4,5 |
| 12 | birch, pine, spruce | 45 | 4,5 |
| 15 | birch, pine, spruce | 50 | 4,5 |
| 18 | birch, pine, spruce | 60 | 4,5 |
| 21 | birch, pine, spruce | 70 | 4,5 |
| 24 | birch, pine, spruce | 80 | 5,0 |
| 27 | birch, pine, spruce | 70 | 5,0 |
| 30 | birch, pine, spruce | 90 | 5,0 |
| 36 | birch, pine, spruce | 100 | 5,0 |
| 40 | birch, pine, spruce | 100 | 5,0 |
| MDF, fibreboard, chipboard, furniture board | |||
| 3 | wood chips, shavings, cellulose | 30 | 4,5 |
| 6 | wood chips, shavings, cellulose | 35 | 4,5 |
| 9 | wood chips, shavings, cellulose | 40 | 4,5 |
| 12 | wood chips, shavings, cellulose | 45 | 4,5 |
| 15 | wood chips, shavings, cellulose | 50 | 4,5 |
| 18 | wood chips, shavings, cellulose | 60 | 5,0 |
| 21 | wood chips, shavings, cellulose | 70 | 5,0 |
| 24 | wood chips, shavings, cellulose | 80 | 5,0 |
| 27 | wood chips, shavings, cellulose | 80 | 5,0 |
| 30 | wood chips, shavings, cellulose | 90 | 5,0 |
| 36 | wood chips, shavings, cellulose | 100 | 5,0 |
| 40 | wood chips, shavings, cellulose | 100 | 5,0 |
When choosing self-tapping screws for Plywood, OSB, chipboard, you should take into account that the dimensions of the board of finishing material may vary depending on the humidity of the environment, therefore the most loaded points of fastening of wood-based board materials are the points located along the perimeter of the board.
The number of attachment points (the number of screws) is determined by the size and thickness of the slab and in most cases is at least 20 per square meter, provided that the screw size is selected correctly. In the middle of the slab, a lower density of fastening points is allowed than along the perimeter.
Self-tapping screws for plywood, OSB, chipboard and board materials
When laying between the slabs, it is necessary to leave a compensation gap to prevent their contact even when swelling.
Virtually all slab materials have a density equal to or higher than the density of the base. When the size of the slab changes under the influence of humidity, the fasteners (screws) become looser to a greater extent in the base and to a lesser extent in the slab.
Therefore, when fastening slab materials that do not have transverse layers (chipboard, fiberboard, MDF, solid wood furniture panels), it is necessary to use slabs of the smallest dimensions. For the open fastening method, it is necessary to select self-tapping screws that have a threadless part equal to or greater than the thickness of the slab.
Why do you need a sheathing?
OSB board (or OSB - oriented strand board, this name is more correct), like any other wood material, in conditions of high humidity and stagnant air, with a lack of natural ventilation, is susceptible to rotting.
By nailing siding directly to the slab, you create ideal conditions for the proliferation of microorganisms - fungus and mold:
- when the outside air temperature is negative due to the difference in temperature between the cladding and the slab, condensation forms on the OSB, which cannot disappear naturally;
- the same thing will happen when washing siding with water from a pressure hose;
- natural humidity - water vapor escaping through the slab during operation also does not erode.
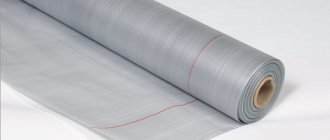
Installing siding without sheathing will create serious problems. In order to prevent this process, you need a sheathing under the siding - it will create a naturally ventilated gap between the surface of the slab and the cladding, and a moisture and windproof strip mounted under the sheathing will prevent moisture from settling on the OSB, while at the same time releasing steam outside and protecting the walls from the wind.
Expert opinion
Strebizh Viktor Fedorovich, leading construction foreman
Before purchasing panels, it is recommended to carry out careful calculations so as not to run around, then look for products of the same color shade and not overpay for excess that may never be needed. If you want to clarify something, please contact me!
Is it harmful to use slabs for interior decoration?
According to the technology, the inner and outer layers are glued with various types of resins. The outer layer is glued with a composition based on melamine-formaldehyde resin, and the inner layer is glued with urea-formaldehyde or phenol-formaldehyde resin, the fumes of which are harmful to health. The use of these resins is due to their low cost and high adhesion.
When choosing a material, you should give preference to well-known manufacturers who produce certified products with low emissions of toxic substances. Modern technologies involve the use of polymer MDI for gluing all layers. OSB boards based on polymers have the prefix ECO or Green. Clean finishing will help reduce emissions
Features of self-tapping screws for fastening plywood, furniture panels, fiberboard, chipboard, MDF, OSB.
- Torx slot ensures reliable transmission of torque from the tool
- Countersinking ribs make it easy to embed the self-tapping screw into any even dense material
- Partial thread ensures a tight connection between the slab materials and the supporting structure
- Large thread pitch ensures reliable connection
- Special tip geometry prevents material from splitting
Detailing of screws for wood-based materials
How to properly lay OSB (OSB) on a wooden floor
Laying OSB on a wooden floor is used when repairing tongue and groove flooring, to strengthen the subfloor, or to provide a continuous layer when laying small-format cladding (for example, tiles, PVC tiles, parquet).
How to properly lay a vapor barrier on the ceiling?- Is it possible to glue wallpaper on whitewashed walls?
- Imitation of a brick wall made of gypsum plaster
Laying process
After completing all the preparatory work, all that remains is to tighten the slabs to the old wooden covering with self-tapping screws and fill the gap between the OSB and the wall with construction foam. After the foam has dried, it is trimmed flush with the flooring.
The slabs are fastened with self-tapping screws around the perimeter every 20–30 cm, but this distance can be reduced. Some experts recommend preparing the holes first, but using a screwdriver can quickly and efficiently tighten screws without pre-drilling.
Leveling the floor using the proposed method is the simplest, most effective and cheapest. If you follow the instructions, you can do without the help of specialists.