Michel
23933 0 16
Michel October 22, 2016Specialization: plumber with 10 years of experience, computer repair specialist, powerlifting coach. I have extensive experience in construction, interior decoration, and making homemade furniture. Hobbies: sports
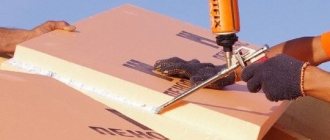
This article is devoted to methods for installing partitions and leveling walls with gypsum-based sheet materials. In it I will talk about the methods used for fastening them and what can be used as lathing and frames for finishing. Since all, without exception, methods of fastening gypsum fiber boards and gypsum plasterboard are identical, we will talk about both materials.
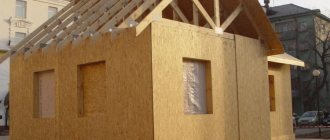
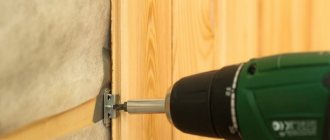
GVL sheathing of insulated walls of a frame house.
What is a Gvl self-tapping screw?
Designed for fastening gypsum fiber sheets
to metal profiles up to 0.9 mm thick and fastening Super Knauf flooring sheets together.
The self-tapping screws
have a reduced, countersinking head with a cross-shaped slot PH2, a sharp tip and a double-start thread.
Interesting materials:
What original gift should you give your wife for her 45th birthday? What to give your wife for her 5th wedding anniversary? What to give your wife for her 50th birthday? What to give your wife for her 51st birthday? What to give your wife for a cast iron wedding? What to give your wife for Mother's Day? What to give your wife for a wooden anniversary? What to give your wife for her birthday? What to give your wife for her 1 year anniversary? What to give your wife for her 35th birthday?
Areas of use
- What can GVL and GKL be used for??
Here is a far from complete list of areas of their application:
- Assembly of suspended ceilings (including multi-level);
- Leveling walls for finishing;
- Floor leveling (so-called dry screed);
- Construction of niches, shelves, built-in cabinets and arches;
- Construction of partitions indoors.
Decorative partitions. Material: plasterboard.
In the future, within the framework of this article, we will discuss only two applications of materials - for wall cladding and installation of partitions.
Laying methods and their features
Before starting work, surfaces are measured and treated with building mixtures. There are three common methods for attaching drywall. Each has its own area of application and technological specificity.
To do this, it is necessary to design and install a frame. The guides are located in increments of 60 cm. The profile is assembled and fixed to the wall with self-tapping screws. The front side of the drywall is screwed to the studs using metal-to-wood screws, and the caps must be additionally recessed into the metal. After that, perforated tape is glued to the joints and puttied.
This method allows you to create a variety of structures from plasterboard sheets, such as arches and partitions. The space between the gypsum board and the wall can be filled with insulating or soundproofing material, and the main communications can be laid there.
This option is suitable for walls without any special defects that are easy to drill, or ceilings. Drywall is secured using dowels.
The advantage of this method is that, due to the absence of metal profiles, there is no gap between the gypsum board and the surface that “eats up” excess space in the room.
If the unevenness does not exceed 2 cm, then the drywall is laid on the wall as follows. Special glue or putty is applied to the underside of the sheet in small piles around the entire perimeter, maintaining a distance of 10-20 cm. In the center, form one to three rows with a gap of 40-50 cm with increased portions of glue. Leveling is carried out using tools. Plasterboard sheets are pressed against the wall and tapped to set.
On surfaces with holes and tubercles ranging in size from 2 to 4 cm, gypsum board is laid in the same way, but with the addition of one preparatory step. To do this, the sheets are cut into strips of 10 cm and attached with the front side to the wall at a distance of 40-60 cm from each other. The stage is reminiscent of installation using a metal profile, only the latter is not steel guides, but plasterboard. The remaining steps are the same as the glue installation described above.
The need to know exactly which side to attach the material is the first step towards proper installation. Even when working with moisture-resistant modifications, in which both parts are covered with a moisture-proof layer, it is better to glue or screw the drywall with the front side facing out.
To avoid wasting your efforts during the installation process, buy only products from trusted brands. The well-deserved market leader is the products of the German company Knauf.
If you follow the installation technique, cladding made from high-quality plasterboard sheets will delight you for many years.
Source
Finishing
- How to reinforce seams?
Traditionally, serpyanka (self-adhesive fiberglass mesh) is used for this purpose. It is glued over the seam, after which it is filled with putty directly through the cells in the mesh. The second layer of putty is applied after the first one has set and covers the reinforcing material, hiding its texture.
Seam reinforcement with serpyanka.
I preferred to reinforce the seams with rolled fiberglass. It is glued to PVA glue diluted with water after filling the seam and covered with another layer of putty. Fiberglass is thinner than serpyanka, so the seam stands out less on the surface of the sheet.
- How to paint walls made of plasterboard and gypsum board?
Any water-dispersion paint. I used acrylic and latex based water emulsions. In the bathroom, the gypsum plasterboard walls are painted with rubber waterproofing paint. It is impervious to water, tolerates wet cleaning well and is resistant to any cleaning agents (except, of course, abrasive ones).
I used rubber paint made in Sevastopol. The impressions are purely positive.
- How to lay tiles on GVL and drywall?
You can use regular cement tile adhesive. In addition, I have used stone flour mastic and silicone sealant at various times. In both cases, the tile was held absolutely securely; Moreover, I have a strong suspicion that it will only be possible to remove it with a fragment of the wall.
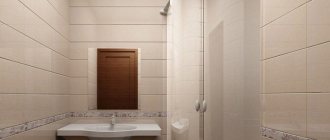
A tiled apron mounted on silicone and rubber paint on the walls of the bathroom.
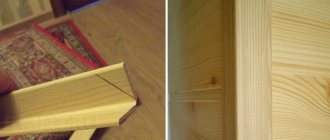
- How to install a shelf or cabinet on a wall made of gypsum board or gypsum board?
When installing the frame, place a board or timber in it and attach hanging furniture to it. With the same success, you can glue an embedded part made of thick plywood to the back of the drywall. Finally, you can use the Molly anchor to install lightweight shelves and cabinets.
Wooden insert for a kitchen cabinet.
Anchor Molly.
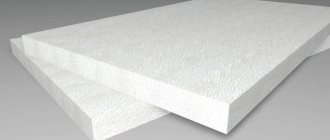
Characteristics and features of the material
Gypsum fiber panels have a lot of parameters that set them apart from other sheet products:
Gypsum fiber includes two main groups of products used for flooring on horizontal bases: the standard version and moisture-resistant gypsum fiber board for flooring - GVLV. The resulting floor covering will be reliable and durable, but only if the variety is chosen correctly.
On a note! Waterproof material is used for flooring in rooms with high humidity (bathroom or kitchen) and is the best solution when laying a heating system.
Advantages of dry screed
Although concrete coating is one of the most reliable, any craftsman, having once laid a floor from gypsum fiber sheets, is unlikely to want to tinker with concrete mortar for constructing a monolith the next time. Moreover, gypsum fiber has high hardness and is perfect for laying subfloors. They do not bend or creak and are suitable for laying any floor covering.
Installing gypsum fiber sheets is a real pleasure, especially for professional builders. Amateurs getting down to business for the first time can also easily cope with this dust-free work.
The material is easy to cut and, thanks to its low weight, is easy to install. Under the floors made using the dry method, utilities are placed and cable mats are laid for the installation of a “warm floor” system.
Dry screed base
The basis for laying GVL sheets is both a concrete coating and a wooden floor. Before starting installation, standard base preparation is required:
When installing floors, special attention is paid to the horizontal surface. At all stages of work, from leveling the base to installing the finished floor, control is carried out using a building level or level.
How to determine the front side?
The answer to the question asked may not be as simple as it seems. A plasterboard sheet is a homogeneous board containing a gypsum core inside. The question arises: which side should I lay drywall and is there a difference?
When choosing material in a store, you may notice that the models differ in color. White or gray gypsum board is the standard option, green is moisture-resistant, and pink is fire-resistant. But this difference concerns only the insulating properties; the installation technique remains almost unchanged.
To determine the front side of the drywall, carefully examine the design of the sheet:
In shape, the inner edge is smooth and even, and the outer one is equipped with narrowing on the sides for joining.
The front side has a more pleasant texture and better quality paper.
The plasterboard sheet is slightly darker on the inside, this is especially noticeable in moisture-resistant modifications.
The advisability of correctly determining the front side of drywall is due to the fact that the “facade” contains a larger amount of glucose, reducing the consumption of putty and ensuring the strength of the connection. The aesthetic factor is also important. When the cladding consists only of gypsum board, high-quality paper will look better. If you plan to lay tiles or other building material on top of the sheets, markings may appear and ruin the uniform appearance.
By following these simple recommendations, you will never go wrong and will easily figure out which side you need to attach the drywall.
Description of material
The building material is used for finishing walls, floors, and ceilings using the dry method. During production, fluffed cellulose fibers are mixed with gypsum binder . The result is a monolithic sheet with high-strength reinforcing threads. This material is more difficult to ignite, since it does not contain layers of cardboard.
Panel sizes:
To increase moisture resistance, special additives are introduced into the mass, so there are types that can be installed in bathrooms, saunas, and kitchens with a large volume of steam. Leveling the walls of gypsum fiber boards occurs quickly, resulting in an ideal surface intended for finishing.
The material is called an improved version of plasterboard; finishing panels are free from the usual disadvantages, but at the same time have many advantages.
Application area
Gypsum fiber panels are used for finishing vertical and horizontal surfaces in rooms where air humidity is no more than 70% . These can be basements, garages, where the material is placed as a base under floors, on walls for further tiling.
Options for using GVL sheathing:
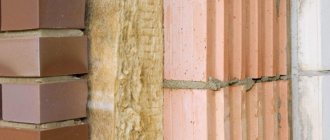
The material is placed on surfaces made of different materials . GVL is laid on stone, concrete, brick, shell rock, wood, and aerated concrete.
Conclusion
Now you know what GVL is and how this building material is used for its intended purpose. Still have questions about the proposed instructions? Ask questions in your comments, I’m sure together we will find comprehensive answers. And of course, watch the video in this article, I hope you will find it interesting.
Did you like the article? Subscribe to our Yandex.Zen channel
October 26, 2016
Plasterboard systems, Construction and repair
If you want to express gratitude, add a clarification or objection, or ask the author something, add a comment or say thank you!
Gypsum fiber sheet: installation guide
1. Installation of the structure frame 2. Installation of gypsum fiber sheets 3. Finishing work
When using gypsum fiber sheets for cladding partitions and for cladding, the following general recommendations should be followed:
1. Use gypsum fiber sheets with straight edges; there is no need to remove the chamfer before applying a layer of putty;
2. To fix gypsum fiber sheets, special screws are used that are intended for gypsum fiber boards;
3. When installing sheets, leave gaps that are equal to half the thickness of the gypsum fiber sheet. The sheets cannot be installed closely;
4. Putty work should be carried out using a special mixture for gypsum plasterboard.
Marking and cutting
The sheets must be marked in accordance with the project, cut using a hacksaw or jigsaw. If the edge resulting from trimming is located on the outer corner, then it should be processed with a roughing plane.
Installation of the structure frame
We mark the position of the partition and openings directly on the floor and walls. We use a tape measure and a cord breaker. Laser marking equipment will greatly facilitate your work.
A special sealing tape should be glued to the guide profiles that will be fixed to the floor and ceiling, as well as to the rack profiles near the wall. It allows you to increase the soundproofing properties of the structure.
The guide profiles are attached to the ceiling and floor using dowels, the step is no more than a meter. When installing rack profiles into the guides, it is necessary to observe a step of 60 cm. Monitor the accuracy of the vertical line, use a level and plumb line. In this case, there is no need to fix profiles. When preparing and cutting rack profiles, take into account the fact that the length of the profile should be 10 mm less than the height of the room.
If an opening is provided in the partition , then it is necessary to install a horizontal jumper. A PS profile is used as an intermediate post. The joint of the gypsum fiber sheets should be on this stand.
If it is necessary to strengthen the support pillars of the doorway due to the weight of the door exceeding 30 kg, wooden blocks should be secured in them. It is possible to install an additional rack, which is attached to the main one through PS profile inserts.
Power and low current wiring can be passed through small holes in the rack profiles. It is necessary to take into account subsequent fastening, which in no case should damage the wires. The casing must have holes provided by the design through which the wiring is routed outside. If it is necessary to install electrical boxes opposite each other, then they should be offset by one meter.
Installation of gypsum fiber sheet
To fasten the sheets, we use gypsum plasterboard screws; the fixation step should be about 25 cm. Start fastening the gypsum fiber sheet in the corner, fasten it in two directions, which will be mutually perpendicular. You can fasten from the middle to the edge of the sheet.
Step back at least 10 mm from the edge of the gypsum fiber sheet when installing self-tapping screws for gypsum fiber board. If the sheathing is done in two layers, then the sheets can be attached not to the frame, but to the first installed layer of material.
Please note that the screws must enter the sheet at an angle of 90 degrees. The depth of penetration of the screw into the profile flange should be about 10 mm. The heads need to be recessed into the material by 1 mm.
Leave a gap of 5-7 mm between the sheets. As you work, adjust the position of the racks that fall on the edges and middle of the gypsum fiber sheet. Only after you are sure of their correct position, fix them with screws.
Finishing work
The joints of the gypsum fiber sheets must be puttied. Using a spatula, apply the solution flush into the gap formed at the joint. Screws recessed into the material should also be puttied. Let the solution dry, then finish the surface with putty.
The resulting protrusions and irregularities are removed by grouting. External corners are most often subject to mechanical damage during operation. Therefore, they need to be strengthened with a PU profile. Putty is applied to the surface of the corner, into which the profiled profile is pressed. A leveling layer of solution is applied over the profile.
After grouting the surface, it is necessary to prime the partition with a special compound. The gypsum fiber sheet is pre-treated with a reinforcing compound, so the primer is applied only in areas where the putty is used.
Only after the primer has completely dried can you begin the subsequent finishing of the partition.
Go to section: Gypsum fiber sheet, floor elements and components
What consequences can result from errors when installing gypsum fiber boards?
It is important to strictly follow the installation rules. If you do not cut off the folded edge of the sheets that will be located near the walls, then there is a high probability of the floor sagging in this place. Metal beacons left in a layer of dry screed can lead to deformation of the floor when the expanded clay shrinks. Be sure to use only dry expanded clay or dry it thoroughly, otherwise the floor is guaranteed to be deformed and you will have to invest your time and money in repairs again.
Video - Knauf dry floor screed with additional heat and sound insulation
Technology and nuances of laying gypsum fiber board on the floor under tiles
Gypsum fiber materials have proven themselves to be excellent when performing work on horizontal foundations. Due to its stable characteristics, the resulting surface is suitable for cladding with various products. Most often, the installation of gypsum fiber board on the floor under the tiles in the house is complemented by the installation of heated floors. But to obtain a high-quality result, certain rules must be taken into account.
Gypsum fiber for floors: pros and cons
Gypsum fiber sheets are used for covering any surfaces in apartments, private houses, and public buildings.
Using GVL, you can quickly and conveniently finish walls and ceilings. They are much better suited for installing subfloors under flooring than plasterboard or fiberboard. Plasterboard boards with moisture-resistant properties declared by the manufacturer, when water gets on their surface, quickly collapse and warp. In addition, gypsum plasterboard is quite fragile; with strong targeted impacts, it can split. Gypsum fiber boards behave completely differently under similar conditions. They differ:
A small fly in the ointment in a huge barrel of honey - the cost of the material is quite high compared to drywall, however, it is justified by its advantages.
Size range
The diameter of self-tapping screws for gypsum fiber boards is standard. It is 3.9 mm. Thanks to such a small head, the screws are easy to disguise.
The length of the screws may vary. They produce products with lengths of 19, 25, 30, 45 mm.
Most often, short self-tapping screws, 19 mm long, are used. This size is considered optimal for installing sheets in 1 layer. This is due to the fact that gypsum fiber board can be from 9 to 12 mm thick. A 19 mm long rod is enough to fasten 2 sheets together or secure 1 sheet to any base. There is no risk that the tip will go too far and come out the other side or hit something hard. It makes sense to buy longer self-tapping screws if there is a need to fasten 3, 4 or more sheets together or to install slabs on specific bases.