Almost all those who like to repair and build with their own hands have to solve problems, look for ways to join tiles and linoleum, the two most common and practical floor coverings in the home of a modern person. The problem is not so serious and complicated, but you always want to design the joint between tiles and linoleum not just reliably, but first of all conveniently and beautifully.
The design of a corridor without a threshold between tiles and linoleum is becoming increasingly popular
How to combine different flooring materials correctly
In a modern apartment or house, there are quite a lot of situations when you need to correctly, and most importantly, correctly connect linoleum and tiles on the floor. Most often, such separation is necessary to ensure protection of the floor covering from dirt, dust, and moisture in a room where, by modern standards, it is no longer possible to do without tiles.
It is better not to use plastic high thresholds in the kitchen
Classic situations where you need to correctly, reliably and beautifully make the joint between tiles and linoleum:
- Large kitchen with zoning conditionally into the area of the dining table and the space around the stove and food preparation area. For the first sector, it is best to use linoleum; it is best suited as a floor covering, non-slippery, soft, comfortable for walking in slippers. For the floor near the stove, tiles are best. The dividing line turns out to be quite large, so the transition from linoleum to tile should not only be beautiful, it should be safe so that your feet and shoes do not cling to the laid threshold;
- The area of the floor adjacent to the entrance door in the hallway or hallway. Here, too, tiles are required, since they best withstand moisture, dust, and sand brought from the street with the soles of shoes. The area is small, the dividing line is very short, so you can join linoleum and tiles in the hallway using metal overhead profiles.
For tiles at the front door it is better to use a threshold
In addition, the difference in height between the linoleum and tiles is of great importance.
Transition option at the exit from the kitchen
Installation rules
Any work requires special training, and therefore, when starting to connect tiles and linoleum, you must adhere to some rules. Without basic construction knowledge and skills in working with tools, it will not be possible to create the perfect floor.
When choosing floor coverings, it is important to consider their color scheme. They can be the same shade or contrast with each other. It all depends on the overall style of the interior and the purpose of the materials.
If the floor is planned to be multi-level, it is necessary to ensure a smooth transition. It should look as natural as possible and not be flashy.
The height should be such as not to cause discomfort when moving around the room.
When installing floor coverings, you must carefully monitor the quality of fastening. It should be strong and level enough to prevent water and debris from getting into the cracks. A well-done job guarantees thermal and sound insulation of the floor and waterproofing.
When purchasing connecting elements, it is important to pay close attention to their quality. If a nut is selected, you must ensure that the fasteners are not visible and that they are sized to suit your specific requirements. The best option is considered to be a T-shaped threshold, which reliably connects linoleum and tiles and securely fixes them to the surface.
How to connect tiles and linoleum: expert advice
For example, for a kitchen, the tiled area should be on the same level as the linoleum; in this case, moisture and most of the dirt remain on the tile only due to the protruding part of the threshold. For the hallway the situation is somewhat different. The entrance from the street is made of linoleum, it is not slippery and retains heat well. Next, a small sanitary space is laid out from tiles, on which the bulk of the pollution brought with shoes from the street accumulates. The barrier between them must be large enough.
And the last area where linoleum and tiles need to be joined is the linoleum covering of the corridor, laid up to the living room and kitchen, respectively. Here, the transition from the tiled area would be correct to perform just slightly below the main level of the floor covering, or to limit it to an overhead threshold, which will serve as decorative overlays and a sanitary barrier.
It is clear that in both cases you will have to use a profile, threshold, or any other scheme with a level difference. It is not worth trying to lay out both types of coating on the same level for purely sanitary reasons.
There are several ways to build a transition from tile to linoleum:
- Use classic metal thresholds to transition from a harder to a softer floor covering. The width of the strip is no more than 50 mm, depending on the model and shape of the lining, the height difference is no more than 16 mm. A scheme convenient for a corridor in a hallway or directly on the floor of a door frame;
- The connection between linoleum and tiles can be made from a finishing or side corner, which is used to sew up the tile covering. This scheme is ideal if the level of the tiles has to be made higher than the plane of the linoleum sheet.
For your information! You can make the transition from tiles to linoleum using the folk method, which was used 20-25 years ago, when special thresholds and profiles for merging two types of floor coverings were not so common. You can seal the seam between the edge of the linoleum and the higher level of the tile covering with a regular wooden bead.
In this case, the plank is screwed to the linoleum like a plinth using thin screws without glue. Moreover, at the fastening points, the fabric is cut from the edge to the hole through which the self-tapping screw will enter. Thus, when shrinking, the linoleum covering will not tear off the glazing bead, but will only move a few millimeters under the wooden overlay. The bead itself must be glued to the end of the tile, and the lower edge adjacent to the linoleum is covered with silicone. The method is not the most elegant, but quite practical; such schemes are used to arrange transition lines in bathrooms and utility rooms.
Linoleum can be glued, but it is not a fact that the PVC sheet will not tear the bead off the tile during the shrinkage process.
Main functions of thresholds
The threshold for linoleum has many different functions, among which are:
- Aesthetic;
- Protective;
- Leveling;
- Designer.
The threshold strip is a mandatory decorative element. Even tightly connected linoleum joints create a feeling of incompleteness.
Connecting flooring seams
The protective function is expressed in reducing the penetration of dirt and dust into the joint, as well as moisture, which can lead to the appearance of mold and mildew.
Often, when laying floor coverings of different thicknesses, a height difference occurs, which can be handled well by a properly selected multi-level threshold.
“Smoothing” height differences
Also, using a plank, you can reduce the contrast between linoleum of different colors and textures.
How to connect tiles and linoleum on the floor: instructions
If good decorative qualities are required, then it is best to make the transition from tile to linoleum using a flat aluminum profile laid on sliding fasteners. Unlike the external method of fixation using self-tapping screws, this scheme turns out to be more flexible and easily adapts to fluctuations in the height of the linoleum sheet and tiled surface. What is especially valuable if the floor under the tiles is equipped with a heating system.
Wide thresholds allow you to cover floor differences up to 20 mm in height
The joint between tiles and linoleum using a threshold and profile
To close the seam line, you first need to lay the edge of the linoleum panel with a strong and at the same time elastic glue. Acrylic, epoxy, rubber or alkyd adhesive compositions are not suitable for these purposes. It is best to glue the edge of the linoleum with silicone sealant.
The reason for this choice is quite simple:
- After hardening, the geometic holds linoleum no worse than classic “liquid nails”;
- Silicone has no shrinkage, which means that the metal threshold laid on top of the linoleum will not fail due to a decrease in the level of the canvas; accordingly, there will be no cracks, and the profile itself will not dangle in the air;
- Most plumbing sealants are not afraid of mechanical stress, even if a very heavy person steps on the threshold that covers the joint between the tile and linoleum. The material easily withstands exposure to dust, hot water, and detergents.
Advice! In addition, if you need to reliably adhere a synthetic material to a very hard and rigid surface, then it is difficult to find something better than silicone sealant. If two relatively elastic materials are glued together, then any glue and even liquid nails can be used. If one of the materials is tile, ceramics, glass, then only silicone can be used as glue.
After the edge of the linoleum is trimmed along the line of separation with the tile, sealant is applied and the panel is laid on the adhesive base. In this case, the surface is not applied with a roller or spatula, as is usually done when laying linoleum flooring with regular glue.
Holes for mounting plugs are drilled along the separation line. They are spaced in increments of 10-20 cm, depending on the shape and size of the threshold. Plastic bushings are driven into the holes, and the dowels themselves are inserted into the groove on the back side of the metal threshold.
To install, you only need to align the fasteners so that each element is located above its own plug. Next, we install the threshold on the plugs and push the trim into place using a mallet and a wooden strip.
At the final stage, the overlay must be loaded with weight, as a result, part of the silicone will be squeezed out from under the edge of the linoleum onto the surface of the end of the tile, forming a very dense, durable and airtight seam, which will perfectly protect the joint between the two coatings from moisture penetration.
Without threshold
The above technology can be used without a decorative overlay. In fact, an overhead metal threshold is necessary only to simplify floor cleaning and prevent moisture and dust that has fallen on the floor covering from penetrating under the tiles.
Without a threshold, but with two metal edges
Therefore, the fastening process can be simplified:
- When laying linoleum, the edge must be cut so that 4-10 mm overlaps the surface of the tile;
- The second step is to glue the linoleum so that the edge fits tightly to the end of the tile with a small fillet;
- A steel metalwork ruler is laid on the joint line, on top of which a load weighing 5-10 kg is placed;
- After the silicone has completely hardened, the crown is trimmed using the same ruler or an aluminum corner, and the remaining seam is filled with hot glue.
Visually, not everyone likes this solution, so many owners and customers prefer to lay or stick a decorative strip on the joint line. In reality, such an addition has no practical use; it quickly falls off and is thrown away by the owners as unnecessary. If you want to emphasize the ceramic coating, it is better to use a regular aluminum edge corner, or even coated with titanium, gold or a film to match the color of the tile.
What types of seam joining are there?
People are often interested in how to join linoleum using available materials. There are four options:
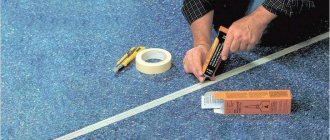
- You can use double-sided tape if you have it at home.
- It’s good if there are partitions or thresholds. They are easy to install yourself.
- There is a special glue designed for cold welding. It's perfect for this type of work.
- Professionals prefer to use hot welding. They use a special cord.
Difficulties in joining linoleum and tiles
The main problem associated with the design of joints between tile and linoleum flooring is associated with the appearance of cracks, peeling of the plank or loose fit of the material to the rough base. The solution to these problems depends on how exactly the overlay is secured.
Joint of tiles and linoleum at different floor heights
A multi-level option for designing a joint between two types of coating is considered the most common and at the same time the most difficult to install. Most problems arise due to poor-quality fasteners:
- If the decorative trim is frequently stepped on, the grooved nails will sooner or later break the internal size of the plastic sleeves driven into the floor. It comes to the point that the bar can be easily pulled out with one hand, without making any effort. In this case, you have to use polyurethane foam or silicone in order to glue the decorative overlay into place;
- Wrong choice of decorative threshold model. In order to close the joint between linoleum and tiles using a regular flat overlay, the difference should not exceed 16 mm. Otherwise, the mount will fail very quickly.
In this case, the best solution would be to use specialized step-type models, which have two supporting planes and are very easy to install on tiles and linoleum. The only thing you need to know is the exact amount of the level difference and the width of the joint between the two types of coating.
Such models are installed only on polyurethane foam.
Joint of tiles and linoleum in a doorway
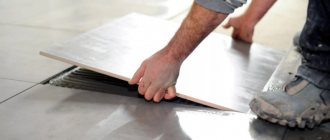
If you have to join two completely different types of covering in a doorway, then you need to pay attention to the quality of preparation of the base and laying of the softer and weaker material, in this case linoleum. Everything is fine with the tiles. When laying tiles, a screed is usually made up to the door opening.
The easiest way is to solder the seam, and for protection put an aluminum threshold lined with PVC film
For the installation of linoleum, either a fiberboard floor or a plywood underlay is traditionally used. It is in the area of the doorway that the lining material most often “plays,” that is, the rigidity of the base is clearly not enough.
In this case, you have to either trim and fill an additional wooden strip, which will be attached directly to the door, or “extend” the linoleum screed by 15-20 cm. In this case, the decorative threshold can simply be glued to the joint line and fixed at the ends to the door frame .
Hot docking
Hot docking.
Before joining linoleum together using hot welding, you will need to buy a set of tools.
Necessary tools
Set of tools for welding.
- You will need to purchase special edger scissors; if you need to cut strips, you will also need strip cutters.
- To apply and level the glue you need a notched trowel and a heavy roller.
- The most significant price is for a kit for hot joining of seams. It includes a manual welding machine, several attachments, a cutter for creating grooves, a crescent knife for trimming excess cord, etc.
Using the cord
Now let’s talk about how to connect linoleum joints using the hot joining method. For this, a special PVC cord is used. It melts under the influence of hot air supplied by a hairdryer, fills the joint and, when solidified, forms a seam that has the same characteristics as the coating itself.
When soldering the panels, the cord is cut so that the length of the piece is enough to process half the joint. The end should be parallel to the floor surface and directly above the groove.
The usual thickness of the lace is 4 millimeters. It is sold in rolls of 100 m. You can choose consumables to match the color of the linoleum or a contrasting one.
Work process
After you glue the covering panels to the floor, you will need to weld their edges together.
- Before starting work, thoroughly vacuum the linoleum. Next, check the tightness of the edges to the base. Any irregularities can negatively affect the quality of welding.
- Then, at the joint to be processed, using a cutter (groove chisel), make a groove having a width of 2/3 of a millimeter and a depth of about two-thirds of the thickness of the material. It is used for laying the welding cord.
- Vacuum the groove well.
- Then you can carry out the soldering of the joints itself.
- Before doing this, heat the welding device to the desired temperature. Usually it is +350/400 degrees. Insert a cord into the five-millimeter nozzle and secure it. When the cord melts, its material glues the linoleum together. Thanks to this, the laid coating will be airtight, aesthetically pleasing, and durable. The beginning of the cord must be pressed against the joint, in this case it will hold firmly and there will be no gaps.
- When the cord is still hot, the instructions instruct to remove excess cord with a special arc-shaped knife. It does not spoil the top layer of coating and neatly cuts off the edge of excess consumables.
- Next, the final (trimming) processing of the seam with a knife is carried out.
- After this, you can begin welding the second half of the joint. It must be remembered that the cords must be joined in the middle of the room with an overlap of 2/3 centimeters.
Photo of the transition from linoleum to tiles in the interior
The joint line has long turned into an element of decorative finishing of the floor covering; when choosing the model, shape and size of the overlay strip, you have to take into account how well the color and texture of the threshold combines with the color schemes of the interior of the room.
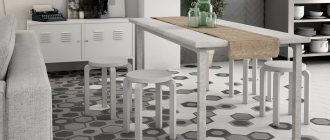
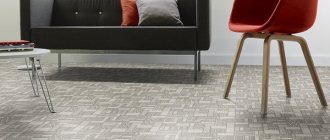
Combination of linoleum and tiles in the kitchen
In a kitchen environment, the joint line turns out to be not so much an advantage as a disadvantage, since you have to walk a lot, and the longer the seam, the greater the chance of tripping. Therefore, most often the joint is made in straight, short sections, this simplifies installation and at the same time allows the use of metal thresholds, which are not very suitable for curved decors.
Well, this does not mean that design possibilities are limited only to rectangular shapes. If desired, you can use a flexible profile that fits perfectly both on the tiles and on the linoleum itself.
Combination of tiles and linoleum in the hallway
The design of the demarcation line in the corridor or at the entrance to the house is usually made a little more complex, since it is believed that the hallway is the calling card of the home.
Making a joint with a flexible profile
Flexible profiles can be metal or PVC. The plastic profile consists of two parts: fastening and decorative.
For PVC profiles, the joint between floor coverings is designed as follows:
- Cut the profile to the required length.
- Secure the bottom with self-tapping screws or glue along the seam.
- Heat the decorative part in warm water.
- They are placed on the mounting profile and snapped into place.
Before starting work on finishing the floor, it is necessary to decide on the material for the joint, since it is more convenient to connect the tiles to linoleum with a flexible metal profile even at the stage of laying the ceramics.
The procedure for joining with a metal profile:
- Mark the edge of the joint.
- Give the profile the desired shape.
- Lay the tiles by cutting them along the marked groove line.
- Lay the profile simultaneously with the tile, inserting its edge into the groove of the profile.
After drying, the tile will securely hold the joining profile, into the groove of which a companion floor covering (linoleum, laminate) is inserted on the other side.
Algorithm of actions
The docking technology is relatively simple and can be done independently. The process of obtaining a high-quality seam can be divided into several successive stages:
- First of all, an analysis of the difference between linoleum and other floor covering is performed . If this value is quite large, then you need to take care of leveling the surfaces. Often a similar phenomenon occurs between linoleum and laminate. To form a single plane, plywood is placed under the rolled material, which is best nailed to the floor.
- The next step is to form a joint with a minimum gap . To do this, the material must be cut along the entire length of the seam using a sharp knife. The better you do this, the better the transition will look.
Conclusion
As you can see, there are many ways to decorate and hide the seams of floor coverings. Which one to choose is a matter of personal tastes and beliefs. But we can say with firmness that it is possible to do it yourself (find out here what auto linoleum is).
Despite the fact that we have considered only the basic techniques for processing floor covering seams. Only now, at the end, I remembered my grandfather’s method, how he diligently nailed linoleum to the floor, at that time everyone did it.
Today, the variety of building materials allows you to apply many options to one task. Therefore, it is very important to study this moment from different sides, so as not to regret what could have been done differently.
And in the video in this article - today’s most popular method of joining linoleum using cold welding, watch it!
Types of tile coverings
Ceramic tiles
This is exactly the type of coating that is implied by the word “tile”. Floor tiles in a hallway differ in many ways from those used in a kitchen or bathroom. It has a much higher density, thickness and grain size. Thanks to these qualities, the material is able to withstand shock and pressure.
The average price of ceramic tiles is from 200 to 1000 rubles per square meter. The price depends on the manufacturer, the newness of the collection and the design. Many companies make patterned tiles from wood or stone, but ceramic tiles remain the most popular flooring option.
Interior tiles look simple, but will last a long time due to increased safety
Porcelain tiles
Porcelain tiles have an excellent appearance and are very practical due to their durability. According to the Friedrich Mohs scale, the material has a load resistance rating of 7.
Manufacturers produce tiles of different thicknesses. It ranges from 7 to 30 mm. In addition, the material easily tolerates frequent temperature changes, which makes it popular for rooms close to the street.
In addition to high strength, the tiles have excellent chemical resistance. The exception is hydrofluoric acid, which corrodes granite. In addition, the material is valued for its ability to eliminate any surface defects when installed correctly.
Vinyl
Vinyl tiles are made from rubberized plastic and stone chips are added to the mixture. Advantages of vinyl: no seams during installation, increased strength and high resistance to mechanical damage.
Vinyl tiles seamlessly replace natural materials in an open area
Quartzvinyl
Tiles are made by combining different materials. In essence, this is a modern PVC surface. Thanks to its excellent wear resistance, it is designed for places with large crowds of people and high traffic.
The tile consists of four layers:
- The first one is made of polyvinyl chloride. Provides reliable attachment to the surface.
- The second one is made of fiberglass, which increases its load-bearing capacity.
- The third strengthens. Made from quartz and vinyl.
- The fourth layer is protective. It consists of polyurethane. It also performs a decorative function.
The material has excellent soundproofing properties compared to others. It has a number of advantages. For example, it is perfect for “warm floors”. Although artificial materials are used in the manufacture of tiles, they are completely safe for humans, as they remain environmentally friendly.
Multilayer tiles
It consists of several layers. The first is thickened polyvinyl chloride, the second is a ceramic base with the addition of granite particles, then a layer of pigmented and green grass. The obvious advantage of such tiles is its high strength. In addition to this, it is not as cool as regular ceramic tiles, but is a bit like laminate.
PBX
Polyvinyl chloride is linoleum that is laid in small parts. Visually, linoleum goes well with ceramic tiles. The coating is soft and easy to install. The natural advantage of linoleum is its low price, but there is also an obvious drawback - it quickly breaks from mechanical damage.
High-quality linoleum replaces ceramic tiles in an open area
Clinker
Clinker is a small brick that has a rectangular shape and is fired using a special technology. Sometimes it is glazed and uneven. Clinker is used not only on walls, but also on open floors.
Clinker brick highlights a small area in the house or hallway
Palette of shades
By placing light tiles in the hallway, you can visually move the room away. A snow-white palette, beige, grayish shades, walnut and pastel colors are excellent options for this. But such tiles on the wall require constant attention, as dirt is immediately noticeable.
However, this feature is also characteristic of a dark floor, when it is very smooth and even small scratches are visible. In addition, such a shade can significantly limit an already small space.
The best options for floor tiles in the hallway are shades of muted tones.
Pay attention to the color. Any cold and dark shades visually contribute to the removal of objects. The property of light colors is to bring them closer together.
Black
A hallway with a black floor should be spacious enough, otherwise the color will narrow the space even more. On this type of floor the damage is most noticeable. Therefore, black tiles are often combined with white tiles, arranged in a checkerboard pattern.
Gray
The most popular and winning option for the hallway, it harmonizes with any wall design. Scratches and dirt are not so noticeable on it.
Beige
Beige belongs to neutral and warm tones. Such a floor in the hallway would rather serve as a backdrop for decoration than attract attention.
Blue
The choice is controversial, which is why it is more common in two-tone floors.
In the photo, a contrasting blue border favorably complements the ornament on a white background.
Red
This color in the hallway is often used in combination with white or as part of ornaments in muted tones - pink, burgundy.
White
Glossy white looks elegant and can be combined with any shade. Bright tiles reflect light and expand the space. But for a hallway this is an excessively slippery coating, and on products with a rough surface and light grouting, the dirt will be more noticeable.
The photo shows white tiles at the entrance, combined with the walls and light wood.
Setting thresholds
The most common way to install thresholds on dowels. For this purpose, an aluminum strip with a decorative overlay is used. The dowels will be hidden under the cover and will not spoil the visual appearance when inspecting the room.
The installation consists of the following steps:
- Seam measurements;
- Cutting the threshold to the required dimensions;
- Cleaning the seam from dirt and dust;
- Laying of the plank is done in the center on the seam with a mark of the place of installation;
- Places for dowels are marked;
- Using a drill, holes are made where fasteners need to be inserted;
- A protective strip is installed on the self-tapping screws.