Not everyone knows that ordinary polystyrene foam can be used to create an effective adhesive solution. The recipes for making homemade glue are very simple, and the quality of fixation will be reliable. This composition can be useful in different situations. How to prepare glue from polystyrene foam and solvent at home will be discussed below.
DIY foam and solvent glue
It is not at all difficult to obtain glue from polystyrene foam and solvent. Such a bundle will glue objects together much more reliably than options from the store, and the price is also much cheaper.
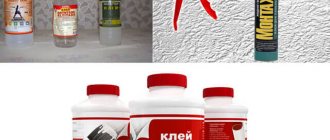
To get started, you need gloves that will protect the skin from the harmful effects of the material, a container for mixing the composition, as well as a spoon or spatula to mix the consistency.
It is also necessary to take care of ventilating the space of the apartment at home to prevent poisoning and other negative effects on health through inhalation of harmful toxic substances contained in the composition.
There are two methods for preparing glue:
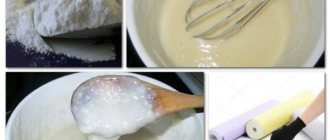
- For the first one, you will need to put the foam in a container and then pour in the solvent. It can be gasoline or acetone. These substances are available in the arsenal of any car owner or in everyday life. But it should be taken into account that a pure solvent for polystyrene foam - acetone - causes much more harm to human health than gasoline and dries much faster, which is why its use is reasonable only when absolutely necessary. After mixing the substances, you should check the resulting consistency. If the composition is very liquid, then it is unlikely that you can get a good result with it during the gluing process.
- In another case, a mixing container will not be needed, because the entire process will take place directly on the object to which the substance needs to be applied. This can be done by cutting the foam into small pieces and subsequently covering the surface for gluing with them. After this, fill the foam with solvent.
You can use either method, but it should be taken into account that the first option will be much safer, since in case of an error the composition can be made new.
Using homemade glue
Before you start preparing a homemade product, you need to understand what objects can be glued together and what materials it is not suitable for.
Connecting only rigid objects will be successful, since the adhesive mass hardens, increasing the strength of the product. You won't be able to seal a crack in a rubber boot that is flexible at the break with a homemade product.
The peculiarity of using glue is the limited time of its use - 10-15 minutes after preparation, later the quality of the adhesive mass decreases.
Therefore, the product is required in cases of small and urgent work:
- sealing fiberboard joints;
- repair of floors, tile or slate roofs;
- gluing furniture, baseboards, interior items;
- basement waterproofing;
- fastening cornices;
- insulation of loggias, balconies, ceilings and floors, foundations, walls with extruded polystyrene foam.
Owners of garages, garden houses, and private houses will more than once be helped out by simple and quick-to-prepare homemade glue instead of expensive casein or carpentry glue.
What is needed for cooking
How to make glue from foam plastic is not difficult to answer. To prepare the adhesive composition, you will need two main ingredients, namely polystyrene foam and its solvent, for example gasoline.
What additional items may be needed during work were mentioned at the very beginning of the article - a container and a tool for mixing substances, protective accessories.
But during the initial preparation, you should not immediately make a large amount of the composition, because there is always a chance that something will go wrong. Therefore, you need to mix a small portion and see how the process goes further.
Which foam to choose
Any purchase of equipment contains polystyrene foam in large quantities, and after unpacking the same TV there is no point in storing this substance. In addition, the foam itself consists almost entirely of air. Therefore, to effectively get rid of it, you can prepare an adhesive composition.
It should also be noted that before starting work, the foam must be cleaned of all contaminants. It is best to combine the use of polystyrene foam and acetone with gasoline by first dissolving the foam in the first option, and only then mixing it with the second.
Practical guide to preparing glue (instructions)
Before preparing the glue, prepare a container, wash it and dry it, drying it in the sun is optimal. It is permissible to start gluing only after the process of release of gas bubbles is completed.
The first option is mixing polystyrene foam with gasoline. First of all, pour out the 10th part of the thinner and part of the prepared foam. The components are thoroughly mixed; there should be 3 times more foam balls than the liquid substance. Mixing is done until all the material is dissolved, then you can add small portions first of the balls, then of the solvent. As a result, you need to achieve a viscous substance similar in consistency to jelly. Allow the solution to stand until gas bubbles are released.
Mixing is done until all the material is dissolved.
The second recipe involves the use of nitro varnish. Nitrovarnish is diluted with acetone, and only then the composition is mixed with foam balls. The process is similar to the previous recipe. This option is more expedient to use for waterproofing purposes; a more liquid solution can be used to fill imperfections on the floor, steps, etc.
Using nitro paint as a solvent for polystyrene foam will produce the effect of a putty mixture that can be used to cover fences made of metal and wood.
Nitrovarnish is diluted with acetone, and only then the composition is mixed with foam balls.
Features of the composition
For preparation, ordinary polystyrene foam from a newly purchased item from a cardboard package is suitable; it probably could have already been crumbled into small pieces, which is handy. If the material contains contaminants, they must be removed before use, and if there are additional substances in it, then stop using it.
It is worth considering that you cannot carry out any manipulations with the foam used for insulation, since it emits harmful gases when reacting with gasoline. There is a difference between the substances chosen for mixing.
For example, if gasoline is ideal and all you need to do when choosing is to buy number 95, then with special solvents things are somewhat different. 646 will not always be able to dissolve foam and it all depends on its manufacturing quality. Therefore, this solvent should be selected with care from trusted manufacturers. Also, when using it, the composition turns out to be more liquid.
If this goal is to coat the surface, then it is best to use xylene. Speaking of acetone, the entire gluing process must be carried out as quickly as possible to avoid drying out the liquid.
In cosmetics
Dimethyl ketone is the main ingredient in traditional nail polish remover. If you think it might cause damage, you can replace the acetone with non-acetone nail polish removers that contain ethyl acetate. The first does a better job of preparing the surface of the nail plate for coating with varnish and the varnish holds better, while the second does not dry out the nail.
Interestingly, ethyl acetate is used as a replacement for acetone for flushing a car engine - decarbonization does not require special knowledge, even a novice car enthusiast can cope with this process.
Making glue from foam plastic
In order to prepare the glue, it is necessary to prepare a space that will be actively ventilated. It is ideal to carry out the entire process outside the home in the fresh air.
This way you can significantly reduce the amount of harmful substances entering during the preparation of the adhesive composition. In this case, the selected location should be far from flammable substances, since gasoline is used during the operation.
In the event of an accidental fire, the fire can easily spread to other objects. If you carry out the entire process in the first way - in a container, then it must be made of metal or glass, since ordinary plastic, unsuitable for storing gasoline, can dissolve in most cases. Next, you need to find a spoon or other object for stirring the composition.
Disadvantages of homemade glue
Despite all the advantages of creating glue with your own hands, the resulting substance also has a number of negative qualities. These include:
- Short service life;
- The strength of the resulting seam is not so high;
- To create a reliable coating, you need to apply two to three times more composition;
- Long drying process, minimum 24 hours required. In this case, the solution should be used quickly; the best properties are retained for only 10-20 minutes. Plastic and metal should be glued right there;
- Porous surfaces require the application of several layers, and after applying the first one, wait until it has thoroughly saturated the structure of the wood or brick.
To create a reliable coating, you need to apply two to three times more composition.
Homemade glue can create a strong layer if prepared correctly. But the work requires compliance with safety measures, due to the use of harmful substances during preparation. It is necessary to carefully crush the foam and select a suitable solvent. The products should be glued to each other quickly to ensure a reliable connection.
Proportions of foam and solvents
During the work process, it is important not to overdo it with the addition of solvent, since the composition can turn out to be very liquid, but not only for this reason. When pouring gasoline, the foam reacts violently with it and the total amount of the substance becomes much larger than the original. The most optimal ratio would be two to three.
Home production, not only of adhesives, is increasingly becoming a trend. People want to try making their own item by hand, rather than buying ready-made goods from the store. How to make glue from polystyrene foam will be an excellent option if you need to carry out repairs.
Where can it be used?
The scope of application of glue from scrap materials is huge. In the domestic sphere, it is used to repair roofs, facades, furniture, if necessary, correct interior decoration, glue a loose piece of tile, seal holes that have appeared in the wrong place, and seal surfaces.
For what materials is it used:
- paper, cardboard;
- wood, particle boards (chipboard, fibreboard, MDF);
- ceramics;
- slate;
- metal;
- concrete.
Since all compositions, of which there are many, are based precisely on mixing polystyrene foam and some kind of solvent, this glue is not suitable for every plastic. Food grade and regular household plastic can lose their strength and become deformed. But when working with plastic suitable for flammable liquids, such problems do not arise. For example, if a leak occurs in a plastic canister, it can be repaired with a patch of thick household glue, and for several more years the container will work properly without letting in a drop of water at the sealing site.
It is worth considering that glue does not adhere well to smooth surfaces, and this applies not only to plastic. It is capable of gluing parts with a glossy surface, but first you need to thoroughly matte the joint on both parts and wipe with acetone immediately before the gluing procedure. Glue is applied to both sides.
The mixture perfectly replaces polyurethane foam: suitable for sealing cracks in roofs, walls, stairs, wooden objects (window frames, window sills, doors, door frames, lining). Large cracks are filled with a spatula; small cracks are filled with a pastry syringe, instead of which you can use a thick bag with a corner cut off. For external repairs, the uncured glue is sprinkled with sand or covered with a clean rag.
Many people do not recommend using glue with this composition for decorative repairs: due to its consistency, it is quite difficult to apply accurately. But if the front surface of the object near the joint is lubricated with oil, no traces of glue will remain. The main thing is not to drip grease onto the place where the glue will be applied.
Useful: the strength and durability of the connection will depend not only on the material being glued, but also on the quality of the components included in the glue itself.
After complete hardening, the substance becomes glassy and holds quite tightly, but you should not use it to attach objects that are under constant or heavy load.
It is possible to use a mixture of gasoline and polystyrene foam as a varnish. To do this, the mixture is made almost liquid, jelly-like. Essentially, it turns out to be liquid plastic. Applied in a thin layer, when hardened it turns into a film and serves as an excellent protection against moisture. Used for waterproofing:
- wooden, metal, concrete fences;
- concrete walls and floors; roofing;
- household items made of wood.
There is a misconception about using homemade adhesive to adhere insulation. As a rule, to preserve heat, sheets of polystyrene foam are used, which in composition is the same foam, only made using a different technology. And the solvent-based glue simply “eats away” the bulk of this material, leaving only a layer of air as insulation.
To create the composition with which we will cover the floor, we will need the following materials and tools
We deliberately do not use the so-called liquid floor, because the garage is large and the floor is uneven, so it will take a lot of such material to fix the problems, and the upgrade work itself will be expensive.
We will need: acetone, xylene, two different colors to give a marbling effect, polystyrene foam. And as tools, prepare a container for mixing materials, which must be resistant to aggressive chemical environments, a stirring stick and a paint brush.
You can buy polystyrene foam, or you can use the kind that comes in boxes with electronics. Look for polystyrene foam on sale in the insulation materials department.
Do I need to insulate the floor in the garage?
There is an opinion among experts that the optimal temperature in a private garage in winter should not exceed +5⁰ C. If a car is driven from the cold into a room with a higher temperature, condensation forms on the body, and air humidity rises sharply. This negatively affects the anti-corrosion properties of the car and shortens its service life.
Many drivers consider the thermal insulation of the garage floor unnecessary, limiting themselves to insulating the doors, walls and ceiling. In such a situation, the owner of the building will experience constant heat loss through the floor covering. Maintaining the optimal temperature in the room will require a lot of energy. In addition, during severe frosts, condensation may form at the point of contact of the cold floor with warm air.
It is important! SNiP 21-02-99 “Car Parking” states that the minimum recommended temperature of a car storage room should be +15⁰ C. In this case, it is taken into account that there is forced ventilation in the garage and maintenance and repair work is being carried out on the vehicle.
By insulating the floor, the owner creates favorable conditions not only for storage, but also for servicing his car.
Floor insulation is an important stage in arranging a garage.
How foam is glued to different surfaces
Depending on the type of work, foam plastic is glued to various surfaces. For example, when fixing to concrete walls, specialists use special foam. Since concrete walls are quite cold, they require insulation, and this material is ideal for this role. Foam glue is suitable when working with brick walls. This composition is a dry mixture, which the master subsequently dilutes with water. Dry mixtures are inexpensive and have low consumption. The specialist applies the finished composition to the wall or to a sheet of material, and the slabs themselves are glued from bottom to top.
Dry construction mixtures are used for gluing. Source obystroy.ru
You can use polystyrene foam glue or PVA construction adhesive. It perfectly fixes the material on metal surfaces. First, burlap is impregnated with this composition, applied to a metal surface and waited for drying. As soon as the layer has dried, fix the foam material. In order for the slab to better adhere to the base, after applying it, it is pressed against the wall. At this time, the glue increases its thickness, and the specialist glues the next slab.
Acetone substitute for degreasing parts
Degreasing removes unwanted dirt, grease, oil from equipment or prepares parts for finishing. Suitable for industrial cleaning and surface preparation, methyl acetate contains no VOCs and is biodegradable. Its hydrophobic properties are critical when it comes to problems associated with moisture, which can damage or corrode parts.
An active, mixable solvent can be used alone or in compositions for degreasing metal parts, wooden parts and others.
Tips/Tricks
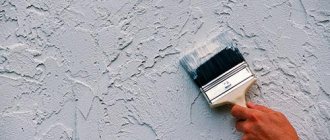
- To prevent streaks and drips from appearing on the foam, you should always move the brush in one direction.
- If you are painting the baseboards that have already been installed on a wall decorated with wallpaper, it is recommended to use masking tape to protect them.
- If it is not possible to use paint that does not contain solvents or gasoline to paint polystyrene foam, you can always use a layer of ordinary plaster to protect it. This way, corrosive chemicals will be isolated from the material.
Advantages and disadvantages of the material
Liquid foam plastic is a fairly popular insulation material in the construction of private houses and industrial-type buildings, due to its many advantages:
- fine-mesh structure - allows air to pass through well, so condensation does not form, the walls are not affected by mold or mildew;
- fire resistance - hardened penoizol does not burn, but simply smolders without releasing any harmful products;
- resistance to changes in temperature and humidity - hardened penoizol is not affected by any temperature changes, therefore it retains its properties from 50 to 80 years;
- noise insulation - a 5-7 cm ball of foam creates a reliable noise barrier;
- Possibility of use in hard-to-reach places.
Painting concrete with homemade varnish (acetone+xylene+foam)
The floor in the garage is concrete and very dusty... absorbs, etc... after searching for a solution to eliminate this shortcoming, I was advised this method... I tried it in the summer of 2022 and now I am writing a review in the summer of 2021. To prepare the varnish you will need: 1- Acetone 2- Xylene
4- Bucket, brush, respirator
We pour 2 liters of acetone into a bucket and begin to dissolve polystyrene foam in it (any foam will do, I dissolved the one I found from household appliances, and when it was not enough, I bought the one that is used for insulation) until a thick slurry forms in which the foam plastic practically does not dissolve... It looks like like this:
When a thick mass has formed, pour in 1 liter of xylene and stir, it will thin out this mixture, making it less thick and similar in consistency to varnish... Then everything is simple... Take a brush and apply a thin layer to concrete or other surface... Before applying it, you need to sweep it, or even better blow it out with a compressor (that’s what I did) The varnish itself turns out transparent:
But... for the sake of experiment, I added a regular color to it for 40 rubles from the paint department...
What is polystyrene foam: composition and production of the material
Foam plastic is a foamed plastic mass. It consists of many closed cells filled with air. Foam plastics include all types of gas-filled plastics.
As a rule, this material is made from granulated polystyrene. The production process includes the following steps:
- Foaming. Polystyrene granules are loaded into a special device. After steam is supplied and the raw material reaches the required level of foaming, it is moved to the dryer.
- Drying.
- Air exposure. After drying, granulated polystyrene is placed in a hopper, where it remains for 12 hours.
- Molding. The aged raw materials are loaded into a block mold, in which vacuuming occurs. The workpiece is subjected to a certain pressure and then cooled. At the end of the procedure, a pneumatic pusher unloads the finished block.
- Cutting finished products. On a special machine, foam boards are cut into sections. The scraps of material are placed in a crushing machine, crushed, loaded into a hopper, where they are mixed in a certain proportion with primary foamed granular polystyrene and reused.
Polyurethane enamel
Often such enamels are two-component; in any case, they have the highest protective properties. They can be used for interior and exterior finishing work. The main advantages of polymer enamels are their harmlessness, cost-effectiveness, resistance to external influences, highest adhesion, chemical and wear resistance.
You should ensure that when applying enamel, the air temperature does not fall below 5 o C, and the relative humidity is less than 75%. Before use, first mix the first component well, then add the second. To obtain the best painting properties, the enamel must be applied in two layers with an interval of 24 hours.
[custom_ads_shortcode3]
Which polystyrene foam should I choose?
To make high-quality glue, use the following types of material.
- Extruded - foam plastic that has a uniform structure due to manufacturing at high temperatures. The material comes out intact.
- The press material is very durable and does not crumble. Pressing is used in its production.
- Pressless sheets are a material with a large number of balls that are interlocked. If, for example, you hit it, the balls will separate and the sheet will crumble quite easily. This foam is an ideal option for making glue, as it dissolves extremely quickly.
- You can use granular foam , but before starting work you should check how the granules will behave in solvents. Different types of this material react to them differently.
It is important to choose clean foam that does not have any traces of paint, soil or dirt.
You should not take material that was used as a thermal insulation material for pipes underground, since it contains fire retardants.
What tools and equipment will be required?
To prepare polystyrene foam varnish, you will need the following raw materials and equipment:
- polystyrene foam (there should be a lot of it);
- dissolving liquid (one of the types or a combination of them);
- dishes for dissolving (any large glass, tin or polyethylene container with a wide neck will do);
- wooden stick for stirring;
- filter for straining (you can use a plastic strainer, gauze, a piece of tulle or old nylon tights);
- storage container with a hermetically sealed lid.
In addition to equipment, you need to stock up on a respirator, safety glasses, rubber gloves and long sleeves. Contact of solvents on the skin, and their vapors on mucous membranes and lungs, is undesirable, since they contain toxic substances. When foam bubbles collapse, they also release gases, the inhalation of which can cause poisoning. Work should be carried out in a well-ventilated non-residential area (garage, workshop) or outdoors. If this is not possible, then the solution is prepared on an open balcony.
Recommendations for preparing and storing glue
To ensure that the glue retains its properties for as long as possible, follow our recommendations:
- Always store formulations in tightly sealed containers. If the container does not close tightly, use one layer of aluminum foil and two layers of polyethylene as a lid gasket.
- If you use the solution from a jar, do not pour it over the edge, as it will get onto the neck and the lid will stick tightly. For convenience, take a brush.
- Always label formulations and keep them away from children and heat sources.
- If the recipe contains solvents or gasoline, use a respirator and gloves.
- Do not use containers in which glue was prepared for storing food products.
- Before you start creating the glue, prepare and measure all the necessary materials in advance.
- Do not dilute the compositions with water; use drying oil or solvents for this.
We recommend watching the video instructions:
Safety precautions during the manufacture of the composition
When making glue with your own hands, you should carefully follow safety rules. This will help you avoid accidents and maintain your health. During the dissolution of polystyrene foam, toxic, flammable and explosive substances are released into the air. This should be taken into account when organizing your workplace and choosing equipment.
Safe work rules:
- good ventilation of the room (open window, doors, working hood or fan);
- absence of nearby sources of open fire, gas pipes, working heaters, faulty wiring;
- a categorical ban on smoking during work;
- protection of exposed skin from chemicals (long sleeves, rubber gloves);
- respiratory tract and eye protection (respirator + goggles).
Harmful substances are released not only during the production of glue, but also during the entire drying time of the parts glued together. To avoid inhaling toxic fumes, items with undried glue should be kept outside of residential areas until complete polymerization. If the taped item cannot be removed from the room, family members should temporarily close access to it and keep the windows open.
Symptoms of solvent poisoning:
- burning in the eyes or nasopharynx;
- sneezing, coughing, feeling of suffocation;
- dizziness;
- unsteady gait;
- convulsions;
- fainting.
If these signs appear, you should immediately leave the poisoned room. In case of eye irritation, wash them immediately with water; if they come into contact with hands or other areas of the skin, they should be washed well with soap and rinsed with running water. If the victim is conscious, he can be given warm milk and a sorbent (activated carbon, Enterosgel). The person who has lost consciousness is placed on his back with his head turned to the side. If you suspect acute severe intoxication, you must urgently take the poisoned person to the nearest medical center or call an ambulance.
Acrylic paint
Acrylic paint is an aqueous mixture containing acrylic resin and various polymers. This paint protects concrete from destruction by forming a protective polymer layer after application.
The result is very reliable, moisture-repellent and strong protection, which makes this paint suitable for covering floors in garages, basements, balconies and landings. Read also: How to make a concrete floor in the basement of a garage in makeshift conditions.
This type of paint is easy to use; a regular brush, roller or sprayer will do. You will like several layers, any of which dries in 12 to 14 hours.
[custom_ads_shortcode2]
Concrete floor protection
Concrete floors are still very popular in industrial and commercial buildings. Even today, they are sometimes found in home workshops, cellars, garages, in various outbuildings, sheds and storerooms. Even though this very strong material is able to withstand heavy loads in not the most suitable conditions, it nevertheless needs protection.
Concrete has high porosity and low tensile strength, which leads to the destruction of its upper layers under the influence of external causes. If poor concrete made from low-grade raw materials was laid, then corresponding dust often appears during wear.
To protect the concrete base, special compounds are often used. They not only give the surface a decorative color, but also at the same time protect it from destruction due to exposure to brutal environments and inevitable wear. Already today, such a surface does not slip, becomes hygienic, antistatic, and more even.
[custom_ads_shortcode2]
Tips you haven't used before
Painting foam plastic must be approached correctly, and in order for the paint and varnish material to lay evenly and correctly, you need to follow a number of tips from those who already have real experience in this matter.
- Before applying paint, be sure to wipe the foam with a damp microfiber cloth.
- When trying to dilute the pigment, use only clean water, following the proportions indicated on the packaging of the foam paint.
- If you are afraid that the foam will start to crumble while painting the foam, cover it with liquid plastic and wait until it dries.
- When baguettes or plastic structures have convex parts, patterns and monograms, they can be painted with acrylic paint using a thin cloth.
- When baguettes or plastic structures have convex parts, patterns and monograms, they can be painted with acrylic paint using a thin cloth.
Remember that all raised parts need to be highlighted when painting. This way the appearance of the decor will be much more impressive.
Foam figurine made of three-dimensional parts painted with acrylic paints Source spkfasad.ru
Bonding polystyrene foam together
Foam can be glued with simple stabilizers, but the durability and quality of this method depends on the subsequent application. For example, if you insulate an attic, they will be affected by humidity, temperature and other factors.
A number of adhesive compositions have a detrimental effect on the structure of the material, destroying it. The selected adhesive should not contain alcohols, gas and oil derivatives, acetones or other solvents.
Bonding material
When choosing an adhesive, you need to consider:
- the purpose of using the glued material, its features;
- influences, including the temperature to which the material will be exposed;
- room humidity;
- foam surface density;
- surface structure, if it is attached to other materials;
- price of the product.
There are many options for gluing polystyrene foam together. In most cases, it will be better to use regular PVA glue (for polystyrene foam), but if we talk about a complex design, it may not be justified. The simplest and most common option for fixing the material is an adhesive composition for various purposes.
Gluing foam is carried out using the following tools:
PVA - for simple structures with short-term use. The advantage is ease of use, but there is a disadvantage - it takes a long time to dry. Styroglue is a special product for gluing materials together. It is sold in special construction stores at a low price, however, it is very rare and difficult to acquire. Polyurethane polyurethane foam. It can be used for insulating beam structures and fastening to iron, but all operational features must be taken into account. Disadvantage: the connecting seam hardens slowly. Hot glue
Must be used carefully and only with a glue gun. Allows you to combine several foam parts into one. The advantage is instant setting, the connection will be strong and durable
The disadvantage of hot-melt adhesive is that it hardens quickly. The parts must be connected over the entire plane until the composition cools. Special types of adhesives for adhesion to other surfaces - metal, wood, and so on. The polymer composition is a water-resistant product that, when joined, forms a thin but very strong connecting seam. It is not suitable for joining polystyrene foam, but is suitable for installing it on various building surfaces (insulation of load-bearing walls with foam plastic). Can be used for gluing penoplex. Cement-polymer is a type of construction adhesive made on a cement base, with additives that increase the strength of the adhesive layer and resistance to cracking. Bitumen glue. It uses bitumen emulsion. Provides resistance to cracking, the adhesive layer does not rot. It also prevents the appearance of mold on the wall and is resistant to excess humidity. It can be used for mounting polystyrene foam on building surfaces, and for gluing foam plastic together. The gluing area will be invisible, since the glue is applied in a thin layer. "Liquid Nails". For application to surfaces, use a sealant gun. They are applied pointwise, after which it is necessary to ensure firm pressure for five seconds. The grip is strong and durable. The disadvantage is the high cost. Special foam. This is a great option than gluing foam to concrete on the ceiling or wall.
What can you replace eyelash glue with?
If you don’t have time to go to the store, you need to come up with a safe alternative. You can replace it using different methods, using improvised means or products from the pharmacy.
Other types
You can replace eyelash glue using other store-bought products. Varieties:
- black;
- white;
- transparent;
- waterproof.
Black is suitable for fixing hair extensions: the gluing points are completely invisible.
The effect of black arrows is created, this emphasizes the look, making it more expressive. Using white is a little easier, the contrast of colors helps it work. The effect will not be noticeable after extension: when dry, the paint becomes transparent.
Transparent adhesive is a reliable replacement product, with which you don’t have to worry that your eyelash extensions will start to fall off at the end of the evening.
The ideal option is waterproof: they can withstand high humidity, effectively fixing every hair. You can safely go to the beach or swim in the pool.
Varieties of texture to replace the traditional product:
- silicone – safe, do not cause allergic reactions;
- rubber – a hypoallergenic product based on rubber;
- rubber – securely fixes, allowing you to preserve makeup;
- resinous - suitable for beginners, dry slowly, making it possible to glue eyelashes without haste. Not suitable for allergy sufferers - causes irritation and redness.
Hypoallergenic compositions are safe for the eyes, but do not last as well.