Today, store shelves are full of a variety of glues of different prices and compositions - I don’t want to choose! However, there are those who prefer to make it themselves, which, by the way, saves a lot of money.
In this article we will tell you how and from what to make glue from improvised materials, and it is no worse than in the store.
Paste - a traditional flour recipe
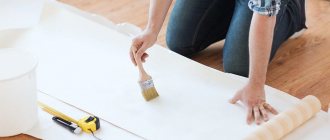
Paste is perhaps the best wallpaper glue. It is based on flour. It is absolutely non-toxic and safe for children. It can be used at home.
One liter of it is enough for about 2-3 rolls of wallpaper.
To make it you will need:
- Two containers: for mixing glue and for water.
- Flour - 6 tablespoons per 1 liter of water.
- Water - 1 liter.
Let's start making:
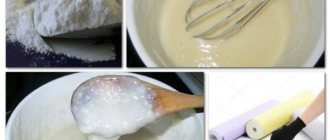
- Take the first container, pour water into it and bring it to a boil.
- At this time, in another, thoroughly mix the flour and cold water until it becomes liquid sour cream, so that there are no lumps.
- Without ceasing to stir the mixture of flour and water, we begin to pour boiling water into it in a thin stream.
- Mix everything well, bring to a boil again, set aside and then let cool.
The consistency of the mass will resemble thick jelly. If there is suddenly no flour in the house, then ordinary starch will do instead, and the quality will not suffer from this. They can easily replace wallpaper glue from the supermarket.
For the sake of experimentation, before applying it to the surface of the wallpaper, take small pieces and adhere them to each other.
It is also great for working with different types of paper, such as cardboard.
Peeled wallpaper: methods for eliminating errors
If the paper wallpaper has come off, you can correct the situation as follows:
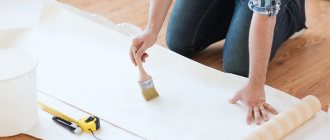
- The edges of the joints have come off. Clean the wall and wallpaper from debris and dirt. Perform priming. Let dry for several hours. Apply wallpaper glue and join the panels. For a better fit of joints, it is recommended to use plastic spatulas.
- A good way to deal with peeling wallpaper is PVA glue. The negative side of its use is the appearance of yellow spots and a problem when it is necessary to dismantle the decorative coating.
- Bubbles have formed. The situation is corrected using a medical syringe. Poke the needle into the problem area and let out all the air. Fill the void with glue using a syringe. Smooth out with a plastic spatula and a soft cloth.
Important! There is no need to release air from the bubbles using cuts with a stationery knife. In the case of plain wallpaper, this method may work, but on walls decorated with wallpaper with a pattern, it is fraught with the appearance of more noticeable, more serious defects.
- Peeling together with the plaster layer. This problem needs to be resolved as soon as possible. A sagging load can tear off a significant section of the canvas. Subsequently, such a problem will be much more difficult to solve. To solve the problem, a complete replacement of the canvas with preliminary plastering of the wall will be required.
Glue up loose wallpaper
DIY PVA
In second place in terms of efficiency and popularity is PVA glue, which is rightfully considered universal, since the scope of its use is quite extensive. The good news is that no special technology is used in its manufacture, which means we can weld it at home.
What we need:
- Distilled water - 1 liter.
- Photographic gelatin - 5 g. (sold in photo stores).
- Pharmaceutical glycerin - 4 g.
- Flour - 100-150 gr.
- Ethyl alcohol - 20 ml.
Preparation consists of 2 stages:
- You need to soak the gelatin in a glass of water for a day.
- The manufacturing process itself.
After the gelatin has swollen, we begin the process:
- Place distilled water in a water bath, add gelatin and flour pre-mixed with water.
- Mix everything well.
- Bring to a boil, but do not boil! Gradually it will turn white, similar to thick sour cream.
- At the very end, add ethyl alcohol and glycerin. Be sure to stir the mixture constantly until it becomes fairly thick - about 10 minutes.
- After the mass has cooled, it can be used for work.
Additional options
Less often, users try to make other types of glue that serve as an alternative to store-bought products.
Glue stick
The glue stick is made from PVA. For the case, you need to take an old antiperspirant deodorant package that closes tightly. Make laundry soap (2 parts), add water (1 part). Dissolve in a water bath, pour in 4 tablespoons of PVA, cool. Then put the mixture into packaging and let it harden.
Super glue
Of course, it is impossible to make real super glue - it is prepared from cyanoacrylate with the addition of a number of complex chemical components. But you can still create a very reliable composition with your own hands. For this you will need:
- 125 g wood glue;
- 100 g sugar;
- 35 g slaked lime;
- 450 ml water.
Sugar is dissolved in water, lime is added, and heated for 30 minutes in a water bath. Next, crushed wood glue is placed into the solution and boiled until the mass is homogeneous. The product can be used for gluing metal, ceramics, porcelain.
Foam glue
Wood glue is best suited for gluing foam plastic. Casein glue is also suitable, which is mixed in equal parts with slaked lime. This product is ideal for fastening polystyrene foam when insulating a house.
Foam glue
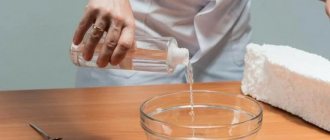
Glue is made from acetone and polystyrene foam to join elements of glass, metal, and wood. The foam is crushed into crumbs and poured with acetone to completely cover it. A viscous mass is obtained almost immediately; it can be used like regular glue, after mixing well.
When making adhesives with your own hands, you can save a lot of money, especially if you are planning a major renovation of your house or apartment. The quality of the finished product may be somewhat inferior to the store-bought product, but it will definitely be safe for health and affordable!
Today, there are many recipes for making such an original toy as slime at home. In this article we will tell you how to make a similar slime from a regular glue stick. It is easier to make lizunov from such glue, since the composition is thicker.
Not every glue stick is suitable for making slime; the offering from erich krause or uhu is best suited for these purposes.
Wood glue
This look is ideal:
- For the tree.
- For paper.
- For cardboard.
- Other materials are made from cellulose and sometimes even plastic.
There are two disadvantages of wood glue:
- Shelf life in liquid form is too short.
- The smell is too strong and quite bad. But if you boil it in advance and turn it into a gelatinous mass, it will be stored much longer. Then, if necessary, you can cut off the desired piece, melt it on the fire and use it.
Of all the methods for preparing this type of glue, four can be distinguished:
Recipe 1
- We take regular wood glue, grind it and soak it in water until it swells and resembles jelly.
- Next, place it in a special container (cloth). In the absence of one, you can take an ordinary tin can and place everything in a water bath over low heat.
- Using a wooden spoon or stick, stir the mixture continuously to avoid burning. If the mass acquires a yellow tint, it will lose its adhesive properties.
- After the mixture has become liquid, dilute it with vodka in the ratio: 720 g. glue and 950 gr. vodka.
- Next, add 12 grams of powdered alum per 100 grams of glue.
It perfectly glues surfaces and also has moisture-repellent properties.
Recipe 2
- Mix glue and water in a glass bottle in a 1:1 ratio.
- Bring slightly to a boil, then remove from heat and pour into a ceramic mortar, in which, using a pestle, grind the mass to a jelly state.
- Place it on a plate, let it cool and cut into desired pieces.
- If necessary, mix it with vodka in the following proportions: 720 grams of glue and 360 grams of vodka. Bring to a boil, cool.
Recipe 3
- Take 1 liter of water, 1 kg. wood glue, 1 liter of 9% table vinegar.
- Place this mixture in a water bath and bring to a boil.
- Pour 1 liter of vodka into the continuously stirring liquid.
Recipe 4
- We dilute glue and water - 1:1.
- Place in a water bath and heat the mixture until thickened.
- Add 1 part glycerin and 1 part glue (the amount of glue is equal to that taken earlier).
- Place on low heat and heat until the water evaporates.
- Then put it in molds and let it dry.
- Before use, dilute with water in equal proportions.
Compound
The name of the universal glue PVA stands for polyvinyl acetate. An aqueous solution of this substance is office glue. The composition also includes plasticizers and modifying additives. The consistency and color of the glue resembles liquid sour cream. PVA is found in three types of packaging: a regular tube, packaging with a dispenser cap or a special brush. The second and third types are stored longer.
Silicate glue is used much less frequently. It is potassium or sodium semi-silicates dissolved in water. It is based on liquid glass. The low popularity of this type is explained by the fact that the glued paper begins to turn yellow over time, unlike PVA, which remains colorless.
Hard glue is also made from polyvinyl acetate (PVA) or polyvinylpyrrolidone (PVP). This type is more convenient than others: it cannot be spilled. It is difficult to accidentally deform the paper with its help: the pencil contains glycerin, which ensures the roller glides gently over the surface. However, this form is not universal: paper, cardboard and some types of textiles can be properly glued. For working with wood and...
The adhesive in spray form allows you to work with both paper and textiles, foam plastic, and wood. The spray is easy to apply, does not leave stains, and does not smell.
Advice! If you need to fix a spray bonded job, you can do so within 12 hours.
Foam glue
Since recently, panels made of foam plastic and other similar materials have increasingly begun to be used to insulate walls. When choosing an adhesive on which to place the panel, it is worth remembering that solvents, such as acetone, easily melt it. Therefore, in order not to rack your brains over the choice of adhesive, you can use the carpentry one described above.
As an option, for such purposes there is an equally effective and very easy recipe for cottage cheese glue: just mix cottage cheese and slaked lime in equal proportions.
Important point! Use it as needed as it gets hard very quickly.
What can you cook with shaving foam?
Velcro made from shaving foam will turn out no worse than store-bought, and the price is several times lower.
For production you will need:
- 15 grams of glue stick;
- 15 grams of shaving foam;
- a couple of drops of sodium tetraborate;
- dye (optional).
Step by step recipe:
- The glue is cut into a bowl and melted in the microwave.
- Dye is added to the resulting mass; it should be taken into account that the finished slime will be several tones lighter.
- Add shaving foam and mix everything thoroughly.
- Sodium tetraborate is added to a teaspoon of warm water, and the resulting composition is mixed with glue and foam.
Instead of shaving foam, you can use shaving gel or cream.
Casein
The casein version is also good for many materials, particularly for gluing leather or wood.
The process of its preparation includes two stages:
- Isolation of casein itself from low-fat cottage cheese.
- Preparation.
Stage 1
- To get low-fat cottage cheese, soak it in a soda solution (1 liter of water and 1-2 tablespoons of soda) for 20 minutes.
- Then the cottage cheese is washed well in running water, squeezed out and dried until hard.
Stage 2
- Pour casein into a flat bowl.
- While stirring the mixture, gradually pour in a thin stream of water (proportions - 1:2). The mass should be thick.
- Then mix the mixture thoroughly by hand or using a mixer (about 30 minutes).
The glue obtained in this way will perfectly adhere to the necessary materials.
It also cures quite quickly, so try to use it within the first three hours.
Conclusion
Thus, we can conclude that three main methods are used to attach wood to concrete: gluing using special glue, gluing to polyurethane foam, using anchor bolts or dowel-nails. If an adhesive is used, wood and concrete must first be prepared, paying special attention to priming the concrete monolith and removing dust from both compounds.
When connecting wood and concrete with special metal fasteners, there is no need to pre-treat the materials.
Special glue for fabric
Women who are actively involved in needlework and constantly gluing some elements onto fabric know how important it is to have the right product at hand in time.
Here are three easy options for making your own glue:
1 option
Ingredients:
- Flour - 3 tablespoons.
- Water - 1 glass.
How to do:
Dilute the flour in a small amount of cold water and pour a thin stream into a glass of boiling water. Bring to a boil.
Option 2
Ingredients:
- Flour - 1 tbsp. spoon.
- Potato starch - 1 tbsp. spoon
- Sugar - 1 tbsp. spoon.
- Water - 1 glass.
How to do:
Mix all the ingredients thoroughly (so that there are no lumps) and bring to a boil.
Option 3
Ingredients:
- Gelatin - 1 pc.
- Flour - 2 tbsp. spoons.
- Sugar - 1 tbsp. spoon.
- Water - 1 glass.
How to do:
It is necessary to soak the gelatin in 1/3 water in advance overnight. In the morning, mix gelatin, sugar, flour in the remaining 2/3 of the water and bring to a boil.
The glue must be stored in a tightly closed container in the refrigerator.
How to make tape at home?
How to make tape at home without using water
- Take a colored clipping: it should be narrower than the width of the transparent base.
- Stick it on tape, the colored side facing the adhesive base.
- Iron it well to avoid any pimples.
- Cut off the clear tape.
- Thus, the result was a colored sticker framed with transparent tape.
Interesting materials:
How to find out the telephone number of a Moscow district police officer? How to pay for a home phone in Yerip? How to flip a photo in your phone gallery? How to show your phone screen live? How to remove the cover on a Lenovo phone? How to switch to Cyrillic in your phone? How to get your Samsung phone back from the blacklist? How to return the previous screensaver to your phone screen? How to return the weather forecast to your phone screen? How to turn on alarm clock on Xiaomi phone?
Dextrin glue
This option is suitable for all paper-related activities, be it quilling or origami. They can completely replace PVA glue.
The main ingredient is starch.
How to cook:
- Place the starch in a heated oven. We increase the temperature to 160 degrees and simmer it for about 1.5 hours. Hot air breaks down starch and it turns into dextrin.
- Take 3 tbsp. spoons of dextrin, mix with 5 tbsp. spoons of water and stirring continuously, heat until it is completely dissolved.
- Add glycerin and mix again.
- Let cool.
Making mastic
You can add CMC to the mastic while rolling. Add it little by little and mix thoroughly. To sculpt flowers, add one teaspoon of thickener to 200-250 grams of mastic, and when making figurines, one teaspoon is enough for 400-500 grams of mastic. SMS gives the mastic strength and elasticity. Thanks to it, the thinly rolled edges of the mastic easily become wavy and hold their shape well. The thickener has an immediate effect. You can start working immediately. But you can stand it for 1-1.5 hours. Then the mass will become more viscous and plastic. In addition, CMC has bleaching properties and gives products a snow-white appearance. If homemade mastic is used, then SMS is first mixed with powdered sugar, and then with all other products.
Linoleum and acetone glue
To prepare it we do the following:
- We take old, unnecessary linoleum, cut it into small pieces and place it on the bottom of a deep plate.
- Then we take acetone (in a ratio of 1:2, where 2 parts are acetone) and pour it over the chopped pieces.
- Close the lid tightly and let it brew for 12 hours in a dark place.
It perfectly adheres to products made of metal, wood, leather, porcelain, etc.
Gluing method
There are two common methods of gluing products and materials: hot, cold.
Hot way
The hot gluing method is effective; it requires a burner with liquid fuel or a hair dryer on hand. More detailed process of hot gluing in the video
Cold way
The cold gluing method involves following the following recommendations:
- product preparation;
- removing contaminants from the surface;
- degreasing areas, applying glue
Precautionary measures
Before carrying out the procedure, gluing artificial hair to the eye with a product not intended for this purpose, be as careful as possible and be ready to take restorative therapeutic measures to prevent side effects. To do this, first pay attention to what you can use to glue false eyelashes.
Initially, select the most gentle product if you are replacing the solution. But this is not enough; you need to check for an allergic reaction to the product. Otherwise, allergies can lead to consequences that will affect the deterioration of the girl’s health.
If the solution gets into the mucous membrane of the client’s eyes or a burn forms on the sensitive surface of the eye, it is necessary to urgently rinse the mucous membrane and go to the hospital if health deteriorates. This will prevent severe permanent deterioration of vision and other parameters.
Advice from experienced cosmetologists
Hot air, sun, and dust irritate the membranes of the eyes, causing them to begin to water. Hair becomes weak, begins to break more often and thin out. Just don’t get upset ahead of time. Advice from cosmetologists will be helpful.
- You need to wash your face morning and evening, removing makeup from your eyes, and use micellar water or another cleanser, but not regular soap.
- The best vitamins for eyelashes are castor or burdock oil. You should use it before bed, and also apply moisturizer around your eyes.
- It is recommended to make chamomile compresses, which will soothe the skin, giving it elasticity.
If properly cared for, glued eyelashes will last about 2 weeks. Moreover, because of false eyelashes, a woman’s lifestyle does not change, but, on the contrary, there is much more time that can be spent with benefit for herself.
