Expanded polystyrene is one of the most popular materials used for insulation of various surfaces. Its loose structure allows for subsequent finishing, which each craftsman does at his own discretion.
But there are technological requirements, non-compliance with which leads to rapid wear of the protective layer and the formation of deformations on the finishing surface. To prevent such incidents, it is worth familiarizing yourself with the rules of reinforcement and recommendations for the use of building materials.
Tools for working with glue
When applying the adhesive composition, you should use two spatulas: a wide façade trowel and a regular metal trowel.
A facade spatula with a width of about/more than 20 cm is convenient for evenly distributing the composition on the wall. Using a small metal tool, take the adhesive mass from the container and distribute it over the area of a wide spatula. All holes and cracks disappear, the surface becomes perfectly smooth. It is especially convenient to work with two spatulas when processing corners; with strong pressure, the canvas can move and form waves. To eliminate mistakes, you should hold it with one tool and smooth it with the other.
Installation of the facing layer
The facing layer made of reinforced foam plastic can be installed in two main methods: with sealing and with grouting the seams of the finishing panels.
The option of grouting the seams formed during the installation process is the most common. It involves installing panels on the wall surface using high-quality adhesive. Individual cladding elements are mounted as close to each other as possible to reduce the likelihood of so-called cold bridges.
Small seams, which, one way or another, remain at the joints of individual panels, with this installation option, are rubbed with a special paste made using natural marble chips. This mixture reduces the likelihood of shrinkage of the cladding during the operation of the house.
The option of installing panels with seam sealing involves, in addition to the adhesive composition, also using dowels to install the tiles. This technique is more reliable and durable. The actual sealing of the resulting seams is carried out through the use of aluminum rustication.
Whatever installation method is used, finishing the facade with reinforced foam plastic can significantly improve the visual features of any building, make the house more protected from environmental influences and improve thermal insulation. Polystyrene foam does not allow moisture to pass through, and therefore building structures will be reliably protected from the harmful effects of water, which can significantly extend the overall service life of any home.
Main characteristics of the material
Polystyrene foam is a building material, polystyrene foam, which is characterized by a foamy structure filled with gas bubbles.
Its average thickness is 10 cm, which in terms of thermal conductivity is equivalent to a meter thick brickwork.
Thus, this product allows not only to reduce the consumption of material for wall decoration, but also to insulate the house without reducing efficiency. Even extreme cold will not be a problem for polystyrene foam.
This material is a fairly popular product in the construction market due to its advantages:
- has a low level of thermal conductivity, which ensures the preservation of heat in the house;
- Compared to other materials, foam has a low cost;
- characterized by resistance to wetness.
Despite the positive reviews, foam plastic also has disadvantages. These include:
- It has an unpleasant smell, so it will be absolutely safe and most useful for external insulation of a building.
2. Fire hazard. Polystyrene foam, based on its structure and components, burns well, albeit at very high temperatures. The proximity to other fire hazardous materials, for example, cardboard or plasterboard, OSB, etc., is of great importance.
Additional preparation tips
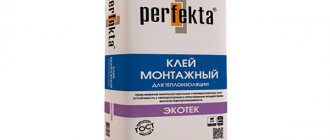
Ceresit CT 85 polystyrene foam adhesive is applied to a wall that is completely free of areas susceptible to fungi, algae or moss. Such surfaces are cleaned with brushes and treated with the fungicidal preparation ST 99.
Those walls that have not been plastered and have been in use for some time should be dust-free by washing them with water under pressure. The walls are left until completely dry. Sometimes you have to work with highly absorbent substrates. This should include surfaces made of aerated concrete or silicate blocks. They are treated with a primer and dried for 4 hours.
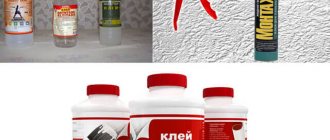
Selection of glue and tools for facade mesh
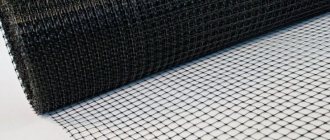
Reinforcing mesh is used to secure insulation materials such as polystyrene foam, expanded polystyrene, mineral wool, glass wool and others. They are attached to the outer wall, and a finishing decorative layer in the form of plaster, siding, or corrugated sheeting is mounted on it. To ensure that the entire structure lasts a long time, the insulation is fixed with reinforcing fabric along the entire wall. Therefore, the glue for facade mesh must be of high quality.
Usually external walls are insulated, so the glue must have the following qualities:
- moisture resistance;
- vapor permeability (pass air);
- frost resistance;
- thermal stability (resistance to temperature changes);
- slip resistance;
- environmental friendliness.
To choose the right adhesive, you need to know something about plaster grating. It comes from different materials: metal, plastic, fiberglass and fiberglass mesh or fiberglass mesh. The cell size ranges from 2×2 mm to 200×200 mm; it is a fairly strong material, so it can ensure the strength of the entire structure.
How to choose the right material
The modern construction market is overflowing with an assortment of reinforcing meshes. Many consumers choose material based on its cost. But expensive material does not always correspond to quality, and vice versa. Therefore, when choosing a material to perform a certain type of work, you should take into account some factors that accompany this process. First of all, you need to remember that many plasters and putties contain alkaline additives, which can have a rather aggressive effect on the reinforcing material. Therefore, a mesh should be chosen that is resistant to this impact. It must be impregnated with a special composition that will give it strength and resistance to an alkaline environment.
In view of this, it is necessary to be able to correctly determine the quality of the reinforcing mesh in a given direction. To do this, you can conduct a simple, albeit lengthy test. A test piece of mesh must be placed in an alkaline environment for 25 days. After the time has passed, check the test specimen for strength.
It would also be a good idea to check the quality of the mesh for tensile strength. In this case, we conduct the following experiment: the test piece of material is collected into a ball like a snowball, and then released. If the material has the necessary quality of density, it will instantly take its original shape. The quality of weaving can also be checked visually. To do this, we fold the grid sample and look at the coincidence of the cells and their sizes.
It would also be a good idea to familiarize yourself with the technical characteristics in the manufacturer’s passport and view the quality certificate.
Fastening methods
The most popular methods of attaching foam sheets are:
- on polyurethane foam;
- with special glue.
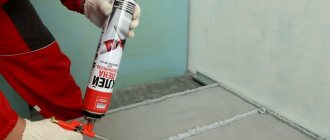
Polyurethane foam
This method ensures reliable fastening of the material to the base. The foam layer creates additional thermal insulation. The foam does not need to be diluted; it is easily and quickly applied. Exactly as much foam comes out of the gun as measured by pressing the trigger; there is no need to mix it and monitor the expiration date of the solution. The disadvantage of the method is the high cost of the material. If you need to insulate a small area of the facade, then polyurethane foam is the best solution.
Glue
Fastening with glue, when used correctly and following the technology, gives strength comparable to polyurethane foam. This method requires more thorough surface preparation and is more labor intensive per unit area. The glue will have to be mixed periodically, making sure that you have time to use it - the shelf life of the solution is limited to 2-4 hours, depending on the brand.
Efficiency of using extruded polystyrene foam
The accumulated experience in using this multifunctional insulating material allows us to draw a conclusion about the economic efficiency of its use. Even though the prices for panels made of reinforced extruded polystyrene foam require certain capital investments to create reliable insulating structures, the economic efficiency of its use completely compensates for such costs:
- energy savings in rooms insulated with extruded polystyrene foam with a 20 mm reinforced layer, for example, allows you to save up to 200 kW/hour per square meter;
- savings on heating premises insulated using extruded polystyrene foam with a 20 mm reinforced layer is at least 300 rubles per square meter per year;
- the cost of extruded polystyrene foam does not exceed the cost of mineral wool, which is so popular among the population, and the efficiency is much higher;
- the use of extruded polystyrene foam with a reinforced layer, a thickness of only 20 mm corresponds to 60 mm of brickwork.
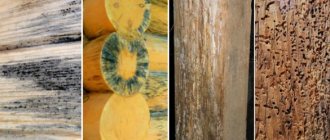
Technological features of foam reinforcement
The process itself involves the creation of a protective reinforcing layer. The barrier prevents the destruction of foam due to exposure to ultraviolet radiation, precipitation and other external factors. The reinforced surface requires further finishing, which is performed in different ways, depending on the location of the work and functionality.
2. Mixing the adhesive solution.
3. Attaching the starting profile.
4. Laying the slabs on the surface with minimal gaps. The rows are laid out in a checkerboard pattern.
5. Installation of polystyrene foam boards with special dowels is carried out only after the glue has completely dried. It is possible to use 5-6 fasteners per sheet.
Which plaster to choose
When choosing a plaster composition, first of all you need to take into account the characteristics of the foam. This material is not durable, so the protective coating must be sufficiently dense and resistant to mechanical stress. Also, the plaster mixture must have high adhesion to the base, since the foam has a smooth surface. In addition, you need to choose a plaster that is moisture-resistant, plastic, easy to apply and not prone to cracking. But the vapor permeability of the composition is not of great importance, since the vapor permeability of the insulation is very low.
A conventional cement-sand mixture only partially meets these requirements, and it is not advisable to use it on foam plastic. Of course, this is the most budget-friendly composition, but within a year the facade will be covered with small cracks and everything will have to be redone. Therefore, for finishing on foam plastic, it is recommended to use only factory-made plasters containing special additives.
Cement-sand plaster
- Mineral plasters are the most popular option in terms of price-quality ratio. They are made on the basis of white cement, containing lime hydrate and mineral chips as a filler. They go on sale in the form of a dry powder, which must be diluted with water in a certain proportion before starting work. Such plasters perfectly withstand the effects of precipitation, temperature changes, and have good adhesion. True, they have a short service life - only about 10 years, and low ductility, as a result of which the plaster cracks when the building shrinks.
- Acrylic plasters are ready-made plastic mixtures based on acrylic resin. They contain mineral binders and various additives that increase the performance characteristics of the coating. These plasters are not prone to cracking, withstand temperature changes and the negative effects of precipitation, and are highly durable. The service life of acrylic coating is from 15 to 25 years. The disadvantages of this type of mixtures include high price and tendency to burn out.
The range of plasters for foam plastic is quite large, but there are brands that are in particular demand: Ceresit, Stolit, Osnovit, Knauf, Ecomix. Manufacturers produce several types of formulations:
- for attaching insulation to the base;
- to create a leveling layer;
- universal.
It is best for a novice master to choose a universal type of plaster that can be used at all stages of finishing with equal efficiency. But even if you prefer to use separate compounds for each process, they should all be from the same manufacturer, and preferably from the same line.
| Name | Characteristics |
| Knauf Sevener | A universal-purpose cement-based composition. It has good frost resistance (up to 75 cycles), water resistance and excellent adhesion. Consumption ranges from 3.5 to 7 kg/m2 |
| Ceresit ST 60 | Acrylic plaster, ready to use. Designed for the formation of thin-layer decorative coatings. It has strength, elasticity, and excellent water-repellent properties. Consumption ranges from 2.6 to 4 kg/m2 |
| Stolit AF | Water-soluble polymer-based mixture, structural. It has excellent performance characteristics and is highly decorative. Consumption is 2.5-3.5 kg/m2 |
| Founds CAVEPLIX T-117 | Plaster and adhesive composition. Has excellent adhesion to polystyrene foam, waterproof, frost-resistant. Consumption is 1.3-1.5 kg/m2 |
Mixtures for reinforcing polystyrene foam in the production of facade decor
When manufacturing facade decorative elements from foam plastic, reinforcement of the parts is necessary. Polystyrene foam, in itself, is a fragile and short-lived material, unable to withstand atmospheric influences without collapsing, but in the production of architectural decor, it is only a molding material, protected on all sides by a reinforcing coating, which gives the elements a stone texture and strength. Our company supplies protective coatings to our customers, and also carries out a full production cycle for the production of architectural decorative elements. This allows us to constantly test new formulations and improve the physical properties of coatings. We are constantly trying to improve our coatings, increasing their durability and manufacturability of application, thereby reducing the time for the production cycle at enterprises that use our products in the production of facade decor.
Quartz coating SPIRELL K-2 applied by extrusion
Visual comparison of marble and quartz coatings on identical parts
Polymer cement coating SPIRELL SC (Gray cement) applied by extrusion
The video focuses on the “survivability” effect of the mixture during the mechanical application process. The absence of premature hardening of the mixture in the hopper of the broaching machine allows us to avoid technological stops of the production line.
The application procedure is mandatory for any elements of architectural decor, both exterior and interior. To calculate volumes, costs and order polystyrene foam coating, you can leave a request on our website, we will contact you and send it in any convenient way.
Coating SPIRELL Travertine applied by air spraying
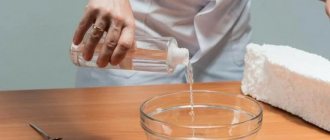
The compositions are produced in moderately concentrated form. When preparing for application, it is recommended to introduce varying amounts of clean water to achieve the required consistency. Depending on the method of reinforcing polystyrene foam products, the required amount of introduced water also varies. When applied by air or vacuum spraying, the consistency should be as fluid as possible and should be associated with “liquid sour cream.” The amount of water introduced should not exceed more than 10% of the volume of the mixture, since the formation of coagulants of the binder may be disrupted. When applied by extrusion, the consistency of the composition must be brought to the state of a plastic mass with stable, residual deformation.
To prepare the mixture directly for use, it is necessary to mix it thoroughly in order to evenly distribute the filler particles throughout the entire mass. During long-term storage in original containers, heavy particles may settle, which is a natural process. For ease of mixing, it is recommended to use containers of larger capacity (30-60 l), mixing the contents of several factory packages at a time. When mixing, make sure that the mixer whisk is constantly immersed in the mixture, avoiding excessive air entrainment. During mixing, you should follow safety precautions when working with a high-speed electric mixer. The use of safety glasses and gloves is highly recommended. In case of contact with skin or mucous membrane, rinse thoroughly with warm water.
When applying the mixture by air spraying, a hopper-type plaster gun with an outlet nozzle diameter of 3.5-4.0 mm is used.
Coating SPIRELL Ceramics applied by air spraying
After reinforcement, the product should be placed in a room with an air temperature of 20±3°C and with a ventilation system that allows moisture to be effectively removed from the room. The best conditions for drying reinforced products are a specially equipped chamber with forced air circulation. It is not recommended to place a reinforced product with a wet coating under open sunlight in hot weather. This can lead to excessively intense evaporation of moisture, which will lead to the formation of shrinkage cracks. To dry a reinforced product, under optimal conditions, it takes from 3 to 5 days. Depending on the application method, the coating layer varies from 0.5 mm to 10 mm, which also directly affects the drying time of the reinforced product.
It is recommended to store the compositions in a closed original container at a temperature not lower than +5°C and not higher than +40°C. After opening the original container, it is recommended to store it for no more than 20 days in a bucket with a hermetically sealed lid. Do not remove the composition from the container with dirty or rusty tools. This may lead to contamination of the composition and, as a result, loss of performance.
Technology of facade insulation with foam plastic
Polystyrene foam can be fixed to the wall of a house in two ways: glued and glueless. The use of the first installation option is justified if the load-bearing surface is smooth and does not have significant flaws. This situation often occurs in new buildings. Therefore, if possible, use the PPS gluing technology. It is much simpler and more convenient than the glueless installation method.
Facade insulation, diagram
Step-by-step installation of foam plastic
Stages of façade insulation with polystyrene foam using the adhesive method
Step 1. Dust removal and strengthening of the base.
This is done by applying a deep penetration primer using a brush or roller.
Step 2. Marking and fastening the base profile.
Fastening the plinth profile
Option for fastening profile corners at 45 degrees using a plate and self-tapping screws
The base profile is attached to the bottom of the walls along the entire perimeter of the building. It will act as a support for the foam boards.
Step 3. Preparation of the adhesive composition.
Use dry adhesive mixtures. Experts recommend simultaneously purchasing reinforcing compounds from the same manufacturer. They (compositions) are applied to a mesh reinforced over PPS, which is necessary if plastering of the facade or other type of finishing is planned, the installation of which requires a cement-sand mortar.
The following adhesive mixtures can be used: Cerisit CT83, Kreisel 210, Master Termol, SOUDATHERM, Bitumast.
Cerisit CT83
Kreisel 210 Adhesive for polystyrene foam boards
Foam adhesive for expanded polystyrene and polystyrene foam “Soudal” Soudatherm
Step 4. Applying the solution to EPS boards.
Applying glue to foam plastic
Leveling the glue with a spatula
The solution is applied in two ways: along the perimeter of the canvas and in its middle, at 5 points (in the corners and in the middle). The thickness of the layer depends on the type of glue. On average, it is 0.5-1 cm.
Example of applying adhesive foam
Step 5. Gluing the boards.
Bonding boards
The PPS sheet is installed on the base profile and pressed against the wall. Hold in this position for several seconds (refer to the adhesive mixture manufacturer's instructions). Excess glue is removed with a spatula.
The sheets are fixed with dowel mushrooms.
Laying foam for insulation
Secure the foam boards with dowel mushrooms
Hammering a nail into a dowel
Seal the seams between the plates with foam
Step 6. Applying adhesive and gluing the reinforcing mesh.
Reinforcing mesh for foam plaster. Photo
Attach the mesh and cut off the excess
Step 7. Applying reinforcing solution to the mesh. Leveling the solution.
Applying plaster
Plastering on foam plastic
Plastered surface
Step 8. Applying finishing primer.
Glue-free technology for insulating facades with foam plastic involves fastening PPS boards to dowel-nails with a wide head (umbrella).
The mushrooms should be approximately twice as long as the thickness of the foam.
The work technique is as follows:
- Through the slab laid on the base profile, holes are drilled in the wall. Fasteners are made at 5 points: in the middle and corners of the sheet;
- drive in dowel nails.
Using a hammer drill, we drill a hole a little deeper than the length of the fungus, insert it and hammer in a plastic nail, so that the entire fungus sinks a little into the foam.
Installation of dowel-umbrella for facade insulation
Otherwise, all stages of the foam installation work are similar. If a ventilated facade is being installed, reinforcement of the slabs is not required. In this case, a frame of wooden bars or a metal profile is built on top of the insulation.
Reinforcing composition for foam plastic
When it comes to making figures, this option is the most budget-friendly. Used if the figures will be viewed from afar (for example, they will be standing on the stage). It also happens that they order from us only blanks of figures (bare foam), and further processing or painting is done on their own.
Here you need to understand that you often have to assemble figures by detail and the joints will have a seam that is either sealed or not, but in either case, upon closer examination it looks “not very good”.
Foam masks (faces)
Polymer putty
A special composition based on marble or quartz, which is applied to the figure by spraying through a special gun called a cartouche or hopper gun. If necessary, several layers can be applied. The more layers, the stronger the figure, however, with this option, small details will “disappear” and be smoothed out, and the weight of the figure will increase significantly. After application, the texture will have a rough surface, which, if necessary, can be made smooth, “reduced to zero.” To do this, the figure is covered with finishing putties and sanded, and this is repeated until the perfectionism runs out.
It should be noted that, in principle, with a layer thickness of about 8-10 mm and a long drying time, a figure covered with this method can withstand the weight of an adult (this means that you can sit on it, and not tap dance).
Fiberglass
The strongest reinforcing coating, which consists of fiberglass and epoxy (or polyester) resin. It can be applied either layer by layer or immediately in a “thick” layer in one go. If desired or necessary, you can make a practically “unbreakable” surface. It is used for the street, power elements or objects that will have constant contact with people of all ages. Despite all the obvious advantages of this coating, it also has disadvantages. All of them are exclusively about how to work with it. Firstly, you need to understand and get good at the lamination process itself, because although it is not complicated, it is chemistry and if you are a layman, then, for example, your resin may not harden. Plus, you have to work in special rooms and in very serious protection, otherwise you can immediately go and pound your own coffin. Secondly, since the material is very strong, it has to be polished and processed only with the use of tools and for an extremely long time. And, of course, only in defense, otherwise you will itch worse than a person with chickenpox. And thirdly, it usually requires special putties and primers, for example, automotive ones, which will have good adhesion to it and the appropriate strength so as not to fall off from any click. And finally, fourthly, before applying fiberglass, the foam mold itself must be protected from the emission of styrene (if you are using polyester resins), because it dissolves the foam in the best tradition of unsuccessful experiments with acid!
Plastering on foam plastic
Expanded polystyrene (foam plastic) is used in different ways for facade decoration. This material can serve as a layer of insulation in a facade bonded thermal insulation system. In this case, polystyrene foam is covered with an adhesive layer, reinforcing mesh and decorative plaster. There are also open methods of finishing with foam plastic. Decorative architectural elements and hard-coated finishing panels are made from expanded polystyrene.
Expanded polystyrene consists of granules sintered together under high temperature. Heterogeneous granules provide the main feature of the material - the finished polystyrene foam consists of 98% air, and therefore has low thermal conductivity. Also, polystyrene foam is not at all afraid of moisture.
Strengthening corners.
The corners of external walls are at increased risk of damage. Therefore, they require additional reinforcement with a layer of reinforcing mesh or mesh in combination with special corner profiles.
Laying of reinforcing mesh without a corner profile is carried out with an overlap of 40 cm (20 cm of double layer on each side of the outer corner). At this stage it is recommended:
- glue the mesh in small sections - 90-100 cm;
- apply the mixture at an angle of 5-7 cm on each side with a thickness of 2-3 mm;
- smooth the mesh with a corner or regular spatula from the corner to the side and down.
Recommendations for foam reinforcement
- Before use, the plaster must be thoroughly mixed.
- To make the plaster plastic, you can add water to it.
- The time for using the mixture is 1.5-2 hours.
- To glue polystyrene foam to flat walls, you need to apply glue with a notched trowel.
- Leveling the differences in the wall is carried out by applying glue to the foam in strips using a regular spatula.
- After finishing the work, the container with plaster must be tightly closed.
- Work on reinforcing foam plastic on walls must be carried out at a positive temperature. Recommended temperature: +20°C.
- The time required for complete drying of the plaster ranges from 24 hours at a temperature of +20°C to 72 hours at a temperature of +5°C.
- The plaster is applied in one layer.
- The optimal layer thickness is 3 mm.
- Irregularities larger than 10 mm are eliminated by applying glue in beacons in the middle and at the corners of the sheet. There should be about 9 beacons on one sheet.
- on the walls is carried out from the bottom up. Polystyrene foam sheets are laid in “brick laying”. It is necessary to ensure a tight fit with a minimum gap to the adjacent sheet.
- If there are gaps of more than 2 mm, the resulting space is filled with strips of foam or foamed. To prevent the formation of cold bridges, careful gluing of the foam and sealing of the resulting cracks is necessary. You need to carefully approach this procedure in order to effectively insulate the walls.
- To ensure firm adhesion to the surface, you need to tap the sheet with your hand or a plastic grater.
- Irregularities and differences at the joints of the wall are eliminated with a metal float, sandpaper or an abrasive mesh.
- The consumption of plaster depends on the thickness of the layer and ranges from 3-5 kg/sq.m.
- With high-quality coating of reinforcing plaster, its service life will be at least 50 years.
Preparing the walls of the house.
Work is carried out at base temperatures from +5 to +30 degrees. Do not carry out work in strong wind or rain.
When working with polystyrene foam, it is necessary to ensure that it fits tightly to the surface, since heat leaks can occur through air pockets. Therefore, before laying the insulation, it is necessary to carefully prepare the surface. The paint layer is completely removed from painted walls. If there are any bulges or depressions, they are sealed with plaster mortar. Unevenness should not exceed 1 cm per 1 m of surface.
The base must be dry, free of grease, dust, fungi and construction debris. To strengthen the surface, reduce water absorption and improve adhesion of the adhesive composition, the wall is carefully primed.
Our advantages
Specifications:
| Indicator name | Standard for PSB-S 25f |
| Density, kg/m 3 | 16-18 |
| Compressive strength at 10% linear deformation, MPa, not less | 0,1 |
| Bending strength, MPa, not less | 0,18 |
| Thermal conductivity in dry condition at (25±5)°С, W/(m K), no more | 0,039 |
| Self-combustion time of PSB-S type slabs, s, no more | 4 |
| Humidity, %, no more | 12 |
| Water absorption in 24 hours, % by volume, no more | 2,0 |
The appearance of PSB-S-25F foam plastic is practically no different from other brands. It has exactly the same white color and structure in the form of foamed and fused granules.
Like other brands of foam plastic, PSB-S-25F has the same favorable and quality characteristics, among which builders especially value:
- Environmental safety;
- Resistant to moisture;
- Durability;
- Resistance to harmful microorganisms.
Most of the facades of houses, for the finishing of which PSB-S-25F foam plastic was used, today retain their attractive appearance, even after many years, after finishing. Purchasing this brand of polystyrene foam is not only practical and effective from the point of view of builders, but also beneficial from the point of view of the buyer.
Foam plastic 1000x1000x100 mm (density 15) Foam plastic Mosstroy-31 1000x1000x100 mm (density.
Foam plastic 1000x1000x30 mm (density 15) Foam plastic Mosstroy-31 1000x1000x30 mm (density.
Foam plastic 1000x1000x50 mm (density 15) Foam plastic Mosstroy-31 1000x1000x50 mm (density.
Foam plastic 1000x1000x100 mm (density 25 F) Foam plastic Mosstroy-31 1000x1000x100 mm (density 25 F)
Foam plastic 1000x1000x30 mm (density 25) Foam plastic Mosstroy-31 1000x1000x30 mm (density.
Foam plastic 1000x1000x50 mm (density 25) Foam plastic Mosstroy-31 1000x1000x50 mm (density.
Foam plastic 1000x2000x100 mm (density 25) Foam plastic Mosstroy-31 1000x2000x100 mm (density.
Foam plastic 1000x2000x50 mm (density 25) Foam plastic Mosstroy-31 1000x2000x50 mm (density.
Foam plastic 1000x2000x30 mm (density 25) Foam plastic Mosstroy-31 1000x2000x30 mm (density 25).
Foam plastic 1000x2000x30 mm (density 25 F) Foam plastic Mosstroy-31 1000x2000x30 mm (density 25.
Foam plastic 1000x1000x100 mm (density 35) Foam plastic Mosstroy-31 1000x1000x100 mm (density 35.
Foam plastic 1000x1000x30 mm (density 35) Foam plastic Mosstroy-31 1000x1000x30 mm (density 35).
Foam plastic 1000x1000x50 mm (density 35) Foam plastic Mosstroy-31 1000x1000x50 mm (density 35&nb.
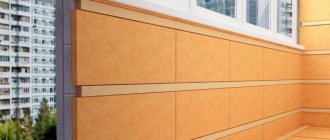
Why is it beneficial to use polystyrene foam?
Cladding the façade of a house with foam plastic is fully justified by the relative low cost of the material and its excellent heat and sound insulation properties. It is resistant to sudden temperature changes and practically does not absorb moisture (up to 1% of the total volume), so it can be used in any climatic conditions.
Installation of foam sheets does not require special skills in carrying out such work or the use of complex tools. There is no need to install a layer of waterproofing on the outside of the insulation, since all joints can be formed airtight, and the material itself does not allow moisture to pass through.
The minimum service life of foam sheets is at least 20 years, which will allow you to not carry out additional technical inspections or replace the insulation before this period after finishing the walls. Periodically, you only need to update the plaster, which will not cause significant financial costs.
Scope of application of reinforced extruded polystyrene foam
The currently popular extruded polystyrene foam with reinforced mesh is widely used in various works to ensure the insulation of buildings or structures under construction. Extruded polystyrene foam reinforced with mesh is used for:
- Creation of building roofs - as a material that insulates the under-roof space.
- Insulation of balconies, loggias or verandas - extruded polystyrene foam with reinforced mesh is used to level surfaces, increase the heat, noise, sound and waterproofing properties of these structural elements of the building.
- As an insulating material for finishing facades, extruded polystyrene foam with reinforced mesh is used to create a thermal insulation and waterproofing layer before applying the final façade coating. How to apply plaster over a mesh onto extruded polystyrene foam is described here.
- Reinforced extruded polystyrene foam is used for decorating ceilings, preparing and insulating room walls.
- This insulating material is widely used in the waterproofing of bathrooms - a podium is created for bathtubs, a protective casing is installed for pipes for various purposes (water or sewer), and shower trays are installed.
- The high thermal and waterproofing properties of extruded polystyrene foam with a reinforced layer made its use justified even when constructing Turkish baths.
Laying the leveling layer
The second stage is the alignment of the reinforcing layer with the laid mesh. This must be done, since façade decor on polystyrene foam without leveling will look very uneven. If the surface of the walls is primed for painting or similar facade decoration, the house will lose its entire appearance. A couple of days are allowed to dry the reinforced reinforcing sublayer.
The first operation is to grout the surface of the reinforcing plaster with liquid adhesive mass. Using a wide spatula, apply a leveling sublayer of facade finishing to the walls. The glue is the same, but the consistency is liquid, so as not to load the insulation with additional weight of the finish. After a day, the thin leveling sublayer will dry, and you can proceed to the rough finishing of the facade surface.
No matter how hard the craftsmen try, small marks and even barely visible contours from the foam and mesh remain on the leveling layer, which must be sanded down with sandpaper. Usually they use emery - “weaving”, glued on a wooden block. You cannot put off grouting; after a week or two, the rough plaster sublayer will become as hard as concrete. In addition, the risk of abrasive penetration of the finishing material up to the insulation increases.
The detailed process of leveling facade plaster laid over foam insulation is shown in the video
Leveling the surface for finishing
Leveling the surface of the facade for further finishing
Now the entire resulting cake needs to be leveled. This process, oddly enough, is done again using the universal plaster mixture that was used previously.
A very important point in this process is to complete work on one wall without interruption.
Alignment is done as follows:
- The leveling mixture is applied to a 35 cm spatula. You need to place it using an additional small spatula.
- The mixture is distributed evenly onto the working wall. The thickness of the new layer of material is most often approximately three millimeters.
- The joints of individual sections should not coincide with the joints of the mesh - the further away the better, place them.
Types of reinforcing mesh
Fiberglass meshes that are used for reinforcement are divided into:
- painting;
- façade;
- road.
Types of mesh
To perform facade work, a mesh is mainly used to reinforce foam plastic, the density of which is from 145 to 265 g/m2. This type of material can provide:
- reliable reinforcement of surfaces during plastering and puttying of surfaces both when performing internal and external work, including the process of thermal insulation;
- reinforcement of waterproofing of roofs or floor slabs;
- imparting strength to the flooring when using self-leveling mixtures;
- giving strength to the base for ceramic tiles;
- an additional reinforcing layer of the basement room, after which it is plastered or finished with another type of finishing.
In addition to the reinforcing mesh, elements such as plastic corners, drip edges, and elements for strengthening foam junctions to window and door openings are recommended during the thermal insulation process.
Priorities of the reinforcement process
If glued incorrectly, the mesh will simply fall off
The essence of the reinforcement process is to attach a reinforcing mesh to the surface of the foam using adhesive mixtures before plastering the foam. This type of work provides a seamless coating of the insulation system. With the help of reinforcement, an increase in the degree of rigidity and strength of the foam is achieved. If the reinforcement process is carried out correctly, the insulation layer can last as long as the house can stand.
To carry out a competent process, you must select the right materials for the reinforcing mesh. Otherwise, cracks may appear on the surface of the facade and peeling may form. This entails depressurization of the insulation and its destruction.
You should also pay attention to the material with which the reinforcing mesh should be glued. Many experts do not recommend using foam glue. It's very wasteful. It is necessary to choose a brand of glue that is designed specifically for the reinforcement process. The glue must be applied in two layers. The first layer provides fastening of the reinforcing material, and the second provides reliable protection for both the foam and the mesh itself.
Reinforcement can be provided not only by the method of attaching the reinforcing mesh, but also through the initial use of reinforced foam.