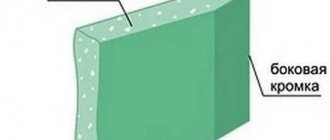
How to insulate a wall with penoplex and plasterboard
It is preferable to insulate the room from the outside. In this case, a greater heat-saving effect is achieved, load-bearing structures are protected from the influence of the external environment, and the usable area is not reduced. But this is not always possible, especially when it comes to apartment buildings. It is cheaper and more convenient to insulate the walls of a home with plasterboard and penoplex from the inside.
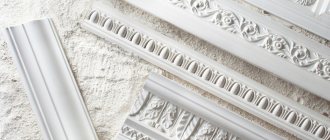
Benefits of penoplex
For internal insulation under gypsum plasterboards, foam plastic, mineral wool or penoplex can be used. Polystyrene foam does not have the best thermal conductivity, and mineral wool is hygroscopic, so penoplex is more preferable for this method of thermal insulation. This is facilitated by its characteristics:
- Light weight of slabs.
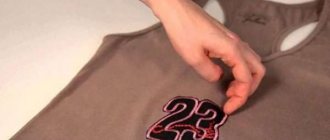
- Easy to process and give the desired shape, which greatly facilitates installation. For example, if there is a window or radiator on the wall, then it is not difficult to cut out a piece of foam plastic of the required size to go around them.
- Good moisture and vapor barrier performance.
- Good noise-absorbing properties.
- Strength, durability, safety.
- The material does not withstand prolonged exposure to the sun. Therefore, you must follow the rules for its storage.
- During operation, it may be damaged by rodents.
- Quite expensive compared to other materials.
A few nuances that you need to know about when installing insulation under drywall
As already mentioned, insulating walls from the inside is not the most optimal solution due to some disadvantages of this method. Let's consider 3 main nuances:
- Dew point offset. It ends up between the wall and the insulation, so the base can become damp from the inside.
- Reducing the size of the room. Thermal insulator, frame, gypsum boards occupy part of the internal space.
- Reducing the permissible load on the floor surface. The insulation may not withstand heavy objects hung on the wall, so if necessary, it is recommended to use anchors.
Required materials and tools
To install insulation under drywall you will need:
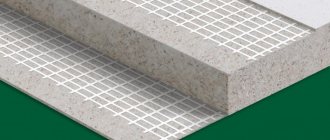
- Directly the penoplex itself. For internal wall insulation, products marked “C” with a thickness of up to 30 mm are used.
- Reinforcing mesh, plaster and putty. They are useful both for leveling the base surface and for finishing drywall.
- Deep penetration primer and special for gypsum plasterboards.
- Glue intended for fastening penoplex.
- Vapor barrier.
For the frame method of installing drywall, penofol with a foil surface is ideal. It will reflect heat into the room.
- Dowels. The insulation boards are fastened to their disc-shaped type, and the metal frame profiles are fastened to dowel-nails.
- Guide and rack profile for creating a frame.
- Metal screws for fastening elements, direct hangers and other necessary fasteners.
- Silicone sealant.
- Drill with mixer and container for preparing adhesive solution.
- A hammer drill with a drill for drilling holes for dowels on which we will attach profiles.
- Metal scissors.
- Screwdriver.
- Painting knife.
- Spatulas and graters, sandpaper.
- Roller and brush for applying primer.
- Marking tools: level, plumb line, tape measure, pencil.
Screw method
There is a lot more work to be done here, but the result will be better and it is possible to correct strong bends in the plane or get rid of large bumps. Before gluing drywall to polyurethane foam in this way, it is necessary to carry out some preparatory operations:
- First, several holes are drilled on the part for future fastening and injection of adhesive composition under the surface. A standard sheet requires nine to twelve holes.
- By attaching the part to the base and using it as a template, marks are made on it for drilling.
- Next, following the marks, you need to make holes in the wall and insert plugs or plastic dowels into them.
- Pieces of foam rubber slightly thicker than the space that will remain free between the base and the sheet are glued to the inside of the mounted element. Foam rubber will prevent parts from dangling freely.
- Having attached the finished parts to the base, everything is secured through the holes with screws and wide washers. The washers will prevent damage to the outer side of the parts, and the foam rubber will spring back and they will be slightly fixed.
- Level the vertical and horizontal, using the depth of screwing in the screws, and pump the adhesive into the free holes. In principle, this is where the installation of drywall on polyurethane foam ends.
After the glue has hardened, the screws are removed, and in their place you can screw in ordinary self-tapping screws, recessing the caps into the surface of the sheet. All that remains is to carry out the usual puttying and grinding in such structures at the joints of the parts, and, if necessary, on the entire plane.
Methods for laying penoplex under drywall
There are two installation options: with and without a frame. You can correctly install insulation under gypsum boards with your own hands using both methods, the main thing is to know their advantages and disadvantages.
- The frameless method is suitable for insulating small and flat surfaces. Quick, easy installation of insulation and drywall. Disadvantages: inability to level the base surface, low structural strength.
- The frame method is used if the walls are curved or have a significant area. This type of structure is more difficult to build, but it is more reliable.
Penoplex insulation under drywall without frame
Step-by-step instructions will be like this:
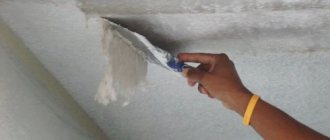
- At the first stage, the base surface is prepared: the old coating is removed, cracks and potholes are sealed, and protrusions are knocked down. The wall should be as flat as possible.
- The surface is treated with a deep penetration primer.
- According to the manufacturer's recommendations, a special composition is prepared. If you don't have it, you can use tile adhesive.
- The inside of the insulation board is rolled with a needle roller. Another option is to brush it with a metal brush. This will ensure good adhesion to the adhesive solution.
The glue is applied to the surface of the sheet using a notched trowel. It is not necessary to cover the entire slab with the composition: it is enough to coat the perimeter and center, options are shown in the photo.
- A fragment of insulation is applied to the wall and held for a minute. Be sure to check the correct installation at the building level.
- Begin gluing the penoplex from the bottom. It is recommended to move the rows relative to each other so that the slabs are staggered.
For reliability, penoplex is secured with disc-shaped dowels: 4 are placed at the edges and one in the center.
- The seams between the plates are filled with silicone sealant; wide cracks can be sealed with polyurethane foam.
- Drywall is attached to the insulation using glue. The scheme for applying the composition is the same as for penoplex slabs. It is recommended to place a layer of vapor barrier between them.
- After the glue has dried, which will take 24 hours, the drywall is finished. The seams are sealed using putty and serpyanka mesh, rubbed down, after which the entire surface is covered with a double layer of primer.
Types and characteristics of compositions
There are several types of means that can be used to glue drywall to a concrete wall or other bases. They differ in their properties. The choice is made based on the type of material and operating conditions in the room. Therefore, knowing the features of commercially available solutions will help you make the right choice.
The mounting adhesive solution must be prepared according to all the rules prescribed by the manufacturer on the packaging. The ratio of components must be strictly measured, otherwise the resulting properties will be different from those declared. They work with a spatula, moving in circles, leaving a distance of 15-30 centimeters between them.
During installation work, it is important to check the evenness of the sheets; a building level is used for this purpose. Correction of the sheet location is possible within 15 minutes. Previously, this type of adhesive was used only for tile materials, but positive properties such as water resistance, low temperature endurance, and safety have expanded the scope of application.
The next suitable option is polyurethane foam. The process of working with this glue consists of the steps described below:
- It is necessary to make 9 holes on the material, and drill the surface next to them.
- You should stick the foam pieces onto the surface, maintaining a distance of 10 centimeters between the holes.
- The gypsum board is secured to the base with screws and washers.
- Put the composition into the holes.
- The washers are removed and the screws are screwed in until the desired fastening is created.
Mastic on gypsum material, includes adhesive mixture and lime. First, fill the base with the required amount of water, wait 15 hours for the composition to swell well, then add lime, which is also pre-diluted in water. To create a thicker base, you should use heat in a steam bath or on a gas stove. At the end of preparation, gypsum is introduced. Among the advantages of this product, it is noted that the layer does not shrink and has antiseptic properties. This makes the composition suitable for rooms with high humidity, such as a bathroom.
There are mastic mixtures to which sawdust is added. The resulting solution will be similar to sour cream. It is necessary to prepare and mix gypsum with sawdust in a ratio of 4 to 1. Next, glue is added, it is prepared from a ratio of 25 grams of mixture per liter of water. You can mix water with stillage, the ratio is the same 4 to 1. How much gypsum mixture to use is decided experimentally. The products are distinguished by their soundproofing properties and plasticity. Such options can take the shape of the surface, so covering small imperfections in the wall with them will be easy.
Specialized adhesive for gypsum boards is produced in cylinders, the average consumption of these compositions is equal to a cylinder per 15 square meters. It is necessary to apply the layer in strips so that the distance between them is thirty centimeters, and the perimeter is also treated.
The product, characterized by elasticity, is made on a polyurethane base. Suitable for gluing sheets, as well as gluing seam areas. You can choose the adhesive used for ceramics and gypsum boards.
Insulation with frame
The procedure for choosing this installation method will be as follows:
- The wall surface undergoes minimal processing: poorly adhering elements of the old coating are removed.
- The frame is marked: a strip is drawn on the ceiling, then using a plumb line it is transferred to the floor. These are the guide attachment lines. The location of the vertical posts is marked on the wall in 60 cm increments.
- The guides are secured with dowels. The fastening step is 25–30 cm.
- Vertical elements are mounted. They are screwed to the guides with metal screws. The deviation is adjusted using direct hangers located every 50–60 cm. The position of the racks is checked with a building level.
- Glue the penoplex to the wall in the same way as with the frameless method. The insulation boards are rolled with a roller with needles, and an adhesive solution is applied. Then they are tightly inserted between the vertical posts and pressed for 40–60 seconds.
Advice. Pieces of insulation are placed in the metal profile to prevent heat transfer through the studs. Another option is to fill them with foam.
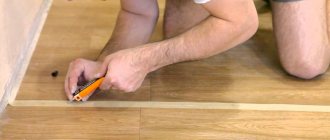
- Sheets of drywall, if necessary, are cut into the required fragments. Docking of gypsum boards occurs strictly on racks. Fixation is carried out with self-tapping screws in increments of 25–30 cm. In order not to damage the surface of the drywall during installation, a special bit is placed on the screwdriver, limiting the depth of screw tightening. You can find it in construction stores.
- The seams are sealed using reinforcing tape and putty. After grouting, the entire wall is covered with two layers of a special primer for drywall. The second layer is applied after the first has dried.
Thus, it is quite possible to insulate the walls of an apartment from the inside using penoplex and plasterboard with your own hands. If you do everything correctly and carefully, the desired effect will definitely be achieved. The process can be seen in detail in the following video. And if you have any questions during the work, ask them in the comments.
Attach directly to glue
In this case, gluing drywall onto the foam is very simple, since nothing additional needs to be done except priming. However, the method is only suitable for relatively flat walls that do not have serious differences in level. The advantages of the method include the ability to control the area of glue application and the speed of finishing. It is necessary to apply glue over the entire area of the parts in strips, and then press it firmly in the desired place on the wall. After this, every fifteen minutes for an hour it is necessary to inspect the created plane and press the swollen areas.
Tip: if there is severe swelling, you can use self-tapping screws with washers to temporarily secure the bulging area. Then the screws are unscrewed.
The disadvantage of this method is the impossibility of its use on highly deformed planes. In addition, if you glue drywall to polyurethane foam in this way, it will be more difficult to obtain very even walls than the following method.
We install insulation under drywall without the help of hired specialists
If it is not possible to insulate the outside, then the optimal solution is to insulate the walls from the inside with penoplex and plasterboard.
Many people experience freezing of walls in apartments, private houses, balconies or basements. The problem is solved by installing insulation on the outside of the building, but sometimes it is more expedient, cheaper and more reliable to do it from the inside.
Choosing insulation
Polystyrene foam, mineral wool, and penoplex are used as heat-insulating materials.
- Polystyrene foam is an artificial material. It is characterized by average hygroscopicity, thermal conductivity and density. Without special additives it is highly flammable. They are used to insulate external walls, balconies, and basement floors.
- Mineral wool is a time-tested material. It is characterized by high hygroscopicity and an average degree of thermal conductivity. Rarely used as insulation under drywall for interior spaces.
- Penoplex is a modern material obtained by thermal processing of foam plastic. It is characterized by low hygroscopicity and thermal conductivity. Has high density. Thanks to special additives, it practically does not burn. They insulate apartments, balconies, and basement floors.
The optimal insulation for interior work is penoplex.
Insulation from the inside: pros and cons
Insulating walls with plasterboard from the inside is a technology that goes against the basics of heating engineering. However, there are situations when it is impossible to carry out work outside. In this case, this technology is indispensable.
The disadvantages include:
- Dew point offset. There is a high probability that the walls will get wet.
- Reducing the volume of the room. The metal frame, insulation and drywall “eat up” the usable area.
- Reducing the threshold of maximum loads on the wall. Insulation has a lower density than brick or concrete. When installing heavy shelves on a wall sheathed with insulation, anchoring may be required.
Insulation methods
After choosing the material, the question arises of how to insulate a wall with plasterboard with your own hands. In home practice, two methods are used:
Frameless method
A common insulation option. No metal or wood frame needed. It is used for insulating small, flat surfaces: interior walls of apartments in panel houses, basements, garages; balconies and loggias.
Let's consider the sequence of actions for insulation:
- Preparing the wall for pasting with penoplex. For the frameless method, you need a flat surface, without strong potholes. Let's start work on covering the walls with plasterboard and insulation by removing wallpaper, plaster, and paint. If you need to cover an unplastered brick wall, then knock down all the protruding masonry mortar. A loose base of old plaster can be treated with concrete contact. This will strengthen him. We fill potholes and cracks with cement-sand mortar. We mix it on the spot or buy it ready-made in bags.
- Installation of penoplex. For this we use Penoplex-35, which has all the necessary properties. The standard sheet size is 600×1200 mm, thickness is 20 – 100 mm. As glue we use special compounds that can be bought in the store. In extreme cases, tile adhesive will do. Before gluing, treat the surface of the sheet with a stiff brush. This will increase the coefficient of adhesion between the wall and the insulation. Apply the glue in a thin layer over the entire area using a grooved spatula. We start pasting from the bottom corner. First, apply the sheet, press a little, hold for a few seconds. Then we release. We treat the joint seams with silicone glue. If their width is more than 5 mm, then we seal them with polyurethane foam. Additionally, you can secure the insulation with plastic dowels. The number of attachment points is 3–4 per 1 m2.
- Installation of drywall. We use dry glue mixed with water. Apply it with a notched trowel to the entire surface or in strips. It hardens within 24 hours. Drywall with insulation can be separated by a layer of vapor barrier. The best option is penosol. Its shiny surface reflects heat from the interior. No condensation forms. One “but”: drywall cannot be glued to penosol. First you need to mount the frame.
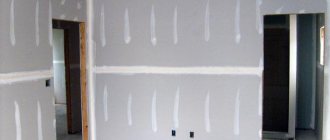
- Finishing. Tape the seams between the sheets with masking tape. Then we putty, paint or wallpaper the wall.
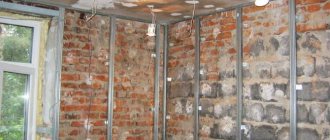
Frame method
Insulating the wall with penoplex and covering it with plasterboard along the frame are relevant for large, uneven walls.
- Surface preparation. It does not need to be cleaned, small potholes do not need to be covered. If necessary, pre-spread the wiring.
- Frame installation. It comes in metal and wood. Metal profiles are popular among consumers. Its size depends on the thickness of the insulation. First we install the lower guides, then the upper ones. We fasten them to the wall and ceiling using self-tapping dowels 40 - 50 mm in increments of 2 - 3 pcs. by 1 m p. Then we install vertical racks. First we insert them into the guide profile. Then we screw it to the wall using hangers. Mounting on hangers levels out all the unevenness of the wall. The installation step of the vertical posts depends on the size of the insulation sheet. In our case it is 600 mm. A wooden frame for insulating walls from the inside with plasterboard is mounted according to the same rules as a metal frame. We treat wooden beams with an antiseptic. This will avoid rotting, the formation of fungus and mold.
- Installation of insulation. We treat one side of the foam sheet with a wire brush to improve adhesion to the wall. Using a notched trowel, apply glue to the sheet. Then we insert it into the gap between the vertical posts, press and hold for several seconds. Then we release. The glue will dry in about 24 hours. We seal the seams with silicone sealant. If they are wide, then we use polyurethane foam. The metal profile is a cold bridge. We fill the profile cavities with pieces of insulation or foam to avoid freezing.
- Installation of plasterboard sheets. We apply each sheet to a metal profile or wooden beam. Then we fasten it with self-tapping screws measuring 20 - 25 mm. A layer of vapor barrier can be glued between the outer skin and the insulation.
- Finishing. We putty the finished surface, paint it, and cover it with wallpaper.
The proposed technologies will help to insulate the wall and cover it with plasterboard. The main thing is to follow the rules and not violate the technology of work.
Application for interior and exterior decoration
An expanded polystyrene sheet attached to the frame allows you to protect the room and the building as a whole from the penetration of cold. This idea is a practical option for ensuring a comfortable temperature in the living space. Internal and external finishing of surfaces with polystyrene foam has its own characteristics, which you need to become familiar with at the stage of planning the insulation of the room.
We advise you to look at: insulating a balcony with mineral wool and penoplex.
Installation work for exterior finishing
Insulation of the outside with penoplex should be performed in the following sequence:
- To fix penoplex sheets to the wall, the surface must first be leveled. This is not difficult to do; just remove the flaws and plaster the coating.
- When the plaster has dried, you can begin installing the penoplex. The process is carried out by gluing slabs of material onto a special adhesive solution on top of the plaster.
Useful tips
- In order for the penoplex to be securely fixed on the wall, the sheet coated with glue should be applied at a distance of 20 millimeters from its actual placement. Then, pressing on the plate, move it to the desired place.
Glue on penoplex is applied pointwise or using a construction gun along the perimeter of the sheet. Having attached the material with glue over the entire surface of the outer covering, you should proceed to the next step - attaching the polystyrene foam sheet using dowels to the frame. To securely fasten the sheets, you should prepare dowels at a rate of 4 pieces per square meter.
Fastening penoplex to concrete using “umbrellas” for greater strength In order for the gypsum board and expanded polystyrene to be securely fixed around the perimeter, at joints, corners, near doors and windows, more dowels should be screwed in. You need to calculate so that there are approximately 6-8 dowels per square meter.
The fastening of penoplex differs depending on the location of insulation. Finishing, in the case of exterior finishing, is carried out in several ways. In this case, you can level the plaster using sandpaper that was applied to a sheet of polystyrene foam. This technique also uses finishing using metal or wooden beams, as well as siding.
Finishing the facade of the house with penoplex and siding. A reinforcing mesh is applied on top of the plaster or other selected finishing material. It is overlapped so that there are no sections of coverage left without a mesh.
Reinforcing mesh applied to the wall and the process of filling it Having insulated the outer surface using penoplex, you can proceed to the final stage. Namely, to carry out cladding with the selected material. If these are plasterboard sheets, then they can simply be glued on top of polystyrene foam using a special fastening adhesive for installation work. If another material is preferable, such as wooden beams or siding, then it must be fixed on top of the foam with dowels or screws, passing the fastening element through the foam and the frame. To do this, you need to select fasteners of the required diameter and length.
Penoplex laid under the cladding of the facade of the house
- After completion of the work, if the cladding was carried out using a sheet of plasterboard, you need to apply a primer that will protect the surface from corrosion and fungal formations.
- When the primer has dried, the first layer of plaster is applied to the drywall sheets, and then sanded with sandpaper.
- After applying and leveling the second layer, you should begin decorative finishing.
By completing the process in the correct order, paying attention to every detail, you can obtain a reliable, cold-proof exterior finish.
Interior decoration
If you are gluing penoplex on the interior wall of a room, the process is similar to that for exterior decoration.
- Sheets of foam plastic are fixed on top of the plastered and leveled wall. How to secure the insulating sheets is up to the owners alone. You can mount foam boards onto frame profiles, or you can attach them with glue.
- Indoors, it is recommended to install a vapor barrier foil film on top of the polystyrene foam before sheathing with dowels or gluing drywall. This will extend the service life of both polystyrene foam and plasterboard construction.
Internal insulation of house walls using waterproofing, several types of insulation When drywall is glued to penoplex or fixed with dowels, it is necessary to plaster the recesses from the screws that hold the drywall to the surface. If the sheets were glued, then the gaps between the sheets should be sealed and the gypsum board surfaces should also be plastered.
The process of filling joints between plasterboard sheets
How to glue drywall foam adhesive: 4 repair tips
Drywall is a very popular material that is used to decorate walls and ceilings. It has a flat surface, which greatly simplifies the subsequent decorative finishing of the walls. You can attach drywall to the surface in different ways. One of them is foam adhesive for drywall. It allows you to significantly save time when installing sheets, and also take up a minimum of space. To perform installation correctly, you need to know the features of the material, its characteristics and methods of handling it.
How to prepare the solution correctly
To obtain a reliable and durable fixation of the material with the base, you should not only pay attention to the choice of product, but also prepare the solution correctly. You should always carefully read the instructions from the manufacturer, which are written on the packaging. There are general principles of preparation, as well as the proportions of stirring the mixture with water.
It is better to choose a drill with a special attachment as a mixing tool, if you have a construction mixer. The mixture is introduced into the prepared water, working gradually so that lumps do not form.
You can also use not ready-made mixtures, but mix PVA glue with gypsum putty. The second component should be similar in consistency to sour cream. The elements should be mixed until smooth, wait five minutes for the composition to infuse, after which you can apply it to the surface.
Surface preparation before installing drywall on foam
Having decided to mount drywall on a wall or ceiling using foam, you need to familiarize yourself with the features of this type of fastening. This is a convenient way to install sheets, since the wall surface may have deviations of different levels. In case of very large deviations, special guides are used for gluing sheets.
It is important that the foam is of high quality: its properties should appear immediately after application.
Fixing drywall must be very reliable, since the properties of the foam affect its ability to push the material away from the wall. Of course, it is better to perform preliminary surface preparation. Walls, ceilings and sheets must be primed.
Preparation stages:
- Remove old finishes from the wall.
- Cover the wall with primer.
- Attach a sheet of drywall to the wall and drill at 9 points.
- Drill holes for fastenings according to the marks.
After completing the preparatory work, you can begin attaching the gypsum board sheets. When installing it yourself, experts recommend first installing one sheet and letting it dry. If the next day you are satisfied with the result, then you can continue working.
When are gypsum board adhesives used?
Glue for drywall can be chosen if it is definitely decided that the installation will be carried out using mortar and not using profiles. There are criteria that help you understand when gluing sheets will be the best solution. The following conditions are noted:
- When the surface is not very uneven and the flaws do not exceed 50 millimeters. In other cases, applying a large amount of mortar to the wall to obtain an even coating will be impractical, and it is better to use profile fasteners;
- When working with ceiling coverings, it is important to securely fasten the sheets while the mortar is setting on the base; during this period, you can use screws to secure the material to dowels;
- When working on creating the area around doors and windows.
It is also possible to stick gypsum boards with a two-layer surface design, but it is more economical to attach the 2nd layer of sheets using self-tapping screws.
Drywall on polyurethane foam: what is worth considering
There are several ways to install plasterboard sheets on a wall or ceiling. One of them involves fastening the sheets with screws and pouring foam between the surface and the drywall. Another option involves directly applying foam to the back side of the gypsum board.
It is important to ensure in advance that the temperature of the foam can is not lower than 5 degrees Celsius.
It is best to apply the foam in zigzag lines with a diameter of 3 cm. After applying the foam, you need to wait 5 minutes. After this, you need to firmly press the sheet of drywall to the wall.
Things to consider:
- Weight of a sheet of drywall;
- Foam quality;
- External factors in the room.
After the sheets have dried, the seams and holes between the sheets must be sealed with putty. Irregularities and cracks can also be covered with foam. All work on finishing drywall should be carried out no earlier than an hour after installation.
The best manufacturers
It’s easier to choose than to stick gypsum board to the base when you know the brands that are in demand. Popularity is determined by quality, so the compositions can be considered the best. The following funds are available on the construction market:
- Knauf, high-quality adhesion is achieved even when using a small amount of product, due to the low consumption of compounds. The company provides a guarantee for its products; the products combine well with sheets from other manufacturers;
Is it worth gluing drywall to foam?
Many people are interested in the question: is it possible to glue drywall to a wall or ceiling using foam. Many masters today advise against doing this, since this process is quite painstaking. In addition, the quality of fastening the sheets depends on the accuracy of gluing and on following the instructions of the master.
It is important to take into account the fact that when gluing drywall to foam, you should press the material against the wall for 15 minutes every hour.
It is also important to take into account that foam tends to expand. It is necessary to carefully press the drywall to the surface so that the foam does not “push it out”. After gluing, there is a possibility that the sheets will come off.
Reasons not to glue drywall to the wall:
- Long process;
- Lumps may appear;
- Possibility of peeling off if done incorrectly.
Polyurethane foam is a fairly durable material. That is why many craftsmen use it for gluing drywall. This avoids unnecessary construction work. The gluing itself takes quite a lot of time, especially if you do it yourself for the first time.
Advantages and options for such fastening
In addition to the fact that gluing drywall to foam adhesive occurs very quickly, there are other positive aspects of this method of fixation:
- There is no need to assemble the frame - less materials will be needed, costs will be reduced and everything will take a little time.
- The fastening is very strong, since the composition has very good adhesion to almost any material.
- Very serious deficiencies can be corrected - surface bends and holes more than three centimeters deep.
- It will be very easy to work with.
However, installing drywall with foam adhesive also has some disadvantages. First of all, it is worth noting the possible fragility of the fastening. The foam may dry out and everything will fall off. In addition, you will have to constantly monitor the position of the sheet, since the foam will expand and increase in volume, which can cause the appearance of bumps. At the same time, there are two options for gluing drywall to the wall with foam:
- Apply the adhesive composition to the part and press it all at once onto the area to be leveled. Suitable only in cases where drywall is glued with similar glue to a relatively flat wall. If there are protrusions, bumps, level differences and other similar defects, another method is needed.
- Fixation with screws and glue. If you need to make a wall with large defects smoother, then it is better to first attach part of the structure with screws, and only then do the actual gluing.
The second method is a little more complicated and will require additional costs, but they are justified by the possibility of leveling very problematic areas of the plane. In addition, gluing drywall on foam to the wall in this case will not be much more difficult. Both types of installation are worth separate consideration.
Types of foam adhesive for drywall (video)
When we glue plasterboard sheets to the surface of a wall or ceiling, we must adhere to strict rules. It is important to carry out the preparatory work correctly: make the slope correctly, make sure that the previous finish, paint and wallpaper, is removed. Only after this can you begin the main type of work. You should carefully consider the choice of foam adhesive, since how the drywall adheres to the wall depends on its quality. Gluing drywall is a rather labor-intensive process, but if it is done correctly, the finish lasts long and reliably.
How to choose the right one
You can choose a specific product if you take into account the type of base. Usually it is necessary to attach sheet material to a concrete or brick surface. There are also works using penoplex, then you should choose gypsum mixtures. Gypsum options are also suitable for aerated concrete, aerated concrete, and brick; this is the best choice due to the fact that the consumption is low. 5 kg required. composition for processing a square meter of area, this is a budget way to create high-quality adhesion.
For concrete, when the curvature is small, it is possible to choose between the following adhesive solutions:
- Polyurethane foam;
- Gypsum based adhesive;
- Cement mixtures for tile materials;
- Putty mixtures with acrylic or gypsum base;
- Polyurethane type of glue.
To glue sheet covering onto polystyrene foam material, acrylic putties or foam glue can be used. Drywall on drywall can be glued with most compounds. But in order to obtain a smaller distance between the sheets, thereby reducing the area occupied by the sheets, silicone-based products or liquid nails are selected. To create slopes using sheet material, professionals prefer acrylic putty mixture.
When you have to glue sheets in rooms with a large area, it will be economical to purchase dry mixtures, which are packaged in large paper bags with a protective layer against getting wet. Plasterboard sheets are a finish that, after installation, allows you to quickly begin the next finishing work.
Penoplex and plasterboard for insulating loggias
Very often, a loggia in a residential building remains an object “for beauty” that does not carry any significant functions. But as soon as you insulate it and finish it using modern technologies, using, for example, penoplex and drywall, it becomes almost a full-fledged part of the apartment in which you can relax, work and have a great night's sleep on a warm summer night.
The first thing they usually do is glaze the loggia. The next stage will be its insulation. To do this, you can use various materials - polystyrene foam, polystyrene foam, finish with plasterboard or siding - it all depends on the preferences and budget of the owner. You may come across such a concept as insulation with plasterboard and penoplex - it is not entirely true. There is a technology for insulating walls with penoplex - plasterboard is used to finish the walls, but in itself it is not an insulation material.
There are questions on the forums: “Is it possible to cover penoplex with plasterboard? Is it permissible to use these two materials when decorating a loggia?” Polystyrene foam, penoplex and drywall are quite “friendly” to each other. Installation of drywall to penoplex or polystyrene foam is carried out using the same technology. We will discuss such issues as how best to attach penoplex to the walls, and drywall to penoplex.