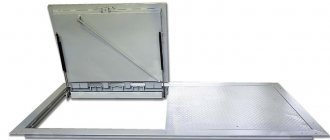
The entrance door to an apartment or private residential building is part of the enclosing structure, which is why it is subject to increased requirements for burglary resistance, heat and sound insulation. In addition, the interior side of the structure must be combined with the overall style of decoration of the hall or hallway. Many companies offer ready-made decorative finishes for this structural element. If the owner of the premises does not have the opportunity to purchase a complete product, he needs to know how to decorate the front door from the inside with his own hands.
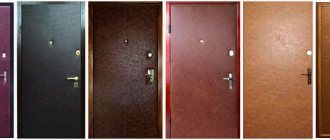
Inner side of the front door
The most popular methods for decorating the front door from the inside
When decorating the interior, designers recommend that customers use the following technologies for finishing the inner surface of the front door:
- Coating a steel sheet, plywood or OSB with a paint and varnish composition in a single color scheme, or with a shagreen effect. Most often, manufacturers use the principle of hammer painting with special pigment substances for metal, as they increase the corrosion resistance of the material and give a decent appearance to the surface.
Plywood door covering
- Upholstery of the inside of the door with leather or substitutes for natural materials with padding of the internal space with elastic inserts, for example, batting. This finishing option significantly increases the heat transfer resistance of the enclosing structure.
Carriage tie
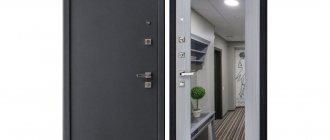
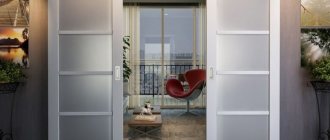
- Interior cladding made of rigid panels - MDF, chipboard, plywood with textured color lamination. Materials can be combined with various inserts, including mirrors and steel overlays, which is especially important for high-tech interiors.
Door with MDF panel
- In many hardware stores you can find polymer stickers that are fixed to the smooth and grease-free surface of the door, creating the illusion of a beautiful landscape and other interesting images.
Stickers on the front door
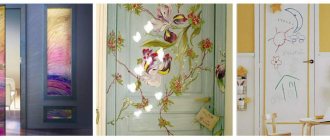
When finishing an exclusive interior, designers also often personally decorate the front door, resorting to the technique of aging wood, brushing or decoupage. As a result of many hours of work, the result is an interesting vintage interior, or a pronounced “country” style.
Application of brushing technology
Conclusion
Choosing upholstery for metal doors is a responsible matter, because it largely indicates the status of the owner. When making a decision, carefully weigh all the pros and especially cons of the materials described above and let your door be the most beautiful in the area.
Choosing the finish of metal doors is a responsible matter.
Source
The most commonly used materials for finishing the inside of the door
The methods listed above allow you to realize any designer’s idea, provided the following materials are available:
- Natural wood of valuable species - oak, walnut, beech, and ash.
Natural wood paneling
- Boards made of natural coniferous materials - pine, cedar.
Pine paneling
- Genuine leather for carriage screed.
Covering with genuine leather
- Leatherette for soft upholstery.
Leatherette upholstery
- Ready-made MDF panels.
MDF panel in assortment
- Chipboard or OSB sheets, moisture-resistant plywood.
OSB sheets for the door
- Laminated film.
Film sticker
- Nitro paints, alkyd, acrylic, hammer, oil or other paints and varnishes.
Dyed canvas
- Carpeting, laminate and other materials used as floor finishing.
Laminate as a finishing material
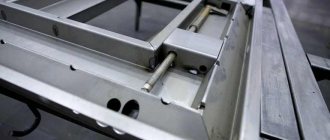
Large factories that supply doors of modular dimensions, or on individual orders from premises owners, usually use the technology of constructing MDF panels with high-quality lamination. Modern materials in this category are characterized by increased wear resistance, durability, and are resistant to mechanical damage and temperature changes.
Factory for the production of entrance doors
PVC slopes and polyurethane linings
Wherever PVC is used now! So the front door can be framed with it. Installation is quick, and the price of PVC slopes is quite low. But this material does not have many advantages.
PVC is fragile and easy to break. Sometimes it’s enough to just lean on it and all the work will go down the drain. The slope cannot be repaired; it will only have to be replaced. And in general, the service life of the material does not exceed a couple of years. Some people cover plastered slopes with plastic, but in reality it looks ugly and cheap.
Plastic slopes
By the way, you can also decorate the slopes with polyurethane overlays, which can imitate stucco. This option looks decent. But the price for such overlays is high. You need to glue the overlays on a flat surface, so you will still have to pre-plaster or cover the ends of the walls with plasterboard.
How to paint the inside of your front door yourself
To paint a door with your own hands, a home craftsman will not need special skills or complex professional tools. At the same time, the finishing materials market offers many options for paints with different compositions and shades intended for painting metal, wood, plastic and other surfaces.
Paints for processing metal doors
This type of finishing of the interior side of the door has many undeniable advantages:
- First of all, painting is the cheapest finishing option, and, compared to other types of decor, it does not require the purchase of a large number of high-quality materials.
Metal processing with primer
- To apply an even layer, you only need a paint composition from a trusted manufacturer, as well as a high-quality brush. The simplicity of this solution eliminates the need to turn to expensive professionals to complete the work. Painting can be done by any home craftsman, regardless of age, gender and experience.
Tool for painting door panels
- Various color options in a matte finish or with a glossy finish are widely available, as well as textured paints, which make it easy to create an original surface stylized as natural wood or stone.
Textured hammer paint
- The possibility of combining different colors, as well as creating patterns or ornaments on the surface of the interior side of the door.
Drawings on the front door
To paint the entrance door leaf with your own hands, you should stock up on simple painting tools, solvent or other degreaser, paint, and carry out all work according to the following flow chart:
- All fittings that could interfere with painting - handles, locks, peepholes - are removed from the canvas.
Removing the handle
- The surface is cleaned of the old coating, after which it is polished with abrasive disk attachments on an electric drill.
Surface cleaning
- After cleaning, the inside of the door is swept and degreased with a solvent or alcohol-containing liquid.
Surface degreasing
- A protective film is glued around the perimeter of the door, as well as on the floor, to protect finishing materials from paint.
Sticker of protective materials
- The surface of the door is primed with a protective compound, which simultaneously prevents the metal from corrosion and promotes better adhesion of the material.
Corrosion protection
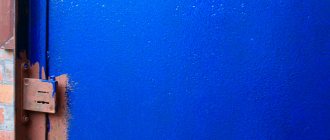
- On the primed surface, after the protective composition has dried, paint is applied in an even layer in one direction. The best solution is to move a roller or brush along the long side of the door leaf.
Painting a metal surface
- If it is necessary to apply two or more layers, wait time for the composition to polymerize, after which the procedure is repeated.
Waiting for polymerization
- After applying the last layer, in order not to damage the freshly painted surface, during the next 24 hours you should operate the door with extreme caution, avoiding contact with the interior surface.
Door operation
When painting a door, you should make sure in advance that each layer is applied evenly, because after the substance has polymerized, it is almost impossible to restore an unpainted surface without a trace.
Evenly applied layer
How and how to finish door slopes in a house and apartment ↑
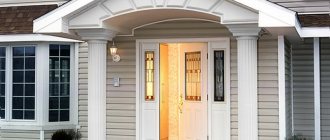
From the outside, a small gap between the opening and the frame can be closed using platbands - special shaped strips, usually included in the door installation kit. However, from the inside of the room there remains a fairly wide area of exposed brickwork with layers of concrete mortar, and to ensure the proper level of tightness it must be finished not with one, but with several types of materials - insulating, load-bearing and decorative.
Finishing slopes improves the microclimate and is part of the design
According to the installation method, there are 3 options for finishing slopes for entrance doors:
- Applying cement mortar directly to the wall and further plastering it. It is considered the most reliable and cost-effective method, but at the same time the most labor-intensive. To lay out perfectly smooth surfaces, you must have some experience both in preparing the plaster solution and in its application.
- Gluing finishing panels using a suitable adhesive mixture. Finishing door slopes using this principle is more expensive, while the “wet” installation process is quite long (each layer must be allowed to dry), but it is quite accessible even to a beginner in the repair business.
- Fastening finishing elements to a pre-assembled frame. The fastest solution that allows you to achieve a perfectly flat surface, hide telephone or electrical communications, and install lighting equipment in the door block. The downside is the low mechanical strength required to protect the door fasteners from breaking.
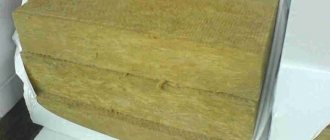
It is advisable to isolate the slopes from the concrete walls with a layer of polyurethane foam or mineral wool
In order for the slopes to withstand temperature changes, especially noticeable if the door leads directly to the street, and not to the corridor or landing, it is advisable to install a layer of thermal insulation on the wall: it can be mineral wool, polystyrene foam or its modification - penoizol. If installing insulation does not allow the width of the opening (according to SNiP, the dimensions of the doorway must be at least 0.8 x 1.9 m), cover the slopes with sandwich panels.
Frame slopes are indispensable when the opening is too wide and a large volume of cement mixture is required to seal it. They are also chosen when there are damp walls, or there is no time to do finishing work - plastic or wooden panels themselves look presentable. In order to fix thin sheets, the space between them and the walls is filled with polyurethane foam sealant, which also serves as a heat barrier.
You can choose the shade of the sandwich panel to match the color of the front door
In addition to the protective function, the slopes perform the task of decorative design of the opening. To cover the rough surface, one of the following materials is layered onto concrete or drywall:
- paint – thanks to the varied palette, you can choose any shade, and, if desired, a textured pattern, thereby decorating the hallway space in an original way;
- wallpaper is a good choice for those who, at the same time as replacing a door, are making repairs in the corridor, since using the same wallpaper on the wall and slopes creates the impression of a monolithic surface (a step-by-step algorithm showing how to decorate slopes at the front door with wallpaper is described in the section on finishing operations);
- one-sided sandwich panels - due to the peculiarities of their structure (a layer of extruded polystyrene foam is attached to a sheet of polymer plastic), there is no need for additional measures for insulation and sound insulation of surfaces, and their minimal weight allows them to be attached directly to the wall using an adhesive method;
- plastic panels are considered a compromise option, since, despite the external similarity with sandwich panels, plastic is very fragile, and when finishing deep slopes it is very problematic to achieve uniform rigidity over the entire area;
- MDF is quite durable (withstands medium impact loads without causing scratches or dents) and easy to install material, allowing it to be installed even under conditions of increased operating load;
- laminate or parquet board - a wide variety of colors and textures allows you to choose a tone-on-tone panel with the canvas and door frame, and the high strength, designed for use as a floor covering, determines the long service life of the slopes.
Laminate cladding
Recently, designers, trying to include the doorway into the overall interior picture, use atypical building materials to decorate it - ceramic tiles, mosaics, natural or artificial stone.
Artificial stone in the hallway looks modern
Tiling
How to do door trim yourself
Another popular way to improve the front door is to upholster the door with leather, leatherette with a soft filler. Such a surface provides comfort, helps retain heat, prevents the spread of vibration, is easy to clean and lasts for decades, subject to careful handling.
Door upholstery in the interior
To do the door upholstery with your own hands, you need to buy fabric or eco-leather in a textile and hardware store, filler - batting, as well as a set of decorative nails with wire for installing a screed.
Upholstery set
When installing soft door trim, the home master must sequentially perform the following algorithm:
- Similar to the previous method, handles and other fittings are removed from the surface.
Door upholstery nails
- Before starting work, the door must be dismantled from the hinge hangers and carefully laid on a flat horizontal surface. Considering the large weight of the metal product, it is better to do this work together.
Leatherette and batting for upholstery
- All elements of the old finish are removed from the inside of the canvas, the surface is brought to a smooth state and degreased with white spirit.
Applying glue
- The plane of the upcoming finishing is treated with an adhesive compound - glue based on epoxy resin or silicone sealant, after which the soft filler is carefully laid out on it, in an even layer, without the formation of empty areas.
Gluing the filler
- The upholstery material is carefully applied to the surface of the canvas so that there are overhangs of equal size on each side.
- Consistently, using quick-drying glue, the edges are folded and fixed along the entire perimeter of the door, with force. As a result, you should get a uniform, moderately stretched surface, without folds or bends.
- Excess material around the perimeter of the canvas is trimmed with scissors or a construction knife.
Leatherette sticker
- At the location of the peephole and locks, the material is cut out with a knife, and the edges are carefully glued to the plane of the door.
- If heat-insulating rollers are supplied with the upholstery material, they are also fixed with glue around the perimeter of the product.
- At the final stage, a tie is made of wire and decorative nails on the surface of the door.
- The drawing should be drawn in advance with a pencil on the surface of the material, and then installation of the screed should begin.
Screed device
When the screed is completed, it is recommended to check the reliability of compliance with each mating line, then install the canvas in place and re-mount the fittings.
Installation of drywall: 3 ways
This is another easy way to make attractive door frames with your own hands.
Finishing putty
Instead of the adhesive used for plastic, preference is given to conventional finishing putty, which has proven to be a good fixer for plasterboard sheets.
- Careful repeated measurement of all surfaces of the opening is the first necessary step. Markings are applied to the drywall, and the material is cut into blanks with a construction knife (metal hacksaw, jigsaw).
- After trying on all the elements in the opening, putty diluted with water to a paste-like consistency is applied to their “wrong side” in large “slap” patches. The parts are fixed on prepared (primed) slopes.
- If suddenly there is a need to fix them, then use supports - for example, a wooden beam. Having fixed the material, it is left in this state for 10-12 hours. Then the supports are removed and the composition is waited for to dry completely.
- The surface of plasterboard slopes is puttied, sanded, primed and painted.
Polyurethane foam
This material is used if the surface has been well prepared, meaning there are no large depressions (up to 30 mm deep). If there are any, then the potholes are first filled 1/3 with foam. Deeper defects require the intervention of cement mortar or starting plaster.
- A foam snake is applied to the back of the plasterboard blank; its thickness is no more than 10 mm. The part is pressed to the surface, then torn off and placed to the side. The purpose of this step is to wait for the foam to increase.
- After 5-8 minutes, the element is finally fixed and left until the composition hardens for 12-24 hours. The last step is to close the gaps between the drywall and the wall with plaster. Finish the slopes after the material has dried.
Both methods have a big advantage - simplicity and speed of surface design. But there are also disadvantages:
- pre-leveled surfaces are a prerequisite, otherwise ideal installation is impossible;
- there is a risk of bending of plasterboard elements;
- voids left between the wall and the material;
- low reliability of such finishing.
For those who want to get durable and beautiful door slopes, it is better to choose the next, more complex option.
Frame mounting
This method is universal, but also more labor-intensive, but the end often justifies the means. The frame is made of wooden beams or (better) from an aluminum profile. Such slopes can withstand almost any cladding: both tiles and artificial stone.
- Measure the opening - the dimensions of the racks, as well as the horizontal guides. The necessary elements are cut with a grinder or metal scissors.
- In the opening with a pitch of 300-400 mm, holes are made with a puncher into which plastic dowels are inserted. Constantly checking the geometry with a level, the segments are fixed with self-tapping screws. For reliability, jumper elements are installed.
- If work is carried out in the entrance door opening, then the slopes are additionally insulated. In this role, practical mineral wool, glass wool, polyurethane foam (in a very thin layer) or more expensive material - extruded polystyrene foam - are used.
- Plasterboard blanks are fastened around the perimeter, maintaining a distance of 200 mm. The caps are recessed into the skin by 1 mm, but no more. The outer corners are reinforced with perforated corners, they are fixed with self-tapping screws.
Drywall sheets mounted on a frame, polyurethane foam or putty are finished. The seams are glued with serpyanka, the surfaces are puttied, primed, then the finishing material is applied.
How to properly decoupage the front door
Creative painstaking work that turns the door into a decorative element of any interior. The entire operation takes a whole day, depending on the complexity of the design, and is performed in compliance with the following nuances:
- As in all previous options, all fittings are removed from the door, after which the door leaf is removed from the hinges.
- The surface is cleaned of the old finishing coating and sanded until a smooth surface and a metallic shine are achieved.
- The entire inside of the door is degreased with special paint chemicals.
Decoupage doors in the interior
- The owner of the premises initially purchases stickers made of polymer film, which can be installed entirely or different elements for appliqué can be cut out of them, according to a previously developed sketch.
Material for decoupage
- To glue decorative elements, you will need PVA glue, which is first diluted in clean warm water.
- Before sticking the pictures, you should first outline them on the surface of the door with a simple pencil.
Outlining drawings
- Each element of the applique is carefully treated with glue, pressed against the surface, smoothed and pressed for a few seconds.
Applique sticker
- When the adhesive composition polymerizes, the surface of the material should be coated with high-quality varnish, which will smooth out all irregularities and reliably protect the product from destruction.
This method of decoration will not only improve the door at minimal cost. The material, coated with varnish, is reliable and durable, resistant to scratches, and can be easily wet cleaned. The only drawback of the technique is the need to contact artists or designers, since not every average person will be able to perform such creative work.
How does the process of decorating slopes with MDF panels take place?
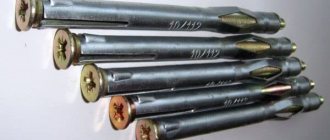
Step 1. First of all, you need to prepare all the tools. This includes a tape measure, a square, a pencil, a miter saw, a sharp knife, a hammer, masking tape, a screwdriver, and a drill. You also need fastening materials and polyurethane foam.
Tools required for work
Prices for popular models of screwdrivers
Screwdrivers
Step 2. Next you need to take measurements. The procedure is carried out after installing the door - you need to measure the width of the end part of the wall, as well as the width of the doorway. It is better to take measurements at several points vertically and horizontally.
Taking measurements
The width of the opening is measured
Step 3. Now you need to make markings on the MDF planks according to the obtained dimensions. The edge along which the cut will be made must be taped with masking tape. If this is not done, unsightly chips may appear on the panel during sawing.
Marking MDF panels
The edges of the cut are taped with masking tape
Step 4. Using a square, you need to draw an even cutting line.
The cutting line is drawn
Step 5. Using a miter saw, you need to cut the workpieces.
Blanks are being sawed
Step 6. Now you need to assemble the received additions into one design. Use a drill to drill holes for the screws. It is not recommended to screw them in directly with a screwdriver - the fasteners can damage the panels. The holes are made in several pieces at a distance of 10-15 cm from each other.
Assembly of accessories
Step 7. Next, the resulting box needs to be installed in the doorway. You need to install it evenly so that the gaps between the frame and the door are equal on all sides.
The box is installed in the openingStep 8. Now you should make about 10-12 spacer elements from a wooden block.
Manufacturing of spacer elements
Step 9. Spacer elements need to be hammered between the wall and the box. About 3-4 pieces are hammered vertically, and 2 pieces along the upper and lower borders of the box. The block should not stick out; it must be hammered in tightly.
Spacers get clogged
Step 10. Now you can install the platbands. First you need to attach the trim and measure the desired length.
Installation of platbands
Step 11. Next, you need to use a saw to cut the trim to measure at an angle of 45 degrees.
Trimming trims
Step 12. Before installing the platbands, the gaps between the wall and the box must be foamed with foam. It will help further secure the box and provide sound and heat insulation. Excess foam can be cut off with a knife after it hardens.
Gaps are filled with foam
Step 13. Next, you need to secure the vertical trims to the extensions using small decorative nails.
Vertical trims are nailed
Step 14. Now you need to measure and saw off the casing at the top and bottom, and then secure it with nails.
Platband is measured
Step 15. After the structure has been assembled, you need to fix it on the door frame with masking tape for about a couple of hours. Once the foam is completely dry, the tape can be removed.
The structure is fixed with masking tape
Video - Finishing narrow slopes
After the main work on finishing the slopes has been completed, you can begin additional decoration. If they were plastered or decorated with plasterboard, then there is a lot of room for creativity. You can cover the slopes with paint, decorative plaster, wallpaper, draw patterns, attach laminate, stone, tiles and use other materials. The main thing is that they fit the overall style of the interior and meet all the wishes of the home owner.
Briefly about the main thing
To improve the interior of your front door, you don’t have to spend a lot of money and turn to professionals. Every home craftsman, with basic experience in finishing work and a set of standard tools, can do all the work with his own hands. The most popular types of finishing are painting, upholstery, carriage binding, hard paneling and decoupage. For each type of decor, preparatory work should be carried out and all points of the technological map must be consistently completed.
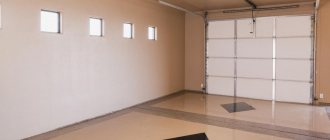
Peculiarities
After installing the door, you want to relax, but the most important stage is just ahead. After installing the product in the opening, it turns out that the door slopes look, to say the least, ugly, and can spoil the first impression and the joy of replacing the door. A completely reasonable question arises: what can be used to cover the walls to make them look attractive.
The most popular options are to plaster and then paint or cover the space with laminate. Both options are practical, but when working with laminate you will have to do lathing. If you have absolutely no experience in carrying out construction work and want to spend a small amount, then plaster remains the most attractive option.
There are several reasons why you should choose plastering walls. Among the main advantages:
- there is no need to make a lath, which on interior doors will take up part of the space in the passage;
- there is no need to involve specialists in the work;
- low cost of material;
- it takes half as much time as in any other case when designing slopes.
But this method also has disadvantages that are worth knowing about:
- it is necessary to additionally coat the slopes with paint;
- from an aesthetic point of view, not the best option.
Working with laminate requires not only experience, but also patience. Creating a sheathing takes more time, additional tools will be required:
- hammer;
- glue;
- screwdriver
Colors
Slopes are a small detail that can either support the style in the interior or completely break out of it.
An inappropriate color of decoration will become an element that violates the integrity of the overall picture, so it is important to choose the right color in accordance with the design of the door and the decoration of the walls, floor and ceiling in indoors
The color of the slopes directly depends on the selected material:
Tree and its derivatives. This group includes all materials in the production of which wood was used in one way or another. These include classic solid wood panels, lining, and all slabs pressed from chips and adhesives, veneer, and laminate. Accordingly, the color palette is varied, but does not go beyond natural colors: pine, spruce, poplar, ash, bleached oak, stained oak, pink oak, light walnut, medium walnut, dark walnut, red maple, mahogany, antique pine, Douglas . Chic colors are collected in a dark palette of natural and synthetic origin: cherry, mahogany, wenge, chocolate, teak, Indiana, Macassar, Locarno apple.
Beautiful design options
The finishing of slopes in a standard apartment, in a panel house or in a private house has the right to be original. Slopes of small width are difficult to make non-trivial. Classic extensions are best suited for them. But even in this case, there are several design techniques that can add variety.
First of all, it is the use of extensions that match the color of the door, which makes the structure seamless. In the second case, a play on contrasts is used, when the finishing of the extensions is radically different from the interior finishing of the door panel. This technique looks ideal using contrasting light and dark colors.
A rarely used but interesting technique is to decorate the slopes with mirror and reflective materials in the form of a mosaic. This visually “stretches” the doorway in height and width
You can focus attention on the slopes and openings using stone or textured plaster. But the most popular type of finishing is stylizing the opening under an arch with extending the pattern beyond the edges of the slope