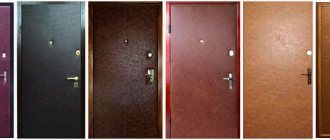
Compared to the advantages, there are also some disadvantages. For example, such doors do not have good soundproofing characteristics, since the leaf simply covers the visible opening. If these characteristics are not critical, then you can begin the process of selecting doors, purchasing them, and then installing them.
Sliding door system
Today, two mechanisms for implementing the function of sliding doors are known: suspended and rail. Each mechanism has both its advantages and disadvantages.
Rail mechanism
A supporting beam is used as a moving mechanism, to which a guide device in the form of the letter “P” is attached. This element is installed with the ribs up, which allows the rollers on which the door leaf is attached to move freely in it. In other words, it is a hanging door that slides on a track.
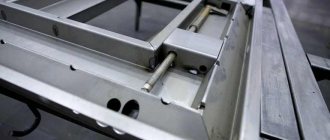
Basic design of sliding interior doors on the top rail
The installation of such doors does not involve the installation of any floor elements, so the floor remains flat and untouched. Bottom rollers are mounted on the right and left, which fit into grooves located in the lower part of the door leaf. This is necessary in order to fix the canvas in a vertical plane. It is believed that the installation of such a system is not difficult and is accessible to anyone who wishes to install it at home.
Installation includes several stages:
- The process of attaching the top rail.
- Attaching the rollers to the upper end of the web.
- Installation of the blade with rollers into the guide rail.
- Installation of the upper locking mechanism.
- Securing the lower guide roller.
Single-leaf interior sliding doors
As you can see from the steps, nothing complicated, you just need to have the desire and the tool, and an assistant will not hurt. Such a system practically does not block any noise, but the passage is closed.
Rail sliding doors
Such doors are characterized by the presence of upper and lower guide rails. Rollers are also mounted at the top and bottom. This mechanism design is characterized by increased stability, since it cannot deviate in the vertical plane.
Rail sliding doors
The presence of a guide rail in the floor is a negative point that affects the cleaning process, and not only that, since it interferes with free passage. The best option is to install such doors in a closet or dressing room. Since this system is more stable, the presence of children cannot lead to various injuries, since children test the strength of many interior elements.
Peculiarities
Installation of products will help solve the problem of lack of free space in the house. The mechanism opens easily and does not slam shut due to drafts. If everything is configured correctly, unnecessary noise is eliminated, the system operates in its calm rhythm, without unnecessary haste, the room has reliable sealing when the air conditioner is running. Materials such as MDF and wood, laminated chipboard and tempered glass, as well as a combination of your favorite ones are used in production options. Depending on this choice, the weight will change, which will certainly affect the design of the sliding mechanism and the required number of carriages with rollers. For example, a blade weighing 45 kg is provided with 2 carriages.
Options for using sliding systems
Sliding systems, regardless of design features, can be used as:
- For sliding doors, it is enough to fix the guides on the wall along which the door leaf moves.
Sliding doors. The guide is mounted on the wall above the correct opening - Cassette doors, when a special niche is made in the wall into which the door leaf is hidden when opened.
Cassette sliding interior door: the door is hidden in a wall niche - Cascade doors, which can consist of one fixed door and several movable ones, which, when opened, hide behind the fixed part.
Cascading sliding doors: one leaf pulls the other
Sliding doors are the simplest solution to the problem of occupied living space. These doors are easy to install yourself. It is very important that the preparatory work is of high quality: the wall must be vertically flat, as well as reliable, capable of withstanding additional load. The disadvantages have already been mentioned, so this system is not suitable for installation, for example, in an adult bedroom. The advantage of cassette doors is that when open they do not interfere with anyone or anything, since they are located in a niche. In addition, such doors have better sound insulation characteristics, since it is possible to stick a seal around the perimeter. The disadvantages, although not obvious, do exist: firstly, such doors can only be installed at the renovation stage, and secondly, they also take up useful space, since you have to install a false wall. Although, as mentioned above, not everyone can understand this, since the shortcomings are hidden.
Cascade doors are difficult to install due to the presence of several guide elements and leaves. Their installation requires precise calculations, so such a system will be expensive, and it is not possible to install it yourself without experience. As a rule, such doors are installed in luxury residential premises, when issues of saving money fade into the background.
Installation of a sliding system of 4 panels - standard option
Selection of materials
The reliability of the product will depend on the type of materials used. Aluminum, steel and plastic guides are the most famous in the furniture market.
In the first case, parts made of such metal will be useful if a weightless door leaf is being installed.
Steel and aluminum do not deform under load. This is a suitable option for arranging heavy structures.
Plastic is suitable for simple products.
The choice of door leaf material is also very important. The appointment will play a big role here.
Usually the cost of glass filling is quite high. The weight is significant, therefore, the installation of additional carriages will be required. To avoid distortions, you need a competent drawing. Such products are not the easiest to install. The same applies to solid wood.
If we consider panel materials such as chipboard, MDF and OSV, it turns out that these options are easier to install and their price is lower. Two carriages will be enough for each sash; weight is not a hindrance. If you need to restore a door leaf, you don’t have to contact a professional technician. It is quite possible to cope with this task on your own.
Subtleties of the technological stages of installation
Despite the presence of some nuances associated with the technology of installing sliding doors, it is quite possible to do without specialists, although their installation will take more time. The main thing is to adhere to the recommendations outlined in this article.
Sliding interior sliding doors
Despite the differences in some systems, the technological stages of installation are no different, as are the requirements for preparatory processes, which must ensure:
- Ideally even dimensions of the doorway, so as not to install too large a door leaf.
- The appropriate load-bearing capacity of the doorway, as well as the walls.
- Finishing the doorway, with wallpapering or installing decorative panels.
After all the preparatory work has been completed, you can begin the process of installing the door system. First of all, you can secure the rollers using some recommendations from sliding system manufacturers. Some manufacturers recommend making a slight deviation from the edge of the door leaf, while some recommend fastening without departing from the edge. It is this fastening system that will be discussed further. Therefore, the profile on which the rollers are installed is attached immediately, without departing from the edges of the door leaf.
Marking the installation location of the rollers
At this stage it is very important to center everything and also make sure that the distances are the same. Marks are made using a pencil or marker, after which holes are drilled at these points. In this case, you need to make sure that the diameters of the holes are 1 mm less than the thickness of the screws or self-tapping screws.
Securing the Roller Shoes
After drilling the holes, the profile plates are installed in place and secured with mounting screws, the length of which can be 70 mm or even more: the longer the mounting screws, the more reliable. At the drilling stage, it is also necessary to ensure that the holes are drilled smoothly, without distortions.
Installation of rollers
After this, you can begin installing the rollers themselves; for this, special plates are inserted into the profile, to which the rollers secured to a threaded pin are screwed.
Roller platforms are screwed onto the pins
It is advisable that handles, as well as specially designed locks, be installed at this stage. If all these elements were included in the sliding system kit, then it is quite possible that in place of these elements there are all the recesses and all the holes are drilled. As a rule, you have to do this yourself, especially if the canvas was purchased separately. To cut the lock yourself, you will have to be patient, use a pencil and a sharp tool.
Handle installation
After the door leaf is prepared, you should begin installing the guide system. The most important thing at this stage is to secure it at the required height. If rollers are already installed on the canvas, then the task is greatly simplified.
Often, the guide rail is attached to a wooden beam of the same length, with a cross-section of 5x7 cm. The dimensions of the guide profile are calculated from the condition of two dimensions of the width of the door leaf, with an addition of 5 cm at the edges. The wooden beam is also taken of the same size.
We measure the length of the carrier and mounting bar
To secure the guide to a wooden beam, it is laid on the floor, after which the guide is set. Fastening is carried out with self-tapping screws, no less than 70 mm long. The number of attachment points should be at least 3 - at the edges and in the middle: the more often, the better and more reliable, but within reasonable limits. Here a lot depends on the weight of the door leaf. Naturally, the lighter it is, the better for the entire system.
Attaching the guide to the beam
After this, you can take measurements to determine at what height the beam with the guide profile should be fixed. Before fastening, 4 holes are drilled in the horizontal plane of the beam.
The guide with the beam “rolls” onto the rollers on the door
The beam should be secured so that there is a gap of at least 10 mm between the floor and the canvas, especially if there is a floor covering. If you plan to lay laminate, linoleum or other coverings, then their thickness must be taken into account.
Trying it on to the doorway
During installation, such a sheet can deviate in the vertical plane, which significantly complicates the installation of the entire system. To prevent this from happening, the blade should be fixed with a wooden wedge, and there should be two wedges, near each roller.
We wedge the canvas
To mark the attachment points, the timber is applied to the wall, strictly horizontally, which is controlled using a building level. The fastening points are also marked with a pencil or self-tapping screws, which are inserted into the holes, after which they are tapped with a hammer. As a result, marks remain on the wall where holes for fasteners are drilled. The best fastening option is anchor bolts, and even better, fastening using through bolts, which is the most reliable.
Transfer the marks to the wall using a thin drill
If the strength of the wall allows, then the system can be secured with dowels. As a rule, this is practiced if the wall is concrete (in panel houses).
If the wall is brick, it is better to drill through holes and secure the system with bolts, installing large diameter washers on the inside of the wall.
Attaching sliding doors to the wall
The system must include locking elements that are attached after the door leaf is installed. Before fastening them, it is necessary to check that the doors completely cover the doorway and, when opened, roll back to an acceptable distance.
Installing stoppers on sliding doors
After this, they begin to attach the flag rollers to the floor. It should fit into the groove cut into the bottom of the door leaf. It is necessary to ensure that the doors cannot deviate in the vertical plane.
Installing Flag Roller
First of all, the roller must be inserted into the groove with the door closed, after which, using a pencil, marks are made for the fasteners.
This is what the installed flag roller looks like with the doors open
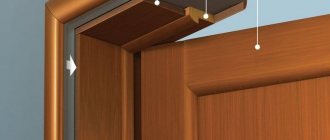
After installing the guide roller, we can safely say that the sliding doors are installed. All that remains is to test them for functionality and then cultivate them. For this purpose, a decorative overlay is used, with which the wooden beam is closed. This trim can be simply nailed or secured with screws, which is more functional. If you suddenly have to remove this cover, you won’t have to worry about breaking it. When installing the cover, you should make sure that all elements of the system are inaccessible to human eyes, otherwise you won’t get a beautiful interior.
The decorative overlay can be nailed directly to the beam
Video: a visual demonstration of the installation of sliding doors of such a system.
Installation of Sliding Doors interior doors
Cassette doors: installation rules
The installation steps for such a door are similar to the installation steps for conventional sliding doors, with one exception: at a distance of about 10 cm from the wall, it is necessary to mount a false wall to be able to form a niche. When making such a wall, you can use plasterboard as the basis of the material, since this material is the most technologically advanced, although you can use other building materials at your discretion.
The fact is that the main load will fall on the real wall, covered with a false wall. In this case, it is enough to use conventional profiles for installing drywall. When using other building materials, you should think about how and with what materials you will subsequently have to finish this wall.
Video: features of installing cassette doors.
Doors - compartment - pencil case (Installation features)
Measurements
When installing, it is important that measurements are taken accurately. If installation is carried out in a new building, it is worth considering how the finished floor will be located. This is taken into account in the calculations.
If you are making repairs in a residential building, not only the frame, but also the platbands are first removed. After the existing section of the wall has been cleaned, you have decided that you do not plan to strengthen or expand the walls, the next stage begins - choosing an installation method.
This will help not only to take correct measurements, but also to understand how to position the structure.
The threshold-free system has gained great popularity. Its advantages are undeniable compared to systems with a lower support.
Height adjustment
To attach a single-leaf system partition to the ceiling, two upper PU10 wheels must be installed in the upper running profile PU01. We fasten the profile to the ceiling with M 3.5x 51 self-tapping screws. After this, the assembled system is hung on the tetrahedral head of the PU-10 wheel screw.
In this position, the system is secured with a fixation nut to the bracket. Manipulation is carried out by tightening it to the surface of the bracket.
Debugging is performed by rotating the height adjustment bushing of the partition. Afterwards, the wheel is secured with a nut to the bracket, while the partition bushing is held in height.
How is the opening made?
We decide what the edge trim will look like. It is worth installing platbands or extensions. The choice depends only on your preferences. It is better if the guides are closed. At this stage, you should not have any problems, since there is a wide selection of decorative strips on the construction market. When purchasing accessories, there is always the best option for any room interior. Now you know what the instructions for installing interior sliding doors are.
Installation of the structure
Before installing the pencil case, you need to determine the width of the door opening, which depends on the type of sliding doors. Designs with one door are usually installed in small bedrooms, kitchens and bathrooms. A block of several doors fits perfectly into spacious rooms. They consist of two combined single-leaf systems.
Stages of installation work:
- Determining the type of wall (load-bearing/non-load-bearing), checking for the presence of internal wiring and pipes.
- Selecting the type of sliding mechanism (rails at both ends or only the top type of fastening).
- Installation of the structure inside or along the partition.
- Closing the pencil case with subsequent masking of the installation area.
Important nuance! Installation of cassettes is possible only after completion of finishing work on the floor surface, taking into account the thickness of the future coating.
Main advantages and disadvantages
When deciding to install a sliding door in a pencil case, you need to weigh all the pros and cons of the design. an advantage :
- Space saving. The absence of a swing sash eliminates the formation of a dead zone. You can place furniture close to the wall and it will not interfere with the opening of the canvas.
- Reduces the likelihood of injury. A person walking in the dark sometimes hits the end of an open swing door. The sensations are unpleasant and sometimes dangerous. No matter how hard you try, you won’t be able to hit the end of the sliding panel.
- Increased service life. Due to the rollers, the weight of the door leaf is evenly distributed across the frame lintels. The box becomes more resistant to loosening and does not warp. The linen hidden inside the pencil case is protected from pets and will not be smeared by children.
- The sliding design visually expands the space , creates a zoning effect, and emphasizes the modern style of the interior.
The disadvantage is the high cost . A high-quality roller mechanism is expensive. Additionally, the costs of purchasing or manufacturing a pencil case are taken into account. It is difficult to install a cassette for a sliding door yourself. If you have no experience, you will have to hire specialists.
Another disadvantage is the reduction in sound insulation . There is a gap at the bottom and top of the end of the door leaf. It will not be possible to ensure silence in the room. Additionally, odors will penetrate from the kitchen through the gaps. The problem will have to be solved by installing a powerful hood.
Connecting bracket PU09
We fasten the PU09 bracket into the groove of the KR300N handle with a standard self-tapping screw in the upper part until final fixation. This must be done in such a way that the groove for the wheel screw head on the top shelf of the PU09 bracket faces the inner surface of the door. We perform a similar action on the opposite side.
We secure the installed parts to the other two corner joints with M6X30 self-tapping screws, using shock absorbers.
What other points does the installation instruction for interior compartment doors include?
Now you need to make adjustments by eliminating the gap between the lower roller and the partition. There is play between these elements. To make adjustments, you need to place the tip of a flat-head screwdriver into the end of the wheel plate, directly opposite the elliptical groove.
Now, using a hammer, rotate the roller body relative to the central hole. Lightly tapping with the tool removes the gap. Remove the partition again.
We tighten the screws until they stop to firmly fix the lower wheel.
We put the structure in place. A double-leaf partition is installed in the same way.