Master class: screen made of plastic pipes
We introduce you to a master class on making a screen with your own hands from plastic pipes.
What we need for this design:
- plastic pipes;
- connecting corners (4 pcs. for each frame);
- hacksaw;
- soldering iron or glue;
- loops;
- fabric and machine;
- dye.
The work progress is as follows:
1. Align the pipes so that they are the same length. If you plan to make three frames, you will need to make 6 long and 6 short elements.
2. Paint the blanks with acrylic.
3. We connect the elements with a soldering iron or glue.
4. We drape the frames. To do this, we measure the length and width of the sashes, and sew the material according to these parameters. Its edges can be secured with Velcro or buttons.
5. To make the sashes fold, we fasten them with hinges.
6. You can attach caps to the legs to prevent damage to the floor.
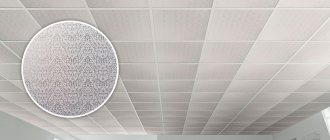
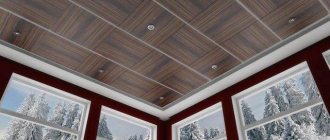
Laminate
Laminate strips can be laid both across and along the ends of the doorway.
When laying transversely, it is enough to fasten the first lamella to the frame from below along the edges. Subsequent elements are installed with a snap lock. The last lamella must be secured.
All intermediate ones can be secured, for example, through one or even two elements. Along the upper horizontal slope, all laminate strips must be secured at the edges. The longitudinal strips of the laminate are attached in at least three places: along the edges and in the center.
Calculation of the required amount of material
Even such a simple design as a greenhouse requires precise calculations. The main materials for this structure will be polypropylene pipes, as well as polyethylene film or cellular polycarbonate plates. Today on the Internet there are many online calculators with which you can easily, quickly, but not entirely accurately calculate the required configurations of figures and volumes of material. However, if you want to get exact dimensions, and therefore not spend extra money, you can carry out simple calculations yourself. All you need to do is remember one of the geometry lessons from the 7th grade textbook or use the instructions below. The most important thing in this situation will be to determine the exact number of pipes needed to create the arcs of the arched structure.
To do this, we will need the Pythagorean theorem and Huygens’ formula for calculating the length of the arc:
- From previously prepared drawings and diagrams we take the future width of the structure and its height.
This is enough to make the necessary calculations. The diagram below shows an arc in which two right triangles are placed. In them we do not know the meaning of the hypotenuse - the side indicated by the letter m. To determine it, we apply the Pythagorean theorem. It looks like this: m = √b²+a²=√220²+150²=√70900=266.27. The length of the greenhouse arc is calculated using simple formulas from a school textbook - Now let's use Huygens' formula, which looks like this: L≈2∙m+(2∙mM)/3. Substituting the values, we get the exact length of one arc required for our design: L≈2∙266.27+(2∙266.27–300)/3 = 532.54+(532.54–300)/3 = 532, 54+232.54/3 = 532.54+77.51=610.05 cm.
- Find the total length of the polypropylene pipes of all arcs in the structure. To do this, you need to multiply the length of one arc by their number in the frame. In total we will have 6 arcs every 90 cm. Substitute the values: 610.05∙6=3,660.3 cm.
- To the obtained value we add the length of the transverse tubes to strengthen the frame. Since the greenhouse has a length of 600 cm, and three pipes are needed, an additional 600∙3=1800 cm of pipe will be required. Then the total amount of polypropylene will be equal to 1,800 + 3,660.3 = 5,460.3 cm.
- We determine the area of polycarbonate sheets to cover the entire structure. We multiply the length of the arc by the length of the structure: 610.05∙600=366,030 cm2=36.6 m2. In the retail network you can buy standard polycarbonate sheets measuring 2.1 x 6 m (area 12.6 m2). Our greenhouse will require three such sheets.
Required Tools
To build an arched greenhouse structure made of polypropylene pipes, you cannot do without using the following tools:
- Bayonet and shovel.
- Hacksaws or grinders.
- File.
- A sharp knife.
- Blowtorch.
- Electric drill.
- Screwdriver.
- Hammer or sledgehammer.
Disadvantages of cladding
It is not recommended to sheathe the external surface that faces directly onto the street. If you have a metal door installed, then powder coating is more suitable for this purpose.
Do not maintain the cladding using abrasives, chemicals or use mechanical force.
This finish should not be used in rooms with high humidity. The material may swell.
If the surface has a varnish coating, it must be renewed periodically.
Finishing doors with MDF panels can be done either by professionals or independently.
Watch a video on the topic:
If you decide to do the cladding yourself, then you need to prepare tools, purchase materials and carry out the cladding following the installation technology.
Materials for work:
- Anti-corrosion agents (when installing linings on a metal surface);
- Self-tapping screws or liquid nails;
- Decorative corner;
- End profile;
- MDF panels;
- Wooden slats at least 3 cm wide and about 1 cm thick.
Plastic pipe connections
You can often hear that plastic pipes are construction toys for adults. If you learn how to correctly assemble the parts of this construction set, you can make almost anything!
As already written above, it is generally best to use PVC pipes for crafts. Their price-quality ratio is optimal today.
Plastic pipes can be connected into a detachable or permanent connection, it all depends on your needs. Another option is to heat the pipe in a certain place with a hairdryer and bend it as needed for your design, that is, in fact, do without connections at all.
How to choose which screen to make
The design of the screen, its shape and color can significantly improve or, conversely, ruin the appearance and ergonomics of your bathtub.
Pay careful attention to the choice of design and color:
- a room decorated in dark colors is visually smaller than a light one;
- matte partitions look more massive than transparent ones;
- bright designs and large patterns quickly become boring and difficult to combine with the rest of the decoration.
To install a screen on a bathtub, you do not need the skills of a professional finisher or plumber. If you doubt your abilities, give up glass. It is easier to work with plastic: it does not require special tools for processing (you can cut the canvas with a stationery knife) and will not crack at the slightest blow.
Examples in the interior
The closet in the restroom can be made in any style, have a variety of shapes, colors, and be decorated with unusual patterns or mosaics.
A wall cabinet above the installation will make the room spacious and comfortable.
Using an original product of an unusual shape or color will make the room more interesting.
The usual color scheme can be diluted with a bright spot by hanging interesting shelves in a niche or along the wall.
A mirrored cabinet will visually enlarge the room. This will eliminate the need to buy a separate mirror.
A tall white cabinet will add freshness to the design and complement the chosen style.
To learn how to make a closet in the toilet with your own hands, see the following video.
Step by step lesson #3
You will need:
- Wooden boards (choose the sizes yourself to suit your interior)
- Sanding paper
- Dye
- Hand saw or setting machine
- Screwdriver
- Cutter
- Electric drill
- Screws
- Loops (you will need 6 small loops).
Material:
- Calculate the required amount of fabric based on the size of your screen, make a small reserve for ties.
- Boards for the screen frame (in order to avoid tears and tension in the fabric, add a little)
- 16 ties, length 36 cm, width at your discretion. You can use the remaining fabric or purchase special ribbons, laces, and ties.
- Threads of a suitable color, scissors, sewing machine.
Blanks
As a result, you should end up with 8 boards for the frame (8 for vertical supports and 8 for horizontal ones). Measure, mark and cut the required number of parts.
Cut the fabric into 4 pieces of the size you need, turn it wrong side up, iron and finish all edges. If the fabric has to be folded in half (the edges are unraveling), then add the appropriate addition to the measurements.
If you are using leftover fabric for ties, cut 16 strips, iron the edges and stitch.
Assembly!
Start by making "pockets" with a cutter, two at each end of the bottom (four holes total). Once all the holes are done, sand all the recesses, cuts and the rest of the surface. Then apply paint.
After drying, you can assemble the structure. Place the long pieces on the floor (with the connection holes facing up). Make sure the parts are level and screw them on. Secure so that the parts do not move while screwing. Repeat the same on the other side. Collect 4 panels.
Connect the panels with loops. Leave enough space between the edges of the screen so that it closes smoothly. Fasten the loops as follows - the two side parts of the loop open back, and the central part opens forward. Secure the loops by retreating 25 cm from the top and bottom.
Make sure all holes are on the back side.
Final stage! We fix the material.
Secure the ties a short distance from the outer edge. 8 ties at the top and 6 at the bottom.
Measure and pin to all four panels of ties. Sew securely along the edge.
Door assembly
Depending on what material the lamellas are chosen from for installing the sliding door compartment, the assembly process may vary.
Scheme for assembling an accordion door
PVC panels
To assemble the PVC construction sashes, you need to prepare all the included elements. The technology for assembling PVC lamellas is as follows:
- First, each plastic lamella is connected to each other. The connection is identical both in one leaf and in all leaves combined. Each lamella has grooves into which it is necessary to insert the same grooves of the next lamella. Sometimes the technology is such that the lamellas are connected to each other by attaching them to each other using a jumper (gasket).
- When the required number of lamellas are assembled into a single structure, you need to create an accordion shape. To do this, the required number of parts are shifted towards each other, and the first lamella is connected to the last one.
- Afterwards, rollers are attached to the upper part of the structure and the door leaf can be considered fully prepared for installation on the profiles in the opening.
Installing the accordion door into the guides
Watch the video for the process of installing an accordion door made of PVC panels.
MDF panels
- The first stage of assembly, namely connecting the lamellas to each other, is usually identical to the process of assembling PVC panels.
- Creating the required accordion shape is usually done by connecting the required number of lamellas to each other using an axis.
The axis is fixed on the grooves of each lamella from the block, providing tightening and compression into the desired shape when the structure is opened. The process of assembling an accordion door from MDF panels
Door portal finishing
To minimize heat loss through the doorway, you should take the most responsible approach to sealing it. The main role in achieving this result is played by the finishing of the entrance door slopes, which are subject to cladding after completion of the main installation work.
There are several basic options for finishing front door jambs. Among the main ones, plastering, the use of MDF panels, installation of gypsum boards with subsequent painting, and installation of laminate should be highlighted. The first step is to level the slopes with plaster or using plasterboard sheets. The first option is more labor-intensive. To plaster the slopes, it will be necessary to prepare a cement-sand mixture, and also use special paint corners for better leveling.
The space between the corners must be filled with mortar and the surface carefully smoothed using a spatula. After the plaster has dried, you can continue finishing the slopes with any material. In addition to the described method, you can use gypsum boards for cladding. They must be cut in advance into pieces of the required size. To secure gypsum plaster boards, a frame or frameless method is used. In the second case, an adhesive mixture is used. Let's take a closer look at some finishing options.
Types of screens and their purpose
The design of the future partition completely depends on the functions that it will perform and on the time available for the implementation of ideas.
Depending on the purpose, screens can perform the following functions:
- decorative - a partition is used to decorate the interior of a room, being an artistically designed object;
- division of space - a screen visually divides the room into zones, which is often used by designers in large rooms;
- implementation of creative ideas - a small screen made of pipes acts as theatrical equipment when performances are staged at home.
The size of the future product is also important for the project, so you should immediately decide on its function. Most often, partitions are made from plastic for a kindergarten group, for playing tabletop puppet theater, for fulfilling household needs, for zoning a one-room apartment, trying to separate an office from a bedroom or living room.
And also, this is a favorite craft of creative and creative craftswomen who prefer to make an unusual and completely unique thing with their own hands.
In principle, it is not at all difficult to buy a screen for every taste and size - manufacturers offer a huge range of different purposes from a wide variety of materials.
Ready-made solutions offered by art studios are not very expensive. Therefore, it is much more interesting to build a partition yourself. Moreover, there are always improvised materials at hand that will work, you just need to show your imagination.
You should immediately think about the design - mobile (on wheels), portable or stationary partition
It’s also important whether it folds or not
All these points need to be carefully considered, because the project of the future homemade screen depends on them.
Decoration
One of the options for decorating furniture made from pipes is to use different colors of the material. A table with blue legs will become a bright element in the room. Products come in different colors: white, black, blue, blue, yellow. Connecting elements also come in different shades. Thus, the pipes will be one color, and the fasteners will be another. Combinations of white and blue or black and red look beautiful.
When it comes to armchairs and chairs, they are decorated with decorative pillows. The foam lining on the back and seat is covered with a beautiful bright fabric. Decorative pillows decorate the product, making it cozy, comfortable, and original. They come with embroidery, buttons or tassels. The color range of pillows is varied. When choosing it, it is necessary to take into account the overall design of the entire room.
Children's furniture should be interesting and colorful. It is recommended to cover the chair or high chair with durable fabric with a bright pattern. It could be a cartoon character, toy cars, dolls, stars and much more.
Pay special attention to furniture made from PVC pipes for children; it must be safe, without sharp elements. Otherwise, babies may get hurt
Wall shelves in the interior - which style to choose? (70 design photos)
Everyone dreams of their own corner. Having a dacha or your own room is already a great achievement.
After they appear, you want to decorate them with something: furniture, rugs or wall shelves.
You can make the shelves yourself, and it’s not at all difficult. For this you only need boards and fasteners. Instead of fasteners, you can use a simple rope.
Thread it through the hole in the shelf itself, tie a large knot and attach it to the hook.
One of the advantages of wall shelves is that they will be appropriate in different interiors. For example:
In the kitchen, shelves can be used to display decorative dishes or, more functionally, it will be more functional if you put various cans of cereals or fruits on them. In the hallway you can line the shelves with various types of cosmetics. In the corridor. The corridor itself is not very lit
Therefore, you can place various lamps on the shelves that will attract special attention. Place wall-mounted bookshelves in the bedroom. In your personal account, you can place literature, a couple of certificates or cups on such shelves. This will help create a work environment. If you have a library, then a very good option would be to fill the wall shelves with books. And in the living room you can dream up
Here on the shelves you can place everything your heart desires.
Related article: Installing a chimney through a wall in a wooden house
Manufacturing and assembly process
Armchair
An original way to use plastic pipes is to make a chair out of them. There are many options for making it. It all depends on the desire, capabilities and imagination of the master. Plastic pipelines can become a material for making a chair. You can make it using PVC pipes, a knife and glue.
To get an unusual chair, you need to do the following:
- First, cut pieces of different lengths. The main thing is that the longest segments should be the same length. They will act as supports;
- long ones will be needed for the backrest and armrests;
- Then the segments are glued together so that the surface of the armrests and backrest is at the same level. Towards the bottom, the length of the segments changes.
Thus, we get an interesting chair that will decorate any room in the house. To make it even more comfortable, pillows are placed on it or covered with foam fabric. You can have a good time in such a chair, read a book, watch TV.
The parts under the letter "A" determine the width and depth of the seat. The length of the pipes “B” determines the height of the seat from the ground. Details under the number “C” are the height of the armrests, and under the number “D” the height of the backrest.
Bed
Using the method described above, a table and a bed are made. The different sections are glued together to create the base of the bed. On top of it you need to put a comfortable mattress, pillows, and blanket. This is quite a suitable place to sleep and relax.
In addition, cribs are made from this material. To do this, you need to study diagrams and drawings. Then prepare the required size pieces. They are connected using fittings. If you fasten the parts together with glue, they will be very strong and durable. Without the use of glue, the structure will be collapsible and can be removed at any time. A crib for a baby will be unusual, reliable and durable. If there is more than one child in a family, you can make several beds.
Table
You can make such furniture from polypropylene pipes with your own hands, like a table. Its frame will be made of pipes, and the tabletop will be made of any other material. At the same time, it must be remembered that PVC pipes are not suitable for heavy loads. The lighter the countertop, the better.
The size of the tabletop in this case will be 91.5 x 203 cm. The following materials and tools will be needed:
- door leaf as a tabletop;
- fasteners for connecting parts;
- drill;
- saw.
You will also need pieces of size:
- 30 cm – 10 pcs;
- 7.5 cm – 5 pcs;
- 50 cm – 4 pcs;
- 75 cm – 4 pcs.
To assemble the frame, prepare:
- t-shaped fittings – 4 pcs;
- plugs for pipes, fittings – 10 pcs;
- 4-sided fitting – 4 pcs;
- cross fitting – 2 pcs.
According to the diagram, assemble the side elements first. Then proceed to the back of the table
Pay attention to the stability of the structure. All details must be the same. The last thing is to assemble all the elements into one design.
Inspect the product for any unevenness or sharp parts. Process everything carefully, glue the connections. This is a simple way to make a table
The last thing is to assemble all the elements into one structure. Inspect the product for any unevenness or sharp parts. Process everything carefully, glue the connections. This is a simple way to make a table.
Tool
Materials
Preparing parts of the required size
Connecting fragments
Fastening the table top
Rack
Armchairs, beds, tables - this is not the entire list of products that can be made from this material. Another useful interior item is a shelving unit. Design parameters can be very different. It all depends on the size of the room where it will be installed and the wishes of the master.
First of all, it is recommended to make a drawing, a diagram of the future product. Next, use them to prepare the required quantity of a certain size of parts. Connect everything together. The base of the shelves can be plywood or other material. The only thing we must not forget is that the materials are not suitable for heavy loads.
Such racks are used for flowers and toys in a children's room. Shelving can be installed in the garage. There, the products will be a great place to store tools and other things. You can place garden tools on the shelves: pots, tools. PVC products look unusual, neat, and do not require additional decoration. Plastic shelves and racks do not harm the health of others, they are durable and environmentally friendly.
Where to start
As in any other matter, the installation of plastic doors begins with preparatory work. The scope of this work directly depends on what you have at the start. Before installing a plastic door, you need to go through 3 preparatory stages:
- Take dimensions from the doorway and order a plastic door from the appropriate company;
- Dismantle the old door yourself;
- Prepare a doorway for a plastic door with your own hands.
Let's start by measuring the opening and ordering the doors. The easiest way out is to call a surveyor. A professional will take measurements and place your order. But it is not a fact that a professional will come, therefore, in order to avoid unpleasant mistakes, it is advisable to monitor the work of this person.
When measuring the opening, you need to start from a bare, unplastered wall
Doors should be installed on a clean opening, that is, without plaster, on brick, concrete or any other base. If the old doors have not yet been removed, then to get to this base you need to dismantle the platbands and partially knock down or remove the slopes.
The door frame cannot be placed close to the doorway. A gap of 10 - 20 mm is left around the perimeter of the box. If the doorway is bare, without old doors, then it is measured at 3 points horizontally and at 3 points vertically. After measuring, you need to start from the lowest value.
Next you need to measure the diagonals of the doorway. If the diagonals are different, then the doorway is skewed. The skew is not taken into account during measurements; this gap will then be filled with foam, but first you need to take a plumb line and find out the scale of the skew.
Remember! The dimensions of the doorway are calculated according to clear horizontals and verticals; unevenness and distortions of the walls are not taken into account.
It doesn’t matter which door was installed before, an entrance, interior or balcony plastic door is measured horizontally and vertically.
Dismantling old doors is also a responsible matter. There are often no problems with metal structures; the slopes are removed and the fastening anchors are unscrewed. If instead of anchors, steel spikes are driven into the wall, then they are simply cut off with a grinder with a metal disc, after which the frame is easily removed.
Removing the frame of old wooden doors is a little more difficult.
- First you need to remove the door panel;
- Then you tear off the platbands;
- Next, take a wood hacksaw and cut the lintel in the middle;
- Now you need to pry the edges of this lintel and try to remove them; it is most convenient to do this work with an ax;
- When the lintel is removed, pry it with an ax and pull out the side posts;
- Lastly, according to a similar scheme, the threshold, if any, is removed.
Do-it-yourself installation of metal-plastic doors involves dismantling old doors
Under no circumstances should a wooden box, or wood in general, be cut with a grinder; the tool’s disk will get stuck in the material and can burst at high speed, which will result in injury.
Preparing a doorway for the installation of metal-plastic doors is quite simple. If the walls are strong, then the plaster is completely removed from them, after which the base is covered with a complex primer with an antiseptic. If there are falling bricks, they need to be removed, the base cleaned and the block placed on a cement-sand mortar.
Almost bamboo screen
Bamboo stems undoubtedly look very impressive, but they also come at a price. However, there is a simple alternative available to almost everyone. These are long cardboard tubes (bushings, sleeves, spools). From them you can make your own fashionable interior decoration. To implement your plan, you need to prepare:
- cardboard tubes, their number (20-30 or more) depends on the size of the future screen;
- stationery knife;
- pencil, ruler;
- drill (awl);
- a skein of cord, preferably decorative;
- acrylic paint in cans of natural “bamboo-like” color - beige, marsh or light beige, gray-green, yellow-brown, khaki, etc.
The first stage is to give the pseudo-bamboo a natural, natural look and authentic color.
- All tubes are cut: they are made of different lengths to make such a fence look more interesting.
- Each “bamboo” element is painted separately. It is better to purchase several different shades in advance; the colors can be mixed so that all the “stems” are slightly different from each other.
- After the paint has dried, begin connecting the tubes. First, they retreat 150-200 mm from the bottom edge of each, then make through holes.
- Having finished working with the bottom row, they make a second one: this time the distance is set aside from the holes already made in the tubes.
- Thread a cord into both rows of the future fence. They try to connect all the pipes as tightly as possible. The rope is tied in such a way as to protect the screen from falling apart: for example, several knots are made.
Such a product weighs little, rolling it up and removing/moving it to another place is also not difficult, but a “hedge” that appears in a house can decorate almost any interior.
We make a screen with our own hands
If you are planning to make a simple version of the partition, then this can be done without difficulty. It is enough to purchase the necessary material, tools and think through the decorative details in advance.
Materials needed
What we will need:
- screwdriver, drill;
- screws;
- construction stapler;
- special varnish and paint;
- pieces of wood;
- material for sashes;
- furniture hinges;
- hacksaw;
- decoration of your choice.
Step-by-step frame production
How to make a screen with your own hands step by step:
1. First of all, we make the frame. To do this, we take measurements on the bars, then saw them and grind them.
2. Apply impregnation to the material and paint it in the desired color.
3. We attach the bars to each other with tenons or screws.
4. Apply a couple of layers of protective varnish.
5. We make the remaining sashes in the same way.
6. We connect the individual sashes using hinges.
Decoration
For complex structures, you can use glass or sizoflor. Working with such materials is not easy, so for the first time you should take a simpler option - this is fabric. You can choose any type of it, the main thing is that the color matches your interior.
Corner bookcase
An example with drawings on how to make a corner bookcase with open shelves with your own hands.
There is even a beautiful drawing included.
If you wish, you can change all the dimensions for your interior, simply maintaining the proportions according to your space needs.
This bookcase goes all the way to the ceiling, so leave room for a crown. It's not necessary, but many people like tall base moldings and a crown. If you plan to use them, add the trim height as well as the width of the face frame.
The diagrams show everything in great detail, just don’t forget to convert inches to centimeters (1 “is 2.54 cm).
And here you can see step-by-step photos of how to assemble a corner bookcase with your own hands using the drawings presented above.
Of course, this is an example for a specific interior, but the idea can be used for any room.
Corner bookcase drawing
Here is a drawing showing how to assemble a simple corner bookcase with your own hands. The diagram shows the design details in letters; here is a list of materials with dimensions.
A - 5 2×2 bars, 35 3/4" (91 cm) long, 2 pcs. - 4 1/2" (12 cm)B - 4 1×2 bars 30" long (76 cm), 2 pcs. — 18 1/4" (46 cm), 2 pcs. - 17 1/2" (45 cm) long frame C - 2 sheets of plywood 11" x32 3/4" (28 x 83 cm) D - 3 sheets of plywood - 31 1/2" x31 1/2" (81 x 81 cm ) E - 2 sheets of plywood - 32 1/4" x32 3/4" (82 x 83 cm) F - 1 piece of 3/4" plywood - 31 1/2" x31 1/2" (81 x 81 cm)
You can see the order of assembling the bookcase in the diagrams in the small photo gallery.
Photo source: howtospecialist.com/finishes/furniture/corner-bookcase-plans/
Structures for summer cottages and personal plots
You can make many interesting things from plastic pipes for your dacha or for the area of a country house.
Alcove
To create a gazebo, two long pieces are used. They are given an arched shape and fixed in the ground. The frame configuration is chosen in such a way that garden furniture fits. A dense fabric is stretched over the finished structure, which will protect from rain, wind and sun.
The simplest gazebo for a summer residenceSource yandex.net
Arched design
A garden arch made of polypropylene pipes looks impressive in any area. When creating it, one difficulty arises - some segments need to be bent. This can be done using a torch, but you need to work very carefully so as not to damage the product or get burned. The required section of the structure is heated until the material becomes pliable. The tube is given the required shape, which is fixed in a matter of seconds.
Two arched vaults are connected by crossbars. As a result, the structure will be filled with greenery as much as possible. Also an arch made of PVC pipes
must be securely fixed to the ground in order to withstand gusts of wind.
Example of a garden archSource tovary4you.ru
If you have no experience with heating devices, you can connect several sections to form a curved structure. In this case, the upper part of the product will resemble a polygon.
Plastic finish
A popular material, environmentally friendly, budget-friendly and easy to maintain. Manufacturers offer a wide color palette, which makes it easy to match the plastic to the texture of the door leaf. A square meter costs no more than 200 rubles. But the material is not particularly durable and does not fit every door.
The entrance door opening is lined with plastic according to the same principle as MDF: first the surface is prepared, then a sheathing of slats is attached, and then plastic panels are attached to it.
Video description
To make an arch made of plastic pipes as quickly as possible and with minimal effort, check out the following video:
Greenhouse
Such a structure can have any size and configuration. Moreover, it is suitable for growing any plants. Greenhouse construction technology:
- The area for placing the greenhouse is being marked.
- Pieces of reinforcement are installed along the long sides of the structure in increments of 40-70 cm. They should rise 50-80 cm above the ground surface.
- A tube is placed on the rod, which is given the appearance of an arc. It is fixed on the opposite side to the same piece of metal.
- Cross members are installed that act as stiffeners.
- The frame of the future door is formed from the same tubes.
- The greenhouse is covered on top with a transparent film or polycarbonate.
Fakes for the playground
Plastic tubes are an ideal material for creating playground items.
Gates
Creating such a craft takes little time and requires a minimum of finance. For gates, you can use sections of old pipes, which are connected according to a previously developed drawing. The mesh is attached to the finished structure and the product is ready for use. These goals are lightweight, so they are easy to carry around the football field.
A pair of gatesSource livemaster.ru
House
To make a house from plastic pipes for children, you will need a minimum of effort. A simple frame is formed in the shape of a cube with triangular elements on top for the roof slopes. The finished structure is sheathed with fabric to create walls and a roof. You also need to remember to leave holes for windows and doors.
The simplest version of a children's houseSource livemaster.ru
Mounting slopes on a frame
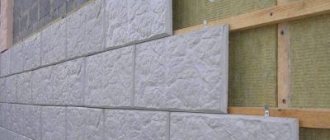
Even though the solution will not be used, the entire surface of the wall under the slope should still be primed. This will prevent it from crumbling over time. Next, parts are prepared for mounting the frame.
As a material for the frame, you can use wooden bars and slats, or a metal profile, which is used for the construction of plasterboard walls and ceilings.
Given the thickness of any of these materials, care should be taken to level the wall on which the frame will be mounted so that the frame elements fit snugly against the wall.
The frame elements should be secured using plastic dowels and impact screws of the required length.
Along the entire perimeter of the doorway, two slats or profiles are attached in parallel, placing them on both edges of the future slope. To strengthen the structure, jumpers are fixed between the main load-bearing elements. This is especially important at the corners between the sides of the doorway and the top.
Before sheathing the frame, you can just start laying the cable to the installation site of the switch.
Fastening the sheathing is slightly different for each type of material:
Video description
The following master class describes in detail all the stages of work that will help you create a very beautiful house made of polypropylene pipes for a child:
Manege
Creating a budget playpen from pipes is quite simple, since it has a simple design. First, the lower contour of the product is formed, periodically installing tees for mounting racks. The vertical sections are placed in increments of 10-15 cm. The fence is fixed at the top with the same rectangle with tees.
Scheme for creating a playpenSource retete-usoare.info
Ready-made playpen made of PVC pipesSource retete-usoare.info
Briefly about the main thing
Homemade products made from polypropylene pipes are inexpensive to make and require a minimum of skill and effort. Creative and useful products can be created using waste scraps left over from plumbing or sewer repairs.
Pipes make stylish decorative items, furniture, items for the garden, or items for the playground. They not only look beautiful, but also fulfill their intended purpose. All items made from pipes are durable, resistant to moisture and can be used both indoors and outdoors.
How to Make a Door From Plastic Panels
From plastic panels with your own hands
How to make a decorative screen with sliding doors from plastic panels with your own hands? It’s even painfully simple! Construction stores have long sold plastic panels of various colors and patterns. Who doesn't know? They are simply cut and installed. Often, many people cover the walls and ceiling with plastic panels in the bathroom, toilet or hallway with their own hands.
They also sell fittings for plastic panels, for example, as an ending or connecting element.
True, these panels have two huge drawbacks. They can smell unpleasant for some time and in the event of a fire (I don’t wish this on anyone) they emit toxic smoke.
I had a need to close the hot and cool water pipes in the toilet. There are meters on the pipes, which must be monitored every month to take readings, and also changed at the end of the inspection period.
Blinds
If you don’t want to make doors, there is another original option on how to hide the pipes without installing a frame, drilling into the walls, etc. - installing blinds.
Blinds as a screen that covers the pipes
You will have to order blinds, since the height of the space from the side of the bathroom to the floor is small. But it won't cost much. The height of the blinds is equal to the distance from the floor to the installation site. Since the blinds are lightweight, a solid frame is not needed. The hanging bar is made of wood and installed just below the level of the side using corners. The method of installing blinds is the same as when installing them on a window.
The option with blinds is affordable and easy to implement; in addition, the space under the bathroom is well ventilated, while maintaining aesthetics. The blinds do not interfere with coming close to the side to wash the bathtub or the child in it, without having to create intricate frames.
Idea for a screen under the bathroom