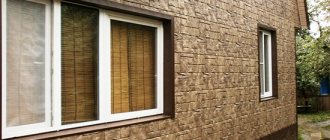
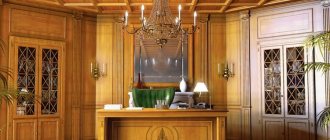
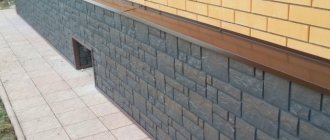
Wall decoration with plastic panels is widespread. After the prices for seamless panels, which make it possible to create a solid-looking plane, have dropped, we can talk about a “plastic wave” in interior decoration.
However, there is foam on the wave: at first glance there is an abundance of information about finishing plastic, but it is often distorted, and some essential points are obscured. Therefore, when deciding the question: “Maybe we should cover the walls with plastic panels?” It doesn't hurt to deal with them with an open mind.
Varieties of plastic panels
This finishing material is made of polyvinyl chloride, which is why they are often called PVC panels. This material, in a semi-liquid state, is extruded through a special mold, after which various patterns are applied to the panels. Often the design is already prepared and placed on a film that is simply glued to the front side of the panels. The surface can be either smooth or textured. Panels with a pattern retain an attractive appearance for a long time, but they are much more expensive compared to regular panels.
PVC wall panels with a pattern
There is another technology when the design is applied directly to the panels and covered with two layers of varnish. This type of panel does not have a long service life, since the quality of the pattern is lower.
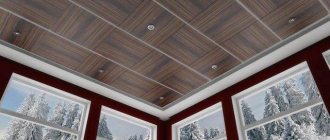
Ceiling and wall panels
There are panels both for finishing walls and for finishing ceilings, and they differ in the thickness of the panels themselves and the partitions in the panels. Those for ceilings are 2 times thinner. If you look at the cut of the panel, you can easily determine its purpose. In addition, the ceiling panels have a glossy surface, and the quality of the joints is such that they are practically invisible.
PVC ceiling panel
There is another type of plastic panels - this is plastic lining. The thickness of the panel is 10 mm, and its width is 10 cm, and it has shaped edges, so when upgrading the walls, you get a surface similar to that obtained when installing wooden lining, that is, relief.
Plastic lining panels
Wall panels come in different widths, but most often the manufacturer produces PVC panels with a width of 25 and 37 centimeters, with a length of 2.7 and 3 meters. As for the cost, it depends on various factors, since different manufacturers use different technologies.
PVC panels for walls – thin
There are various PVC panels, but those that consist of two layers of plastic connected by thin bridges have a number of disadvantages. The main drawback is their poor resistance to physical stress. If you press on the panel even slightly, a dent will appear, and if you press harder, you can push it through. This drawback always becomes the stumbling block because of which people refuse to use these types of panels.
PVC panel sectional view
Recently, a completely different type of PVC panels has appeared on the market, which do not have this drawback. Their thickness is only 3 mm and they have no cells, and a pattern is printed on the front side. The panels differ in size 950x480 mm, although the dimensions may be different. These panels also differ in their installation technology, since they are glued to a flat surface. Due to their thinness, the panels are easily cut with scissors, which simplifies the processing process. This type of panels takes up virtually no usable space, but they can only be glued to flat walls.
Flexible PVC panels
About the finishing profile
As you can see, with all the methods of assembling sheathing from plastic panels, it is the finishing profile that is the stumbling block. However, homemade Kulibins often solve this problem purely in Russian:
- The finishing profile is not mounted at all.
- After installing and attaching the last board, a piece of corner is cut to size - it is cheaper than a profile.
- One of the corner shelves is roughly cut with side cutters, metal scissors or pruning shears to a width of 5-10 mm.
- The resulting stub is simply glued onto the last board.
And it’s not observed that such a gag is inferior in appearance or durability to cladding made in accordance with all the rules and torments of technology.
Features of care
There is an opinion that plastic panels require special care. However, this has absolutely no basis - of all types of finishing materials, it is perhaps difficult to find a simpler and more “unpretentious” one. Regardless of whether they are in the hallway or on the loggia, it is enough to wash them a couple of times a year with any traditional dishwashing detergent or soap solution.
However, sometimes during service more serious contaminants appear on the surface - drawings made with felt-tip pens and markers, motor oil stains, tape residues, and others. To clean them, abrasive cleaning wipes will help, and if the marks are significant, then liquid cleaners such as Synto-Forte, Graffiti Flussig, etc.
There are several compounds that are not recommended for use when cleaning PVC panels:
- chlorine;
- degreasing compounds;
- alkaline soap;
- nail polish removers;
- acetone;
- polishes of all types.
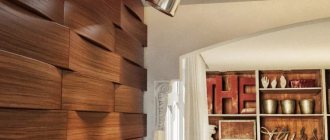
Tree
An excellent solution for those who value the environmental friendliness of the material, but it is worth remembering that wood requires special care so that the panels serve you as long as possible.
This type of coating will look quite organic in country or Provence style interiors. The panels will also look stylish in more modern styles - it all depends on the decor you choose.
Calculation of material requirements
There is no need to make any special calculations. You can determine the required amount of finishing material in one of two ways:
- by the total area of the wall;
- according to the size of the panels.
The first method is to determine the total area of the walls. To do this, their height and width are multiplied.
The most convenient option is to calculate the needs based on the dimensions of the panels. The facing material has the following standard dimensions: length - 3 m, width - 0.25 m. For example, if the bathroom is 2 m wide, then 8 panels (2 m 0.25 m) will be needed for renovation.
When calculating the number of panels, the area of the door and window openings and the space behind the bathtub installed flush against the wall are subtracted. In the process of work, the cladding can be damaged. For this reason, 3-4 more pieces need to be added to the estimated number of panels.
Plastic panels serve as a good alternative to tiles.
How to properly make sheathing for panels
Plastic wall cladding begins with the construction of a frame for the panels or wall sheathing. This will allow you to quickly replace, if necessary, plastic panels and securely fasten them.
For the sheathing the following are used:
- Wood blocks.
- Metal profile - less common.
In this case, small cells located behind the structure can be used for laying insulating materials. The sheathing is attached to the wall surface with clamps or self-tapping screws in dowels.
Lathing device for plastic panels
The fastening elements of the sheathing are installed in increments of up to 0.5 meters. The distance between the bars is chosen so that laying the insulating material is as simple as possible.
Fastening the slats
To secure plastic panels when finishing walls, you can use glue, screws or clamps. Both special PVC and liquid nails can be used as glue, but this method is only suitable for a smooth and even wall. Using glue, you can save a lot, because there is no need to attach the sheathing. The downside is that if the panel is damaged, it cannot be replaced.
A reliable and convenient method is to fasten plastic panels with self-tapping screws, especially since there is no need for the wall to be perfectly even. To reduce installation time, it is recommended to screw in the screws with a screwdriver. The disadvantage of this option is the need to install a wooden frame under self-tapping screws. You will need to set aside some time to prepare the wood base.
The easiest way is to use clamps, which are quickly and easily attached to the sheathing. They allow you to conveniently and efficiently fix the panels on the wall. The lathing can be made from a metal profile. If the lamella is damaged, it is possible to replace it with a new one at any time.
Brief characteristics
Before making a final decision, each developer must know all the objective parameters of the selected material, because this is the only way to be sure that during operation there will be no disappointment in the chosen finish. We will look at both the positive and negative sides of plastic panels, since some of them have a direct impact on installation technology.
Types of plastic panels
What elements are needed to install panels?
Before covering the walls with plastic panels, it is necessary to purchase additional moldings - fixing and at the same time decorative elements that give the cladding its final appearance. There are several types of profiles, shown in the photo.
- Starters.
- Finish.
- Guides: upper and lower. These are installation moldings that create a frame around the perimeter of the entire surface to be finished.
- Corner external. With its help, protruding corners of the room are formed.
- Corner internal, mounted along internal corners.
- Connecting. Designed for end connections of elements for combined finishing of panels of different colors.
- Skirting boards or fillets. Fixed with glue.
- Simple corners. Used for finishing corners, glued to the sheathing.
Installation diagram of plastic panels
The panels are attached to the wooden frame with staples and a construction stapler, and to the metal frame with self-tapping screws.
Tip: Polyvinyl chloride has a high coefficient of thermal expansion, which means that during installation, fastening points must be made with a small gap for elastic deformation of the plastic panel. At the same time, the staples allow the plastic to move, but the flea screws do not. In this case, you need to use thermal washers with self-tapping screws, consisting of an O-ring, a lid and a washer with a leg. There should be a gap of at least 1.5 millimeters between the wall of the hole in the plastic and the leg of the washer.
Before covering the walls with plastic panels, the video lesson will tell you the nuances of the work.
Preparation stage
Many home craftsmen are interested in how to cover uneven walls with plastic panels? This can be done as follows: after the calculations have been made, it is imperative to prepare the surface for PVC cladding. This can be done depending on the chosen method.
You need to do the following:
- Make calculations and take all dimensions.
- Then you should mark and cut the posts for the frame. It is recommended to number them in order.
- After this, you need to remove all excess from the walls. If there is any damage on the surface, it is recommended to putty it.
- Next, the surface must be coated with an antiseptic. To do this, you can use two in one, that is, a primer with additives against mold and mildew.
- The surface that will subsequently be covered with plastic panels must be leveled.
- If work will be carried out with wooden elements, then first of all it is recommended to impregnate them. And this can be done with the help of antifungal compounds.
Tools and accessories
It is necessary to prepare for working with PVC panels. As already mentioned, the use of this finishing material involves the use of professional tools, namely:
- hammer drill - will be needed when forming the frame;
- screwdriver - used for fixing panels to bars or metal profiles (a hammer drill can also handle this task, but it is quite heavy, so it will not be easy for a finisher with little experience to handle it);
- a jigsaw with small teeth or a circular saw;
- cowling with an angle of 90 and 45 g;
- stapler - used when installing wood sheathing;
- rubber mallet - required for removing jammed slabs; if such a procedure is carried out manually, then there is a high probability of breakage of the sheathing and the panel itself;
- spatula - it is used to bend the profile when you need to insert the very last panel. It is optimal to use a tool with a length of 80 to 120 cm.
Auxiliary tool:
- tape measure for taking measurements;
- pencil or marker - for making notes on panels;
- level - to measure deviations from the ideal coating geometry;
- square, moldings, clips, edging;
- elements for fastening (dowels, screws and clamps).
We install the sheathing ourselves
Work on the internal wall cladding begins with assembling the sheathing for the PVC panels. It is done very simply, anyone can assemble the sheathing with their own hands. The material from which it is made is wooden slats or metal profiles. The wall sheathing is attached using a self-tapping screw with a dowel, right through to the wall panel. Then all installed slats must be leveled so that the structure is level.
Wooden slats of 10x50 mm are suitable for the frame; they can also be used to level the surfaces of the walls; all wooden parts must be treated with an antiseptic.
Make the frame in increments of 30-50 centimeters, the design is quite simple and linear, there are no special tricks in it. It is necessary to make a frame along the entire wall; it is unacceptable for the ends of the PVC panels to hang in the air, they must be completely fixed. For insulation or additional insulation, the necessary material can be added to empty openings.
Bamboo
Suitable for you if you like ethnic style, for example, Chinese or African. Expensive and rarely found in interiors.
They will perfectly convey the atmosphere of the East in your home if you are a connoisseur of such decor.
How to cover walls with plastic panels
Wall covering can be done in three ways. With smooth walls, these panels can be installed with glue for PVC materials, universal glue or liquid nails. The disadvantage of this method is that during repairs these materials damage the walls and it is quite difficult to replace them.
The second method is to use self-tapping screws for fastening. To do this, a wooden frame is mounted on the walls in half-meter increments. This basis is measured by level and if there are errors, they are corrected immediately. Also, the wood and frame must be treated with antiseptic compounds.
The third method is to use metal guides on the wall and fasteners in the form of clips or clamps. The latter are mounted on metal guides and secure the panels. This method makes it possible, if necessary, to repair a separate section of the wall.
When the panels are positioned horizontally, the sheathing is carried out in the vertical direction. When the panels are arranged vertically, the guides are mounted horizontally. First, the upper part of the frame is mounted, and then the rest. Before installation, everything is measured and lines are drawn. Then the guides are placed and secured along them. When installed in a vertical direction, the frame is made from the corner of the room. The guides are secured with dowel nails or self-tapping screws.
The intermediate guides should be in the same plane as the main ones. If wiring is necessary, the cable is secured so that it does not touch the top of the frame. Holes for sockets and switches are made with a stationery knife. After installing the panels, protective boxes are inserted.
The panels are mounted from the far corner or from top to bottom. To create a neat and beautiful look, you can use plastic moldings for corners and edges.
The last panel is installed with special care and precision to ensure a smooth surface. If necessary, the panel can be cut to size
Useful article: Finishing house facades with building materials
The upper part of the wall under the ceiling is covered with ceiling plinth. Below, the plastic is also covered with a plastic plinth. This type of wall covering has many advantages and when renovating, many people use this material to decorate kitchens, baths, living rooms and hallways.
Covering walls with plastic panels with your own hands is a good way to carry out inexpensive wall cladding in a short time. Do the renovations in the apartment yourself, then you can realize any design ideas and create a cozy and harmonious atmosphere.
Installation of sheathing
The guides on which PVC panels for interior decoration are attached are installed perpendicular to the direction of installation of the sheathing. Between them there are intermediate bars/profiles, the distance between which is 500-600 mm. Before installation, markings are made.
A mandatory strip is installed at the bottom (closer to the floor) - it provides additional rigidity to the structure. The profile/beam should also be secured on top. This may be near the ceiling or below. It all depends on the level to which the cladding is carried out.
Paneling
Starting and finishing profiles are installed at the top and bottom, where each panel is inserted. The installation begins from the corner that first catches the eye when entering the room. Here the corner molding is installed (attached to the sheathing using the chosen method).
Then the panel is inserted with the side where the small fastening strip of the PVC panel is located. A large fastening strip is used for fastening to the sheathing.
Each subsequent PVC panel should fit as closely as possible to the previous one installed. It is recommended to use silicone sealant to seal the joints. It is applied to the side edge before installation.
The final stage
When covering the balcony with the main material is completed, you need to cover all the edges with moldings. These could be corner areas or areas where a material color transition is used.
Cutouts for switches and sockets are also made after finishing the balcony cladding. Special boxes are installed in the finished openings.
You just need to correctly calculate the amount of material and add a small margin to the resulting number, and also carefully mark the sheathing and the panels themselves. This will avoid wasting time and effort on dismantling an erroneously installed structure.
Finishing instructions
The installation process consists of several stages. To perform the finishing correctly, each of them must be followed. To get additional information, you can watch the proposed video, where you will see how walls are decorated with plastic panels by professional craftsmen.
Surface marking
To avoid distortions, fastening the sheathing should only be done level. You can save time on measuring each batten by marking the wall. At a height of 1–2 cm from the floor, mark a point with a pencil and draw a horizontal line from it using a level along the perimeter of the entire area for finishing. This will be the bottom row of the sheathing. We repeat the process similarly under the ceiling. Now, at a height of 40–50 cm from the bottom line, we place a beacon and repeat this until the very top. We draw parallel lines through the installed beacons and complete the marking.
Typically, plastic panels are attached perpendicularly, so the horizontal frame should be sheathed vertically. Otherwise, we do the opposite. To create such markings, you need to draw the first line in the corner between the ceiling and floor using a plumb line. The second angle is also marked, and lines are drawn in increments of 50 cm.
Installation of sheathing
When the sheathing is mounted from wooden beams, they should be primed with an antiseptic in advance. On the wall, along the marked lines, you need to drill holes for dowels using a hammer drill at a distance of 50 cm from each other. After this, you need to attach slats to the lines and secure them with self-tapping screws.
In uneven areas, you can place a wooden wedge under the sheathing. To hide the wiring under the trim, you need to take measurements and drill holes in a certain place. After this, the wires should be secured with clamps so that they are outside the plane of the sheathing.
Fastening plastic panels
Installation of the first lamella should be done in the most visible place: the far corner from the entrance. After making the necessary measurements, if necessary, you need to cut the length of the panel with a hacksaw. Having adjusted the size, you should insert it into the side molding on one side, and secure it to the sheathing on the other. The second panel needs to fit exactly into the groove of the first. Then it is pressed tightly and fixed with the frame slats. We install other plastic panels in the same way.
To achieve greater sealing, you can coat the side edges with a small layer of silicone. When inserting the last panel, cutting to width is most often required. To do this, you need to attach it to the wall, draw a cutting line and remove the excess with a hacksaw. Don't forget about switches and sockets. For them you need to cut holes with a sharp knife, and after installation is completed, these places should be covered with plastic boxes.
Installation of moldings
When finishing the process of decorating walls with plastic panels, it is important to ensure that the final walls are smooth, monolithic and without gaps at the seams. To do this, you need to cover all joints, corners and connections with plastic moldings.
They are designed to allow panel edges to be inserted on both sides. Thanks to this, the finish will look much more attractive.
It is also necessary to install decorative molding where the wall meets the ceiling. And around the perimeter of the floor you need to fix a plastic plinth. After this, you can enjoy the work you have done with your own hands.
Where to start construction
Let's start with the tools that are needed to get this job done:
- drill or hammer drill;
- construction stapler and staples for it;
- silicone sealant (matching the color of the panels or colorless);
- screws or dowels;
- level and roulette.
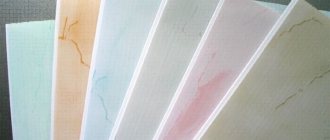
Now as for the plastic panels themselves. The modern building materials market will offer you not only different manufacturers and different quality of plastic panels, but a wide selection of colors (plain, with or without a pattern), imitation of natural materials, sizes and much more. Its popularity is explained primarily by its huge number of advantages.
- Firstly, it is its availability, because compared to other facing materials, plastic panels are relatively cheap, so everyone can purchase them.
- Secondly, ease of installation, which means that anyone, without exception, can carry out proper work with this material with their own hands. In addition, the panels can be placed vertically, horizontally, or diagonally, and they fit together perfectly, without seams.
- Thirdly, plastic has high moisture resistance, so it is often used in bathroom and balcony cladding.
- Fourthly, they are very practical to care for, that is, they can be washed and cleaned with any household detergents, without paying special attention to the composition and concentration.
- Well, fifthly, this is the durability of this material and its practicality.
First install the panel fastening elements. This is the final element, as well as an internal or external corner. If you are going to panel the entire wall up to the ceiling, then install a ceiling plinth.
We begin work on covering walls with plastic with our own hands with preparatory activities:
- we level the ceiling and walls, and then measure them;
- we buy the plastic itself, but it’s better with a reserve and taking into account the place where you are going to use it (hallway, balcony or other), as well as the interior of the room;
- guides and, if necessary, heat and sound insulating material.
Now let's move on to working directly with the sheathing and panels. You need to know that the installation of plastic panels can be carried out in two ways: frameless and framed.
The latter option is used much more often, since the plastic cladding is made just for the frame. Well, the frameless version is used mainly for covering balconies with plastic, so as not to reduce the already insufficient space.
Glass
There is no need to be afraid of the fragility of this material, because modern technologies make it possible to produce panels of special strength.
Glass coating has only recently begun to be used for decoration, so it looks unusual and new, especially in minimalist and high-tech interiors.
In addition, glass panels are resistant to moisture or high temperatures, which is ideal for decorating the kitchen area, bathroom and more.
In the kitchen you can use a glass panel with a pattern; some designers use it as an apron.
Material selection
Naturally, you want to quickly cover the walls with plastic panels, but you need to select them first. And this should be approached with the utmost care. After all, the final result depends on the correct choice. The following rules are taken into account:
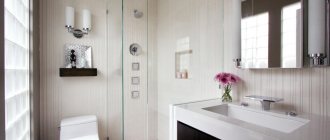
- For bathrooms and shower rooms, as well as for all types of wet rooms, panels that are moisture resistant and have no relief are suitable.
- For corridors and balconies (loggias), it is better to choose products that are resistant to mechanical damage.
- Wall decoration with wall panels in living rooms is carried out with PVC coatings, which have different reliefs and patterns. They also imitate natural materials.
Plastic lining has good moisture resistance, so it is often used for finishing bathrooms.
When purchasing, you need to pay attention to the following indicators:
Appearance of the packaging. It must be intact, without damage
It is important to choose material from the same batch. Number of cells. The bigger, the better
You can also navigate by weight. Light products are a sign of deficiency. Lock. To do this, check the two selected panels for connection - it must be reliable. Price. Products that are too cheap are most likely a fake.
Covering walls with panels requires preliminary calculations. They concern all stages of work. This helps to avoid problems in the future, as well as significantly save money and time.
- The location of the profiles is taken into account. It can be vertical or horizontal. This depends on the installation of plastic panels. In any case, they are always perpendicular to the sheathing posts.
- The distance between them is also taken into account, which is 30 - 45 cm. From everything, the required number of frame parts is calculated (+ two profiles at the edges of the wall).
- The number of dowel nails is taken into account in increments of 35-50 cm.
- There are 20-25 clasps per square meter.
- The size of the wall and the selected panel is measured. One indicator is divided by the other, and the required amount is obtained.
- The material in the form of tiles is calculated based on square meters.
This group includes all other parts and moldings. For calculations, measure the entire perimeter of the room. The number of external and internal corners is taken into account.
Additional elements that may be useful when decorating walls with plastic panels
On a note! All calculations are made with a margin of 10%. Such a reserve is due to the fact that various damage to products or other unforeseen circumstances are possible. Door and window openings are also taken into account.
Chipboard
They are made from wood chips and are very cheap. Like many types of panels, sound insulation can be added.
One of the most significant disadvantages is the harmful and not environmentally friendly composition, as well as susceptibility to deterioration from steam, moisture or mechanical stress. In addition, such panels are quite heavy, so installing them will not be easy.
General recommendations for working with polyvinyl chloride panels
Use the following recommendations for comfortable work:
- Before starting work, let the PVC panels lie in the room for at least 2 hours.
- Finish the walls only after the floor and ceiling are done.
- Make removable panels in the places where communications are located.
- Draw the electrical diagram for the room in advance and prepare sheets of PVC panels: cut holes according to the location of the fittings in the diagram.
The use of PVC panels greatly reduces time and material costs during repairs. You can install plastic sheets yourself. At the same time, the appearance and quality of work will not be affected: plastic sheets are so easy to install that even a novice in repairs can handle them.
Mirror
Such panels will help visually expand the room and make it larger. This will also help increase the amount of light in the room.
Due to the fact that the panels are made using different technologies, they can be made on the basis of acrylic, which gives it flexibility, allowing you to decorate even rooms of complex shapes and formats.
How to install a frame base
You should start by installing the frame (sheathing).
First of all, you need to purchase the guides that are needed for the sheathing.
It is necessary to pay special attention to the quality of installation, or more precisely, to the evenness of the installed panels. Guides are made from two main types of material - wood and metal; plastic guides have recently appeared on the market, but this is still rare
Guides are made from two main types of material - wood and metal; plastic guides have recently appeared on the market, but this is still rare.
If you choose wooden slats, then it must be a well-dried material with dimensions of at least 50 mm in width and thickness of at least 20-22 mm.
We determine the length based on the height of the room, but take a few centimeters in reserve, since the ceiling may not be perfectly flat and it is easier to trim off the excess than to make it short.
Metal guides are of standard sizes and experts still recommend using them.
The sheathing is installed based on how the panels will be located. Let's consider the most common method of placement - vertically.
In this case, we place the guides horizontally - the topmost and bottom profiles, which we fasten with dowels or self-tapping screws and align strictly according to the level. Next, we attach the guides between them (intermediate) at a distance of no more than 50 cm.
In the event that the wall being finished does not complete the cladding process, then it makes sense to install internal or external corner molding in its corner, everything will depend on the corner of the room itself.
Also, when you install plastic panels with your own hands, you will come across the concept of a profile (sometimes called molding) - these are wall finishing elements that greatly facilitate the work, and it is on them that the panels will be attached.
For example, the starting profile is used to determine the starting point for all finishing work; it is attached first.
The finishing profile is installed before the very last panel. External corner profile is used for covering areas such as windows, doors and niches. Internal profile - in all corners inside the room. Docking - when the length of the panel is not enough and you need to add another one, or if you are using a design solution and you need to build a mirror or other object into the wall.
Slopes
Cladding slopes is a real headache for plastic finishers. “Blunt” angles are not produced, and if they were, where would you get slopes for them with precisely maintained angles?
Do-it-yourselfers and professionals offer many ways to cover a slope with plastic, but they all boil down to making the angle of the slope straight. However, SNiP and sanitary rules clearly and unambiguously say: the slope must have the so-called. dawn of the slope, expand inward.
Meanwhile, a very simple method of decorating slopes with plastic has long been practiced, see figure:
- We sew both sides of the slope up to the corner; allow an indent of half the width of the corner shelf.
- We take a regular right angle and cut it along the length of the side of the slope with a margin of 40-60 mm in both directions.
- We cut one of the corner flanges equally at both ends exactly along the length of the edge of the corner of the slope, pos. A.
- From the angle of repose we draw a line with a pencil at 45 degrees, pos. B.
- We apply a corner to the corner of the slope, press it firmly and, following the trace of the line, mark the cutting line on it, pos. B.
- Use a profile cutter or garden pruner to cut off the excess.
- We cut the edge of the corner from the INSIDE with a mounting knife or a shoemaker's knife-jamb to approximately 1/3 of the thickness of the material.
- Apply glue or homemade dichloroethane compound to the corner from the inside.
- We apply it, press it until it opens as it should, wait for it to set - it’s ready.
Features of PVC wall panels
PVC sheets are a modern finishing material that has a number of advantages. That is why they are often preferred to other types of decorative coatings. The positive aspects of using PVC include:
- Plastic panels are an environmentally friendly material that does not emit harmful substances during operation. This property allows the panels to be used in residential premises, including children’s playrooms.
- Wide selection of design solutions: PVC stone or tile, floral prints and children's images.
- The surface of PVC panels is suitable for recycling: it can be painted, painted and pasted over.
- The plastic is assembled in the form of small cells, which allows it to retain heat for a long time.
- The panels are easy to adjust to each other, which allows you to finish the room yourself in a short time.
- The panels can be laid horizontally, vertically, diagonally relative to the floor and ceiling.
- The plastic is durable and can withstand the weight of accessories: electrical sockets, ventilation hatches, hooks and shelf fastenings.
- The plastic from which PVC is made is frost-resistant: it can be mounted on open balconies or verandas.
- PVC panels are water-repellent, so they are used to decorate rooms with high humidity. Finishing the toilet with PVC panels will be an excellent solution and will allow you to save on expensive tiles. It is possible to finish with panels that imitate stone.
- To finish PVC walls with your own hands, no additional preparation of the walls is required.
- The plastic washes well. The gaps between the panels do not allow particles of dust and dirt to pass through.
Despite the obvious advantages, PVC panels are not a panacea for repairs and have a number of disadvantages that do not allow their use in residential premises. These include:
- The panels are laid on the sheathing. In order to install it yourself, you must have special knowledge and tools. Leveling such a sheathing takes a significant amount of time.
- The material does not allow air to pass through; it is not advisable to install it in bedrooms.
- The surface of the plastic is glossy, so it creates glare in strong sunlight. For this reason, it is not recommended to install plastic in rooms where sick people live.
- According to fire safety rules, PVC plastic cannot be placed in corridors and on escape routes: when exposed to fire, the plastic begins to melt and releases additional amounts of carbon dioxide mixed with toxins. This may make it difficult for people to evacuate a burning room.
Disadvantages of plastic lining
- Despite numerous misconceptions that PVC panels can be easily used for any surface, practice shows that this is not true. In any case, preliminary preparation is required for proper finishing. Moreover, we are talking not only about removing old wallpaper and worn-out plaster, but also about installing sheathing. Otherwise, the surface of the panels will be wavy.
- Finishing with plastic panels cannot be carried out by a completely ignorant craftsman. It is necessary that a person has at least basic skills in working with plastic panels or, at least, has studied in detail the features of using PVC.
- Working with plastic requires a special set of tools, which will be discussed below. Even the most experienced worker will not be able to make high-quality repairs with a hacksaw and hammer.
- Plastic panels are not highly hygienic. Each panel is a hollow structure, inside of which, if not properly cared for, various insects can live, but this is more a rarity than a rule.
- Plastic can hardly be called a fire-resistant material. Even if you persistently try to set fire to a PVC panel using matches or a lighter, this will be extremely difficult to do. However, in the event of a fire, PVC will not only support the fire perfectly, but will also release a large amount of toxic substances during the combustion process.
Recommendations
When purchasing goods, everyone pays attention to the manufacturer. Image and reputation mean a lot and are a kind of indicator of quality
PVC panels in this sense are no exception; there are hundreds of manufacturers on the market, but only a few have won consumer recognition.
Venta (Belgium). The company is a leader in the finishing materials market in Europe and around the world. The company regularly opens new production facilities in various countries and in 2003 a plant began operating in Russia. This has made it possible to reduce the cost of slabs for domestic buyers - now Russians can buy models of European quality at affordable prices. The assortment list includes a large selection of panels of all colors and shades, the products have the property of increased strength, and printed panels are also available.
How not to make a mistake in choosing panels, watch this video.