DIY baseboard frames
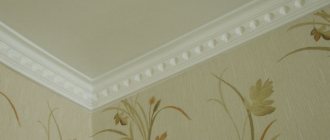
Plinth is a decorative and protective element of room decoration for hiding the gap between the floor or ceiling and the wall.
In addition to being used in the construction and finishing industry, skirting boards are a great thing for realizing creative fantasies. For example, the production of various kinds of frames.
Frames for photos, paintings, mirrors, etc. They turn out very original and beautiful.
It is also worth noting the ease of processing, since the plinth is made mainly from materials such as foam, wood or plastic.
This article shows how to make frames from baseboards, which you can make at home with your own hands.
Types of skirting boards
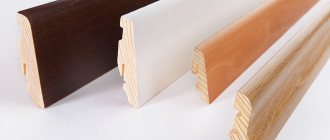
The main materials for skirting boards today are: foam, wood and plastic.
Plaster, metal and ceramics are also used in certain interiors.
These materials require certain skills and tools for processing, so they are very rarely used for making various kinds of crafts with their own hands.
So, the main material for the plinth is foam :
This is a very cheap and very easy to process material, it cuts and glues perfectly, you can buy it at almost any hardware store.
But there are also disadvantages: polystyrene foam is a very fragile material, any careless movements or falling even from a short distance can ruin the appearance of the product.
Plastic:
The main advantage is that plastic is a strong enough material for use in modern creativity, and plastic is also not susceptible to moisture.
The disadvantages are that plastic is quite more difficult to process than foam and it is made from artificial materials.
Tree:
The main advantage of wood is its naturalness; you must agree that no matter what material looks like wood, natural wood is immediately visible.
The beauty and environmental friendliness of the material still does not allow a large number of people to be indifferent, despite the rather high cost compared to other materials and the complexity of processing.
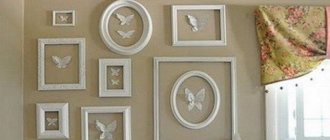
Volumetric vintage design
Ceiling plinth blanks are cut at an angle of 45 degrees; after gluing the frame, it can be painted with acrylic dyes and varnished.
How to make a three-dimensional frame? You can make a vintage design with your own hands. Skirting boards can be angular, which are attached between the wall and the ceiling, and wall-mounted, flat on the reverse side.
They come with or without patterns. You can combine different types to make a voluminous vintage frame.
Read also: How to make a day in terraria
Materials and tools:
- ceiling plinth;
- miter box;
- hacksaw;
- polymer glue;
- acrylic paint.
You need to take a corner copy. The tip is sawed off and the first corner is formed. It lies in the miter box in this way: one part is located horizontally, the other vertically.
Measure the required length from the first corner and cut at an angle. The second plank of the same dimensions is made in the same way. You must work very carefully and try to accurately observe all dimensions.
Then two smaller strips are cut out. The parts are glued together. Each corner is smeared with glue, aligned and held for a long time for better gluing.
The corner specimen turned into a kind of cup. Now you need to make the edging of this cup from a wall copy.
Templates and options for making a do-it-yourself photo frame from cardboard
To bring creative frame design ideas to life, you must first learn the basics. That is, you need to learn how to make a regular rectangular frame from cardboard.
It must be neat and strong in order to please the eye for many years.
After this, you can experiment with materials, shapes and colors, creating a unique decorative item. There are two options for making the base: the first is suitable for small photos, and the second is for large paintings or portraits.
First way
Necessary materials:
- cardboard;
- scissors and stationery knife;
- ruler;
- glue;
- pencil.
Instructions for making a frame:
- Print the template on cardboard or redraw it by hand. Cut along the contour.
- Make folds along all lines. If the cardboard is thick, you should first go through these places with the blunt side of the knife.
- Roll the two short sides into a tube.
- Secure them with glue, spreading only the outer strip of the template.
- Carefully form one long side.
- Insert its corners into the holes of the short strip. This element is also secured with glue, adding it to the bottom edge or to the corners.
- Process the opposite long edge in the same way.
Office paper is also suitable for this craft.
In this case, you can do without glue at all, since the sides of the frame will hold each other.
Second way
List of required items:
- thick cardboard from boxes;
- large scissors or stationery knife;
- PVA glue;
- pencil;
- ruler;
- spray bottle with water;
- scotch.
You can make a strong frame like this:
- Remove the top layer from the cardboard so that the corrugation is visible. To do this, moisten its surface and remove the soaked material after 2 minutes.
- Cut the base to the desired size from the thickest material.
- Make a rectangular hole in the middle for the photo. Attach the door to the back using tape.
- Make several long strips of cardboard 1-1.5 cm thick. Glue them around the perimeter of the photo compartment and around the frame itself.
- Attach another piece with a hole on top, repeating the shape and size of the base, or add decor, as in the picture.
Making a frame
So, we seem to have figured out the types of skirting boards and now we can safely proceed to the question - how to make a frame for a picture from a skirting board. If you are an artist, cross-stitch, sculpt various miniatures from mosaics, or are interested in photography, then you will probably need a lot of frames so that you and your guests can admire the result of your work.
But the modern trend is such that not everyone can afford to spend a lot of money on a dozen different frames.
Not happy with the color? Let's paint!
Designers took this problem seriously and came up with a cheaper and simpler solution - a DIY frame made from plinth boards.
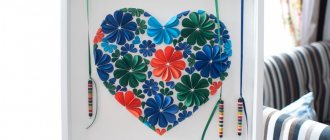
I would like to pay tribute to the various design of frames - you can not only paint them, but also glue all sorts of decorative elements to them, from decorative flowers to buttons and other small details. But this question is more suitable for women - the technical component of the work is mainly required from men, and therefore we will immediately get down to business.
Let's get started
The resulting product can be decorated with various decorative elements
In order to begin work, you will need to purchase the following tools and material:
- Ceiling plinth (as has already become clear from the article, it comes in three types);
- Any glue that will be able to tightly glue the material you have chosen. For skirting boards made of polystyrene foam or expanded polystyrene, adhesive for ceiling tiles, which is applied through a special gun, is perfect;
- Stationery or construction knife;
- Small miter box;
- Marker with ruler;
- Acrylic (or any other) paints.
Execution of work
This is what a frame made from aged wooden baguette looks like
To be honest, many home craftsmen will probably be somewhat skeptical about this kind of product. In general, polystyrene foam and polystyrene foam are somewhat different materials that have high strength indicators. But if you think a little, then in general it turns out that a frame is not a structure into which nails are driven, but one that simply dangles on the wall.
It turns out that we do not need high strength of products - the main factors here are durability, ease of processing and, of course, low weight. If we consider the design according to these parameters, then these materials are simply ideal.
To make a frame you will need a minimum of materials
Below are step-by-step instructions to help you:
- To begin with, we take the baseboard in our hands. In our case, we will consider a product made of polystyrene foam, since it is the most popular. Such material can be easily cut, glued, and like polystyrene foam it does not have a fine-grained texture that crumbles;
- The next step is to take measurements from a photograph, painting or embroidery. In our case, it uses the usual A4 format, so the dimensions are 210x297 mm. Now we measure these dimensions on the baseboard and make marks with a marker. Then, using a miter box, cut the baseboard at an angle of 45°.
Attention! Particular attention should be paid to the fact that the frame will be the same size as the sheet. This is necessary so that you can then glue the frame itself to your work of art.
- Before gluing, you will need to check the conformity of all sides - to do this, the parts must be laid out on the table and attached to each other (see photo);
The photo shows that the frames can be completely different
- We glue the product. For these purposes (as mentioned above), we use a glue gun. He will glue the individual parts of our product tightly together. To do this, you will need to warm up the gun and apply a little adhesive to the end of the part, and quickly, before the glue dries, attach another part to it;
- The products are pressed tightly together for a few seconds. Next, according to the same scheme, we should complete our frame;
- Now all that remains is to paint this thing. For this we used acrylic enamel - it looks quite nice;
- After drying, all we have to do is glue the frame to the picture and that’s it, the job is successfully completed!
Attention! Glass cannot be inserted into frames made of polystyrene foam or polystyrene foam!
detailed instructions
There are several ways to make frames from ceiling plinths. But we will consider only one of them, which requires thick cardboard. But if you want to frame a mirror, then you can do without a dense base.
Cutting the parts
First you need to cut out all the necessary parts. The dimensions directly depend on the object being framed. But before you start separating the fillets, you need to prepare the corrugated cardboard. Cut a piece of the base slightly larger than the framed image.
Now you need to cut a hole in the rectangle itself, the dimensions are slightly smaller than the inserted picture. Then make the same rectangle, but its internal hole will be narrower by 5 mm on all sides. Glue both parts together and a photo will be inserted between them. If you plan to fix the plinth on a solid base - a mirror - there is no need to mess with cardboard.
Next, measure the baseboard to the required length and cut it at an angle of 45° on each side. Wort will help with this. If you don’t have this tool on hand, then draw the desired angle on paper, and then transfer the marks to the baseboard.
Place the parts next to each other and check how tightly they fit. If everything is in order, then you can glue the fillets to the cardboard base. A glue gun is best for the job.
We putty, paint and decorate
Gaps that appear in the corners between the baseboards must be filled with putty. You also need to fill the joints between the fillets and cardboard with this material. Thanks to this, the product will be durable and solid.
Decor ideas
How to make a frame for a mirror from a ceiling plinth to suit a certain interior style? Decor will help you cope with this task. If you already have an idea of what the future mirror should look like, great. But sometimes there are no ideas, but you want to decorate the room.
Then you need to carefully consider the space in which you plan to place the mirror. Pay attention to the prevailing colors, textures, or maybe, on the contrary, there is some item that you really like, but it does not yet fit with the rest of the space.
Modern trends in interior design allow the use of bright colors and rough textures. It is better to paint the ceiling plinth frame in your favorite shade or leave it without decoration if it is made of metal. An additional decoration for the mirror for a child or teenager will be a variety of bright stickers with characters from popular films, comics and cartoons.
A classic interior is characterized by pretentiousness and pomp. A white or black frame with a pattern highlighted in gold paint, artificially aged and worn, will fit perfectly here. A plain frame will fit into any interior, the main thing is to choose the right color. It can be an inconspicuous part of the decor or a bright accent.
For more experienced craftsmen, complex frames made from ceiling plinths are suitable. They can be multi-level, made using additional parts. For example, mosaics or sea stones and shells.
General provisions
Frames have been used to highlight the contents of paintings for hundreds of years. Beautiful design allows you to highlight and present a work of art in a more favorable light against the background of the wall and surrounding furniture.
Today, their use has become much wider; now they are also used for decoration:
- Mirrors;
Incredibly beautiful frame made of ceiling plinth for a mirror
- Photos;
DIY frames from plinth for photos
- TVs;
DIY frame from ceiling plinth for TV
- Tapestries;
Frame made of plastic skirting boards with tapestry
This is interesting: Ornament in interior decor: interesting ideas (49 photos)
LiveInternetLiveInternet
—Categories
- FAITH AND RELIGION (50)
- Icons (4)
- Prayers (5)
- Signs and superstitions (19)
- Church rituals (5)
- Church posts (4)
- Church holidays (20)
- CHILDREN (14)
- Children's poems and riddles (1)
- Games and activities with children (4)
- Tips for parents (7)
- LEISURE (15)
- Games, riddles and illusions (7)
- Tests (8)
- LIVING WORLD (53)
- Wild animals (5)
- Pets (34)
- Inhabitants of rivers and seas (3)
- Nature (7)
- Birds (5)
- STARS (19)
- Fortune telling, rituals, mysticism (10)
- Horoscopes, numerology (5)
- Conspiracies and rituals (4)
- HEALTH (63)
- Traditional medicine (29)
- Healthy and harmful foods (13)
- Doctor's advice (25)
- BEAUTY (40)
- Hair, hairstyles (4)
- Fashion (2)
- Beauty secrets (7)
- Losing weight (3)
- COOKING (218)
- Jam (7)
- Desserts and baked goods (60)
- Blanks (23)
- Snacks (29)
- Cooking tips (2)
- Meat (19)
- Drinks (4)
- New Year's dishes (23)
- Vegetables (9)
- Holiday dishes (6)
- Fish (9)
- Salads (6)
- Soups (1)
- PERSONAL (136)
- From my life (13)
- My creativity (96)
- My Love Story (24)
- Native Vladivostok (3)
- VISUALITY (204)
- Patterns and pictures (95)
- Templates and stencils (109)
- NEW YEAR (233)
- New Year's bottles (2)
- Christmas trees (8)
- New Year's costumes (6)
- Christmas crafts (157)
- New Year's predictions (2)
- New Year's toasts and congratulations (4)
- New Year traditions and rituals (10)
- Christmas balls (9)
- New Year's decor (33)
- Snowflakes (6)
- EASTER (40)
- Easter ideas (3)
- Easter crafts (31)
- Easter eggs (6)
- USEFUL KNOWLEDGE (66)
- New in the country (2)
- Cheat sheet for LiRu (45)
- You need to know this (19)
- USEFUL TIPS (93)
- Attention, scammers! (1)
- Tips for car enthusiasts (2)
- Tips for tourists (4)
- Tips for Dummies (2)
- Tips for all occasions (6)
- Economic advice (5)
- POETRY AND PROSE (34)
- Parables and fairy tales (4)
- Russian language (2)
- Poems (27)
- HOLIDAYS (41)
- All holidays (25)
- Congratulations and cards (10)
- PAINTING (136)
- Stained glass painting (22)
- Painting (26)
- Spot painting (75)
- HANDCRAFTS (1198)
- Beads (6)
- Embroidery (49)
- Cross stitch (3)
- Ribbon embroidery (7)
- Knitted clothes (28)
- New Year's knitting (8)
- Various knitting (48)
- Knitting.Patterns (23)
- Knitted toys (7)
- Knitted napkins (8)
- Knitted secrets (9)
- Knitted jewelry (10)
- Knitted flowers (10)
- Bottle decor (76)
- Interior decor (68)
- Decoration (96)
- Decoupage (57)
- Ideas for needlewomen (148)
- From waste material (93)
- From paper (1)
- Made from natural materials (75)
- Modeling (98)
- Modeling from plastic and HF (3)
- Salt dough modeling (1)
- Master classes (608)
- Paper crafts (59)
- Various crafts (195)
- Wedding (6)
- Candles and candlesticks (20)
- Plates (5)
- Braid and cord (33)
- Paper flowers (10)
- Flowers made from ribbons and fabric (10)
- Flowers made of plastic and HF (6)
- Handmade flowers (67)
- Edible flowers (2)
- Sewing (103)
- GARDEN (37)
- Vegetables (3)
- Tips for summer residents (14)
- Indoor flowers (13)
- Garden flowers (9)
- Berries and fruits (1)
- THIS IS INTERESTING (0)
- Great love stories (1)
- Celebrities (8)
- Interesting stories (1)
- Interesting facts (8)
- Psychology (1)
- HUMOR (18)
—Tags
—Photo album
—Search by diary
—Subscription by e-mail
-Friends
— Regular readers
-Statistics
How to decorate?
You can decorate the frame yourself in different ways. The choice of one design or another depends on the taste preferences of the manufacturer. For example, a frame can be:
- cover with white paint, creating the effect of matte stucco;
- decorate using decoupage technique, pasting it with special napkins with drawings;
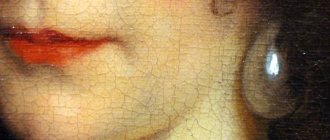
- decorate with an antique coating, creating the effect of cracks;
- decorate with ribbons, bows, beads and even sequins;
- add gilding and silver, using the relief of the plinth pattern for the gold ornament;
- cover with colored paints, making the existing pattern contrasting.
Depending on the type of skirting board chosen, you can make a frame with glass or a frame with a metal effect (for example, bronze, copper, silver, gold) . At the same time, you can make frames of different shapes and sizes, creating themed photo galleries or collages on accent areas of the interior. You can choose a design option for a specific design style (for example, classic, avant-garde), wallpaper, furniture, interior accessories.
You can decorate the frames both around the entire perimeter and in the corners . Some craftsmen decorate frames with artificial leaves and flowers. Some people use special corner elements to mask gluing defects. You can decorate the frame with ready-made carved corners if you choose the ideal width of the ceiling molding.
To make the decor match the frame itself, it can be painted with identical paint. You can use several paints for one product: as a base, a base color, and a gold or silver coating. However, when choosing a dye you need to be extremely careful. Some types of paints can destroy the texture of the baseboard.
What are liquid nails
This composition for installing foam plastic ceiling plinths differs from polymer glue in that it does not harm the material. You can always be sure that the ceiling skirting boards will remain intact and will be firmly fixed for at least 10 years.
Liquid nails come in the following two types:
- Neopropylene.
- Acrylics.
The difference between them is that the first type is made from an organic solvent. Such liquid nails have a pungent odor and are harmful to health in a liquid state if basic safety rules are not followed during work. The positive side of neopropylene adhesives is that they are indispensable for use in rooms with excessive levels of humidity.
Acrylic glue is the safest for humans and does not have any negative effect on ceiling skirting boards. The downside is that this composition is sensitive to high humidity, so it is better not to use them in bathrooms or kitchens.
Putty, painting and decoration
Most often, gaps form at the junctions of the baseboards, but they can be easily masked with putty and painting.
- After the glue has dried, fill the corner cracks, the junction of the baseboard with the cardboard base and the back side of the frame. This will not only hide defects, but also make the structure solid and more durable. The ends of the product will have to be puttyed in several layers or strips of foam plastic must be glued between the cardboard and the baseboard before puttying.
- Wait for the putty to dry and start painting. It is best to use acrylic or water-based paint. Other types of compositions can spoil the foam, so before using them you need to cover the surface with PVA glue in several layers.
Advice. A dark frame painted in a shade obtained by mixing black and red or dark brown will look impressive. The light milky shade is obtained by combining white with ocher. An antique product can be gilded using acrylic gold paint or water-based construction enamel. Gilding is applied with a semi-dry brush in a circular motion onto the completely dry previous layer.
- After painting, the frame is coated with water-based varnish.
If necessary, a fastening is made on the back side. To do this, take a piece of twine and cut out a rectangle from thin cardboard, the length of which will be slightly shorter than the width of the product. Place the string on the back of the frame and glue the cardboard so that it presses the ends of the string.
USEFUL INFORMATION: Small bedroom design: design ideas
Cutting parts and gluing the product
The first step is cutting out the base for the future frame. The parameters depend on the size of the photograph or painting that will be framed using a homemade frame. The cardboard rectangle that will serve as the basis should be slightly larger than the image being designed or match it in size.
- In the rectangle you need to cut a window that will be slightly smaller than our picture, so that its edges will disappear under the frame.
- We cut out a second cardboard piece of the same dimensions, but with a smaller window, each side of which will be 5 mm smaller than the first.
- Both cardboard pieces are glued together to form a place to insert the image. If the frame for a mirror or for a picture will be attached to a thick base, the previous paragraphs of the instructions are omitted.
- Now you need to use a ruler to measure 4 pieces of plinth that will be on the sides of the frame. Using a miter box, the panels are cut at an angle of 45 degrees. If there is no such device, the required slope and cut line are drawn on paper, applying the plinth to it. A mark is made with a marker, then the baguette is carefully cut off.
USEFUL INFORMATION: Design of a bathroom combined with a toilet (32 photos)
- Check the fit of the sides by placing the individual parts of the workpiece next to each other. Glue the pieces of plinth onto the cardboard blank. If cardboard is not used, simply attach the pieces of foam panels to each other by applying glue to the ends of the planks and pressing them tightly. It is most convenient to use a glue gun for these purposes.
The most difficult thing in making a photo frame from ceiling plinth is to achieve even joints at the corners of the product.
Tools and materials
Before you start working, think about the design of your crafts. Skirting boards or moldings can be purchased at any hardware store. Trimmings and pieces are also suitable for work, but novice craftsmen are better off buying new ones.
Suitable materials
You can choose a molding decorated with a textured pattern or smooth. Any materials from which skirting boards are made are suitable. But their different properties must be taken into account.
- Styrofoam is cheap and suitable for beginners, but it crumbles and breaks easily.
- Expanded polystyrene is one of the types of foam plastic. Its reliability is better and its price is higher.
- Polyurethane is durable, wear-resistant and cuts well. Flexible skirting board options allow you to create products of any shape. But it has a high cost.
- Wood is also an expensive material. Working with it requires professional training.
The choice of material for creating baguettes depends on their purpose and your imagination
The choice of material for a baguette depends on what kind of picture you are going to place. Fragile foam plastic is suitable for small and light photographs, and polystyrene foam, polyurethane and wood are suitable even for oil paintings.
How to make a photo frame with your own hands for dad on February 23
The product can not only decorate your home, but also become an excellent gift for any holiday. For example, every dad will be touched if on Defender of the Fatherland Day his son or daughter gives him a photograph in a handmade frame. To make the present thematic, you should use appropriate details: camouflage or stars. A good solution would be a combination of the three colors of the flag.
The photo frame will be original if it is made using the origami technique.
Required materials:
- double-sided sheets of red, blue and white;
- pencil;
- scissors;
- ruler;
- glue.
Detailed explanation of how to make a gift:
- Prepare 4 pieces of each color measuring 10x10 cm. You should get 12 squares in total.
- First fold one piece of paper in half, and then fold it in half again.
- For convenience, mark the point of intersection of the fold lines. Fold all corners to this point.
- Fold the resulting square in half again.
- Bend one of the corners, as in the picture.
- Turn the workpiece over to the other side and raise another corner.
- Repeat these steps 12 times to make the required number of modules. Then assemble the circle by inserting the two corners of one element into the two pockets of the other. For reliability, you can lubricate the inserted parts with glue.
- Cut out the photo in the shape of a circle and paste it into the craft. If desired, you can attach more tape.
The size of the product can be adjusted by increasing or decreasing the number of modules.
The process of making a paper photo frame with your own hands
We suggest making a basic three-dimensional frame that can be decorated in any way to suit your interior.
What you need to prepare for work
You don't need anything special except scissors, a printed template and thick paper or colored cardboard. Just a little time and accuracy.
Step by step process
To make a good photo frame with your own hands from paper, you need to download and print the template below.
PHOTO frame template: 33-podelki.ru
If for some reason it is impossible to print now, just take a photo, trace it along the outline, and leave stripes 1.5 and 1 cm wide on the sides. It is necessary to make recesses, similar to template ones.
If you have a ready-made template, you need to transfer it to cardboard. We bend all the lines and wrap the sides of the structure, and we do everything clearly and accurately.
We do everything strictly step by step PHOTO: 33-podelki.ru
It is convenient to fold, ironing the folds with a ruler PHOTO: 33-podelki.ru
Let's fold the short sides first, and then proceed to the long ones. You will have to insert the corners of the long sides into the corners of the short sides. PHOTO: 33-podelki.ru
For glossy and overly thick paper, it is better to first insert a photo, and only then begin the process of folding the sides. It is not forbidden to attach the structure with glue or double-sided tape for greater strength.
The frame is ready PHOTO: 33-podelki.ru Related article:
How to decorate a paper photo frame with your own hands
Making a DIY photo frame is not particularly difficult. You can decorate paper with anything, but the decor should not be too heavy. Let it be inscriptions, stamps, glued buttons, paper flowers. When decorating it in a modern style, you can paint the frame with chaotic abstract elements using a regular marker.
Master class on making a children's photo frame
When there is a child in the house, you want to fill all the shelves with his photographs. But ordinary store decor is not cheap and does not always look beautiful. This problem can be solved with your own hands and a little imagination.
For example, in just one hour you can make a frame in the shape of a funny animal. The child will like to follow the process and help his mother.
Materials:
- white sheet for templates;
- thick cardboard for the base;
- multi-colored paper;
- ruler;
- glue;
- scissors;
- markers or pencils.
To get a cute teddy bear, you need to repeat these steps:
- Make templates from scrap paper. Their size should be calculated based on the size of the photograph: it is indicated by a rectangle on the template.
- Lay out the parts on cardboard, focusing on the photo. Trace the silhouette of the bear and cut out to create a solid base.
- Cut out parts from paper of the desired color according to templates, not forgetting about the spout.
- Glue the ears and body onto the cardboard cutout.
- Mark the outline of the photo and apply glue to three sides of the frame. Attach the head, leaving a hole for the photo card.
- Using paper and a felt-tip pen, add the remaining details.
- Attach a stand made of thick material to place the photo on a table or shelf.