Vadim
16963 0 17
Vadim June 14, 2017
Finishing stoves and fireplaces is not the easiest task, but it is also not as difficult as it might seem at first glance. Let's figure out together why such a finish is needed, what mixtures the market offers us, and whether it is possible to putty the stove with ordinary putty. And as a bonus, I will clearly demonstrate how to putty a stove with your own hands.
The classic Russian stove was always puttied.
Composition of materials and mixtures for the oven
You can buy a refractory mixture for puttingtying a stove ready-made.
The walls of the stove become hot during operation, so the usual mixture will crack and crumble after a few months. The raw materials for mixing refractory putty for the furnace are sand, cement, gypsum, lime and clay.
Recommendations for preparing the solution:
- it is preferable to use lime or clay in the composition, but be sure to add asbestos;
- Complex cement-based mixtures can be used, but asbestos or other fibers remain an additional component;
- straw or hemp can replace asbestos.
Store-bought dry putties are sealed with water in accordance with the instructions on the package. The finished mixtures in buckets are pre-mixed. The amount of solution that is used before hardening and loss of plasticity is prepared.
Prepare the composition yourself to coat small fires; for large stoves it is better to purchase high-temperature mixtures prepared at the factory.
Materials
Options for the composition of the putty mixture
Sand is a sedimentary rock with a loose structure, almost entirely consisting of silicon dioxide. River, sea and quarry types can be used for the solution. Sand grains formed in reservoirs are round in shape with a smooth surface.
Clay is a sedimentary rock containing kaolinite, which when dry is dust and becomes plastic when moisture is added. Porous and waterproofing material is characterized by sinterability, fire resistance, viscosity, and shrinkage.
Lime is obtained artificially by burning carbonate rocks and includes large amounts of calcium, magnesium, and dolomite. Lime dough or a slaked variety (kipelka) is used.
Asbestos refers to mineral filaments from the group of silicates, which in nature form flexible fibers. It is classified as a carcinogen, has high heat resistance, does not dissolve, but fluffs up in water. In oven putty it serves as a binding and dispersed component.
Cement refers to astringent hydraulic inorganic substances obtained artificially. When moistened, it forms a plastic mixture, which subsequently hardens and gains strength not only in air, but also in water.
Fireproof mixtures
Competitor brands on the Russian market of refractory putties
Factory-made refractory compounds are versatile and intended for high-quality work. Manufacturers abandoned the use of asbestos due to its carcinogenic effects and replaced it with harmless components.
Common ready-made formulations:
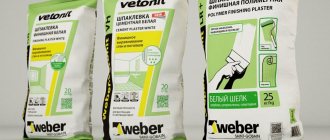
- Plitonite. The line of Russian-German manufacturers includes materials of the Super-Fireplace brand for domestic and industrial hearths. The scope of application varies depending on the composition.
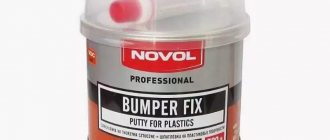
- Mastic Titan. The solution is prepared on the basis of stone flour with polymer additives. Heat-resistant putty for ovens firmly adheres to the surface and can withstand up to +1300°C.
- Terracotta. Gray plaster sets quickly, breaks down at +400°C, and can be applied in a layer of up to 8 mm. It is prepared on the basis of kaolin fireclay clay.
- Thermo +999 PRO brand. The composition is suitable for top application and for repairing the fuel compartment. The reinforced mortar can withstand +1000°C, sets in 1 hour, but fully gains strength within 24 hours.
Coating for Emelya stoves and fireplaces is made on the basis of white heat-resistant clay and kaolin. The dry mixture is diluted with water, after hardening it prevents cracks and shedding of the layer.
The Pechnik brand is a competitor to the well-known Terracotta brand, it can withstand surface heating up to +300°C, and is applied in a layer of up to 10 mm. The line includes starting and finishing mixtures.
Terms of use
Working with coating will have a positive result if you follow the manufacturer’s recommendations and follow the following sequence:
- The surface of the heating device must be cleaned of dust, dirt, grease deposits, and old peeling coatings. This will improve adhesion and allow the composition to hold much more securely;
- If the already applied coating will not be removed, you need to ensure its strength;
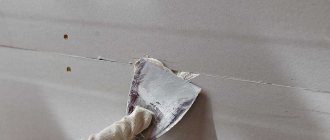
- The putty must be applied in a continuous layer or in spots with a construction spatula; the thickness of the facing coating should not be more than 5 mm.
- You need to have time to level the surface while the solution is wet. As a rule, 10-15 minutes are allotted for this process, after which the putty hardens.
- If the solution has hardened and it was not possible to completely level it, you can moisten the surface with a spray bottle and wipe the remaining area, periodically moistening the work area.
Experts recommend heating the stove or fireplace before starting work; the surface should be slightly warm, but not hot. These manipulations are carried out so that the solution adheres better to the surface being treated and dries faster. In addition, the smoke will allow you to detect possible cracks and thereby ensure a complete repair.
Consumers managed to test the Emelya putty and were convinced by personal example that it is a high-quality, reliable, highly plastic material that is easy to work with. It is applied to the surface without problems and is easily leveled. After complete hardening, it does not crumble or crack.
As customers noted, it has a faint smell, but unobtrusive, so working with the putty is quite comfortable. The solution is easily removed from the tool and hands, does not weigh down the structure, and withstands high temperatures perfectly.
To learn how to plaster a stove, see the following video.
Advantages and disadvantages
Heat-resistant putty does not emit substances harmful to health when heated.
Heat-resistant putties have advantages over traditional solutions. They are characterized by high strength when exposed to high temperatures due to the presence of binding fibers and the use of refractory materials.
Positive aspects of use:
- The solution consists of safe components; when the surface is heated, harmful air impurities are not released.
- Putty prepared in compliance with the technology and application rules lasts a long time.
- The mixtures adhere well to the surface of the stove made of various materials; there are varieties that are used for finishing metal.
Disadvantages include higher cost than standard ready-mixes. Such compositions are rarely used as a finishing layer - they need to be painted or tiled.
What do the main parameters say?
Heat-resistant tile adhesive has special properties and composition that distinguish it from other adhesive materials. Product Features:
- High degree of plasticity. Thanks to this quality, you can create an even coating.
- Fire resistance. This property is necessary for finishing fireplaces and stoves.
- Cost to temperature changes. The use of fireplace structures is constantly accompanied by temperature changes, especially if they are installed outdoors.
Heat-resistant adhesive creates a protective coating between the tiles and the fireplace, avoiding deformation of the material.
The basic properties of mortars intended for laying fireplaces determine their quality and the operating time of the stoves. These include:
- linear expansion and elasticity, ensuring the preservation of the masonry structure;
- fire resistance, which allows you to significantly extend the life of structures that are constantly in contact with fire;
- resistance to temperature changes, the impact of which is observed both during the masonry process and during the period of use of the fireplace, and prevents their destruction;
- wear resistance and moisture resistance;
- environmental safety, excluding the release of harmful and dangerous substances for human health under the influence of high temperatures;
- great heat transfer.
https://www.youtube.com/watch?v=7t-4RUsuDJU
The presence of such characteristics of heat-resistant adhesives confirms their excellent quality. They have become a worthy replacement for the mortars that they prepared with their own hands for laying stoves and fireplaces, and rightfully deserve the praise of real masters.
- Heat-resistant adhesive is capable of maintaining technical properties at temperatures above 140°C for several hours.
- Thermal-resistant material must retain its qualities for a long time.
- The heat-resistant material increases the temperature level of heat-resistant adhesive by 10 times.
- Heat resistance – the ability to maintain qualities under prolonged exposure to temperatures above 1000°C degrees.
- The fire-retardant composition comes into direct contact (open contact) with the flame itself for several hours.
- Fireproof adhesive is adapted to long-term contact with fire.
If the adhesive composition has only certain characteristics that are clearly expressed, then such a material is suitable for performing a narrow range of work.
Mixture under the brand name Terracotta
Heat-resistant and fire-resistant mixtures are used when laying fireclay bricks in the firebox itself. They form a durable solution that, when dried, has high adhesion and can withstand critical temperatures without cracking. Heat-resistant compounds are often used for laying stoves in heat exchange areas or in the labyrinths of a brick chimney.
Some contacting surfaces (fireplace walls and their lining) have different expansion coefficients. The connecting link can only be an elastic material, which is not heat-resistant glue. After drying, heat-resistant mixtures are able to deform without destruction under the influence of external forces. This adhesive is suitable for cladding the fireplace frame, as a tile mortar or in places where the temperature does not exceed 140°C degrees.
Making your own putty for the stove
The main component of the mixture is fireclay clay of medium fat content.
A solution prepared by hand saves money and differs little from factory mixtures. For preparation, natural materials are taken, which are found in all areas.
Compositions are being prepared:
- gypsum-sand-lime (0.3:2:2);
- clay-sand-lime (1:2:2);
- clay-sand-cement (1:2:0.3).
If the clay is thin, the solution is mixed with skim milk. The addition of slaked lime lightens the putty, and the final white color is given by a mixture of chalk and milk. Fiber is added to the mass in an amount of 1/10 of the total volume. Gypsum additives speed up hardening, so you need to mix less mortar.
You will need fireclay or other fatty clay, sand, lime, gypsum (alabaster). The volume of sand depends on the fat content of the main component, but for the first time it is difficult to determine the required proportions. Advice from an experienced specialist will help.
How and with what should I cover the stove so it doesn’t crack? Video
To prevent the stove from cracking, it is covered with clinker or some other tiles
An option to solve the problem is to finish the outer surface with ceramic tiles. The material will last a long time if technological recommendations are followed.
Types of tiles used:
- porcelain stoneware;
- types of tiles;
- clinker material;
- terracotta
You can seal the stove to prevent it from cracking using a clay solution. The mixture adheres well to the surface, and cracks rarely form.
The stove surface is processed using the following tools:
- Putty knife. Several varieties are used for ease of coating.
- Hammer for driving nails under plaster.
- Trowel. Used for mixing the solution and applying the mass to the surface.
- Metal scissors. The tool is needed to cut metal plaster mesh.
- Grater. Used for grouting mortar.
- Ironing iron. Using the device, the plane is leveled to an ideal state.
- Chisel. Used to notch the caulking area for better adhesion.
- Brushes. For wetting the surface.
- Construction level, plumb. The tool is taken to level the plane in a horizontal or vertical position.
Over time, the operation of the stove leads to the formation of cracks. The reason for the appearance of cracks is uneven heating of the stove masonry and the evaporation of excess moisture on its surface.
Cracks on the Russian stove
When cracks form on the surface of the stove, it is necessary to answer the question of how to cover the stove and how and with what to cover the seams in the stove, in places where cracks have formed on its surface. There is no doubt that the material with which the stove must be coated must be fireproof, easy to apply to the surface of the stove and have good adhesion to the edges of cracks.
Cover the stove with clay
So, how to cover the stove with clay.
The simplest and most proven material used for filling cracks and crevices on a stove is traditional clay, with which a classic solution for filling cracks in a stove is prepared.
This solution consists of a mixture of clay and river sand in a 1:1 ratio. This solution is thoroughly mixed to avoid lumps. Moreover, it is recommended to pass this solution through a metal sieve with large cells.
To check the strength of the resulting solution, you should make a ball out of it and throw it on the floor. If cracks form, a little more clay must be added to the solution.
To do this, it is recommended to fulfill the following condition: To avoid the formation of cracks on the stove during its operation, it is recommended to wrap the stove lining with gauze soaked in a liquid clay solution and allow it to dry.
In order to cover the stove with clay you will need the following tools and equipment:
- container for preparing the solution;
- a ladle for applying the solution to the surface of the furnace;
- rubbing to level the solution;
- Master OK.
To seal cracks and crevices in the furnace, non-traditional solutions are also used, consisting of the following components:
- clay;
- sifted river sand;
- horse manure or chaff (seeds from sifting grain).
According to the advice of experienced stove makers, this mixture must be kneaded with your feet. When mixing this solution, care must be taken to ensure that no lumps form. The readiness of the solution is checked in a simple folk way - if the leg pulled out of the solution remains clean, then the solution is already ready. You will also be interested in familiarizing yourself with the types of dry construction mixtures.
- The resulting solution must be covered with oilcloth and left overnight, after which it must be mixed again. Before using this solution, the surface of the oven must be moistened with water, and it should be laid in two layers, allowing the first layer to dry before laying the next one.
- After coating the stove is completed, let it dry for at least two weeks, and after that, you can begin plastering it with a solution of river sand and starch. After the stove has completely dried (approximately within a month), you can apply lime whitewash with color additives to the stove at your discretion.
Mixture-solution for sealing the stove
A home is a symbol of home comfort; it warms the body and soul. A high-quality stove will protect you from any weather conditions and create a comfortable atmosphere at home, so it is extremely unpleasant to find cracks on the surface of the stove. Putty for stoves is the only way to restore their original appearance.
Purpose of the solution for the oven
Putty can improve the appearance of a stove or fireplace.
Treating the surface of the stove improves the appearance and helps the fireplace fit into the interior. Regardless of the material of the structure, putty levels the surface. It is important to strengthen the strength of the walls, on which the plaster remains for a long time in its original form.
If the masonry cracks, combustion products pass through the cracks and lead to carbon monoxide poisoning. Conventional putties cannot withstand high temperatures, they are destroyed and contribute to the formation of cracks. The uneven surface of the masonry accumulates dust, soot and is difficult to clean from contamination. The layer of putty is painted with heat-resistant paints.
Tool selection
The speed and quality of work depends on the selection of tools. Using the right tools makes it easier to process the surface.
Surface Treatment Tools:
- grater;
- putty knife;
- corner spatula.
Before starting work, you need to slightly moisten the surface. Finishing occurs in stages. First, the top is processed, gradually going down. The main difficulty is processing the corners of the surface. Previously, there were a lot of difficulties with this, but now they use an angled spatula. It has an angle of 90 degrees, which helps to level what you need with one movement.
Technology for finishing a stove with plaster
Before applying the putty, it is necessary to clean the seams between the bricks and apply a primer.
Standard tools are used for the work. Surface preparation is required for good adhesion of the solution. The thickness of the plaster is determined before the start of the process using a level, plumb line and straight edge.
Work order:
- Old and peeling coatings, if any, are removed. Use a brush for metal work or a hammer and chisel. Cleaning is carried out before the initial laying.
- Notches are made and the seams are deepened by about 0.7 cm.
- The surface is primed with a deep penetration compound. The degree of adhesion depends on this.
- A reinforcing metal mesh is nailed down. Nails or self-tapping screws with dowels are used.
- The spraying is done as the first layer and is almost not leveled. The second layer is applied to determine the texture of the treated area.
The surface is smoothed with a trowel and a certain amount of solution is added to the holes. The mixture must dry completely and set before finishing decoration.
How to putty correctly
Finishing the stove structure with plaster is carried out in stages:
- preparing surfaces for work;
- padding;
- reinforcement;
- applying plaster;
- grinding the plaster coating;
- decorative finishing of the stove.
Preparing for work
Applying putty involves preparatory measures. Measurements are taken of the surfaces that need to be cleaned and processed, and the volume of putty material is determined, taking into account the proportions specified in the instructions. Then the surfaces are cleaned. It is required to remove the plaster layer from old structures and clean the joints between brick blocks to a depth of 10-15 mm. Before plastering work begins, the oven is heated.
Reinforcement
Work on reinforcing the surfaces of the furnace is necessary to strengthen the plaster layer and increase the durability of the structure. The work is carried out using reinforcing metal mesh, self-tapping screws or burlap. A popular method of furnace reinforcement is to screw screws up to 75 mm in length into difficult areas of the furnace. The caps should protrude 10-15 mm above the stove surface.
Another reinforcement option involves covering the oven walls with burlap.
The fabric must be soaked in advance in a liquid clay solution, which will be used to coat the stove structure. Then the burlap is glued to the surface and carefully smoothed.
Burlap can be replaced with metal fine mesh. To secure the steel mesh, you will need to lay a wire with a cross-section of 3 mm at the laying stage.
Applying the composition to the stove or fireplace
Putty for fireplaces and stoves is carried out on pre-primed bases. It is optimal to use a primer with heat-resistant characteristics when preparing surfaces.
It is recommended to use a starting and then finishing heat-resistant putty. For the work you will need a 10 cm spatula, with which the starting composition is applied. The surface is leveled, cracks are cleaned. After the starting mixture has hardened, the finishing composition is laid out with a wide spatula. For large ovens, it will be necessary to install beacons to level and form smooth surfaces. After the finishing putty has dried, it is necessary to apply a fire-resistant primer. The stove is left to dry for 2 weeks, then a test fire is carried out.
Decorative finishing
You can apply paint or artificial stone to the putty.
The finishing coating is selected depending on the preferences of the owner and the surrounding interior. Puttying the fireplace plasterboard for painting is done with mixtures that can withstand high temperatures.
The fireplace in the room is finished:
- improved putty with painting;
- decorative plaster;
- natural stone, marble;
- artificial stone-like material;
- metal, heat-resistant glass;
- ceramic tiles, porcelain stoneware;
- decorative brick (bassoon).
For any type, materials with fire-resistant properties are used. Natural stone does not crack when heated, but the quality of the glue matters. Ceramics can withstand temperature fluctuations, but the tiles are laid with seams; the seamless method is not used. Tile crosses are used to maintain uniform spacing.
Selecting heat-resistant paint
Heat-resistant paint can be applied both to a metal or brick surface, and to the preparatory layer of putty or plaster.
The use of paint protects the surface from corrosion and helps give the equipment an aesthetic appearance. The paint for the stove must have sufficient elasticity so as not to crack when heated and cooled, there should be no changes in color, burning, or fading due to high temperatures. Important! Paints for stoves cannot be made based on oils, which release toxic substances when heated, so mixtures are made based on acrylic, epoxy, and silicone. The consistency of the paint should be uniform and applied evenly
Sometimes spray guns and ready-made aerosols are used - in this case, the consistency of the composition is more liquid (for example, this is how heat-resistant enamel is applied)
The consistency of the paint should be uniform and applied evenly. Sometimes spray guns and ready-made aerosols are used - in this case, the consistency of the composition is more liquid (for example, this is how heat-resistant enamel is applied).
Selecting heat-resistant paint
Heat-resistant paint can be applied both to a metal or brick surface, and to the preparatory layer of putty or plaster. The use of paint protects the surface from corrosion and helps give the equipment an aesthetic appearance. The paint for the stove must have sufficient elasticity so as not to crack when heated and cooled, there should be no changes in color, burning, or fading due to high temperatures.
Important! Paints for stoves cannot be made based on oils, which release toxic substances when heated, so mixtures are made based on acrylic, epoxy, and silicone. The consistency of the paint should be uniform and applied evenly
Sometimes spray guns and ready-made aerosols are used - in this case, the consistency of the composition is more liquid (for example, this is how heat-resistant enamel is applied)
The consistency of the paint should be uniform and applied evenly. Sometimes spray guns and ready-made aerosols are used - in this case, the consistency of the composition is more liquid (for example, this is how heat-resistant enamel is applied).
crazy hands
The putty composition for stoves is often prepared by hand.
It only requires an equal amount of fine sifted sand and moderately oily clay.
- Dry clay is mixed with sand and filled with slightly salted water.
- After soaking for 3 days, the solution is thoroughly mixed again and can be used to putty joints or plaster the entire surface of the oven.
The technology for making oven putty yourself has a couple of subtleties.
- If the clay has insufficient fat content (the wall plastered in the test area crumbles when touched), skim milk (without cream) is used instead of salted water.
- Adding a small amount of slaked lime will make the putty white. As an option, the finished surface can be whitened with an extremely durable mixture of skim milk and crushed chalk. The service life of such coating is at least 10 years.
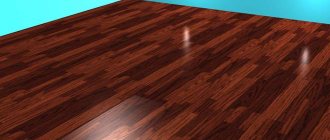
The stove in the photo is plastered and whitewashed using the method described above.
Cladding Adhesive Components
In all types of stove and fireplace temperature-resistant adhesive solutions, the basis is the following components:
- Cement (M 400, 500).
- Fine sand.
- Mineral granules.
- Fireclay powdered fibers.
- Synthetic plasticizers and liquid glass.
Binder components - cement and sand - provide the necessary strength of the composition, mineral granules - elasticity, fireclay fibers - resistance to high temperatures, synthetic plasticizers and glass - moisture resistance, thermal expansion of materials and thermal output.
A proper ratio of the various components in the composition ensures high performance characteristics of the finished high-temperature adhesive.
Purpose
Starting (leveling) putty - used at the beginning of finishing work, when it is necessary to seal large holes and depressions. Apply a fairly thick layer (up to 1.5 cm). The starting putty must be durable, strong and have good adhesion to the surface.
Finishing (decorative) putty - used after the starting putty in order to prepare the surface for decorative cladding. Apply a thin layer (0.5-1 mm). Finishing putty smoothes out minor defects, resulting in a smoother surface. The finishing putty must have good compatibility with the bottom layer (starter).
Important: in order to achieve excellent adhesion of the finishing layer to the starting layer, you should use products of the same brand, manufactured by the same manufacturer. Universal putty - used for both leveling and finishing putty
The main advantage is that it is easy to use and suitable for almost any surface. Hence the main drawback - it is inferior in quality to each of the specialized putties. In addition, the price is quite high. Good option for non-professionals
Universal putty - used for both leveling and finishing putty. The main advantage is that it is easy to use and suitable for almost any surface. Hence the main drawback - it is inferior in quality to each of the specialized putties. In addition, the price is quite high. A good option for non-professionals.
Specialized putty - used for specific purposes:
- floor putty - used to level the floor surface and depends on its type (concrete, wood, etc.);
- putty for seams - used to eliminate gaps between two sheets of drywall, plywood, etc.