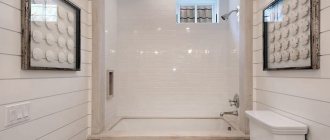
I have an acrylic bathtub in my bathroom. It differs from cast iron or steel in the presence of a supporting frame for the entire structure. And metal analogues stand on legs. The bathroom set included a decorative blank screen that covered the container from views from below.
I decided to replace it. And there are two reasons for this. Firstly, his appearance is not entirely presentable. Secondly, since he is deaf, he loses a lot of space under the bathroom. Meanwhile, there could be various chemicals there to clean the same bathtub. After all, you can’t think of a better place.
But since time does not stand still, I found myself in some difficulty. Because there were too many of these screens in the store. And everyone is different from each other, especially in assembly. Let's figure out together how to install a screen on an acrylic bathtub. But first, let's try to choose the right one.
Source otlichnyjremont.ru
Criterias of choice
The decorative screen under the bathroom can be of three types:
- Have sliding panels.
- Have swing doors.
- Completely block access to the space under the bathtub.
In this case, the choice depends only on the preferences of the home owner. Only he can decide whether the screen will have only a decorative appearance or whether the latter can be combined with practicality. And pragmatism often wins.
Source zen.yandex.ru
But any owner of a beautiful acrylic bathtub should be guided by the following criteria:
- The screen must be sized to fit the support frame.
- It is necessary that it retains its original appearance for as long as possible.
- The design should not be difficult to install.
- She is simple and easy to care for.
- The price of the screen should be within reason.
- Today, different materials are selected for decorative screens. Most often, durable plastic or metal is used. From stainless steel to lightweight aluminum. But if the screen has hinged doors, they are often made of wood. Moreover, both natural and pressed sawdust.
- But you can find models made of glass. Materials can be hardened or glued with a special film. There are also models made of plexiglass. And the highlight are the samples with a mirror surface.
- But the buyer faces the biggest difficulty in choosing when discussing installation methods. Since literally every second person wants to install a screen under the bathtub with their own hands, everyone is trying to find a simpler design. Meanwhile, the choice here is quite large.
Source triton16.satu.kz
Screens can be fixed:
- self-tapping screws;
- magnets;
- springs;
- clamps;
- by surprise
And when choosing, you must be guided by the following. The screen should not only be easy to assemble. It also needs to be removed quickly in case of an accident. But you shouldn’t renounce. And in the event of an unexpected water leak under the bathtub, access to the breakdown site should be free.
Mirror and transparent designs
Screens made of transparent and translucent glass or mirrors are quite expensive and rare.
Undoubtedly, a bathtub with such a design looks extravagant and expensive, but it is very difficult to find a ready-made mirror or glass product. It can be made, but it is better to entrust this task to a professional, since cutting and fitting of thin material will be required. This type of screen is not susceptible to moisture, but it is very fragile and requires constant care. After all, water leaks and salt accumulation are especially noticeable on glass surfaces. When installing such structures, you need to make sure that the surface is covered with a film that does not allow small fragments to fly away.
Despite the complexity of installation and operation, such designs are finding more and more buyers. After all, with the help of mirrors you can visually change the geometry of the premises; you just need to slightly change the angle of reflection.
Screen mounting methods
Installing a screen on an acrylic bathtub is somewhat different from installing it on metal counterparts. This is because the structure already contains a support frame onto which the panels need to be attached. And for work you will need wrenches and screwdrivers. As well as a tape measure and a building level.
Source aoon.ru
Self-tapping screws
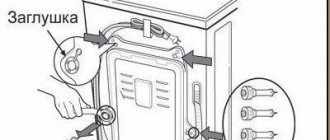
If the screen must be attached using hardware, then its kit must include special parts. They are installed at the top and bottom of the frame. And the panels are already mounted on them.
Installing a screen under a bathtub comes down to the following:
- An aluminum corner, supplied with the screen, is attached to the upper stiffening rib of the acrylic bathtub.
- The same part is installed at the bottom of the support frame post.
- The panels are tried on and marks are made on them for the holes.
- Grooves for hardware are drilled in the designated places. Be sure to make a secret place for the screw head. It is performed with a larger drill, and the passage is not made completely.
- After this, the panels are attached to the corners with self-tapping screws.
- Decorative plugs are installed on their heads.
If the store does not have suitable ones, you can always replace the part with stickers. They are cut out independently from a film of a suitable color. And then they simply glue it to the heads of the screws.
Source bezkovrov.com
Preparatory work
Moisture-resistant MDF board
How to choose the right screen? First you need to decide on your desires and set a specific goal:
- what functions should the protective screen perform;
- how much money can you allocate for its installation;
- who will carry out the installation;
- whether you have enough strength to do the work yourself;
- what type of screen is most suitable for your bathroom;
- what materials will you use to make the frame?
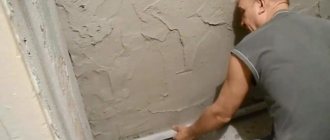
Moisture-resistant materials are selected for the bathroom. For the manufacture of structures the following are usually used:
- brick;
- metal profile and gypsum board;
- plastic;
- wooden beams and MDF with moisture-repellent impregnation.
The power frame is made of a metal or plastic profile. For cladding the finished frame, each homeowner chooses the material according to his taste and material capabilities. This can be tile, mosaic, plastic or vinyl film. In a modern bathroom, the screen becomes the main decoration of the room.
Once you have decided on the choice of materials, take the necessary measurements. You only need to measure two parameters:
- the distance under the bathtub (horizontal profile) that the screen will occupy;
- distance from the edge of the bathtub to the floor (vertical profile).
Prepare free space for cutting the material and assembling the frame. From the bathroom, take out the things that are in the way and get to work. If you are installing a solid brick structure, take care of additional materials in advance.
Magnets
Perhaps the easiest way, but not very reliable. Allowing you to quickly get under the bath if necessary. True, attaching the screen to an acrylic bathtub requires a steel support frame. Or vertical metal stops that are rigidly attached to the frame.
Sometimes this design is accompanied by special L-shaped stops, which are attached to the legs and the stiffening rib of the bathtub. It is to them that magnets are attracted. For the latter, it is necessary to make precise marks on the back of the panel. Then seal the parts with silicone sealant.
Peculiarities
The screen is a structure that covers the sides of the bathtub, as well as adjacent sections of the walls and plumbing communications and water pipes located near the floor. In addition to its decorative function, the screen can be used to store household chemicals and household supplies, and also limit access to pets under the bathtub. Screens are made from modern and environmentally friendly materials that can withstand the humid conditions of bathrooms and constant temperature changes. The frame is usually a steel or aluminum profile, which is rust-resistant and durable.
The aluminum frame is lighter than its steel counterpart, but may be subject to deformation due to excessive mechanical stress. You can safely attach lightweight plastic doors, as well as elements made of MDF and acrylic, to such a profile. Steel frames are intended for the formation of screens from natural wood, as well as for the production of lattice models.
The shape of the models depends on the configuration of the bathtub and the preferences of the apartment owner. To make it more comfortable to sit near the bathtub, some front panels have foot recesses, and sloping designs are used to prevent water from getting onto the floor. The fabric of the models can be solid or lattice. The first looks more attractive and allows you to close pipes and communications, while the second prevents mold and promotes normal air exchange under the bathroom.
Standard factory screens for steel and cast iron bathtubs have a length of 1.5 to 1.7 meters and a height of up to 60 cm. The legs are often adjustable, which allows you to independently install the model to the desired height and ensures the convenience of placing a person close to the bathtub. The modern market offers a large number of screens for corner acrylic bathtubs, as well as for non-standard curved models. This allows you to choose a product of any size and shape, enhancing the appearance of the room.
Springs
Let's look at how to attach the screen to an acrylic bathtub using springs. First, you need to experimentally find the place where the spring is attached to the bottom of the frame. To do this, the screen is placed over the side of the bath and pressed tightly to the top. The position of the bottom of the panel is marked on the frame.
Then each mark must be shifted upward by 3 cm. A spring is applied to the new line. And the top part will be the place where it is attached. And after attaching the springs to the frame, it is necessary to carry out a number of more operations in a clear sequence.
You need to do the following:
- On the back side of the decorative panel, a corner is glued into which a hole for the hook is drilled. They will cling to the lower part of the spring.
- The bars are glued to the side wall of the bathtub, which will prevent the panel from falling towards the bowl. The thickness of the parts must be selected so that the screen is strictly vertical.
- The panel is attached to the springs with hooks.
All that remains is to press the latter to the floor and place the screen under the side of the bath. When the springs push the screen upward, it will be fixed by the bathtub stiffener. And the glued bars will not allow it to fall over.
Source u-mama.ru
Common mistakes
The main installation errors related to attaching plumbing products to the wall are:
- springy material of the frame legs or gaskets under them - a crack forms between the wall and the side of the bowl;
- absence of a hatch - access to the siphon for its maintenance is blocked;
- The size of the bracket is too large - the side has free movement and is not completely pressed against the tile;
- instead of brackets and adjustable fasteners, brackets are used - these elements provide support for the bowl, but do not fix it completely in a horizontal plane near the wall;
- incorrect location of the adjustable fastener - there is no access to tighten the nut or anchor;
Standard screens usually interfere with the production of blind screens, both from brick, tongue-and-groove block, and from plasterboard. The home craftsman removes the frame, but forgets that its lower frame is designed to support the bottom, increasing the strength of the bowl structure.
Therefore, this frame should be correctly replaced with other design solutions - brickwork, timber under the bottom. This will prevent sagging and peeling of the structural material under the weight of the user and water.
Thus, attaching a bathtub made of acrylic composite to the wall solves exclusively the problem of immobility of the sanitary ware in the horizontal plane. This can be done either by fixing the side to the wall with homemade, factory-made fasteners, or by screwing the legs of the standard frame to the floor, or by constructing a screen from brick, plasterboard, tongue-and-groove blocks.
Clamps
Installing a screen under a bath using clamps is only suitable for asymmetrical bowls. Or for bathtubs with a rounded shape. Before work, you must check the completeness. In addition to the clamps, the kit should include top latches.
The procedure is as follows:
- It is necessary to draw a line along the floor that completely corresponds to the top edge of the bathroom. The easiest way to do this is with a plumb line.
- Clamps are installed along the intended line to mark the places where they are attached to the floor.
- Holes of the required depth are drilled in the latter.
- All clamps are fixed with dowels.
- Latches are attached to the side of the bathtub.
- On the inside of the panels, opposite the latch, screw the fastening tabs.
All that remains is to install the screen into the lower clamps and press the upper part tightly against the side of the bath. A click will indicate the tightness of the fixation in the latch.
Source sanplast.pl
Installing a screen under a bathtub with your own hands using screws requires making a wooden frame to fit the size of the bowl. Decorative panels will be glued onto it. And at the bottom of the frame two locking screws are attached, which will serve as legs.
The screws are completely screwed into the frame. And the frame fits under the side of the bathtub. Now you need to unscrew the spacer screws until the top of the frame rests against the stiffener on the inside. To avoid subsidence, the operation must be carried out with a full bath.
Source 78.ngsdo.ru
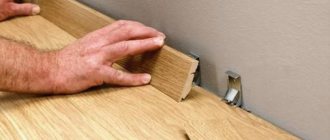
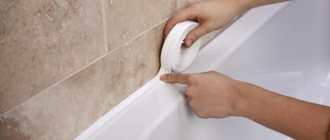
Installation technology for a ceramic bath border
Ceramic borders consist of straight, corner and end elements. The number of straight elements is calculated based on the size of the bathtub/shower tray, corners and ends; standard placement requires two for a bathtub; for a shower tray, there can be one corner. Take the number of straight elements with a small margin - for trimming.
It is advisable to inspect all elements before installation. If there is a need (they are not joined accurately, there are differences in thickness, etc.), the back side can be slightly improved with a file. It is better not to use an angle grinder - the chance of doing more harm than correcting it is too great.
Layout options
Installation methods
The method of installing a ceramic border depends on the finish of the wall and the size of the gap. If it's tile, you can use waterproof adhesive. If the tiles are embossed or the wall is simply plastered, installation with adhesive does not provide the required level of tightness. In this case, install a ceramic bath border using a special tile adhesive for wet rooms. It is sold in bags in dry form; before use, a certain amount is mixed with water until smooth.
Colors can be different, but more often they use white - to match the color of the bath
Sequencing
The whole process consists of a sequence of steps:
- The surface is cleaned of deposits and dust. If there is mold, remove it, treat the wall with an antibacterial compound, and let it dry.
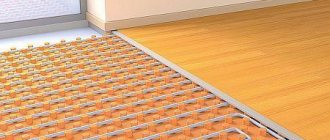
- If the gap between the bathtub and the wall exceeds half the width of the existing curb, it must first be sealed. It’s better to make formwork from below and fill it with cement mortar. The second way is to attach moisture-resistant gypsum board in two layers. If the shelf turns out to be large (more than 5 cm), it must be made with a slope. Maybe about 5%. This way you can use the shelf (put something on it) and the water will not stagnate on it. If necessary (if the border does not cover the entire wall), the tiles used to decorate the walls are first laid, and then the installation of the ceramic border for the bathtub continues.
- Start from one of the corners. Set the angle, then two adjacent straight segments. A layer of glue is applied to the back side of the border and leveled. It is installed in place, pressed, and leveled.
- Then continue laying to one side. End elements are installed on the sidewalls.
The process of installing a ceramic border for a bathroom is not much different from laying tiles. The actions are the same. It is necessary to align the elements in two planes - so that both the edges and the plane go smoothly and without differences.