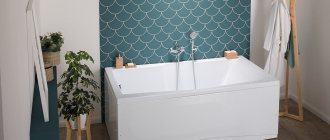
The specificity of bathroom renovation work lies in both the possession of construction skills and the use of special materials used for wet rooms. Plaster under tiles must meet certain requirements. Because of this, it is worth figuring out which plaster is best to put under the tiles for the bathroom.
Is it possible to apply plaster in the bathroom under the tiles?
Wall finishing is an important process, as it helps eliminate defects and level the surface. This manipulation is important, especially if you need to lay tiles in the bathroom or paint the walls.
To figure out whether it is necessary to plaster the walls before laying the tiles, the degree of their unevenness is determined. If the difference in surface level is less than 3 cm, cladding can be applied; a larger figure indicates the need to cover the walls with a leveling mixture.
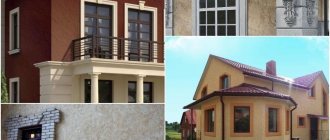
The basis of leveling materials available on the construction market are cement and gypsum. Cement plaster is waterproof, it can be used in rooms where there is high moisture, as well as for exterior finishing.
Due to the hygroscopicity of the main component, the gypsum composition was used for a long time only in dry rooms. Today, additives and modifiers are introduced into finishing materials that can increase their invulnerability to moisture. Due to this, it is sometimes allowed to use such a mixture in the bathroom.
Types of plaster (description of types such as gypsum, cement, decorative, sanitizing)
If we talk about how to plaster bathroom walls under tiles, then today the construction market offers a lot of dry mixtures used to level the walls and create a high-quality base for subsequent cladding.
To plaster the walls in the bathroom, the following types of solutions are used:
- plaster;
- cement;
- decorative;
- sanifying.
Is it possible to lay tiles on gypsum plaster? Gypsum mortar is different from cement and sanitizing mixtures, but it can also be used for plastering walls.
Important! Gypsum is a porous material that absorbs moisture. It is recommended to purchase it for rooms that have normal humidity. For wet rooms it is recommended to use moisture-resistant gypsum plaster.
Gypsum plaster under tiles in the bathroom has advantages. The solution can be applied in as thin a layer as possible, while leveling the surface. The plaster is easy to apply and does not require much effort to spread over the wall. The mixture is plastic and has good tenacity with any material.
Laying tiles on gypsum plaster also has disadvantages:
- the average strength of the gypsum coating requires careful use so as not to damage the plaster;
- On top of the gypsum composition, waterproofing is necessary to protect the coating from moisture and steam;
- the material can react negatively with metal structures, causing rust stains.
Since gypsum mixtures are of medium strength, they are not recommended for laying heavy, thick tiles. Due to the impact of the load along with moisture, the leveling layer will not withstand, peeling and falling off of the tile will occur. And thin tiles can be glued, only before applying the glue, the walls are primed 2 times with a strengthening compound.
How to lay tiles in a bathroom on gypsum plaster? When finishing the canvas with this composition, you need to follow the recommendations.
- After leveling the walls, you need to lay tiles and seal the seams using moisture-resistant grout.
- The applied layer of plaster should be up to 20 mm.
- There is no need to clean the plastered wall, just go over it with soil.
Often, cement mortar is used to plaster walls. In addition to the main components, plaster contains hydrophobic impurities and plasticizers.
Cement plaster for bathroom tiles has a number of advantages.
- The use of the material allows protection from salts and moisture.
- Eliminates the appearance of mold and mildew.
- Has excellent vapor permeability.
- The material is reliable, high strength, environmentally friendly, durable.
Working with cement plaster allows you to create a smooth and solid coating. You can plaster the interior with a cement composition; it is better not to finish the base.
Cement plasters, depending on their purpose, are decorative. They are used to create a beautiful appearance - relief.
Interesting! Such compositions in the form of a ready-made mixture are viscous and easily follow a spatula, forming a pattern on the wall.
Often, when carrying out finishing work in the bathroom under the tiles, one forgets about humidity and the formation of moisture in the thickness of the wall, even when sealing the seams. To eliminate defects, a leveling plaster mixture for the bathroom is selected under the tiles and repaired. Sanitizing and drying materials are suitable for these purposes.
Interesting! Universal sanitizing mixtures. They can be used both in the bathroom and outside the building, as a solid basis for subsequent finishing.
Is it possible to plaster with glue?
You can plaster walls with anything that spreads and hardens, so glue can also be used in this case. When choosing a material for bathroom renovation, take into account its water-repellent properties. Otherwise, the finishing will all go down the drain.
We also recommend looking at - Frost-resistant adhesive for exterior use
Glue plastering process
Since the glue has effective adhesive properties, it is recommended to use it only for leveling walls as a coating after the main plastering. The technology for performing the work remains the same as in the case of conventional plaster.
Preparatory stages
Before finishing, the surface should be prepared. The preparation process consists of the following stages:
- old material is removed and cleaned;
- existing rust is removed with an acid solution, old paint by burning with a blowtorch, mold with the help of antifungal agents;
- cracks need to be opened and dusted, and the through space around communications needs to be cleared. To seal cracks and crevices, cement mortar is required, and reinforcing tape is additionally used;
- on a surface that is too smooth, notches of 2-3 mm are made, which will allow the composition to better adhere to the wall;
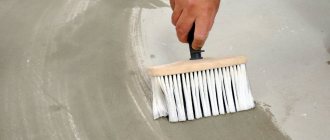
- The final stage is surface treatment with soil.
Calculation of area and necessary materials
To finish a bathroom tile, on average you need to lay a mixture 20 mm thick on the surface. This value is effective, it will protect the walls from moisture, the load-bearing layer will be strong and stable, which will allow you to attach various bath accessories if necessary.
The calculation is carried out taking into account the thickness of the application layer. Differences in vertical planes are measured by applying a flat rod. If the layer thickness is 20 mm, at least 16 kg will be required, so one 25 kg bag will not be enough for 2 sq.m. If the layer thickness is 10 mm, then it will be enough to lay the solution on 3-4 sq.m.
For example, a room is 6 sq.m., and the ceilings are 3 m high, then 10-20 bags will be required, based on the thickness of the layer.
What should be the thickness of tile adhesive: maximum and minimum layer for floors and walls
Determining the thickness of the tile adhesive when laying on the floor or walls is one of the main tasks when planning the finish. In this case, it is important to take into account many factors: the type of material, for example, porcelain stoneware or ordinary tiles, its size, surface quality, etc. Let's figure out what thickness of the solution is considered optimal in a particular case.
The thickness of the adhesive is important when laying tiles
Features of adhesive compositions
The thickness of the layer of adhesive mixture under tiles or porcelain stoneware can vary dramatically. Of course, the key factor here will be the facing material used and its individual characteristics, but much also depends on the adhesive composition itself.
There are three main types of tile adhesive:
- Cement . Standard dry mixture of Portland cement, sand and modifying additives with plasticizers. An alternative is a homemade mortar made from cement, sand and slaked lime. At the same time, working with such glue is quite simple and convenient.
- Two-component . These are predominantly epoxy compounds, which include an epoxy resin and a catalyst. The result is a viscous adhesive that provides effective adhesion of surfaces with minimal mixture consumption.
- Dispersive one-component . These are ready-to-use mixtures, which mainly consist of resin components of one type or another. They can also be based on polymer components, for example, latex.
Types of adhesives for tiles
When applying cement mortar, you will need a larger layer compared to other types of mixtures, but the material itself has a lower cost, which allows you to compensate for its high consumption.
Maximum and minimum values
The thickness of the adhesive layer can vary during the tile laying process, however, there are some restrictions on this. In order for the tiles, especially porcelain tiles, to be securely fixed to the surface, it is important to adhere to the minimum and maximum limits.
The minimum thickness of the adhesive applied when laying tiles is calculated individually depending on the format of the tile. In general, for small products it is not recommended to make a layer less than 2 mm. If the tiles are heavy and have significant dimensions, such as porcelain tiles for the floor, the lower limit can be adjusted to 4-5 mm.
Now let's look at what the maximum thickness of a layer of standard tile adhesive should be. An increase in the amount of mortar is often associated with attempts to level the surface to be coated without the use of additional materials and screeding. In this case, it is necessary to mark all the irregularities on the surface and apply a minimum layer of glue to the highest point. The depressions and holes will be filled with solution. At the same time, you should not make a layer thicker than 10 mm for ordinary wall tiles, 15 mm for floor tiles, and porcelain stoneware can be laid on glue up to 20-22 mm thick. A further increase in the amount of mixture will lead to deterioration of adhesion, as well as irrational costs.
The thickness of the tile adhesive will depend on the tile used and the structure of the adhesive itself.
Calculation of the required quantity
In order to determine the thickness of tile adhesive, for example, for porcelain tiles and the mass of the required mixture, it is necessary, based on the available data, to make calculations in several stages:
- Determine the dimensions of your tile and select the appropriate mortar thickness for it, taking into account the quality of the surface being tiled.
- The pack with the mixture for the solution should indicate how many kilograms of material are used per 1 square meter with a layer thickness of 1 millimeter.
- Multiply these two numbers and you will get an intermediate result - how much mixture is needed to cover 1 square meter of area.
- Then calculate the total dimensions of the area to be covered.
- Multiply the first result by the total number of square meters.
- In order for you to always have a supply of mixture in case of an error in calculations or force majeure during the installation process, multiply the last result by 1.1. Thus, you will add 10 reserve percent to the calculated amount of the mixture.
When calculating the thickness of the adhesive, it is necessary to take into account the dimensions of the tile and the area of the surface being tiled.
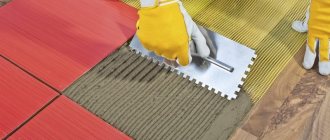
Rules for applying the solution
Most often, purchased powder adhesives are used in repairs. In order for them to acquire their properties, the mixture must be diluted with water according to the instructions before use. In this case, you should not immediately add the entire volume of liquid; it is recommended to knead a thicker mixture first, and then dilute it as necessary. After this, you should leave the solution to infuse for about 10-15 minutes so that all components bond well with each other and form a high-quality adhesive mass.
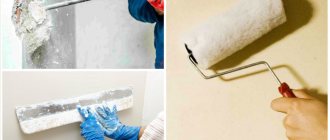
To distribute the adhesive mixture over the surface as efficiently as possible, use a notched trowel. The number of the tool indicates the size of its teeth; the larger the tile, the larger they should be. It is recommended to apply the adhesive directly to the walls or floor. If you need to remove unevenness, then you can additionally lubricate the tile itself. A small spatula is used as an auxiliary tool.
To ensure even distribution of tile adhesive, it is recommended to apply it using a notched trowel.
In order for the glue to better adhere to the tiles and surface, it is recommended to wet them with water and dry them in advance. Please note that porcelain tiles practically do not absorb water.
Laying tiles on walls
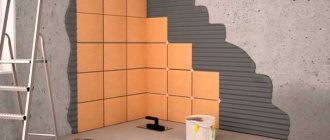
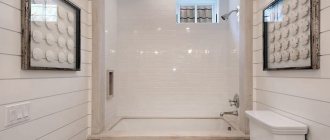
Let's look at how to properly apply the solution to the walls. For standard wall tiles, the thickness of the tile adhesive should be approximately 4-5 mm. In order to install it correctly, you must first level the corners and smooth out the main irregularities using plaster.
It is best to start laying from the bottom at the level of the second row. Its position must be calculated in such a way that in the end all the upper rows consist only of solid elements, not taking into account the outer tiles.
Step-by-step application technology
Plastering the canvas in the bathroom is carried out several times.
The first layer is applied according to this principle:
- the walls are wetted with water;
- Using a trowel, apply the liquid composition up to 5 mm.
The main layer of material should have a thickness of 5 mm. If the layer is insufficient, it is possible to apply another one. The first one must dry thoroughly before applying it. The second layer is made thicker.
When laying the rough layer, the mortar is poured onto the walls and then leveled.
The last stage before gluing the tiles is the final one. It is applied after the rough application of the mixture has dried, adhering to the following rules:
- the last layer is the thinnest - up to 2 mm;
- the canvas is sprayed with water, a simple spatula is used to level the material;
- the surface is leveled using a grater;
- The tile material can be glued only when the finishing layer has completely dried.
Standards for facing work
The document mentioned above was adopted almost thirty years ago and is still in effect today. It gives only a general idea of cladding technology, without taking into account the capabilities of modern building mixtures and soil compositions (see Types of construction primers and their scope). Personal SNiPs for wall cladding with ceramic tiles simply do not exist.
Therefore, home owners who want to clad the facade with their own hands and do it according to all the rules, it is better to turn to the TTK (standard technological maps) for clarification. For our part, we will try to compile the information available in these two documents and convey it to the readers of our site in the simplest and most accessible form.
Vertical surfaces: preparation for cladding
Any construction work begins with preparation, and cladding with ceramic tiles SNiP requires this first of all. After all, this is one of the most labor-intensive types of facade finishing, and the price of tiles is such that mistakes made during its installation will entail quite significant losses. We think that everyone understands this.
Preparatory work includes the following technological operations:
- Visual inspection of the surface to identify defects
- Cutting down mounds and filling depressions
- Notching (bush hammering) the surface
- Installation of reinforcing mesh
- Installation of beacons and marks
- Leveling walls by applying a coating of mortar
Sequence of preparatory work
The workplace must be organized so that all tools and necessary materials are at hand. It is very convenient when there is a mobile cart on which you can place a tub of solution.
- To identify surface defects, you will need a two-meter level. By applying it to the wall in different directions, depressions and bumps are identified, marking them with colored chalk. Protrusions, for example on a brick wall, can be cut down with a chisel or smoothed using a grinding wheel.
- The depressions are primed with a 10% solution of PVA construction adhesive, or a penetrating primer composition, and then sealed with cement-sand mortar. To apply and level it, you need a finishing ladle, a plaster trowel and a trowel. There is no need to grout the surface.
- For better adhesion of the tiles to the base, notches are made on brick and concrete surfaces. For small volumes of work, a manual bush hammer or a notching hammer is used to perform notches.
- If the façade area is large, it is better to use a pneumatic or electric tool. After making the notch, dust must be removed from the surface. This is done with a brush or roller dipped in water.
- The wooden surface is prepared for cladding differently. Wooden washers up to 2.5 mm thick are nailed to the walls every 40 cm. First, roll waterproofing is installed over them, over which a fine-mesh plaster mesh is stretched. Plastering will be done on it.
- To better retain the solution on the mesh, fiber should be added to it - it is commercially available and costs a pretty penny. The thickness of the screed, in this case, should not exceed 2 cm. Thanks to the bars, a small air gap is formed under the mesh, which protects the facing layer when the wood is deformed.
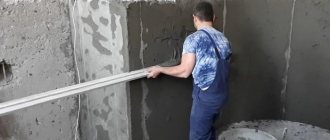
- To ensure uniformity of the screed during plastering, a beacon is installed in the upper part of the wall, at a distance of 30 cm from the cornice, or a dowel-nail is driven in. Its cap should protrude outward to the thickness of the future screed.
- Next, the wall is hung: a cord with a plumb line is applied to the top nail, and, guided by it, the same beacon is installed at the bottom of the wall. The same should be done on the opposite side.
- Now, a cord is pulled between the nails in all directions, which will symbolize the surface of the leveling layer. If necessary, the level of the protruding caps is adjusted to achieve the greatest uniformity of the screed. The total thickness of the leveling layer should not exceed 20 mm.
- After hanging, the walls are plastered in two layers (see Plastering external walls): apply the solution from the falcon and spread it over the wall in a thin layer using a plaster spatula. Work can be continued only after the solution has completely hardened. Then all that remains is to prime the walls, let them dry - and the surface is ready for cladding.
- Wall cladding with ceramic tiles (SNiP 3*04*01-87) involves leveling the surfaces using ordinary cement-sand mortar (1:3). But, since the creation of this document, alternative options have appeared. For example, these are dry universal building mixtures, one of the options of which you see in the photo. They are sold in bags of 25 and 50 kg, and after mixing with water they are ready for use.
In such mixtures, in addition to binders and organic components, there are modifying additives that increase adhesion, increase the plasticity of the solution, and give the plaster layer resistance to temperature changes. Accordingly, the quality of the cladding in this case will be higher.
Tile cladding
If the house has just been rebuilt, it is advisable to begin finishing the facade only after the blind area has been installed. Otherwise, its mark must be placed on the wall. The line of the lower border of the cladding will be marked along this mark, and a metal corner will be installed to support the first row of tiles.
- To determine the vertical contour of the cladding, beacons will again have to be installed. Metal pins are driven in just above the top line of the cladding and a wire is pulled between them. The gap between the string and the base should approximately correspond to half the thickness of the tile.
- The first row of tiles is laid out dry along the wall, from the middle to the edges. This will make it possible to accurately count their number, as well as calculate the width of incomplete elements. The layout is made in accordance with the location of each tile in the cladding.
- If the whole number of tiles does not fit in a row, then you need to move them so that additional tiles of the same size can be installed on both corners. Otherwise, the cladding will not be symmetrical, and this will affect its aesthetic perception. Installation of tiles on the wall is carried out in the same order.
- Different types of tools are used to cut ceramic tiles. Professionals use a tile cutter, with which they can not only separate a rectangular piece of tile, but also cut at any given angle.
It makes no sense to purchase such a tool for a one-time job; you can perfectly use a hand-held circular saw, called a “grinder,” which is found in almost every home. Sharpening the edges can be done either with a grinding machine or manually on an abrasive wheel.
Which glue is better
As a mounting base, it is best to use dry tile adhesive, which is simply diluted with water to the desired consistency. You can, of course, mix the glue yourself, but you just need to keep in mind that the strength of the mortar for tiles should be lower than the strength of the leveling screed.
Thus, if an M150 solution is used for plastering a wall, then an M50 grade mixture is needed for cladding. Her recipe is as follows: for 1 part of M300 cement, add 6 parts of sand; 0.7 parts lime paste, and about 30% water.
Portland cement cannot be used for mixing glue! Lime is added to increase the plasticity of the solution. It can be replaced with PVA glue, at the rate of 250g per bucket of solution, or with liquid plasticizer, which is also commercially available.
Gluing tiles
The most important thing when installing tiles is to ensure that the rows are horizontal and the thickness of the joints is uniform. Since the first row rests on a metal corner, you don’t have to worry about the tiles “going” down.
But then you need to use the mooring cord:
- It is stretched along the top edge of the first row of tiles, and lighthouse tiles are glued. The mooring cord is the reference point that will not allow the cladding to deviate horizontally. Upon completion of the second row of stickers, the entire procedure is repeated. Vertical seams are controlled using a plumb line.
- The thickness of the joints is ensured by plastic or glass wedges inserted between the tiles. Before gluing, the tiles are not soaked in water, and this is not necessary. Modifying additives in the tile adhesive prevent moisture from the solution from being absorbed into the surfaces being bonded. Moreover, in the process of preparing for cladding, the walls were primed.
- The mortar is applied to the tile, grooves are made on it with a notched trowel, and pressed against the wall surface, pressing down with the handle of the tool. The protruding excess is removed, and the surface of the tile, stained with the solution, is immediately cleaned. After pasting the smooth surfaces is completed, using the plane of the finished cladding as a guide, install the corner elements.
While the solution has not hardened, its excess is removed from the seams with a special tool called a curved jointer. How this is done can be clearly seen in the picture above. The space created after removing the mortar is subsequently filled with grout.
Leveling the surface
When there are surface unevennesses of more than 10 mm, the square footage of the tile is very large, then leveling is done using beacons.
Step by step alignment process.
- A gypsum mixture is mixed to attach the profiles. A vertical line is determined by level at a distance of 10-10 cm from the corner, after which the mixture is applied pointwise. The profile is inserted vertically, pressing it into the plaster. The following beacons are installed at a distance of 100-120 cm throughout the bathtub. The location of all beacons is fixed in one area, horizontally.
- The material is mixed and left for 5 minutes.
- The material is thrown in a thick layer onto the surface in the middle of 2 lighthouses. Apply from bottom to top, tightly, excluding emptiness. The plaster is adjusted and smoothed using a trowel, compacting the areas along the beacons.
- After half an hour, uneven areas are eliminated. Afterwards the area is sprayed with water and rubbed with a coarse grater.
- The last stage is to smooth the walls using a wide spatula.
When the solution dries, the walls are primed. Next you can lay the tiles.
How to properly plaster walls in difficult places
Yes, I think that many have encountered the problem of how to plaster evenly and beautifully near and under pipes. All these places are called problematic and complex. Now I’ll tell you what to do and how to plaster in these places. First make a template, without it you won’t succeed. It can be made from a flat piece of board, metal or tin. In general, whatever will be easier for you.
Under the pipes, if there is a distance of a couple of centimeters, then you can use a small corner. Because it is very difficult to get there.
Plastering and leveling corners
Here I want to say the following: “A smooth and beautiful corner is a decoration for the entire room, and if it is made with your own hands, then it is also self-respect and the pride of the owner in the apartment.”
Basic principles of aligning walls according to beacons
All areas located in the corners should be plastered last. Typically these are unplastered distances of 15 or 20 centimeters. The very execution of this work requires great care. One of the sides of the corner can be processed simultaneously with the main wall, and the other side can be processed after the first has dried.
But if you feel confident in yourself, then you can do it at the same time. The principle of operation is the same as when working with walls: we throw on the mortar, remove the excess plaster with a lath, drawing and pressing it against the beacons. In order to get a nice neat and even corner, cut one of the edges of the slats at an angle. This will help you avoid touching the adjacent wall.
At the end, we place the strip in the very corner and lightly rub it up and down. This will give you a clear line of the angle, and most importantly it will be perfectly straight. And this will be the final action in working with angles. After completing the work, we put the slats against the wall and see that you have no unevenness or deflections, which means that you did everything right and you can start to be proud of yourself.
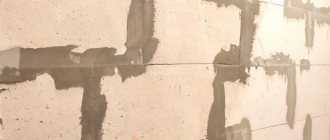
We prepared this wall for ceramic tiles, so we deliberately did not achieve a smooth surface in the plaster and did not remove the beacons. All small chips or irregularities do not in any way affect the overall plane of the wall and will not in any way affect the quality of the ceramic tile installation. At this stage, the preparation of walls for ceramic tiles is completely completed. All that remains is to apply the primer and start laying the tiles.
Friends, at the end I just want to add that there is nothing complicated in repairs. The main thing is to tell yourself that I can do it - I will do everything. Well, we will constantly advise you and will always try to help you with this. When repairing yourself, repair with us!
If this article didn’t help you in any way, and you simply don’t want to get your hands dirty, then it’s better for you to just call the specialists, and they will be happy to do everything in an ideal way for you. Read our second article about the basic principles of aligning walls using beacons.
Recommendations and advice from experts
When choosing a plaster mixture for the bathroom, it is important to pay attention to the advice of experts who will tell you how to finish the walls with high quality.
- The mixture is diluted with clean water at room temperature.
- When mixing the plaster, the dry mixture is poured into water and mixed thoroughly.
- Each layer requires its own thickness of material.
- The composition is prepared half an hour before application, otherwise it will harden.
As you know, plaster mixtures can be different, so everyone independently chooses what type of finish to use. Regardless of the choice, it is important to treat the walls of the bathtub under the tiles with moisture-resistant plaster. This procedure will eliminate the need for regular cosmetic repairs.