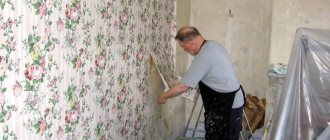
To beautifully cover a room with non-woven wallpaper, it is recommended to properly purchase or prepare the adhesive composition. The result of the renovation of the premises will completely depend on this. There is no need to skimp on the fixer. The gluing will be done poorly. The operational period of repair will be reduced. The aesthetics of the appearance of the room will be lost. How to dilute glue for non-woven wallpaper is discussed later in the article.
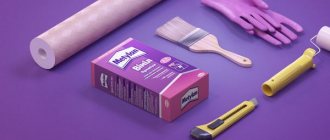
Glue for non-woven wallpaper
Criterias of choice
When choosing adhesive for non-woven wallpaper, it is recommended to take into account important criteria that determine the quality and technical characteristics of the product.
| Manufacturer | Of the large number of adhesive mixtures, preference should be given to well-known brands. Among the brands that deserve trust: MOMENT, EXCLUSIVE, ACM, Metylan, QUELYD, Kleo. |
| Purpose | The basis of the adhesive composition is in most cases modified starch. Thanks to various additives and adjusting the concentration of the main substance, it is possible to create adhesive mixtures intended for certain types of wallpaper: non-woven, paper, textile, vinyl, photo wallpaper. The label of each composition contains information for which material it is suitable. |
| Ready or not | On the shelves there is glue, ready for use and in powder form. The second option requires dilution with water before wallpapering. It takes a little time, the proportions are indicated on the label. It is more convenient to use the finished product; there is no need to wait time or control the consistency. But its cost is higher than its powder counterpart, and its shelf life is limited. |
| Antifungal | Antifungal substances can be added to the adhesive mixture. During the process of gluing and use of the finish, the surface will be protected from microbiological processes. |
| Waterproof | They produce an adhesive mixture for wallpapering in damp rooms. The product label says "moisture-resistant adhesive" accordingly. You need to work with it strictly following the instructions. Upon completion of work, you should wait until the surfaces are completely dry before using the room as usual. High humidity during this period will prolong the drying of the wallpaper. |
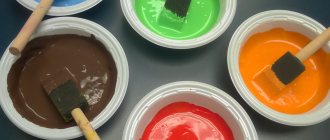
| With indicator | When diluting the glue, you may encounter that the solution turns out blue or pink. There's no need to worry. The pigment is added to indicate the quality of the coating of the working surface with glue. He does not dye the canvas. In the seam area it is easier to remove protruding excess. |
| Weight, kg/volume, l | Glue powder is packaged in polyethylene and cardboard boxes weighing from 0.06 to 10 kg. The finished mixture is poured into polymer containers with a volume of 0.2-15 liters. |
Preparing the glue correctly
You can prepare the adhesive composition yourself. This requires knowledge of technology. Strictly follow the step-by-step cooking instructions.
Starch glue
In total it will take about 40 minutes. So:
- Take an enamel or metal container.
- Water is pouring in. Bring to a boil.
- Starch is added in a thin stream.
- The mixture is constantly stirred.
- Bring to the desired consistency of “liquid dough”.
- Strain through cheesecloth.
- Cools down in about 2 hours. Can be used.
Cellulose glue
Ready-made powder-like mixtures are bought in the store and filled with water. Infuse for half an hour to 3 hours according to the instructions for use. The water should be slightly warm. Hot is not suitable. Glue won't work. A precipitate will form in the form of flocculent discharge. After gluing, bumps and swellings will appear on the wall. The room will look sloppy.
PVA glue
It is especially popular. Step-by-step cooking instructions:
- Add gelatin to a glass of cold water. It is left to swell for a day.
- A water bath is made. Gelatin and flour are added to the water. Mix thoroughly. It is important to avoid the formation of lumps.
- After a few minutes, glycerin and alcohol are poured out.
- The mass is mixed. The fire turns off. Wait until it cools down completely. Only then can it be used for wallpapering a room.
Important! All of the above options for preparing the adhesive composition yourself are used exclusively in cold form. Applying hot or warm glue to the canvas can ruin it.
The choice of glue for decorating a room should be taken responsibly. Only high-quality building materials will ensure a beautiful appearance for your home.
How to dilute and apply
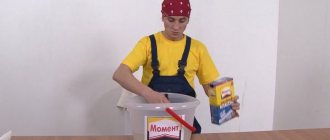
To dilute glue produced in dry form, you will need a spacious container (basin, bucket), a wooden spatula and water. Everything must be clean to prevent solid particles from getting into the glue. If dirt gets on the wall or wallpaper during application, it will be impossible to remove it from under the canvas. This is where a bulge or breakout most often forms.
The liquid for diluting the glue is clean, free of sand and foreign inclusions. The water temperature should be between 23-25 degrees. This is a favorable indicator for dissolving the dry mixture.
When mixing the glue with a mixer, it is allowed to use warmer water (no more than 35 degrees).
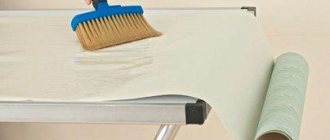
The proportions of glue and water are indicated on the product label. Do not violate the standards recommended by the manufacturer. Otherwise, working with a mixture that is too thick will be problematic. The liquid composition will not provide proper adhesion of the wallpaper to the wall. The glue must match the type of wallpaper with which you plan to cover the room.
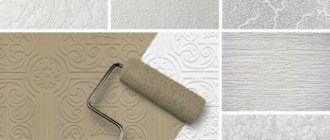
How to properly prepare wallpaper glue. Methods for wallpapering
Procedure for diluting glue:
- fill the container with water (the amount should be proportional to the glue used);
- add dry glue portionwise to the liquid with continuous stirring; this procedure is performed quickly so that lumps do not have time to form;
- after receiving a homogeneous substance, you need to let it brew for the time indicated on the label (from 3 to 10 minutes);
- Stir the glue vigorously again, making sure there are no lumps or foreign inclusions.
The composition is ready for use. If you follow the instructions, you get a consistency reminiscent of medium-thick sour cream.
Moment Non-woven - review
Hi all!
Not long ago we finished wallpapering (finally), and I hasten to share my impressions) Even at the beginning of the renovation, when diluting the glue, I asked myself the question - how to dilute the glue correctly? how to apply it? and in general how to work with it. Yes, there are instructions on the box, but personally we still haven’t figured it out. We went the experimental route and everything worked out. That is why, as the renovation progressed, my review was born. Those who are interested and necessary (and just curious) are welcome.
Place of purchase - first bought at a regular wallpaper store. We went to Stroylandia for the second pack. I think finding such glue is not a problem.
Cost - from 300 rubles. up to 350 rub.
Pack volume - 500 g.
250 g packaging is also available for sale.
Packaging: cardboard, the mixture is located directly in it, without any additional polyethylene (to protect it from getting wet, for example). The package contains all the necessary information for the consumer. Although the instructions seemed too complicated to us. Although, perhaps this is due to our inexperience in the field of wallpapering.
Appearance: White flakes and granules.
Purpose. This adhesive is intended for gluing all types of non-woven wallpaper (smooth and structured). Naturally, we bought it for non-woven wallpaper.
Compound:
High-quality adhesive based on methylcellulose and modified starch
Features of Moment Non-woven adhesive (information from the website):
Applied directly to the wall High adhesive ability Easy correction of joints during gluing Designed and manufactured in Germany
Glue preparation:
It would seem that this is not a tricky matter. With the instructions at hand, you can dilute the glue and get to work. But it was not there. The instructions describe two methods for diluting the glue. The first is for surface treatment, the second is for wallpapering. What is the difference? If to hang wallpaper we need to apply glue directly to the wall, and not to the wallpaper, then is this a surface treatment? For some reason, I thought that these were equivalent concepts, and we went the first route - we diluted the glue according to the instructions in the first column.
We started gluing. And nothing. The wallpaper just didn't stick. Waves and bubbles formed that did not want to disappear. At first they complained about crooked hands, but three people can’t have problems with “curly” hands at once. After scratching the turnip, they decided that it was the glue and dissolved the entire pack. Those. for the second column - added water up to 9 liters and poured the remaining mixture into a bucket. Stirred.
Thus, we got the proportion - for 9 liters of water, a pack of glue is 500 g. By the way, we diluted it in warm water. The first time we diluted it “by hand” - several lumps appeared, which dissolved after a couple of minutes of stirring. The second time they didn’t bother and immediately diluted the glue with a construction mixer.
By the way, the manufacturer indicates that it should be diluted for 20-30 seconds. Neither manually nor automatically - this time is not enough for the glue to mix well and dissolve. This took us 3-4 minutes.
After stirring, leave the glue and let it swell. We waited the allotted 15 minutes, even about 20 minutes. After the allotted time, we see that the consistency is similar to the “necessary” glue (for orientation, it looks like thick jelly).
We are trying to glue the wallpaper - hurray! things went well.
Further. We pay attention to the method of gluing wallpaper to the wall. The manufacturer indicates that there is no need to measure the required dimensions, but glue directly from the roll. Seriously?? It’s actually not that easy to hold such a thing suspended from the ceiling... So we did it the old fashioned way - we cut off the required amount of strip and glued it to the wall. In my opinion it is much easier and simpler.
The glue worked well and showed itself to be excellent. The wallpaper stuck and did not come off anywhere.
By the way, we glued the wallpaper onto two types of bases - concrete and wood. It worked equally well both there and there. I think it’s unlikely that we’ll ever be able to tear them off the tree if we decide to change the situation))
By the way, don’t forget that when wallpapering, drafts in the room are not allowed - otherwise, goodbye to your troubles, and it won’t be the glue’s fault!!
The manufacturer also states
Possibility of correction of joints during gluing
I agree with this point - when gluing wallpaper, especially with a pattern (for joining), there is such an opportunity - you can carefully adjust it without damaging the material.
I also want to note that our wallpaper is light, and I was worried that the glue residue at the joints might show up as some kind of yellow spots. Of course, we tried to be as careful as possible in these places, but mistakes happened, so the glue ended up on the wallpaper. And it didn’t leave any stains/smears.
Consumption. This point gave us quite conflicting feelings. Firstly, the store assured us that this volume of the pack would be enough for us, and there would be some left over. Secondly, this is written on the packaging - such a pack should be enough for 60 sq.m. surface to be pasted.
Our room is almost 25 sq.m. and it took us 1.5 packs! Maybe we got carried away too thoroughly and coated the walls so that it would last for centuries (and then we would never tear the wallpaper off the walls), or we misunderstood something.
Thus, for 25 sq.m. room, 5 rolls of wallpaper 1.06 wide, 10.07 m long took 1.5 packs of glue.
Glue storage. I don’t know how it is for anyone, but for us this lesson lasted for 3 days. And, naturally, it would be expensive to buy a pack of glue every day - so the manufacturer has provided the possibility of storing diluted glue. As indicated on the package - up to 7 days, in a closed container. We had to store it for only a day - the glue did not lose its properties.
The result in the photo at this stage of repair:
Conclusion. In the end, we liked the glue in the work, although in the first minutes we spat at it and swore at it, wondering why it didn’t work for us and the job wasn’t going well.
We hung wallpaper for the first time (on our own), so we had difficulties understanding the instructions, to my shame. But, having figured it out, the wallpapering process went very well, and I couldn’t even be happier with this glue. Does not leave streaks, holds well, is stored well. It does not have an unpleasant odor (on the contrary, the room smelled pleasantly of renovation, I don’t know how to explain it =) ).
I recommend to buy!
Thank you for your attention!)
I will still take off a star for unclear instructions, even if it’s my fault - it still needs to be written more clearly, many consumers are also encountering such instructions for the first time and can also make mistakes in use. Well, and besides, with the expense of misunderstandings...
I think this glue deserves 4*, taking into account its shortcomings. And the glue itself is 5*!
At what temperature can you glue wallpaper?
In the room where repairs are being made, all windows and doors must be closed to prevent the formation of drafts. The following conditions are considered favorable for pasting:
- humidity level – medium and low;
- temperature regime - 15-25 degrees (some manufacturers indicate on the label that the glue can be used at a temperature of 5-7 degrees).
When the temperature reaches 28 degrees and above, work will be more difficult. Dryness helps the adhesive dry quickly, leaving no time for correction. Low temperatures prolong drying of the finish. Therefore, experts advise adhering to standard values.
Elastic compensating pump couplings
In order to partially dampen vibration vibrations and extend the service life of shaft bearings of pumps and electric motors, couplings with elastic elements are used.
The simplest in design and most reliable is the sleeve-pin type coupling. In design, it resembles a rigid flange, the coupling halves do not fit rigidly to each other, and in one of them the connecting pins have elastic gaskets.
The spring coupling is more complex in design. In addition to two coupling halves installed at the ends of the shafts, between which there is a spring, the coupling has a protective housing. The housing or casing is also a storage facility for lubricant. The ends of the spring rest against protrusions on different coupling halves. The pump shaft begins to move at the moment when the motor shaft, rotating, compresses the spring and it, in turn, transmits force to the second coupling half.
Why is wallpaper glued away from the window?
When choosing where to start wallpapering, the lighting of the room is taken into account. The best option is a window. Moving in the direction from the window opening, you will be able to hide imperfections at the joints.
This technique was used in the days of overlapping canvases. This type of connection of fabrics is irrelevant in modern materials. Therefore, starting work from the window is not fundamentally important.
Reasons for discrepancies in wallpaper
To know how to eliminate the possibility of wallpaper discrepancies even before the start of repairs, you need to familiarize yourself with the main causes of this problem. Home craftsmen usually encounter this difficulty when the wallpaper glue does not match the thickness and material of the wallpaper used. The canvases may be too thick or heavy, this also applies to vinyl two-layer material. Quite often, the canvases diverge if the following types of wallpaper are used during repairs:
- fiberglass;
- non-woven;
- on a textile basis.
They require the use of highly adhesive glue.
Is it possible to glue wallpaper onto old paper?
Previously, paper wallpaper was re-glued without removing the old sheets. This approach is now considered unacceptable. There are several reasons for this:
- modern canvases are heavier;
- layers form swellings on the surface of the finish, sagging;
- the joints of the old finish appear on the new layer.
The main arguments against wallpaper layers are low aesthetic qualities and unreliable fixation of the canvases. When applying glue to the old finish, the paper becomes soaked. As a result, it begins to peel off from the wall. Bubbles and sagging form on its surface. It is not possible to glue new wallpaper onto such a base. Labor and money will be wasted.
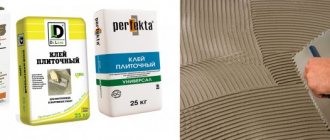
Selecting the mixture
High-quality glue will create a reliable fixation of wallpaper to the surface; there is a wide range of adhesive mixtures on the market. To make a choice, you should study all the types:
- Products for paper-type wallpaper, the fixation is not strong due to the light weight of such wallpaper;
- Products for heavy canvases use PVA in the base to create the required strength;
- Universal, they can be used for all types of wallpaper, but they often cannot guarantee good quality; you can use them for light types of canvases;
- For glass wallpaper, they are distinguished by their dispersion structure, and can cope with gluing fabric types of wallpaper too;
- For non-woven fabrics, designed to withstand heavy material.
High-quality glue will create a reliable fixation of the wallpaper to the surface.
Can the pump motor be used?
Most often, axial piston models are reversible. This information must be displayed in the passport of the hydraulic unit.
Most gear-type hydraulic pumps do not perform the reverse function. In such devices, the rubber seals cannot withstand increased loads on the suction line due to its absence. At the same time, in hydraulic motors pressure is present both at the inlet and at the outlet line. And the pumps are not equipped with drainage systems. When using gear structures as a motor, excess pressure will simply push out the sealing elements.
Vane type pumps are not capable of performing the functions of motors due to special design features. In such hydraulic units, the plates protrude from the grooves and firmly adhere to the stator under the action of centrifugal forces that arise during shaft rotation. When installing a hydraulic pump on special equipment instead of a hydraulic motor, the working fluid will enter the internal space in large volumes and block the movement of the shaft. In our company you can get high-quality hydraulic pump repairs.