Having built a pool bowl out of brick or sculpted a pool bowl out of concrete, you are only halfway through the first water procedure, since the tank has yet to be made waterproof. Even if the design calls for a PVC film for waterproofing, plaster for the pool is necessary, because the bowl also needs to be leveled under the film. What materials to choose and how to perform plastering work so that the pool lasts as long as possible?
Basic DIY pool finishing work
After installing the pool bowl, it is necessary to level the walls and bottom, which gives the base waterproof characteristics, and perform decorative finishing.
It is necessary to carry out step-by-step work:
- cleaning the base from dust and grease stains;
- sealing cracks, tile joints;
- priming of surfaces;
- plastering;
- creating an additional waterproofing layer in the bowl;
- decorative finishing of the container (polyvinyl chloride tint film, ceramics, etc.);
- installation of special equipment.
How to protect your pool from moisture
Without protection from moisture, a bowl made of brick blocks or concrete is damaged by water, and rust forms on the metal reinforcement, reducing the load-bearing characteristics of the structure. The shelf life of the pool will be reduced. You can protect the bottom, walls of the structure, and panels of the room with special putties, plasters and other materials with waterproof characteristics.
The coating is selected in accordance with the performance characteristics of the base. For bowls, waterproofing mixtures are recommended for wet use, for wall panels and ceilings - for wet use.
Methods of execution
There are two ways to perform waterproofing:
- Internal.
- Outdoor.
The purpose of external waterproofing is to cut off groundwater, as well as to protect against capillary absorption of moisture by concrete. It is performed only for bowls immersed in the ground.
In this case, the protection is installed at the stage of formwork assembly, before installing the reinforcement cage. Various permanent types of waterproofing are placed in the trench, polyethylene or more durable types of films, membranes, and bitumen roll coatings are laid.
If the bowl size is large, waterproofing is applied before filling the sinuses (after the final hardening of the concrete and dismantling of the formwork). The choice of type of protection is made at the design stage , at which time the material and other nuances of waterproofing are determined.
Types of hydro-resistant plasters used
They determine how to plaster the pool in accordance with the planned mode of use, workability, characteristics of the bowl material, climatic conditions of the region and other parameters. Plaster compositions for the walls of the room and the pool tank are selected separately. Plasters differ in the base (binding components), fillers and modifying additives.
Based on the type of binding component, plaster is produced in the following varieties:
- mineral (cement, lime, etc.);
- acrylic (the binding component is acrylic resins);
- silicate (based on liquid glass);
- silicone (based on silicon-organic polymer components);
- polymer-cement;
- asphalt.
According to the place of application, the compositions are divided into the following subtypes:
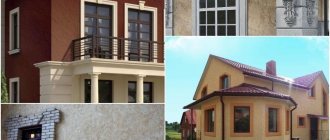
- façade;
- frost-resistant;
- weatherproof;
- increased strength;
- for internal processing;
- universal use.
Determine which material to choose based on the tasks being solved:
- for preparing the base (rough or standard);
- for decorative work at the finishing stage;
- for special functions.
Waterproofing plasters for swimming pools
Waterproofing plaster mixtures are available in several varieties:
- hydrophobic;
- waterproof.
Waterproofing compounds are characterized by increased density, which prevents moisture from seeping through. To add density, the composition includes components that correct surface deformations: ceresite, sodium aluminate, aluminum oxide. Liquid glass is also included in the plaster composition.
Hydrophobic compounds are distinguished by their properties of repelling moisture; an example of such a product is Cemmix CemAqua. Experts advise using bulk hydrophobic plaster compositions for swimming pools, since surface-acting mixtures are short-lived and require regular repairs.
For maximum protection of the bases, it is recommended to use 2 types of hydrophobization (surface and volumetric).
The most popular waterproofing plaster mixtures are products of the following brands:
- Barallastik;
- Bauta;
- Consolid 540;
- Hydrolast;
- Ceresite;
- Covercol.
Moisture-resistant plaster for pool walls
To finish the surface of the room in which the pool is installed, plaster mixtures with water-repellent characteristics and air permeability are used. Waterproof plaster protects walls from moisture damage and allows air to pass through, maintaining a stable microclimate in the room.
For leveling, cement plaster mortars from manufacturers or those made independently are used.
The characteristics of the mixture are determined in accordance with the characteristics of the walls:
- for concrete - Azolit VSh;
- for bases made of stone blocks or bricks - EC mixture;
- For different types of bases, the universal Ceresit CR 65 is used.
Moisture-resistant plaster mixtures with added polymer components are used to level the base or for decorative finishing. To eliminate nervousness, a Dufa Kratzputz composition with acrylic and resins is recommended.
For decorative coatings, plaster mixtures Stuc deco and Stuc granito are used, containing cement powder, polymers, and microcement. These compounds are produced using an improved method and are characterized by good moisture protection, durability, wear resistance, and can even be used for tiles. Microcement finishing acquires moisture-resistant characteristics when applied in a layer of 3 mm or more.
Homemade solution
You can prepare the plaster composition yourself according to the instructions:
- A ceresite composition is prepared from settled water and ceresite in a ratio of 10:1.
- The resulting emulsion is mixed with a mixture of cement and sand in a ratio of about 1:1 - 1:3.
- The solution is stirred and used within 30 minutes.
- The total thickness of the plaster is from 20 mm.
The preparation of the following version of the solution (with liquid glass) is carried out in stages:
- Liquid glass (1 part) is dissolved in water (10 parts).
- The mixture is added to the prepared cement-sand mortar.
- The composition hardens quickly, so it is prepared in small portions.
- Using a solution with liquid glass, you can correct gaps and cracks from the inside, and make the plastered base waterproof.
Why do you need moisture-resistant putty?
Very often, preparation for finishing surfaces consists of leveling out uneven surfaces and finishing them with putty, when a coating of a certain type and purpose is applied. Therefore, it becomes quite obvious that not any such composition can work correctly under certain conditions, which becomes especially noticeable in conditions of high humidity.
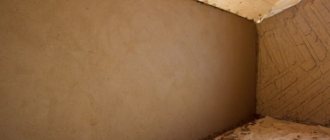
In the photo - when dry, the moisture-resistant putty resembles powder
From the above, we can draw a preliminary conclusion that waterproof putty mixtures are needed for the finishing preparation of various surfaces that are exposed to moisture in various forms, for example, in the form of condensation, evaporation, fog or rain.
The wide list of such premises, with the exception of the external walls of buildings, includes bathrooms and cooking rooms, kitchens, baths and others. Naturally, the price of waterproof material exceeds conventional putty mixtures.
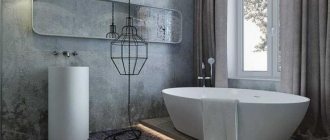
Preparing the walls in the bathroom
Properties of waterproof putties
Cement based
- If we highlight the main component that is present in all moisture-resistant putty solutions, it is Portland cement. This material is obtained by grinding gypsum and clinkers. In dry form, it is a powdery substance, and to turn it into a solid substance, you need to add water in the required proportion.
Tip: the solution should be prepared at a positive ambient temperature so that the water does not freeze.
- Once mixed, the liquid waterproof pool putty will gradually begin to harden. In addition, it becomes even harder the more often it is exposed to moisture.
Tools and accessories
The work will require tools:
- trowel;
- Master OK;
- a set of spatulas of different sizes and shapes;
- grater;
- brushes;
- ladle;
- rule;
- building level;
- rollers;
- yardstick;
- plumb line;
- construction mixer;
- beacons and planks;
- rags;
- containers.
When working on plastering, protective equipment against construction dust is required (special glasses, respirator, gloves).
Preparation of plaster mixture for a concrete pool
The solution is prepared before finishing work begins. For mixing you will need spacious tubs. Powdered materials are poured into prepared water. The composition is mixed with a construction mixer. The ratio of water and mixture, finishing stages are determined according to the instructions for the composition.
If the solution is too thick, you can add water. After mixing, the mixture settles for 1-15 minutes, then the procedure is repeated. Before plastering the pool, the finished compositions are mixed to ensure uniform distribution of particles in the finishing mixture.
How to plaster the pool, walls and floor of the bowl using technology
When applying plaster, it is important to create a reliable connection between the concrete base and the waterproof layer.
Before plastering the surfaces of the pool and the walls of the room, the finishing technology is selected:
- manual application of plaster with preliminary reinforcement;
- plastering using shotcrete method.
Manual application with reinforcement
The technology provides for preliminary fixation of the reinforcing mesh to enhance adhesion characteristics. The advantage of this method is the simple technology of finishing work and applying plaster. However, the need for special treatment of the pool base is taken into account to prevent rust from appearing on the reinforcing mesh.
With prolonged use, the plaster layer may peel off and water may enter the fittings, resulting in the need to repair the pool base.
Step-by-step execution of plastering work:
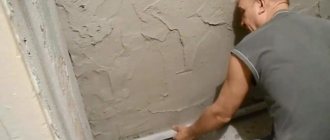
- Preparing the walls and bottom of the pool bowl, cleaning from dust and greasy contaminants.
- If necessary, old decorative trim, paint, mold, etc. are removed.
- In brick foundations, the seams are deepened by 1 cm.
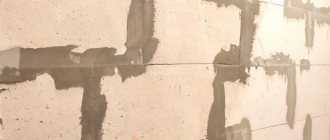
- Concrete pool bowls are covered with notches to increase adhesion. Cracks are corrected with putty, protrusions are cleaned off
- After washing and drying the pool bowl, a primer coat is applied.
- After the soil has dried, a reinforcing mesh is attached to the walls of the pool and the bottom using dowels or other fasteners. The fastenings are placed along the perimeter of the mesh with an interval of up to 50 cm.
- Beacons are being installed.
- The plaster solution is mixed.
- The plaster mixture is applied by spraying and single-layer coating methods.
- The layer of plaster is leveled along the beacons using a rule.
- After the mixture has dried, the beacons are removed and the openings are closed with a solution.
- The surfaces are leveled with a spatula.
- The plaster coating dries within 24 hours. After this, the surface is primed, dried, and rubbed.
- The plaster coating dries within 1-2 days.
Plastering a pool bowl with a solution using gunite method
When using shotcrete technology, an adhesive plaster coating with enhanced adhesion is applied to the surface of the pool bowl. The solution is supplied mechanically - from a cement gun under pressure. The coating gains increased strength. The advantage of the technology is the absence of metal elements on which corrosion may occur. This pool cover is more reliable and durable. The disadvantage is the complex execution technology. First the walls are plastered, then the bottom of the pool.
Mixing of the solution components is carried out in a special equipment container. You can increase the water resistance of the plaster mortar using mineral components (ceresite, etc.).
Before applying the plaster layer, the surfaces of the pool are wetted. Spraying is carried out from a distance of about 70-90 cm. The first layer should be 15 mm thick, subsequent ones - from 8 to 10 mm. The first coating is left for a day, then wetted, and the next one is applied on top. To prevent the appearance of shrinkage cracks, the plaster coating is regularly wetted for 10 days. The moistened layer is covered with film or tarpaulin.
Which material to choose
- If you are laying ceramic tiles, the priority is the strength of the base; minor cracks do not matter. The optimal solution is cement or cement-polymer plaster.
- If the surface is to be painted, the slightest defect will be noticeable. Therefore, it is worth stopping at gypsum.
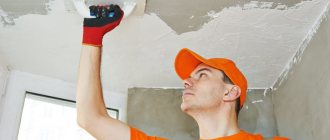
- The same rule applies to the ceiling, where finishing inaccuracies are especially visible.
- If you need to do without additional finishing, decorative plaster in a waterproof version is suitable.
You should not choose decorative plaster with deep grooves, such as bark beetle, for wet rooms. Colonies of microorganisms will quickly colonize them and mold will appear.
Waterproofing after plastering - is it necessary or not?
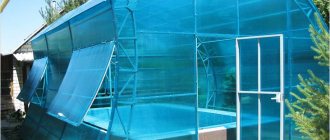
During operation, chips may occur in the pool bowl due to temperature changes and mechanical damage. To protect the pool from the inside, a waterproofing plastic coating is applied - a membrane with water-repellent characteristics.
The membrane is created from pasty mixtures that consist of latex, cement, sand, and fiberglass. When covering in 2 layers using a spatula, a dense membrane film is formed that can cover seams up to 2 mm. Pools require finishing using tint PVC film and ceramic tiles.
Particularly durable, but expensive
If funds allow and you want something unique and inimitable, then you can use especially durable materials for finishing: film with the addition of Kevlar and polyesterol. These materials are part of the PVC film in one of its 4 layers. This film is easy to clean and has antibacterial properties; it is resistant to chemicals and ultraviolet rays.