Creating an optimal level of room insulation helps not only save money, but also improve the microclimate in general. It is important to install thermal insulation so that the walls do not overheat and there are no freezing areas. For this reason, a thermal engineering calculation of the wall is carried out. It helps to accurately calculate what thickness of insulation is required, taking into account various factors. The importance of calculations and the rules for carrying out calculations for working with the facade of a house will be discussed in detail below.
Calculation of wall thickness from various materials
Why is a certain wall thickness of a house selected?
Naturally, to ensure the necessary living conditions:
— strength and stability; — its thermal characteristics; — comfort of living in a room with walls made of this material.
According to SNIP 02/23/2003, the standard value of heat transfer resistance of the external wall of a house depends on the region. In the table, the required heat transfer resistance of the outer wall in Krasnoyarsk will be 4.84 m2 °C/V.
We calculate the real heat transfer resistance of the house wall
The value of the heat transfer coefficient of walls depends on the type and thickness of each individual material used for their construction. To determine this coefficient, use the indicator Λ - W/(m²·K), i.e. you need to divide the thickness of the material (m) by the thermal conductivity coefficient.
Example: Let's determine the heat transfer coefficient of an external wall made of 3D panels
Expanded polystyrene PSB-S-25 - 300 mm
Cement plaster – 250 mm
1. First of all, it is necessary to determine the thermal conductivity coefficients of the materials used. Select from the table: expanded polystyrene PSB-S25 - 0.038 W/m*K cement plaster - 0.9 W/m*K
2. Now we determine the heat transfer resistance coefficients using the formula:
R =D/λ, where D is the layer thickness in m; λ — thermal conductivity coefficient W/(m²·K) taken from the table
0,30 / 0,038 = 7,89 0,25 / 0,9 = 0,28
| Thermal conductivity coefficient, W/m*K | Heat transfer resistance coefficient, m2 °C/W | ||
| Expanded polystyrene PSB-S25 | 0,30 | 0,038 | 7,89 |
| Cement plaster | 0,25 | 0,9 | 0,28 |
3. Now let’s sum up the obtained values and find out the total heat transfer resistance coefficient of the outer wall 7.89 + 0.28 = 8.17 W/(m² K)
The heat transfer resistance coefficient of an external wall made of 3D panels is 8.17 W/(m²·K) The recommended value for Krasnoyarsk is 4.84 (from the table), thus a wall made of 3D panels not only satisfies the “strict” SNiP 02/23/2003 , but also exceeds this indicator, which guarantees comfortable living in such a house and allows you to save your money on heating and air conditioning.
We determine the thickness of the wall from other building materials so that it corresponds to the heat transfer resistance coefficient of the outer wall of 8.17 W/(m²·K), as in 3D panels.
We use the formula: D=λ*R, where D is the layer thickness in m; λ — thermal conductivity coefficient, W/(m²·K) taken from the table; R - Heat transfer resistance coefficient, m2 °C/W (in our case it is 8.17)
| Name of material | Thermal conductivity coefficient, W/m*K | Wall thickness, m |
| 3D panel | 0,55 | |
| Linden, birch, maple, oak (15% humidity) | 0,15 | 1,23 |
| Expanded clay concrete | 0,2 | 1,63 |
| Foam concrete 1000 kg/m3 | 0,3 | 2,45 |
| Pine and spruce along the grain | 0,35 | 2,86 |
| Oak along the grain | 0,41 | 3,35 |
| Brickwork with cement-sand mortar | 0,87 | 7,11 |
| Reinforced concrete | 1,7 | 13,89 |
We see from the table that with the same heat transfer resistance coefficient of 8.17 m2 °C/W, the thickness of walls made of different building materials is different, which affects the size and cost of the house.
The thickness of the walls made from 3D panels is 550 mm, and if you take a brick without insulation, you need to cost a wall 7110 mm thick.
What does thermal conductivity depend on?
Heat conductivity largely depends on the material of the walls.
Heat conductivity is calculated based on the amount of thermal energy passing through a material with an area of 1 square meter. m. and a thickness of 1 m with a temperature difference between inside and outside of one degree. Tests are carried out for 1 hour.
The conductivity of thermal energy depends on:
- physical properties and composition of matter;
- chemical composition;
- operating conditions.
Materials with an index of less than 17 W/ (m °C) are considered heat-saving.
Calculation of wall thickness
The walls must be warm! What are warm? These are superior to SNiP in terms of thermal conductivity! First you need to figure out what they should be in accordance with SNiP. It's not as difficult as it seems at first glance.
The first question that arises is: “how many days a year does the heating season last?” Maybe we don’t need to heat anything at all and we live in India. However, harsh realities suggest that out of 365 days, 202 air temperatures were ≤ 8 °C. But this is in my Lipetsk region, and in yours the numbers are probably different. Which? SNiP 01/23/99 will answer this question. In it we look for table No. 1, in it we look for column 11 and our locality. The number at the intersection is the number of days where the temperature is below 8 degrees.
Why was all this necessary? In order to open SNiP 02/23/2003, find the formula in it and determine the degree-day of the heating period. The value shows the temperature difference between the external and internal air, that is, “how much to heat.” Multiplied by the number of these days, that is, “how many days to heat”
Well, we found out. What's the point of this? And this one! At this stage, we get some figure, in my case it turned out to be 5050. Using this figure, from the same SNiP in Table 4, we look for what the normalized value of the heat transfer resistance of the walls is (3rd column). It turns out something between 2.8-3.5, by interpolation we find the exact value (if necessary and interesting) or take the maximum. I got 3.2°C/W.
Now, to calculate the thickness of the wall, we need to use the formula R = s / λ (m2•°C/W). Where R is the heat transfer resistance, s is the wall thickness (m), and λ is the thermal conductivity. Now imagine that we decided to build our entire wall from gas silicate blocks. In my case, these are blocks of the Lipetsk silicate plant. You need to find out the thermal conductivity coefficient. To do this, go to the website of the manufacturer of your material, find your material and look at the descriptions of the characteristics. In my case, these are blocks made of cellular concrete and the thermal conductivity coefficient is 0.10-0.14. Let's take 0.14 (humidity and all that). Using the above formula, we need to find S. S = R * λ, that is, S = 3.2 * 0.14 = 0.45 m.
The wall turned out good. And darling. There is probably a way to save money. What if we take a block 20 cm thick and make a wall out of it. We obtain a heat transfer resistance of such a wall equal to 1.43 (m2•°C/W), and in our region it is 3.2 (m2•°C/W). It won't be enough! What if we make a multilayer wall and use foam plastic on the outside of the wall, or better yet, mineral wool, because they have approximately the same thermal conductivity coefficients, but mineral wool is environmentally cleaner and also does not burn. And the mice somehow don’t like her. We just have to figure out the heat transfers. 3.2 - 1.43 = 1.77 (m2•°C/W). Now everything is simple again. Since my wall is three-layer and the outside is lined with brick, I need to choose the insulation that is best suited for this purpose. I chose ROCKWOOL KAVITI BUTTS, its maximum indicated thermal conductivity is λ = 0.041 W/(m K) and I calculated S = 1.77 * 0.041 = 0.072. I made a wall from a 20 cm gas silicate block and 7 cm of stone wool. Do you agree that it is better than 45 cm of gas silicate? Or maybe just give up on everything and make a frame with insulation? It’s possible))) in Canada and many European countries everyone does this. But we are Russians! Therefore, we will cover this entire facility with facing bricks, and it will be beautiful and practical for us! Why didn't we take facing bricks into account? It just doesn’t have any energy-saving functions. Moreover, it is necessary to make ventilation gaps in it. But that is another story.
Ultimately, having decided that the requirements of SNiPs were constantly increasing, I made insulation 10 cm thick. Moreover, it did not cost much more.
Sawdust as insulation for the home
Sawdust is wood processing waste in the form of small shavings and wood dust. This well-known material has been used as insulation for a very long time, since it retains heat well, releases wood resins and is an excellent leavening agent.
Application area
The beginning of the history of using sawdust in low-rise construction goes back to those distant times, when they began to be added to clay and used to build floors from this mixture in village houses.
Such floors can be called ideal: they served for a very long time, were not damaged in any way, had no disadvantages and had very significant advantages - low cost and high thermal insulation.
Taking this ancient technology as a basis, modern industry began to produce the same high-quality building materials - granules, wood concrete, concrete with sawdust, wooden blocks.
Sawdust also continues to be used in low-rise construction. Private developers are especially interested in this material, who insulate walls, floors, ceilings with sawdust, and also use them for other purposes as needed.
Today it is impossible to find a cheaper thermal insulation material than sawdust. To insulate roofs, ceilings, interfloor ceilings, floors and wall structures, very different building materials are used. But it is the mixture of cement, gypsum or lime with shavings and sawdust that is extremely economical when insulating any building structure.
Why is sawdust processing needed?
To create thermal insulation, sawdust is used, previously prepared in a special way. Without antiseptic treatment and the addition of impurities, sawdust has two significant disadvantages:
- They become very flammable
- They harbor rodents and other pests
Therefore, before starting work, sawdust is mixed with lime, cement or gypsum, and then moistened with an antiseptic solution. The resulting mixture becomes fireproof and unattractive to pests.
Without special treatment of sawdust and careless handling of fire can burn your house to the ground, especially if it is wooden. Therefore, before you build a frame or timber house, think!
Are you scared? Have you changed your mind? But don’t give up so quickly! There is an excellent material for insulating wooden houses - ecowool. Of course, ecowool has disadvantages, which are described in this article, but they are relative. All shortcomings can be easily mitigated by the competent use of this material.
Do-it-yourself insulation with sawdust
Sawdust is mainly used to insulate a one-story house. If you decide to make sawdust insulation with your own hands, then you need to prepare:
- Sawdust
- Cement
- Watering can
- Shovel or stirrer
- Lime
- Antiseptic for wood (boric acid, copper sulfate)
- Mixing container
The thickness of the thermal insulation layer depends on two factors:
- Local climatic conditions
- Functional purpose of the insulated room
If the building will be used exclusively in warm weather, then a layer of insulation 25 cm thick for the ceiling and 15 cm for the walls is sufficient. If you plan to live indoors permanently all year round, then you should increase the thickness of the layer to 30 cm. To do this, you need to add racks to the main frame, which will create additional space for backfilling.
Proper implementation of sawdust insulation requires knowledge of the following points:
- Objects with a high risk of fire (switches, sockets, heating distribution) and places where electrical wiring and chimney pipes are laid must be insulated with non-flammable material. It is most convenient to hide electrical wires in 3 mm metal pipes
- A vapor barrier is not required, since the cement in the mixture will absorb excess moisture, and the wood block will become much stronger
- It should be taken into account that fresh sawdust contains specific substances that prevent the adhesion of cement to water, so the solution may turn out to be fragile. To prevent this problem, it is necessary to soak the sawdust for at least two months or moisten it with liquid glass before use.
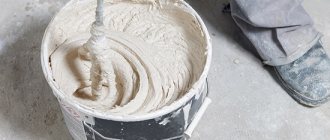
Sawdust with cement as house insulation
How to make insulation from sawdust and cement? To create the mixture we will need the following:
- 10 buckets of sawdust
- 1 bucket of cement
- 1 bucket of lime
All components are thoroughly mixed so that the sawdust is well coated and saturated with cement and lime. After this, dilute the antiseptic in water, pour the solution into a garden watering can and irrigate the previously obtained mixture.
To check, you need to take a little of the mixture in your hand and squeeze it - if no water appears and the lump does not crumble, then everything was done correctly - the mixture is ready.
The next stage is filling the mixture and tamping it layer by layer.
It will take at least two weeks for the blocks to fully mature. The room where the work was carried out must be constantly ventilated.
After a couple of weeks, the filled areas are carefully inspected to identify voids that form during the drying process. If any, they are filled in as described above.
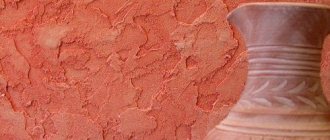
Warm plaster - clay with sawdust
Based on sawdust, you can prepare a solution for warm plaster. To do this, they are mixed with cement, clay, water and old newspapers.
Plaster made from clay and sawdust is used as insulation through interior decoration.
You can also make slabs from the prepared solution, compact them well and dry. Such sheets are a good thermal insulation material and can be used at your discretion.
Sawdust for floor insulation
Pure sawdust without impurities is not used today because it is easily flammable and burns quickly.
Based on them, various insulation materials are made: ecowool, wood concrete, pellets. To insulate floors with ecowool, the manual method or spraying is used. In the second case, you will need a professional blow molding machine and the services of a specialist. Purchasing such a device is impractical, since it will be used one-time, and manual processing consumes 40% more material than spraying.
When insulating the floor in climate zones where the air temperature does not fall below minus 20°C, a thermal insulation layer 15 cm thick is sufficient. If lower temperatures are possible, then for every 5°C of frost it is necessary to add a 4 cm layer of insulation.
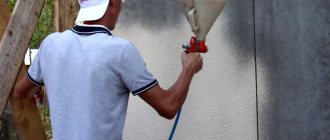
If you do not have the opportunity to hire specialists to insulate your house with sawdust using spraying, we recommend insulating the walls with polystyrene foam yourself.
This material can be used to insulate all types of houses, except wooden ones. It is recommended to use foam insulation for houses made of brick, foam concrete, aerated concrete, etc. You can familiarize yourself with the construction of country houses from foam blocks in this article. Thanks to the large dimensions of the blocks and precise dimensions, construction is carried out at high speed.
However, if you are just thinking about building such a house, we recommend that you read the disadvantages in this article.
Sawdust with lime as insulation for walls and partitions
To insulate walls and partitions, use a mixture of lime with clean, dry sawdust in a ratio of 1:10. If gypsum is used instead of lime, then the ratio must be 1:8.
A small amount of antiseptic solution (25g per bucket) is added to the finished mixture, poured into the walls and compacted. With this treatment, sawdust does not sag and is not damaged by pests.
Blocks can be made from sawdust by adding cement and copper sulfate as an antiseptic. First, the sawdust is moistened with a solution of copper sulfate, and then cement is added to it in the same ratio as lime (1:10). This amount of cement will ensure uniform coverage of the chips.
Water should be added as much as the solution needs so as not to disintegrate in your hand when squeezed. In this case, the water should not be squeezed out.
The finished mixture is laid out in ceilings or walls, and after each layer of backfill it is thoroughly compacted. The shrinkage of the insulation depends on how well the mixture is compacted.
Cement, when interacting with wet sawdust, immediately begins to set and forms a block. After complete drying, a durable hard layer is formed, which practically does not sag, but only crunches underfoot. Thus, at the end of this technological chain, the output is a material with high sound and heat insulation characteristics.
We insulate the ceiling with sawdust
The issue of thermal insulation of the ceiling is very important, since about 20% of the heat in the room is lost through it.
The process of insulating a ceiling with sawdust consists of the following steps:
- The rough ceiling is covered with glassine
- The boards are treated with fire-bioprotection
- Sawdust is added to the water-cement solution in a ratio of 1:10. The mixture should be wet. To do this, for 10 buckets of sawdust you need to take 1.5 buckets of water
- The finished mixture is poured into a 2 cm layer over the surface of the ceiling and compacted. It is better to do this work in the summer so that everything dries quickly. The dried mixture does not sag, but crunches slightly underfoot.
If you take into account all the specific nuances when insulating with sawdust and carry out the work in accordance with technological requirements and rules, the result will be a dry and warm room that will remain so for many years.
Video about insulating the ceiling with sawdust
Why is it important to correctly calculate insulation indicators?
Thermal insulation is installed to reduce energy loss through the walls, floor and roof of a home. Insufficient insulation thickness will cause the dew point to move inside the building. This means the appearance of condensation, dampness and fungus on the walls of the house. An excess layer of thermal insulation does not significantly change temperature indicators, but requires significant financial costs, and is therefore irrational. This disrupts air circulation and natural ventilation between the rooms of the house and the atmosphere. To save money while ensuring optimal living conditions, an accurate calculation of the thickness of the insulation is required.
Sawdust and lime as insulation
Sawdust and lime can be used as home insulation; these materials are capable of retaining heat efficiently. The main advantages of this material are availability, low cost, and high thermal insulation properties. Also, sawdust with lime as insulation has high sound insulation, thermal insulation, and environmental friendliness.
House insulation technology using sawdust and lime
Insulating a house with sawdust and lime will help significantly save on costs and increase thermal insulation properties.
Method No. 1
To carry out the work, it is necessary to prepare the following materials:
- sawdust, lime, cement, antiseptic for wood processing;
- container for mixing ingredients;
- shovel, stirrer, and watering can.
The thickness of the insulation layer will depend on the terrain, weather conditions, and operation of the building. If the building is used as a summer house, only in the summer, then the layer of insulation for the attic should be up to 25 centimeters, and for the walls - 15. But if you live permanently in the house, apply a layer of insulation up to 30 centimeters.
To ensure the safety of the house from fire, all wiring must be covered with metal sleeves.
After this, they begin to prepare the insulation mixture. To get the composition right, you need to take 10 parts of sawdust, one of lime, and one of cement or gypsum. All components are mixed and treated with boric acid or any wood antiseptic. Then add about 10 buckets of water (per 10 buckets of sawdust). After kneading, the mixture must be squeezed tightly in your hand, and then make sure that it does not crumble.
Then the composition is applied to areas that need insulation, compacted, and left for two weeks. After this time, check the voids; if there are any, they must be filled with sawdust. If there are no voids, you can proceed with further finishing.
Influence of the air gap on thermal protection characteristics
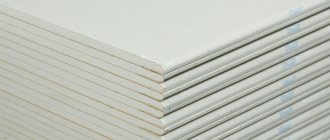
The heating engineer must take into account the air gap that is necessarily left for slab insulation materials such as mineral wool, etc. When installing them, a gap is left so that the material can be ventilated from the condensate formed during operation, usually this distance is 20-40mm. It does not apply to confined spaces, which requires taking into account the points described below:
- The layers of the structure that are located between the gap and the outer wall, when thermal calculations are made, this factor is not taken into account;
- Based on the building from the side looking at the side exposed to ventilation by the layer, the heat transfer coefficient is taken into account.
This gap is taken into account, for example, when calculating for plastic double-glazed windows.
The heating engineer must take into account the air gap that is necessarily left for the slab insulation material.
Carrying out thermal calculations can significantly save your budget by obtaining optimal heat using less energy. But at the same time, it is necessary to take into account many factors, understand the regulatory documents, the best option would be to turn to professionals for calculations.