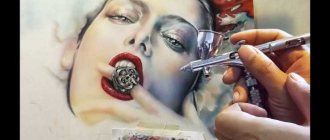
Paint application can be carried out using manual tools, but the process will take a long time and the quality of painting will not always be high. To remove these moments, you can use a pneumatic spray gun. But it is important to choose the right spray gun in order to get good quality painting and use it for a long time. There are several types of devices; their features and rules of use will be discussed in detail below.
Operating principle and scope of application
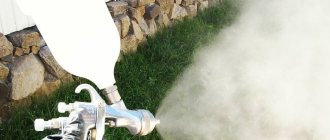
To understand how best to work with a pneumatic sprayer, you should study the principle of operation of the device. Paints equipment using a motor that creates the necessary flow of compressed air. This air flows through the hose, the varnish or paint enters the wall through the gun. The composition must be collected in a special tank.
The pneumatic paint sprayer is designed so that the air moves to the gun, where there is a limiter on its output, the barrier is removed by pressing the trigger. Then the flow goes to the channels and nozzle for the spray gun, to the exit through the air cap.
The release of paint starts after pressing the trigger with great force. From such an impact, small particles are created from the paint and varnish material. Acrylic or other type of paint is evenly distributed over the surface under pressure.
Paints equipment using a motor that creates the necessary flow of compressed air.
Nozzle diameter
It is also important for a car painter to select the diameter of the spray gun nozzle - this can achieve optimal atomization of materials with different viscosities. The thicker the paint material, the larger the nozzle diameter. And vice versa.
Each paint manufacturer clearly indicates which nozzle should be used for which material and what type of work performed. As a rule, these recommendations correspond to the following values (or are not far from them):
- base enamels - 1.3-1.4 mm (for light colors 1.3 is better);
- acrylic enamels and transparent varnishes - 1.4-1.5 mm;
- liquid primary soils - 1.3-1.5 mm;
- filler primers - 1.7-1.8 mm;
- liquid putties - 2-3 mm;
- anti-gravel coatings - 6 mm (special sprayer of anti-gravel materials).
It is easy to understand that the diameter of the nozzle significantly affects the amount of paint passed through and its consumption. For example, varnishing a large hood with a 1.3 mm nozzle will be quite problematic (according to some craftsmen, you could shoot yourself). Even if the paint supply is opened to full capacity, the throughput with such a nozzle for paintwork materials of such viscosity will be clearly not enough. Through a 1.5 mm nozzle, all other things being equal, the paint and varnish material passes through a third more than through a 1.3 mm nozzle.
The variation in nozzle diameters is also due to the habits of painters: some like to apply “thinly”, while others are used to “flooding”.
Pros and cons of pneumatic spray guns
A pneumatic spray gun for painting is distinguished by its ability to distribute paint over the ceiling using the air method, when the process involves applying a certain pressure. Painting work with this device can give good results, thanks to the following advantages of the spray gun:
- The layer obtained after painting has better appearance and quality when compared with the airless method;
- Durability of the device due to the use of metal parts that can cope with wear and tear longer. Loads exerted during work;
- Versatility, can be used for solutions of various viscous properties.
But, like any device, an air spray gun also has its disadvantages. Experts note the following points:
- It is necessary to select a suitable compressor to provide the required level of pressure;
- You should understand the operating rules of the device in order to regulate the operation correctly. You need to carefully read the instructions for the spray gun, then the spray gun will be adjusted correctly and the spray will be uniform; for this you need a gearbox with a pressure gauge;
- When working with the surface of a car, it is important to obtain a layer without defects that may appear from humidity in the air and other impurities. In areas of the car where defects are unacceptable, install a moisture separator and an air preparation device.
When painting areas of the house where a perfectly even layer is not necessary, using an electric spray gun is suitable; for demanding areas, a pneumatic paint sprayer is required.
The resulting layer after painting has better appearance and quality when compared with the airless technique.
Full car painting
I usually start painting a car completely from the roof. If the roof is painted last, dust can ruin all other parts, since they are located below. It is unlikely that there will be dust on the roof when painting the lower parts, and if it does happen, it will not be as noticeable as on other parts. When you pick up a spray gun, a completely logical question arises: how to hold it correctly? The spray gun must be at an exact 90 degree angle to the surface to be painted. The main thing is to observe this position when painting large parts. Neglecting this rule is dangerous due to the appearance of areas of different shades on the surface, especially when using metallic paint. You can tilt the spray gun only when painting ends, arches, and various hard-to-reach places.
Each pass must begin and end slightly away from the part. The beginning and end of the passage over the part itself is NOT ALLOWED.
When passing the sprayer alternately from left to right, be sure to ensure sufficient overlap of the torch. When painting, do not describe a large arc with a spray gun.
Main components of the mechanism
The set of parts that make up the spray gun is small. If you understand these components, then adjusting the spray gun will be easier. Below is an overview of the parts in the order in which they are installed to distribute the air before exiting the nozzle.
The set of parts that make up the spray gun is small.
Gun
The body part contains all the elements that ensure the spraying of the material. On the handle of the gun there is a place for a fitting where a hose is installed, from where the air comes. After the valve is attached to the trigger, in the barrel there is a closed valve for air flow and parts regulating the size of the torch, air pressure and paint supply. There is also a reservoir for the solution so that it does not just come out; a needle-tip serves as a barrier, which regulates the flow of paintwork.
The trigger, when pressed, opens the valves in stages, air starts first, followed by paint. At the exit, everything enters the nozzle, where the solution is broken into particles.
The body part contains all the elements that ensure the spraying of the material.
Tank
The tank into which the paint is poured is made in different ways. Its position can be on the side, which is convenient for small devices. The lower tank is convenient when processing vertical bases. Typically, such containers are made of metal and volumetric, about a liter. The top type of tank is versatile due to the ability to hold the spray gun in different positions.
Standard tanks are made of plastic.
There are vacuum types of containers. which can be installed in the desired position. Manufacturers call them disposable. but in practice, consumers use them several times.
The top type of tank is versatile due to the ability to hold the spray gun in different positions.
Nozzle (nozzle)
Due to the difficulty of cleaning, the nozzle is most often replaced. Typically, the part is sold together with an air cap and a needle, the reason is the need to select a set of these elements that is accurate in size.
Due to the difficulty of cleaning, the nozzle is most often replaced.
How to choose a successful model suitable for solving a given problem
Choosing a spray gun that will immediately perfectly meet your needs and bring pleasure when working with it is almost impossible. The problem is that a beginner often does not fully know all the intricacies of the painting process and cannot clearly formulate a list of requirements for the tool. However, there are several basic criteria by which one or another automobile spray gun is assessed for the overall level of reliability and convenience.
Reliable materials are the key to durability
When choosing a spray gun for painting a car or for other purposes, you should not neglect a thorough analysis of the materials from which it is made. It is worth considering all the details before purchasing.
- The body of a good atomizer is necessarily made of aluminum. For models with increased reliability, structural elements are plated with nickel to protect against corrosion. You should not consider models whose body is made of silumin or other alloys that do not have high mechanical strength and resistance to acidic and alkaline environments.
- The design part that experiences the maximum wear is the paint ejection nozzle. The minimum requirement that a model acceptable for long service must meet is the manufacture of this element from aluminum. If you need a truly reliable tool, you should opt for a spray gun with a brass or stainless steel nozzle.
In general, the entire structure should be as light as possible, made of aluminum and steel, with a good trigger trigger, which should also be made of metal. Saving every gram is a smart move.
Important! It is worth remembering that the total weight of the tool will increase significantly when the working mixture is poured into the colorful glass.
Another area of careful evaluation is the degree of sealing. A car spray gun, regardless of its class, works with high pressure. Liquids must not leak. Therefore, special attention is paid to the quality of gaskets and seals. A good spray gun will offer reliable elements made of fluoroplastic and technopolymers. High quality models are equipped with Teflon gaskets.
Location and capacity of the paint tank
Today, the choice of spray gun for painting a car is offered among models with an upper or lower location of the paint tank. Both types of devices have their own usage characteristics.
- A spray gun with an overhead tank is capable of working with high-viscosity paints; it requires maintaining a constant orientation of the tool for a stable supply of the mixture. The main feature of working with such models is that it is advisable to produce the entire volume of the glass. Changing it is a fairly long process, so you won’t be able to quickly switch from one paint to another.
- Spray guns with a bottom tank will offer a quick change of paint. These models use a siphon paint supply method. This imposes some restrictions on the level of its viscosity, however, experienced painters appreciate the convenience of changing the glass almost without stopping the painting process.
Models with an upper and lower tank differ in weight distribution, ease of operation, and visibility of the surface to be painted. Beginners value simplicity first. They prefer to buy a spray gun with a lower cup for painting a car. This model will allow you to quickly change paints; it offers maximum visibility of the painting area and accessibility of all adjustment controls.
Available adjustments
The configuration of the torch spot and the consumption of the color mixture are responsible for the overall performance. Therefore, a good spray gun must have at least two adjustments:
- adjusting the torch, in the normal position the paint spot has a round shape, by adjusting it achieves a vertically elongated ellipse;
- changing the needle position.
A professional tool often differs from the average spray gun for beginners. In particular, it has a longer needle stroke, the ability to limit its movement and fix its position. It is also often possible to fine-tune and conveniently adjust the size of the torch spot.
Additional items
A compressor spray gun will be easier to use if the kit includes additional parts. Their presence is optional, however, they will help to get the best result.
A compressor spray gun will be easier to use if the kit includes additional parts.
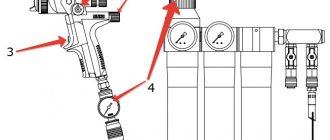
Gearbox for spray gun
A small device that consists of a pressure gauge and a pressure regulator. When working, it is important to know how much pressure is needed for the spray gun to create an even layer. Therefore, the presence of a regulator simplifies adjustment. There are mechanical and digital types of devices.
In the latest professional devices, the gearbox may be built-in.
The pressure gauge that is installed in the compressor can only show the pressure level when spraying. Requires setting the location of the part on the input part.
When working, it is important to know how much pressure is needed for the spray gun to create an even layer.
Water separator
When water-based or other paint must be applied without the slightest defects, it is necessary to exclude moisture in the air, it will leave craters on the surface. To do this, you need a moisture separator, which is placed between the handle and the end of the hose from the compressor.
There are small devices and special stations. The latter, of course, give the best result, completely eliminating moisture and pollution from the air. So it’s easier to get a metallic effect on a car by choosing a similar device.
When water-based or other paint must be applied without the slightest defects, it is necessary to exclude moisture in the air, it will leave craters on the surface.
Learning to paint a car: painting technique, position of the spray gun, rules.
When you pick up a spray gun, a completely logical question arises: how to hold it correctly? The spray gun should be at an exact 90 degree angle to the surface to be painted. The main thing is to observe this position when painting large parts. Neglecting this rule is dangerous due to the appearance of areas of different shades on the surface, especially when using metallic paint. You can tilt the spray gun only when painting ends, arches, and various hard-to-reach places.
Which is better
Instruments differ in different levels of consumption; low consumption is observed in devices of the LVLP type. In addition, the levels of pressure required to apply paint vary. Which option is required for a particular task is decided taking into account the solution that will be used.
The type of viscosity of the paint is important. Also, when purchasing, you should pay attention to the weight, size of the container for the material, strength of parts, the presence of additional attachments, and the ability to adjust the operating mode.
Instruments differ in different levels of consumption; low consumption is observed in devices of the LVLP type.
Compressor requirements
Beginners often make one common mistake. Having a pneumatic compressor in the garage or workshop, they believe that its characteristics will be sufficient for any spray gun. In practice this is not the case. Each device of a certain class puts forward its own requirements for the supercharger.
- The HP system will require up to 5 atm of input pressure and a capacity of up to 300 liters of air per minute.
- For HVLP, the compressor must produce 3 atm at an air flow of 360 or more liters per minute. In this case, it is recommended to equip the devices with moisture and oil filters, since the supercharger has to work almost at the limit of its capabilities and continuously.
- The LVLP system will require up to 2 atm at the inlet and pumping at 150-350 liters per minute.
In order not to make a mistake in choosing and not to encounter troubles, it is recommended that before going to the store you find out the exact characteristics of the compressor you already have in stock. Or buy a complete set of equipment. There is another option: electric spray guns are quite popular among beginners.
Tool parameter settings before use
Setting up a spray gun for beginners is one of the most difficult moments when using it for the first time. You should start by testing the parts for integrity. In this case, you need to fill the device three-quarters, and the engine turns on.
After connecting the hose to the gun, look at the quality of fastening the bolts and nuts. When you are convinced that the paintwork is not leaking and the work is proceeding uninterruptedly, you can proceed directly to painting the base.
You need to adjust the operating parameters of the tool using the regulator screw. The screw located at the bottom of the pistol part rotates. In one direction it increases the volume of air flow, in the other it decreases. The level of material supply is also regulated.
Turning the screw clockwise results in a circular spray pattern, while counterclockwise produces an ellipse.
You need to adjust the operating parameters of the tool using the regulator screw.
Which compressor should I choose for painting walls?
For professional painting
It is best to buy
a compressor
with a receiver with a volume of about 50 liters, for industrial use - over 100 liters. For garage and home work, a capacity of 25 liters is sufficient. It is advisable to choose the engine power so that the network is not overloaded.
Interesting materials:
How to glue rubber? How to glue monolithic polycarbonate? How to glue wallpaper onto cardboard? What is the best way to clean stainless steel? What is the best way to solder copper wires? What is the best way to cut porcelain tiles for flooring? What is the best way to cut corrugated sheets? What is the best way to sand timber walls? What is the best way to lubricate the gearbox of an angle grinder? What is the best way to lubricate the starter gearbox?
What is the function of air cap
The air cap is responsible for breaking the paint material into particles. The air flow is directed to the paint and a torch is formed. The moment of mixing air with the material occurs precisely with the help of an air cap. For this purpose, special holes are created in it.
The air cap is responsible for breaking the paint material into particles.
Selection criteria
Not everyone sees the difficulty in choosing the right compressor for painting a car. But here it is important to keep the line between financial issues and technical characteristics. There is no point in paying for an expensive and high-power compressor if you will not use its capabilities 100%. But too cheap models with poor performance will definitely not allow you to paint.
When choosing a device, you should rely on several key characteristics. Namely:
- nutrition;
- power consumption;
- device type;
- performance;
- receiver volume and pressure;
- manufacturer.
Each criterion requires separate consideration.
Nutrition
It is important to decide in advance what type of power supply should be so that the compressor for painting a car can safely perform its functions.
Since most garages have electricity, it is logical to choose models equipped with an electric motor. It is connected to a standard 220 V power supply and begins to work.
Surely it is a single-phase network with 220 Volts in the outlet that is used. You just need to buy a device that runs on this voltage.
We cannot exclude the need to use the device at the dacha or in country houses, where a three-phase network with 380V is sometimes found. For such cases, compressor models operating in different power modes are suitable. Or only the 380V model.
If there is no access to electricity in the places where you need to use the device, then you should buy models that are independent of electricity. These are compressors powered by a gasoline engine.
Power consumption
To ensure that your car painting compressor does not ruin your family budget by generating tens of kilowatts of energy in a matter of minutes, you need a fairly economical option. Which one should be thought about and weighed.
When purchasing a device, be sure to look at the power consumption indicators. If it is a high-power model, then there is a high probability that your electrical circuit will not withstand such a load. This is also possible in situations where the wiring has a small cross-section. Overload occurs and power outages begin to occur. A short circuit cannot be ruled out.
What should the torch size be?
Before setting up the spray gun, you need to understand what size torch is needed. The reference point is the area of the surface to be treated. When you need to create a narrow stripe of color, you need to make a small torch.
When the entire surface is to be painted with one color, choose the largest width.
Before setting up the spray gun, you need to understand what size torch is needed.
Types of spray guns according to international classification
The international classification of spray guns is more detailed. It identifies the following types of devices:
- HP (High Pressure) – spray guns with high pressure
- HVLP (High Volume Low Pressure) – high volume and low pressure spray guns
- LVLP (Low Volume Low Pressure) – low volume and pressure devices
- LVMP (Low Volume Middle Pressure) – low volume and medium pressure equipment
- RP (Reduced Pressure) – LP devices
- MP (Middle Pressure) – spray guns with medium pressure
- HTE (High Transfer Efficiency) – equipment with high transmission efficiency
It should be noted that experts consider LVLP system paint sprayers to be the optimal type. Their main positive qualities:
- Low compressed air consumption
- High-quality paint spraying on the surface
- Low sensitivity to occasional pressure drops in the compressor
The car must be painted in 3 layers. The pressure should be 3-4 atmospheres on average. Lower or higher values can spoil the final result of the painting work.
Inlet Pressure Setting
The device, which is accompanied by official instructions, operates taking into account the permitted pressure norm. The best result is obtained when a regulator and pressure gauge are installed at the inlet. It is important to mount it closer to the handle, then the readings will be more accurate.
The device, which is accompanied by official instructions, operates taking into account the permitted pressure norm.
Setting the inlet pressure using a pressure gauge-regulator
The pressure gauge regulator helps to accurately adjust the pressure level, then the paint supply process will be correct. This parameter is important, otherwise the layer will be applied unevenly and paint consumption will increase. The best accuracy is obtained with a scheme where the part is placed at the input.
The pressure gauge regulator helps to accurately adjust the pressure level, then the paint supply process will be correct.
If the gun is equipped with a built-in pressure gauge
When this part is built into the spray gun, it acts as follows:
- The screw responsible for supplying air flow is unscrewed completely.
- The screw responsible for the shape and size of the torch is also unscrewed.
- Press the trigger, when the screws are unscrewed, air moves in.
- The pressure gauge sets the required pressure level.
The pressure gauge sets the required pressure level.
If the pressure gauge is without a regulator
There are devices where there is no adjustment screw installed, but there is a pressure gauge. Then the screw for the air flow is unscrewed completely, the torch screw also opens as much as possible. Press the trigger to force air into the gun. The pressure level is changed using a reducer located at the compressor outlet. The result is looked at on the pressure gauge.
The screw for the air flow is unscrewed completely, the torch screw is also opened as much as possible.
If there is no pressure gauge at all. Least accurate method
When a part is missing, how to set up a spray gun for painting. The adjustment is carried out using the compressor gearbox, taking into account the main pressure losses:
- The air supply compartment is unscrewed.
- The torch compartment opens.
- They pull the trigger.
- Not forgetting the loss of main pressure, use a reducer on the compressor and set the desired parameter. The level is set higher by 0.6 bar from the specified level when using a 10-meter hose with a diameter of 9 mm. To obtain better accuracy, it takes into account how many filters the device has.
The adjustment is carried out using the compressor gearbox, and the main pressure losses are taken into account.
Summary
- When completely painting the body, painting individual parts and other large surfaces, the correct setting of the spray gun is considered to be one in which the air flow, paint supply and torch width regulators are fully open, and when the trigger is pressed, the recommended pressure at the inlet to the spray gun is set. In this case, the torch imprint should be as uniform as possible, without any flaws or geometric displacements.
- For partial painting, painting small parts and hard-to-reach places, the width of the torch, material supply and inlet pressure can be varied depending on the situation. The main criterion always remains the correct shape and uniformity of the torch imprint.
- The recommended inlet pressure, depending on the model and manufacturer of the spray gun, varies between: 3-4 atm for conventional sprayers and 1.5-2.5 atm for HVLP and LVLP (RP, Trans Tech). For exact recommendations, see the documentation for the spray gun.
- If the recommended inlet pressure is unknown, it is selected experimentally until the most uniform spray pattern is obtained (with all regulators on the spray gun body fully open).
- The spray nozzle must match the viscosity of the material being sprayed.
And don’t forget to perform a simple “ritual” of setting up the spray gun before starting any painting work.
Rules for using the spray gun
To avoid problems when painting, you should not forget about important working rules. Professionals note the following nuances:
- Internal work requires the creation of good ventilation;
- When working outdoors, use the tool without direct sunlight;
- Compositions for cars are explosive and therefore require careful attention from the technician;
- Dilution of the solution is carried out strictly according to the instructions.
When working outdoors, use the tool without direct sunlight.
Painting the ends and internal parts of the part
To paint the ends and interior parts of a part, you need to use several rules. For example, you need to paint the front left fender. First we paint the ends, starting from the top where the bolts are attached, moving to the front part, where the headlights are attached, then the wheel arches and lower ends, and at the end - the side end near the door. Well, now we paint the front part of the wing. This sequence will prevent spraying on the front part of the part to be painted. In general, when painting any part, first paint the ends, and then the front part, then spraying on the front part is excluded.
Setting up and using the spray gun
The scheme for using the tool is to configure the equipment. Make adjustments when the paint container is full and the lid is tightly closed. It works as follows:
- The air and paint flow is regulated, the device is placed vertically with the direction towards the paper.
- The trigger is pressed and held until drips appear.
- Afterwards, you can move the tool to understand what distance from the surface and speed are needed for uniform painting.
Next, you can paint the prepared surface.
Make adjustments when the paint container is full and the lid is tightly closed.
Full exterior painting sequence
It is better to start the complete exterior painting of a car from the roof. If you leave the roof for last, paint dust can spoil the already painted hood and trunk lid. The dust on the roof is not so noticeable. One of the sequences for completely painting a car is shown in the figure below.
Let's summarize a little and highlight a few main points regarding car painting techniques:
• Hold the spray gun straight (at a right angle), tilting is allowed only in exceptional cases.
• The average distance from the spray gun to the surface is 15-20 cm. We try not to move away from it.
• The average speed of the spray gun is 40-50 cm/sec. One pass from edge to edge takes about 2 seconds.
• We start and end the pass a little away from the part, and in no case above the part itself.
• We make passes with horizontal movements from left to right.
• The degree of torch overlap is not less than 50%. That is, each passage must overlap the previous one by at least half.
• When spraying, do not describe too large an arc with the spray gun.
How to set up a spray gun - basic nuances
When setting up, it is important to obtain the desired pressure level; the required parameter is indicated by the manufacturer on the packaging. The paint must also be brought to the desired level of viscosity. The integrity of all parts must be checked to prevent leaks.
When setting up, it is important to obtain the desired pressure level; the required parameter is indicated by the manufacturer on the packaging.
Types of paint sprayers
When working with a spray gun, it is necessary to take into account how its pressure should be adjusted for a particular type of painting. The quality of the work result will depend on this. For example, excessively high pressure leads to excessive paint consumption and smudges, very low pressure will reduce the quality of the new paintwork.
There are three types of paint sprayers:
- Low pressure spray guns – 2-2.5 atm. Such equipment has a low jet pressure, as a result, paint consumption is economical. The main disadvantage is that to work with such a spray gun, you need a powerful and bulky compressor. Another big disadvantage is the rather low quality of the resulting coating.
- Medium pressure spray guns. This type of device is optimal for the vast majority of car painting work. This spray gun has different pressure values at its inlet and head. As a result, any compressors are suitable for working with such equipment. The paint is used sparingly, and the coating is of high quality.
- Paint sprayers with high operating pressure - up to 56 atm. The main disadvantage of this type of device is the unreasonably large losses of the coloring composition; they can be up to 60%.
Please note that each spray gun model has its own set of adjustments. To ensure optimal supply pressure when painting a car, be sure to familiarize yourself with them before work.
There are three main types of control mechanisms that a spray gun typically has:
- Regulator for opening the nozzle (needle stroke), designed to supply and vary the amount of paintwork materials.
- Air supply regulator. It is responsible for more precise adjustment of the compressed air supply at the outlet of the device.
- A mechanism that regulates the shape of the torch. With its help, the optimal form of paint spraying is selected.
Problems and their solutions
Any equipment can fail over time, due to wear and tear of parts and others. Some breakdowns can be fixed without any problems. Common problems will be discussed below.
Any equipment can fail over time, due to wear and tear of parts and others.
The gun doesn't paint
There are three options when you can use the spray gun for its intended purpose in case of this error:
- The air is supplied at low pressure; you just need to adjust the compressor;
- The nozzle or needle is dirty; until these parts are removed and cleaned, the paint flow will not open;
- The needle and nozzle are broken and should be replaced with new ones.
The nozzle or needle is dirty; until these parts are removed and cleaned, the paint flow will not open.
Spray gun spits
This type of failure can be caused by the problems described below:
- The air cap is loose and needs to be tightened;
- The pressure and viscosity of the material are not suitable, the indicators need to be brought back to normal;
- The paint is too thick and it will bleed;
- The breather on the container with the material is clogged and needs to be cleaned;
- The pressure has dropped, you need to bring it to the desired level.
The paint is too thick and it will bleed.
The torch moves to the side
It is possible that the hole on the side of the air cap is dirty and needs to be cleaned thoroughly. Or damage is detected on the holes, then new parts are installed.
It is possible that the hole on the side of the air cap is dirty and needs to be cleaned thoroughly.
A pneumatic spray gun can create a beautiful layer on a variety of surfaces. It is distinguished by the evenness of paint distribution, but it is important to set it up correctly before work. To do this, it is important to study the operating rules that were described above.
Spray gun system
Depending on the amount of compressed air pressure at the inlet to the spray gun and at the air cap (outlet), all paint guns can be divided into three main groups:
- conventional (high blood pressure);
- HVLP (High Volume Low Pressure - large volume of air and low pressure);
- LVLP (Low Volume Low Pressure - low air volume and low pressure).
Different types of paint guns look almost the same in appearance. The “highlight” is hidden inside the design
Today, the last two types of sprayers are the most progressive, economical and meet environmental standards. As the name suggests, they are characterized by low operating pressure: if conventional conventional guns spray the material at high pressure (approximately 3-4 bar), then guns of the HVLP and LVLP systems spray at low pressure (approximately 0.7-1.2 bar).
What does this give? The main advantage is the high paint transfer coefficient. At low pressure, less paint turns into useless mist around the part (the so-called overspray, “overspray”), and more is transferred to the surface being painted. For low-pressure spray guns, the transfer coefficient reaches 65-70% (compared to 30-45% for conventional sprayers). Considering that metallic and pearlescent paints are not cheap, you can calculate how much money such a spray gun will save you.
The most accurate way to measure outlet pressure is to use a special air test cap with two pressure gauges.
To set and control the pressure of the HVLP gun, SATA produces a test head with two pressure gauges
Unfortunately, such attachments do not come with the gun, so this value is controlled indirectly, by the pressure parameter at the inlet to the spray gun. We will begin adjusting the spray gun by adjusting this parameter.
Purpose of the pressure regulator
The main and only functions of a pressure gauge with a reducer are displaying the current pressure value and adjusting it. A clear understanding and ability to configure this parameter are very important when working with any pneumatic tool, and especially with a painting machine. The spray gun pressure regulator allows you to adjust the spray pattern of the mixture, on which the entire progress of work largely depends. Of course, calibration of the spray gun can be done without this device, but only with the hands of an experienced technician and over a long period of time. Most professional painters always install a pressure gauge in the handle of their gun for quick and accurate adjustments. If you do not install a pressure regulator on the spray gun, and completely ignore any adjustment of the air flow, you can seriously complicate your work and reduce the final quality of the applied layer. You will be very lucky if the output pressure of the air leaving the compressor and passing through the long hose is close to the optimal requirements. However, in most cases, such luck does not happen, and the torch either takes on a figure eight shape due to excess pressure, or chaotically applies large drops of paint due to lack of pressure.
It is difficult to overestimate the usefulness of a pressure gauge in a spray gun, since this compact device significantly increases operating efficiency. It is recommended to use both professionally and amateur painting if you want to get a good result.
Types of pressure gauges
In the era of technology, many different meters have appeared. Modern devices can measure atmospheric, absolute, barometric, gauge, differential and vacuum pressure. The pressure gauge for the spray gun shows the value of excess pressure and belongs to the group of general technical instruments. The most popular, for their reliability and autonomy, are mechanical indicators of the dial type. As an innovation, electronic devices with digital displays are increasingly entering the aerosol painting industry. If the principle of operation of mechanical meters, in general, inspires confidence, then the reliability and accuracy of electronic analogues remain in question. In fact, the reliability of readings in high-quality models has a very low error (up to 0.25%). The service life, if treated with care and properly stored, is tens of years. Of course, not all devices are lucky enough to be assembled from high-quality materials according to the advanced canons of engineering, so it is worth studying the manufacturer’s reputation in advance. Pressure gauges of exemplary quality are produced under the brands SATA, DeVilbiss, INTERTOOL, STAR. When choosing a spray gun pressure regulator, you should pay attention to the thread diameter of its connection, which can be 1/4 or 1/8 inch. In order not to use adapters, it is recommended to select a pressure gauge with a thread that matches the threads on the handle of the spray gun and on the end of the air hose.
