Plastic, wooden or self-adhesive skirting boards are a necessary part of decorating residential or non-residential premises. The absence of baseboards - a visual transition from wall to floor - will make even expensive wall decoration useless and sloppy. Uneven cracks, mortar, torn ends of wallpaper or curved plaster borders at the bottom of walls must be covered with floor fillets.
They serve not only to enhance the visual effect of the renovation, but also to mask the inevitable unevenness between the wall and the horizontal plane of the floor. The floor strip protects the boundaries of the coating from mechanical damage. But how to glue the baseboard to the floor with liquid nails if no other option is provided?
Installation of floor skirting boards
Depending on the material of the plinth, there are several ways to install it. In particular, it is installed on staples, glue and screws. Let's look at these methods in more detail.
On staples
The advantage of this installation method is the absence of traces of fasteners on the outer surface of the plinth. The profile itself is easily installed on the brackets and can be easily dismantled.
Installation is performed according to the following algorithm:
- Make markings for installing fasteners. The first mark is usually placed 5 cm from the corner, the frequency of subsequent marks depends on how smooth the wall is. If the walls are smooth, the marks are placed less frequently, 50 cm apart, otherwise the step can be reduced to 20-30 cm.
- Holes are drilled in marked areas of the wall and plastic dowels are installed.
- Install the fasteners and secure them with screws in the dowels.
- Install the plinth onto the fasteners, having previously adjusted the elements to length.
- Special corner elements are installed at the corners, and plugs are installed in the door area.
Important! The distance from the corner to the first fastening element should not exceed 10 cm, otherwise the fastening will not be very reliable.
Video: installing floor plinths on brackets
On glue
Glue installation is the fastest way. This method is suitable if the walls, floor or ceiling are well leveled, otherwise the profile may sag over time.
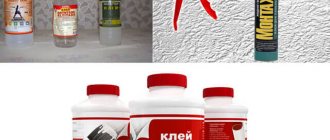
Liquid nails (acrylic or neoprene), acrylic putty (it helps smooth out unevenness), special adhesives for polyurethane, and universal polymer glue are used as glue. Such brands of glue as “Titan”, “Dragon”, “88”, “Moment Montazh” are widely used.
Installation using adhesives proceeds according to the following algorithm:
- The plinth is fitted to the installation site using markings and a hacksaw, trimmed to length and joints are formed.
- If necessary, glue is prepared (some types need to be diluted with water).
- You can glue the profiles directly onto the wallpaper, but for reliability it is preferable to glue them on a prepared wall. To do this, the wall is cleaned of dirt and can be degreased.
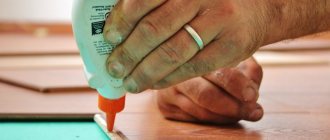
- The glue is applied to the surface according to the instructions for use. For example, liquid nails are applied pointwise, and putty can be used to smooth out uneven areas and cover up cracks.
- The plinth is applied to the wall and held in this position until the glue sets.
- If any glue drips appear, they must be removed immediately with a spatula.
Important! Working with neoprene liquid nails requires good ventilation of the room. The pungent odor remaining after installation disappears after a few days.
For self-tapping screws
Typically, wooden or plastic baseboards are installed on self-tapping screws. This method is labor-intensive and requires certain skills and careful execution. But using this method you can mount profiles even on relatively uneven walls.
This type of installation is performed as follows:
- Profiles can be adjusted in length and for joints in advance; this can be done during installation.
- Through holes are drilled in the profiles for self-tapping screws, in increments of 40-50 cm.
- The holes are machined with a larger diameter drill to form conical recesses that allow the heads of the screws to be hidden.
- The plinth is applied to the installation site. Through the drilled holes, mark with a pencil the places for the dowels.
- Drill holes in the marked places and insert dowels.
- Reattach the profile and secure it with self-tapping screws.
- The screw caps are covered with plugs.
Video: installing skirting boards with self-tapping screws
Step-by-step instructions on how to glue a plinth to the floor
You can use a miter box to cut the baseboard.
All work should begin with cutting the baseboard and preparing the necessary set of tools. This includes:
- hacksaw;
- roulette;
- hammer;
- a tube of liquid nails and a special nozzle, a gun;
- rubber spatula.
When you have prepared all the necessary material and tools, you can move on to further work. They involve measuring the perimeter of the room, taking into account the existing protrusions and recesses. According to these data, the footage and the almost exact amount of necessary materials are calculated. Then buy glue. The next important point is to cut the plinth into elements of the required length. Experts insist on the need to cut the plinth at an angle of 45°, both when creating internal and external corners. Before you start cutting out the second side of the corner, place the panel against the first and try to saw off enough so that no gaps form on the surface of the corner created by the baseboards.
The next stage will be marked by applying liquid nails to the surface of the baseboard, with which it will be pressed against the wall and floor. If you are using a narrow baseboard, then you need to apply it drop by drop, at a distance of 5-10 cm from each other. If you purchased wide baseboards, then the glue is applied to the back surface of the glued panel in a zigzag pattern. This guarantees a strong connection.
You need to start gluing the baseboard on the floor from the corner.
The first segment that will be glued to the floor will be the longest one, which is applied to the corner. Please note that the wall to which the plinth will adjoin must be perfectly flat. Otherwise, the panel will be glued in waves, and the baseboard will eventually swell and fall off, even if it is attached with heavy-duty adhesive. Immediately after the glue is applied to the baseboard, it will need to be pressed tightly against the wall, holding it in this position for a short amount of time so that the fillet is properly fixed in the place allocated for it. As a rule, after about 15 minutes the baseboard will no longer be tearable. But even if you decide to re-glue it and remove it from the gap much earlier, it will be impossible to reuse the same panel, since the strip will be deformed.
It is worth noting that if you plan to re-wallpaper a room in the near future, then it is better not to rush into installing the baseboard. After all, replacing wallpaper cannot be done on top of baseboards, so carefully consider each stage of your repair.
If the installation of the plank is accompanied by glue getting on the surface of the baseboard, then it will need to be cleaned immediately using a rubber spatula. Then wipe the front side with a damp sponge. All seams formed between the plinth elements must be filled with liquid nails, which can be easily and accurately done using a small rubber spatula.
Self-adhesive plinth, its characteristics and use
Self-adhesive plinth is very convenient to use, since its installation does not require perfectly smooth walls.
Self-adhesive floor plinth was developed and released into retail sales specifically for those builders who do not want to spend a long time fiddling with repairs, but want to finish it as quickly, easily and without creating dirt as possible. This innovation appeared on the market more than 5 years ago and is considered suitable for decorating the interior of rooms whose floors are covered with laminate or linoleum.
Related article: 43 original tips! Little household tricks that everyone should know (photo, selection)
The distinctive features of this plinth include:
- The material of manufacture is soft PVC or aluminum.
- Possibility to be used in large spacious rooms, both residential and office premises. Easy installation on almost any flat surface.
- Self-adhesive skirting boards are distinguished by a rich range of colors, including those that imitate natural wood, stone, etc.
- It can be glued in difficult places not only by bending, but also secured with ordinary connecting elements. The aluminum version is glued to the surface using mounting adhesive tape or to double-sided tape.
When attaching a self-adhesive baseboard, it is important to know exactly, or better yet, mark the places where you will attach it. Since, if applied incorrectly, you will not be able to tear it off, leaving the surface of the wall and floor intact.
Caring for this finishing material will be quite simple. You can wash it with plain water and a soft sponge. As a rule, the surface of such a plinth is protected by an oxide film, which protects the plank from various damages. Installation of this material does not involve virtually any cuttings, as it is very economical. With its help it is easy to finish any corner. The cost of a flexible plinth is much lower than the option made from solid materials.
What needs to be done to properly glue skirting boards to the floor?
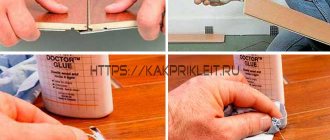
Knowledge of the technology for properly gluing soft skirting boards allows you to quickly and easily cope with this work, which means completing the repair many times faster. First, clean the surface where the tape will be applied. It should be wiped, removing all dirt and dust, wiping everything with a damp cloth soaked in water. And then degrease, for example, using 95% alcohol.
Then take the tape and carefully remove the protective tape from the back side and apply one end to the corner, having previously made a marking for gluing. During this process, lightly press the flexible baseboard against the wall to ensure better grip. Make sure the tape is laid evenly and does not change its intended course.
A soft baseboard is more convenient because it already has an adhesive mounting base. Therefore, there is no need to use other adhesives. Thanks to this equivalent of solid floor skirting boards, it becomes possible to equip a room of any configuration and save on materials and tools.
Why do you need a flexible floor plinth?
The design of curved walls, round columns and half-columns often becomes a problem. The walls in the bay window are also usually round. Some people make rounded corners. All this looks beautiful and adds uniqueness to the house, but problems arise in the finishing. One of them is in the selection of skirting boards. They are usually in the form of slats, and quite rigid ones. The question arises - how to design curved surfaces?
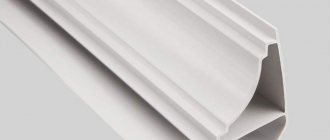
To decorate curved walls and columns there is a special plinth - soft, flexible, elastic
In general, there are flexible skirting boards. They are also called bendable, radius, soft, radial, or they are written as such - “for columns”. There is also plinth tape. This is a strip of vinyl divided along a fold line (pictured below). There are products that are more similar to traditional skirting boards. For example, FLEX LINE CEZAR, SALAG, FN Neuhofer Holz, Korner IDEA 80 (for painting) and Ultima 80, Nova 70 with cable duct, Arbiton made of thin metal. Some materials can be made to bend when exposed to temperature or special treatment. In general, there are opportunities.
Features of gluing some types of skirting boards
Wooden
It is preferable to apply the composition along them in a thin line along the entire back part. However, if their width is small, then the spot application method can be used. However, the edges of the strip must be properly lubricated to prevent gaps from forming at the seams. The main thing is not to fix the part right away, but to wait a few seconds and only then press the bar to the surface - this is how the adhesion will occur as efficiently as possible.
Plastic
Basically, they are used to neatly disguise wires and cables in residential premises. The adhesive substance must be applied to the stiffener and immediately pressed onto the desired surface for several minutes. It is worth remembering that the coupling process most reliably occurs with bases made of carpet, linoleum, wood and tile.
However, there are several significant points specifically for plastic strips:
- It is always worth considering the level of rigidity of the molding edge;
- Skirting boards made of foamed PVC, due to their lightness, quickly break;
- If a type of PVC is required with semi-rigid qualities, then it is mounted in the form of a long strip;
- Plastic baguettes are the most durable;
- Before gluing, these skirting boards need to be laid out around the perimeter and the joints trimmed in the right places;
- If decorative plugs are expected at corners and joints, then they are installed simultaneously with the main body of the plank;
- It is better to apply the composition in small drops within 8-10 centimeters of each other;
- On short sections, this distance can be 4 centimeters, and on complex transitions - every 2 centimeters;
- It is preferable to cover wide planks with a wavy line of adhesive mixture;
- Any plastic corners/joints are covered additionally.
Self-adhesive options
They will be an ideal solution for uneven walls and are able to create such a type of finish between the walls and the floor that the unevenness of the joints will simply be invisible. They go well with linoleum and laminate and look great in large rooms. According to their structure, self-adhesive skirting boards can be made from aluminum or polyvinyl chloride. They can also have their own coloring, for example, wood or stone. External and internal corners in such models are easily formed due to the fact that the base itself bends very easily. In some cases, masking tape will help improve the artistic appearance. The only negative is that you need to fix the self-adhesive plinth as accurately as possible, because then it will be very difficult to separate it from the wall.
Installation of polyurethane ceiling plinth
Now let's see what technology is used to install polyurethane skirting boards on the ceiling. Their installation is carried out in several stages.
Choosing adhesive for planks
To install polyurethane elements, you can use super-strong Moment Montazh glue or any other similar liquid nails. Also, sometimes the planks are secured with adhesive intended for tiles. However, the best solution would be a special adhesive for polyurethane skirting boards. In this case, for a city apartment you need to choose an option designed for gluing planks of this material to concrete.
Polyurethane elements are glued with special glue
To glue the ends between the planks, use a special glue for joints. After its application, a melting effect occurs. As a result, when the elements shrink, the joints do not subsequently diverge.
Surface preparation
The surface of the ceiling and walls must first of all be thoroughly cleaned of dirt and dust.
It is very important to remove all grease stains
The walls and ceiling must be degreased before gluing the polyurethane ceiling plinth. Photo of surface cleaning
Tip: Degreasing can be done with a solution of some alkaline household detergent. Of course, you should wait until the surface is completely dry before installation.
Next, the surface of the walls and ceiling is primed. This step is optional and can be skipped if desired.
How to glue polyurethane strips
Mount the polyurethane ceiling plinth as follows:
- The plank is coated with glue on the side on which it will adhere to the surface of the walls and ceiling;
- Next, you should press it tightly to the surface and hold it there for a while;
- After this, it is torn off and waited for about one minute;
- Next, it is again pressed against the ceiling and wall and held in the desired position for another minute.
Ceiling plinth made of polyurethane. Photo of a tightly pressed bar
- The joints and cracks between the ceiling and the slats are puttied. You can use acrylic sealant for this purpose.
The gaps between can be sealed with putty or acrylic sealant
Tip: On a curved surface, the planks can be temporarily secured with small nails to prevent them from coming off. After the glue sets, they are pulled out with pliers.
This way you can securely attach the polyurethane ceiling plinth. Installing it (the video demonstrates the step-by-step process) with glue is a matter that requires a certain amount of accuracy.
Mechanical installation
Sometimes polyurethane skirting boards are attached to the ceiling and walls mechanically. In this case, the corner elements are mounted first. Next, a mounting plate, which is included in the kit, is installed on the wall using self-tapping screws in increments of 30-50cm. At the final stage, the plinth is simply snapped onto the plank elements.
Polyurethane plinth can be installed on special strips
It is best to attach polyurethane elements to suspended ceilings mechanically. Firstly, due to vibrations of the canvas during drafts, the strips attached to the glue can become loose and move away. Secondly, due to the effect of the adhesive composition, wrinkles often form on the canvas.
Decoration of corners
Without using special elements in the corners, the polyurethane ceiling plinth is fixed by first cutting off the ends of the planks at an angle of 45 degrees. A miter box is used for this. In both cases (when installing with glue and with self-tapping screws), the ends of the two corner strips must be glued. It is best to do this before installing the baseboard in place. In this case, it is worth using glue intended for joints of polyurethane planks. It holds very well, and therefore the corner of two planks will not fall apart. How to cut planks? Most often, a regular stationery knife is used for this.
Cutting polyurethane plinth using a miter box
How to properly apply glue to ceiling plinth?
How to glue ceiling plinths to curved walls. Stages of gluing ceiling plinth
- First, we cut the baseboard to form a corner. ...
- Apply the glue in a narrow strip to both surfaces of the ceiling molding, placing it closer to the middle. ...
- After installing the baguette in place, you need to wait until it hardens.
30 Nov
2022 Interesting materials:
What do you want at 30? Why is it dangerous to give birth after 30 years? What to feed perch in summer? How to surprise a 60th birthday boy? What to teach a child at 5 years old? What happens if you don’t change your license after 10 years? What happens if you don’t pass the medical examination at the military registration and enlistment office at the age of 16? What happens if you don't serve in the army until you're 27? What happens if you don’t register with the military registration and enlistment office at the age of 16? What would a 10 year old boy be interested in reading?
Advantages of plastic skirting boards
Among the types of skirting boards, plastic is the most popular for many reasons. Polyvinyl chloride is famous for its durability and strength.
The service life of plastic floor planks reaches 100 years. They are resistant to fire and moisture, safe, so they can be installed in any room.
Dimensions and design of plastic skirting boards
Skirting boards are easy to install, cut with a sharp knife, and their cost is not high.
Compared to wood and plaster planks, plastic planks are flexible. They have a huge color palette, which does not limit the choice of color for the interior of the room and allows you to fit into the overall background as much as possible.
An additional advantage is that some models are equipped with a special trench into which the wires are laid.
Product trimming
Proper trimming of the material used affects the final result. Therefore, when the problem arises of how to attach a larger plinth, you need to use simple tips:
What to cut with? For this process, a metal saw with a blade having small teeth is used. As an alternative, you can use an electric jigsaw, to which special files are selected. When the parts have already been fastened, but there is a need for minor adjustments, use a sharp construction knife
This device must be used very carefully so as not to damage the front side. It is advisable to cut the plinth only after careful measurements. To trim at the desired angle, use a miter box.
Trimming the plinth: outer and inner corners, arrangement of parts in the miter box
Such simple tips greatly facilitate the process and allow you to install the elements with the highest quality.
Advantages and disadvantages of polyurethane skirting boards
The main advantage of this decor is its flexibility. It can be simply an ideal option for decorating apartments whose walls have a complex configuration - they have rounded corners, niches and arches. Of course, it will look good on flat surfaces as well. How apartments decorated using such planks might look like, look at the photo:
Pros and cons of polyurethane ceiling skirting boards
Polyurethane ceiling plinth has a number of undeniable advantages:
- A wealth of colors and textures. In addition, you can use both wide and narrow decor options to decorate the room;
- Easy to care for. In case of contamination, such strips, unlike foam ones, can simply be washed with a solution of any household detergent;
- Ecological cleanliness. If desired, such a ceiling plinth can be glued even in children's rooms. Polyurethane foam is a foamed plastic material. Essentially, this is the same foam rubber, only hard and flexible;
- Resistant to deformation. You can use this decor, unlike the same wood, even in bathrooms.
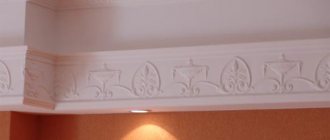
Polyurethane strips can imitate stucco
Ceiling plinth made of polyurethane has only one, but quite significant drawback - heavy weight. Foam planks, for example, are much easier to install.
Important: Polyurethane foam skirting boards should only be fixed with special glue. Otherwise, they will soon simply move away from the walls and sag.
Floor plinth
Floor plinth made of polyurethane has all the advantages of a ceiling plinth. In addition, one can also note its advantage such as mechanical strength. In case of an accidental impact, it does not form scratches, like a wooden one, or holes, like a plastic one.
Polyurethane floor plinth looks very neat and at the same time is characterized by mechanical strength
Being used for both floors and ceilings, due to their elasticity and flexibility, polyurethane strips perfectly hide all the imperfections of the wall surface.
In addition to the heavy weight, the disadvantage of this type of decor, both floor and ceiling, is also considered to be quite high cost. Its price is comparable to the price of wood. However, this floor framing looks no worse:
How to glue skirting boards with liquid nails?
A plinth with liquid nails will only stick to a perfectly flat wall.
The technology for gluing skirting boards using this product is very simple, since a special nozzle is used for application to the back surface. Preparing the baseboard for applying liquid nails involves treating the surface with sandpaper, which will rid it of dust and dirt. Before gluing the skirting board to the floor, you must once again make sure that the surface is clean. To do this, use a piece of sandpaper and go over the back of the panel several times. Experts recommend purchasing universal liquid nails, suitable for fastening panels of any material. Experts advise that if it is impossible, for example, to obtain the material described above, replace it with waterproof glue 88. This is an easy-to-use adhesive material that has such advantages as:
- education of high-quality communications;
- obtaining an elastic and waterproof seam;
- absence of chemicals harmful to humans and animals, for example, toluene;
- The glue is ideal for any floor and ceiling fastenings, and it does not harden for a long time without losing its adhesive properties, which allows you to work with it for a long time without fear of having to add a fresh layer again.
Pros and cons of fixing floor plinths with glue
When attaching plastic skirting boards to the floor, it is preferable to use adhesives. This choice is due to the fact that liquid nails:
- do not cause mechanical damage to the baseboard, walls and floor;
- provide quick and reliable fixation;
- are distinguished by universal properties (able to stick to almost any surface);
- create an elastic and elastic connection that does not allow moisture to pass through.
The main disadvantage of liquid nails is that the surfaces must be leveled before gluing the baseboards. Without this, the structure will not be fixed to the wall or floor.
Tools
The surfaces to be joined must be cleaned and dry (especially important for plastic). The surface of the walls at the joints is treated with a primer. The master will need sandpaper and a primer with a roller.
Necessary tools also include:
- a hacksaw (for cutting the required length of plastic sheets) or a grinder;
- tape measure (at least 3 m);
- miter box (carpentry device for cutting and sawing planks at an angle);
- rubber hammer;
- silicone spatula with blade (4 cm wide);
- joining angles for internal and external connections;
- construction gun for cylinders for squeezing out the adhesive base on the surface;
- a clean old rag that can be used to quickly wipe the stain before it dries.
The baseboard itself must be painted or varnished in advance and then allowed to dry. This will prevent the walls and floor from getting dirty. Self-adhesive skirting boards require no tools. Using a hacksaw for metal will prevent ragged edges.
Trimming skirting board corners with a miter box
Trimming without miter box
If you don’t have a miter box, you can make the corner joints of wooden baseboards yourself. All segments must be laid out around the perimeter of the room. At corner joints you need to mark the surface of the walls with a marker. The result will be four points in each of the corners.
- Alternately, the left and right parts must be attached to the wall, marking their joints on the wall with points 1 and 2. Then, alternately, draw a line perpendicular to the wall from the points. As a result, point 3 appears on the fillet.
- Lines are marked on the floor along the bottom edges. Point 4 is the intersection of these lines.
- It remains to connect point 3 to point 4 diagonally.
- The corner is cut with a hacksaw. In this case, the other side of the cut (which will be glued to the wall) should go along the edge. As a rule, the angular cut is 45 degrees.
Types of compositions used
In construction, during the renovation of residential premises and their final finishing, the following adhesives are used:
- liquid Nails;
- silicone sealants;
- docking;
- putty;
- polymer compositions;
- hot melt adhesive.
Liquid Nails
It is considered a universal glue used to work with:
- tree;
- metal;
- drywall;
- glass;
- Chipboard.
The substance reliably fixes the glued elements to each other, allowing you not to worry about the safety of the repair. The only drawback is considered to be poor compatibility with wet surfaces, which do not allow the composition to adhere securely.
Silicone sealants
Viscous adhesive compositions, among the main advantages of which are:
- fast hardening;
- seam elasticity;
- waterproof;
- long service life.
Does not perform very well when working with wet surfaces or materials containing plastic.
Docking
Special adhesive for working with skirting boards, which often contain polyurethane. It is much more effective than liquid nails. Used to fix ceiling plinths at joints and transitions. Pros of glue:
- quickly sets to the work surface;
- paint adheres well to it;
- has great adhesive ability.
Polymeric
A universal product with a large number of positive reviews from customers. Pros:
- strong adhesion to the surface being treated;
- dries quickly;
- economically used;
- easy to apply even to hard-to-reach areas.
putty
Putty is considered a worthy alternative to glue. Its use allows you to achieve:
- reliable, durable fixation of the baseboard;
- quick drying of the seam.
Flaws:
Working with putty is more difficult than working with glue and, in most cases, only experienced finishing workers work with it.
Hot melt adhesive
It is used in cases where large temperature changes are recorded in the room where the skirting boards are installed. Hot-melt adhesive is easy to apply, does not have an unpleasant, specific odor and hardens quickly.
Features of the use of certain types of glue and control of quantitative costs
As mentioned above, there is practically no universal type of glue for skirting boards and the use of each specific brand will depend on many factors. For example, polymer-based adhesives should be used only in well-ventilated areas, and the same “Moment”, due to its special viscosity, once it gets on the surface, is very difficult to remove. In addition, if the substance is transparent, then unauthorized contamination is unlikely to be noticed the first time. In any case, for synthetic adhesives with similar qualities it is better to use a gun.
If we touch on the topic of “liquid nails”, then among them there is a special variety - neoprene “liquid nails”. They will be an ideal solution for installing skirting boards in low temperatures or when the environment is extremely saturated with moisture. However, this type of “nails” is very toxic and it is possible to work with them only under conditions of constant ventilation of the room where the work is carried out.
But acrylic-based glue is completely safe for the human respiratory system. However, it is not able to maintain its functional fastening properties at low temperatures. From this we can conclude that it is better to use it for finishing interior living spaces, because, as a rule, low temperatures are not established in them.
Regarding consumption calculations. Based on the fact that strips, moldings and baseboards rarely exceed fairly narrow width dimensions, the approximate consumption can be determined based on the number of strips that need to be glued. Thus, half a liter of adhesive will be enough for ten square meters of area. From here we can trace the following pattern - glue for baseboards and moldings is never sold in bulk containers.
Skirting installation options
The plinth can be attached to the floor in various ways. These include:
- attaching with screws and nails;
- anchor or clip fastening;
- gluing to the back;
- Using self-adhesive baseboard on the floor.
This way you can securely fasten the planks to the designated location without damaging the structure. Most often, this method is used when working with wood products that can crack under the influence of a hammer or screw.
Elements for fastening plastic skirting boards.
The objective advantages of liquid nails include, first of all, the fact that their use in no way spoils the surface of the finishing material. After fastening, no dents or abrasions from the hammer can be noticed. At the same time, you will not have to worry about decorating nail heads or screws, which will remain noticeable in any case. The advantages of attaching skirting boards with liquid nails are:
- high quality adhesive fastening base;
- quick fixation of connected parts;
- Possibility of use with any building materials: from natural wood and stone to synthetic materials such as ceramics, plastic and MDF.
- Among the advantages is the possibility of using these fasteners in conditions of high humidity levels, due to which it will be possible to glue skirting boards to the floor in any room of the house: living room, kitchen, bathroom or toilet.
Installation Tips
- The main advantage of plastic is its flexibility, it is easy to work with and you can create a variety of shapes.
- The universal plastic material can be used for various jobs and is easy to clean.
- The plastic plinth is durable and reliable in operation, beautiful in appearance.
- Nowadays there are a lot of different wires in apartments, this material will help to hide them unnoticed. If there are a lot of wires, then a plastic skirting board should be purchased with a special channel.
- You need to carefully attach the floor cornice using self-tapping screws, without touching the wires.
- The plastic strip should be installed when the flooring and walls in the room have already been completed.
- The material will be needed to finish the corners, so when purchasing it, take a small supply. The length of the plinth is 2.5 meters, taking this into account, the required quantity is calculated.
- Connecting elements are purchased by counting the number of corners in the room.
- All purchased plastic profiles must come from the same batch so that the shade is the same type and without defective parts.
- When choosing planks, you need to take into account that narrow skirting boards will look good in small rooms with low ceilings. The interior of a large room with high ceilings will look more attractive with planks from 80 mm.
What types of glue are there?
The choice of mounting adhesive for attaching the ceiling plinth is determined based on the weight of the part and the material from which it is made. To firmly glue molding to a ceiling or wall, you need a quick-setting adhesive that will not lose its properties over time under the influence of ultraviolet rays, moisture or temperature changes. You can attach the plinth to the surface to be decorated using various quick-drying compounds, but you should know that so-called liquid nails are suitable for smooth surfaces of the molding, and styrofoam adhesive-mastic is used for working with porous surfaces.
The most commonly used adhesive compositions for installing ceiling plinths are divided into groups.
Polymer mixtures
This is the most common type of adhesive composition, which has good viscosity, as well as the property of rapid hardening. Polymer adhesives are quite resistant to temperature changes, ranging from positive to negative values; such compositions can work in the range from -60°C to +80°C. Installation work can be carried out with polymer glue both in a warm room and in unheated areas.
Glue made from polymers is resistant even to very high humidity, so it is used for attaching ceiling plinths in the bathroom or kitchen.
As for the cost of such glue, it belongs to the budget and mid-price options
Although it is necessary to take into account that such a product has a certain shelf life, and when it comes to an end, trading companies reduce its price in order to quickly sell the goods left on the shelves. It is not recommended to use adhesives that have expired
In terms of versatility, the polymer product is very convenient. It can be used to glue moldings made of polyvinyl chloride, polyurethane, and foam. This composition does not corrode the surface of the decor and provides it with good adhesion.
Liquid Nails
This type of adhesive composition is universal; it is suitable for fillets of any type, made of any type of material. Liquid nails set quickly and securely hold even heavy polyurethane skirting boards. The composition of liquid nails is designed in such a way that it does not destroy the surface being decorated and the molding mounted to it.
There are two types of liquid nails.
Acrylic composition is a modern universal adhesive that is not toxic to humans during installation work, since it contains acrylic and water, but at the same time the adhesive is not able to withstand the effects of high humidity. For this reason, acrylic liquid nails are not used for installing ceiling decor in the bathroom or kitchen.
The use of liquid nails is advisable where the surface to be decorated is flat and smooth, since these adhesive mixtures do not provide the opportunity to correct small imperfections in the wall or ceiling. Liquid nails can be used on baseboards made of wood, polyurethane, plaster or polyvinyl chloride.
The best adhesives for skirting boards in the form of liquid nails
Good filling of voids and fast setting time are the main advantages of liquid nails. These properties have not gone unnoticed by Russian cladding makers, who successfully use this type of glue to fix skirting boards. Experts liked several effective products.
MasterTeks rubber Heavy-duty
Rating: 4.9
Very strong fixation and fast setting helped the MasterTeks rubber adhesive composition Superstrong to lead the nomination of the best liquid nails for baseboards. The product is designed to perform a range of construction and repair work. The glue feels equally confident both in heated rooms and outdoors. Experts highly appreciated the moisture resistance of the composition. Everything is fine in the composition and in terms of versatility. You can connect a wide range of materials, from plastic to wood. The base can be a concrete or brick wall, stone or plastered surface.
Users are satisfied with the strength of the adhesive joint, the speed of setting, and moisture resistance. The downside is the presence of a specific odor.
Advantages
- strong fixation;
- fast setting;
- moisture resistance;
- wide scope of application.
Flaws
- specific smell.
Kraftool KraftNails Premium KN-601T super strong
Rating: 4.8
A reliable assistant for the finishing craftsman is the super-strong glue Kraftool KraftNails Premium KN-601T. It is compatible with most building materials and decorative elements. Experts pay attention to the transparency of the Polish product, which makes it possible to successfully work with glass or plexiglass. The strengths of the adhesive composition are such properties as frost resistance, special strength, and water-repellent abilities. Liquid nails are supplied in a 310 ml plastic tube. A construction gun is required for uniform application.
Professional veneerers and installers speak flatteringly about the strength of the glue and its resistance to various negative influences. But the composition is quite expensive, and the recipe contains organic solvents.
Advantages
- high strength;
- moisture resistance;
- transparency;
- versatility.
Flaws
- Strong smell;
- high price.
Quelyd Mastifix Decor
Rating: 4.7
French adhesive Quelyd Mastifix Decor has been developed for attaching skirting boards, profiles and cornices. It does not deform or burn through plastic, polystyrene foam, polystyrene foam, PVC, reliably connecting products made from these materials to brick, concrete, plastered and wooden bases. The composition is made on an acrylic basis, so it is odorless and does not have a harmful effect on the human body. The adhesive joint gains strength as the water evaporates, so complete drying time reaches 72 hours. But adjustments can be made within 5 minutes.
Users praise French glue for its environmental friendliness, gentle effect on decorative elements, and reliable fixation. One of the disadvantages is their low moisture resistance.
Advantages
- reliable fixation;
- does not deform decorative elements;
- environmental friendliness;
- possibility of adjustment.
Flaws
- low resistance to moisture;
- takes a long time to dry.
Makroflex MF990 extra strong
Rating: 4.6
The review of the best liquid nails for skirting boards is completed by the extra-strong composition Makroflex MF990. It is made on the basis of synthetic rubber, which is why experts explain the strong hold. Using a one-component product, you can join glass, plexiglass, plywood, metal, ceramics, wood, PVC. The composition demonstrates high initial adhesion, it fills small unevenness in the base, allowing the plinth to be mounted on a concrete, brick, stone, ceramic or wooden surface. The strengths of the glue include resistance to moisture, frost, and vibration.
Consumers have no complaints about the strength of the adhesive joint, resistance to atmospheric and climatic influences, and cost. However, the composition is not compatible with all types of polymer skirting boards.
Advantages
- high strength;
- versatility;
- filling voids;
- low price.
Types of plastic floor skirting boards
The range of products is presented:
- Skirting boards with different methods of making the base. From this parameter, all plastic skirting boards: semi-rigid, characterized by increased flexibility, can be installed on curved areas without problems, can be painted to match the color of the walls; hard - the most accessible and common; soft - foamed. The latter have good thermal insulation and are often needed to reduce heat loss through the floor.
- Products with different functionality. Depending on the intended purpose, there are ordinary decorative plastic strips with a solid cross-section, hollow plinths with a cable channel to hide electrical communications.
- Materials compatible with different types of floor coverings: universal profile with rubberized inserts along the edges; ordinary plinth for linoleum, simply screwed to the walls or floor; L-shaped for carpet, with the function of pressing the covering (fixing a strip of carpet on the outside of the profile).
The outer covering can be matte or glossy; it is possible to combine colors and textures with the floor covering. Individual standards are put forward for quality, according to GOST, they have the same cross-section along the entire length, clear dimensions, smooth outer coating and neat edges. With a standard length of 2.5 m, the width of plastic skirting boards is in the range of 14-24 mm, height – 40-150 mm.
Moldings and baseboards - features and differences
If we talk about skirting boards, then they are more or less familiar to everyone. With their help, the free space between the walls and the flooring is insulated. Thus, the skirting boards are in contact only with the floor covering.
Moldings are special decorative elements that are structurally picture frames, imitation stucco or patterned ceiling linings.
For both elements, the main purpose is to mask empty joints, gaps and minor finishing imperfections. This makes it convenient to decorate mirror frames, door frames or decorate ceiling joints.
At the same time, the elements in question may also have an applied purpose, namely: with their help it is possible to zone living/working areas or protect individual finishing parts from mechanical influences. All this will help visually change the spatial shape of the room. The material from which moldings/plinths are made is extremely diverse and can be matched to any type of finishing work, especially since it can differ qualitatively in the type of relief.
Types of fillets
Fillet is the second name for a plinth, received for the presence of a groove on the outside of the part. Among the most common materials used in the production of fillets are:
- foam products;
- polyurethane products;
- wooden baseboards;
- PVC profiles.
Polyurethane
Polyurethane skirting boards differ from others due to:
- The density of the material, thanks to which polyurethane products are strong and durable.
- Beauty. Decorative elements on polyurethane are more clearly visible than on other materials.
- A large selection of colors and styles, significantly expanding the model range.
- Possibility of installing hidden suspension.
Foam
A material that, despite its low cost, has a decent set of positive characteristics:
- low weight of products;
- ease of installation.
Flaws:
- fragile;
- afraid of high temperatures;
- does not interact well with some types of glue.
PVC profile
Affordable and high-quality material, noted by both professional finishers and ordinary people. Pros:
- heat resistance;
- does not collapse under the influence of ultraviolet radiation;
- easy to process and install;
- not afraid of exposure to water.
Minuses:
- not suitable for installation on curved walls;
- When exposed to high temperatures for a long time, it begins to deform.
Wooden
This material is gradually falling out of use, being replaced by cheaper and more practical counterparts. Despite this, wood skirting boards have many advantages:
- service life is not inferior to most alternative materials;
- wood products are the most environmentally friendly;
- beauty;
- can be painted.
Flaws:
- difficult to install;
- are expensive;
- Wooden skirting boards require special care.
Popular manufacturers
Here, each buyer chooses exactly what adhesives he needs, depending on the most important characteristic for himself. It is good to study ratings from professionals and ordinary consumers in advance, if possible.
Tytan Poland
This is one of the leaders in sales, which is facilitated by a whole set of positive aspects. One of them is the ability to glue skirting boards from any materials, regardless of what types we are talking about - floor or ceiling.
The manufacturer’s compositions provide excellent adhesion to a wide variety of materials:
- Plaster.
- Drywall.
- Tree.
- Concrete.
- Brick.
Moisture-resistant materials that can set literally 20-30 seconds after application. Complete drying takes up to 12 hours. Transparent appearance of materials, which contributes to the absence of marks and streaks when it is glued.
The only disadvantage noted is the slow increase in strength. Because of this, the fillet often has to be kept pressed against the wall for quite a long time.
Moment Russia
This trademark belongs to the famous German concern Henkel. These are polymer types of adhesives. Can fasten almost any materials. They gain strength in just a few tens of minutes. Therefore, you don’t have to keep the fillet pressed against the wall for a long time. The adhesive works without such actions.
Features of the material
The main purpose of the plinth is to complete the overall appearance of the interior, as well as to hide all the shortcomings of the connection with the wall. You should also know that planks made of different materials have their own characteristics. Plastic panels are equipped with additional parts that simplify the fastening process - these are:
- end caps;
- linear connectors;
- corner details of internal and external location;
- brackets.
Additional details are designed to hide joints, including corner joints.
The planks have special recesses designed to hide utility lines (cables, electrical wires, wires). Given this feature, you should know how to attach a plinth to a concrete wall so that it fully fulfills its function and looks beautiful. This minor detail makes plastic products more practical compared to their wooden and MDF counterparts. Additional elements are sold separately, as each situation requires an individual quantity. Installation is carried out with special fasteners.
Types of adhesives for skirting boards
When repairing and final finishing work surfaces, they can choose liquid nails and silicone sealants, putty, polymer mixtures and hot-melt adhesive. Each material has its own differences and technical parameters.
Polymeric
They have become the most common among consumers. With optimal viscosity and the ability to harden quickly enough.
As a result of the use of the compositions, a layer is formed that is not afraid of even significant temperature fluctuations. During operation, properties and positions are maintained in the temperature range from -60 to +80 degrees.
But installation work is carried out only if the ambient temperature is positive. The composition is suitable for decorating ceilings in unheated rooms. The same applies to conditions of high humidity.
The cost allows us to conclude that polymer mixtures represent a budget or medium category. The main thing is to remember the limited shelf life. Some manufacturers reduce the cost for materials that are reaching the end of their shelf life. Therefore, you should be careful when purchasing.
Combined with polystyrene foam, polyvinyl chloride and polyurethane. The compositions have good adhesion and do not have a negative effect on the surface of decorative elements.
Adhesive putties
One of the classic and most profitable options for gluing. Especially when it comes to ceiling types of planks.
Reliable adhesion to the surface is maintained due to the thick structure. A good solution is to apply the compounds until the outer layer of the wall is covered. Putty is often used to seal a crack.
Polyurethane foam
It appeared on the market relatively recently, but has already been appreciated by many craftsmen. Works best with polystyrene foam boards. The latter are often chosen for use as insulation on the territory of various objects.
Has the following advantages:
- Durable fastening with long service life.
- Minimal amount of expansion after application.
- Carrying out work with significant time savings.
- Convenient application to the surface.
- Ease of use.
- Economical consumption.
But it also has a high cost compared to other binders. Additional tools will be required for the job.
Sealants
Their main purpose is to fill cracks and seams. They are perfect for the final stage, when the skirting boards are already fixed to the surface. For the fastening itself, it is recommended to use other compounds, although many are accustomed to thinking otherwise.
Homemade glue
You can make your own adhesive to glue the baseboards. This is an economically feasible solution. All you need is water and gypsum putty with PVA glue.
There are only two stages in the cooking process:
- The putty is stirred until a thick, homogeneous mass is obtained.
- PVA is added in a ratio of 1:4. 1 part glue to 4 parts solution. Everything must be mixed thoroughly. Then all that remains is to put the material on top.
The advantage is that such materials make it easier to smooth out unevenness on the walls. The disadvantage is that everything takes a long time to dry. When applying the adhesive mass, use a spatula. Then the plinth is pressed to the surface. Whether materials can be glued to each other largely depends on the composition.
Installation of polyurethane floor plinths
Next, we’ll look at how to attach a polyurethane floor plinth. It is also usually mounted with special glue. Gluing decorative skirting boards should begin from the corner of the room. The work is carried out in several stages:
- The surface of the walls and floor is being prepared for the baseboard. They must be thoroughly cleaned and degreased;
- The plank is coated with glue on the reverse side. There are special grooves (shelves) here. The composition must be applied specifically to them, as well as to the ends;
Glue is applied from the back side
- The floor plinth is pressed tightly against the wall and held there for several minutes. You can press it against the wall with something heavy;
- The joints between the planks are treated with acrylic sealant.
Tip: In places where the walls are uneven, the polyurethane floor plinth may come off slightly. In order for it to stick evenly over the entire surface, you just need to nail it down not all the way. After the glue sets, they can be pulled out. It is worth nailing the strips at the corners as well.
The wide polyurethane floor plinth looks very impressive in the interior. They glue it using the same technology. However, since it can shrink quite significantly, the joints between such high planks sometimes diverge after some time. In this case, you should wait until the gap stops growing, that is, the baseboard shrinks completely. After this, the old glue will need to be removed. Next, the split seam is filled with joint glue using a syringe. Since it forms a foam, care should be taken that it does not reach the surface by approximately 2mm when applying.
Wide floor polyurethane plinth looks very impressive, but is somewhat difficult to install
Polyurethane plinth can also be mounted mechanically using self-tapping screws. The video below shows this process step by step:
How to make your own glue
Preparing glue for ceiling and floor skirting boards with your own hands is a cost-effective and simple process.
What you need: PVA glue, gypsum putty, water.
How to proceed: take a bucket, mix the putty with water in it until smooth, add PVA in a ratio of 1 to 4 (1 - glue, 4 - the resulting mass). Mix thoroughly and let stand for up to 5 minutes.
The resulting paste is applied with a spatula, then the baseboard is applied to it. The mass hardens for a long time, but has almost no smell and allows you to smooth out unevenness and defects in the walls.
Selection and purchase of materials and accessories
There is a wide selection of different types of skirting boards
Sometimes when purchasing, it is important not only to decide on their appearance, but also to know the properties of a particular type of decorative element, to understand its advantages and disadvantages. Let's try to understand this issue
Wooden
This type of plinth is classic. Currently, wooden elements are often high-status and made from expensive wood. They can be both floor and ceiling.
There are two types:
- the base is made of inexpensive solid wood, which is covered with veneer made from valuable species;
- the entire element is an array made from one type of wood.
We recommend reading about how to install a socket and switch, how to remove paint from walls, whitewash from ceilings, how to hang wallpaper, how to make a plasterboard partition with a doorway, and also how to sheathe walls with plasterboard.
The advantages of such a plinth include its beautiful appearance and texture, as well as environmental friendliness. The disadvantages are high cost, tendency to deformation from moisture, and difficulty of installation.
Plastic and polymer
In this category, there are skirting boards made from several materials on the market. They all have their own characteristics, namely:
Skirting made of polyvinyl chloride (PVC) can be used for both floor and ceiling. Advantages include affordable price, ease of installation (special fasteners included in the kit are used), flexibility, durability, resistance to external conditions (moisture, fungus, etc.), ease of maintenance. Disadvantages include the lack of wide elements and exposure to heat, which leads to deformation and makes it undesirable to use a plinth made of this material above a kitchen stove or in the area of powerful light sources;
polyurethane plinth is used in both floor and ceiling versions. The high flexibility of the material allows it to be used for decorating rooms with complex configurations (niches, arches, curves). In addition, it is durable, strong, resistant to moisture and temperature changes, environmentally friendly, and easy to care for. The disadvantage is its relatively large weight, which makes installation of ceiling elements difficult;
elements made of polystyrene (polystyrene foam) are suitable only for making joints between the wall and the ceiling; they are too fragile for the floor. Products made from this material are inexpensive, lightweight, resistant to deformation and fungi, and can be painted. Disadvantages include fragility and the ability to crumble during processing. Extruded polystyrene has greater strength and crumbles less, but also costs a little more.
Ceramic
Ceramic plinth can only be used for flooring. It has a rather narrow range of application - it is perfect for rooms with floors covered with ceramic tiles. The advantages include durability, strength, ease of maintenance, and absolute resistance to moisture. The downside is the fragility and relative complexity of installation.
You will probably be interested in reading about how to install blinds on plastic windows, a water heater, a shower stall, an instantaneous water heater and an air conditioning system.
Fibreboard, MDF skirting boards
Made from MDF (also known as medium-density fiberboard), the plinth can be used for both ceiling and floor. Products made from this material are inexpensive, resistant to moisture, and do not fade in sunlight. But at the same time they are fragile, scratches and other mechanical damage quickly appear on them.
What edging is suitable for linoleum?
Before you start installing a skirting board, you should first purchase it. When choosing decorative strips, you should take into account the type of coating on which they will be laid. When it comes to linoleum, the best option for it is plastic skirting boards or laminate products. PVC strips are good because they are not only flat, but also three-dimensional with internal cavities for placing wires.
Installation of plinth for linoleum.
They are sold complete with connecting elements, so attaching such skirting boards is easy. Wooden planks can also be used to edge the lower part of the room, but their installation will be more complicated.
As for the color of plastic skirting boards, you should select strips either a little darker than linoleum, or a little lighter. A good solution would be to combine the color of the planks with the color of the trim or furniture in the room. For wooden baseboards, paint is selected in the same way. When purchasing PVC planks, you should take the product from the same batch, otherwise they may differ slightly in their shades.
Installation of wooden plinth
When working with natural wood, the planks must be left indoors for a day for acclimatization.
The cutting stage is the most difficult, because the parts need to be joined with a minimum of gaps.
Working with a miter box, apply the resulting workpiece to one wall, cutting the second part of the corner until the planes coincide as closely as possible.
You may have to repeat this more than once; not every room has right angles.
Installation on self-tapping screws is reliable; according to the technology, you first need to prepare a recess for the head of the fastener by countersinking. This way the cap will disappear into the mass without protrusions.
The use of special nails allows you to skip this step; the special shape of the head does not require preparatory work.
It is so narrow that it is buried in the tree itself. But plasterboard walls won’t work; the nails won’t hold.
Markings for fasteners are applied at intervals of 80-120 cm, then screw in the screws so that the tip on the back side protrudes slightly above the surface.
Applying the plinth prepared in this way to the wall, make marks.
Then we drill and insert plastic plugs into which we screw the screws through the array until they stop.
Which glue to choose depending on the baseboard material?
Binder components are often designed to interact with certain types of materials. Therefore, a careful approach is important when choosing.
Styrofoam
This is a collective name for a number of plastics. Each of them has its own structure and specific composition. Therefore, the binding to a given group of bases may be different.
An example is styrofoam baguettes, which have been on the market for some time. This is a light variety, which is perfect for the following types:
- Acrylic or silicone sealants.
- Liquid nail of any type.
- Adhesive or gypsum type putty.
- Polyurethane foam.
- Assembly adhesive, plastic type surfaces also allow it.
Polystyrene
Its chemical composition is identical to conventional polystyrene foam. But production technologies differ, which leads to differences in density and structure itself. Polystyrene has a higher specific gravity.
But the set of suitable compositions is approximately the same as in the previous case:
- Sealants with acrylic bases.
- Liquid nails and universal materials.
- Putties.
- Polyurethane foam.
- Glue to install the baseboard, and so on.
Polyurethane
One of the most durable decorative elements that are also distinguished by their reliability. Only two types of glue were developed specifically for polyurethane - polyurethane and mounting acrylic.
The latter is a type of acrylate diluted in water. It does not have any strong odors, but the composition dries within 24 hours. Therefore, excess is disposed of a maximum of 30 minutes after application. You can use such materials to eliminate gaps on uneven wall surfaces.
Several varieties are available for sale:
- Concentrated.
- For rooms with high humidity.
- For smooth walls and dry rooms.
Duropolymer is a relatively new composition with properties that are similar to those described above. For fixation on walls and floor coverings, in this case, the same compositions are chosen as in the case of polyurethane.
Plastic
Any type of plastic skirting boards is best combined with Moment Classic glue, super glue and liquid nails.
Tree
Most often, fastening wooden skirting boards is based on self-tapping screws. You can choose a combined method so that there are not so many holes for hardware. Usually these are self-tapping screws and liquid nails, application is spot-on. The wooden appearance of the products guarantees reliable results.
Other types of adhesives are abandoned, although wood has good adhesion to walls made of any material. MDF was no exception.
How to attach a plinth to a plasterboard wall
There should be no problems with gluing - plasterboard walls are usually smooth. But when using fasteners - self-tapping screws - there are nuances. The most important thing is not to twist it so that the plaster does not burst. There are a few more points.
- If a starting profile is running along the floor, there can be no problems, but you need to use self-tapping screws for metal, and of good quality.
- Try to get into the racks. They should be located every 60 cm, which exactly coincides with the fastener installation standards.
- If there are no studs (gypsum board is glued, for example), you can either try to use longer self-tapping screws to secure it into the wall material, or use special self-tapping screws for drywall. They can be plastic or metal. Both are normal. They differ from ordinary ones in that their carvings are much deeper. Due to this, the load is distributed over a large surface.
- If necessary, you can use special butterfly dowels.
The difference between a self-tapping screw for gypsum boards (top) and a regular self-tapping screw for metal
In general, how to attach a plinth to a gypsum board depends on how it is mounted. It also depends on what kind of plinth you are attaching.
Where is it better to mount it - to the floor or to the wall?
The presence of two perpendicular planes determines two options for fixing the floor plinth. The natural preference will be the simplest and easiest method. The easiest way is to attach this finishing element to a surface that will accommodate fasteners with less labor:
- In houses made of timber with concrete floors and cement screed, it is recommended to prefer fastening the plinth to the wall;
- In houses made of foam concrete and brick with a wooden floor, it is wiser to “drive” dowels or nails into it.
In order to attach the plinth to the floor with a concrete screed, to the walls made of foam concrete, you will first have to drill holes for plastic dowels with a hammer drill. The spacing of the points for installing fasteners determines the type and degree of unevenness of the base and the geometric parameters of the slats. The most common distance between the fixation points of both the baseboard itself and the strips or clips for mounting plastic slats is a minimum of 30 and a maximum of 40 cm.
The choice of mounting plane depends on the technical characteristics of the base
Attention. On walls that are finished or only leveled with plaster, on partitions constructed using plasterboard, on structures lined with soft finishing stone, on chipboard boards, the plinth will not hold firmly. In such cases, it is recommended to choose the floor as the basis for fixation.
If for some reason attaching the plinth to plasterboard or to a chipboard panel is the only possible option, for fixing you need to purchase special self-tapping screws designed to work in this material, or finishing nails with zinc coating.
It is generally advisable to place the attachment points on the metal elements of the frame if it was used as a structural support.