The ceiling plinth is a decorative element that emphasizes the decoration of the ceiling and walls. Without it, the entire design of these surfaces can often look somehow unfinished. Accordingly, the installation of such skirting boards (or, as they are often called, fillets or baguettes) must be perfect, with precise adjustment of all connecting joints.
How to make a corner of a ceiling plinth
On straight sections of the ceiling, it is not so difficult to fix and connect the planks. But corner joints cause difficulties for many beginning craftsmen. Therefore, for those who have decided to do the finishing work themselves, and are doing this for the first time, it will be important to figure out in advance how to make a corner of the ceiling plinth. The process of fitting parts in corner areas will be discussed in this publication.
Materials for making ceiling plinths
What options are possible?
To begin with, a few words about what ceiling plinths can be made from.
The classic material for the manufacture of such elements of interior decor has long been gypsum. It was from it that various stucco details were cast, decorating the halls of rich houses and palaces. Gypsum skirting boards, as a rule, had intricate reliefs and different sizes.
Gypsum plinth is still produced today, but due to its considerable cost, heaviness and fragility, it has begun to lose popularity to products made from other materials.
Today, real gypsum products for this purpose are usually produced to order, as they have a fairly high cost both in production and installation. Most often they are cast in small batches for restoration work when restoring architectural monuments.
However, the appearance of gypsum fillets still remains attractive, as they are an excellent finishing touch for rooms made in various styles. Therefore, in our time, customers are offered a wide variety of analogues from other modern, cheaper and lighter materials - polystyrene foam and polyurethane. They perfectly imitate natural gypsum fillets.
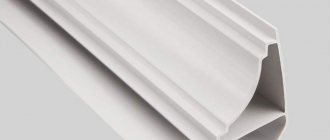
Ceiling plinths made of polystyrene foam - by visual perception after finishing is completed, it is almost impossible to distinguish them from plaster ones
Such fillets have a number of undeniable advantages - they are light weight, which greatly facilitates their installation, a wide range of relief patterns and widths of the strips. They fit perfectly into different design solutions of both classic and modern interior design styles.
Making wooden skirting boards decorated with carvings is a very labor-intensive process, and this affects the cost of such products
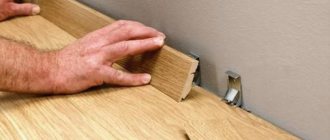
We can’t help but mention wooden skirting boards, as they are quite popular for rooms lined with natural lining, which never goes out of fashion.
Skirting boards made from this natural wood or from composites based on it have their own advantages - durability, the possibility of repeated repainting in various shades and colors, as well as high reliability of fastening to surfaces.
Wooden skirting boards with various relief patterns are made to order. The disadvantage of wooden fillets is their high cost, since very often they require manual work by a craftsman.
Cutting a plinth made of any material, as well as adjusting its corners, is carried out using the same method. The difference may be in the use of tools for marking and cutting, in the methods of attaching fillets to the surface of the wall and/or ceiling.
Features of cutting skirting boards from different materials
Due to the fact that the materials from which fillets are made react differently to the impact of cutting tools on them, before you start cutting the plinth, you should familiarize yourself with some of the features of the process. This information will help avoid accidental damage to products.
Wooden ceiling plinth made using milling technology
- Wood can be called the most durable of all the listed materials used in our time for the manufacture of decorative ceiling strips. Therefore, when cutting it, greater resistance arises, due to which burrs and chips can easily form on the cut. Wooden baseboards, especially those that are small in width, must be sawed with a fine-toothed wood saw or an electric jigsaw, also with a “gentle” file.
The structure of the material is clearly visible on the cut of the foam baguette
- Expanded polystyrene (foam) is the most fragile of all these materials, so it can easily begin to crumble. It is best to cut it with a sharp stationery or construction knife. When carrying out the cutting process, it is not recommended to press the blade hard on the fillet, as the cut area can be pressed through, which will ruin the appearance of the plank. The work must be done extremely carefully, slowly, without allowing any deformation or crumbling on the cut.
Installation of these products must also be done carefully. Expanded polystyrene strips are not devoid of elasticity, but it is not so pronounced that it would allow the skirting boards to completely follow the shape of a clearly uneven surface. And if you press hard on the baseboard, it may simply break.
Considering the disadvantages of polystyrene foam, it is best to purchase planks with a reserve in case they are damaged. The low cost of such fillets allows this to be done.
Products made from extruded polystyrene foam, along with low density, are distinguished by much higher strength indicators
- Extruded polystyrene foam is more durable and reliable, it is easy to cut and does not crumble. Cutting a plinth from this material is much easier, since burrs or cavities rarely form on it. However, just like foam plastic ones, they do not have sufficient flexibility, so it is problematic to stay on a curved section of the surface.
Cutting products from this material can be done using a sharp knife or a hacksaw for metal, with a blade with fine teeth.
Flexible polyurethane skirting board
- Polyurethane. Both rigid and flexible plinths are made from it, so they can be attached to a not very smooth wall or a curved section of finishing (for example, when framing an arched vault, column, etc.).
Flexible products made from this material can only be cut with a sharp knife, while rigid products can be cut in the same way as extruded polystyrene foam. The cost of polyurethane skirting boards is quite high, so negligence or mistakes can cause considerable unnecessary costs.
Cutting Features
Let's take a closer look at how to correctly cut a corner on a ceiling plinth using a miter box using different materials.
Polyurethane
Polyurethane foam (colloquially simply polyurethane) is a very good material for ceiling plinths. Due to its good flexibility, it adheres precisely to the base (the junction of the wall and the ceiling), even if due to construction errors the walls and ceiling are uneven. In addition, polyurethane is easy to clean and therefore can last a long time. Low load resistance is not a problem here: there is almost no load on the ceiling plinth. We also have a separate article that discusses in more detail the question of how to make a plasterboard ceiling and suspended plasterboard ceilings with your own hands.
How to adjust the corners of the ceiling plinth
Preparatory work
Before proceeding directly to the work of forming corners, it is necessary to carry out some preliminary activities, consisting of organizing the workplace and preparing the necessary tools.
To cut a baguette you may need:
- Ruler, tape measure, square, pencil.
- Goniometer or protractor.
- A stationery or construction knife with replaceable blades.
- Hacksaw with fine teeth.
- Miter box.
- Laser level is desirable, but not required.
The miter box allows you to evenly cut slats, baseboards, and other finishing parts at an angle of 45, 60 or 90 degrees
. The miter box is not an expensive complex device, so it can be purchased even if it is needed for one repair. It will be even good if this tool complements the standard home workshop set. The miter box is a kind of box, in the walls of which guide cuts are made for the cutter, made in both directions at an angle of 45, 60 and 90 degrees. The tool can be made of plastic or wood. In its bottom part, holes are often provided for attaching it to a workbench - to ensure immobility.
Methods for forming corners
As a rule, ceiling plinths have a complex relief surface. It is this that creates difficulties when forming a right angle from two of its segments without leaving slit-like gaps.
In addition, the corners in the premises of apartments and houses quite often differ from straight lines, that is, from 90 degrees, which also makes it difficult to adjust the baseboard. And it must be trimmed so that there are no gaps at the junction, otherwise they will spoil the appearance.
Another nuance that is important to consider when cutting planks is the location of the corners. As you know, there are two types of them - internal and external. Most often, in standard rooms of modern apartments there are only internal corners. External corners are typical for rooms that have one or more turns, such as an entryway or corridor, or that have niches or projections.
Trimming the baguette to decorate external and internal corners is somewhat different.
Diagram of internal and external corners
There are several ways to achieve a perfect or almost perfect corner joint of the baseboard. In one of them you can use a miter box, in another you can use a laser level, in others you can make markings using a square and a ruler. The simplest of them is the first option, but its use is only possible if the adjacent walls of the room form an angle of 90 degrees.
Using a miter box
Before starting work, you will have to check the perpendicularity of the walls in the corners to make sure that it makes sense to cut the plinth along the miter box. Control is carried out using a large square or a special tool - a protractor. A protractor is a professional tool, and not everyone has one, but it is a must to have a protractor in your household.
An inclinometer is a device that allows you to accurately determine the size of an angle.
If it turns out that the angles are straight, or do not differ very much from the desired 90 degrees, then you can safely cut the planks at an angle of 45 degrees, placing them in a miter box. It will be better if the miter box is first secured to the tabletop. If displacement is allowed during work, serious errors may occur in the cut of the plinth, resulting in a sloppy joint.
In order for the baseboards to fit together perfectly at a 90-degree angle, their edges must be cut in a mirror image at a 45-degree angle. They can be cut individually or simultaneously in a package.
- When choosing the second option, the planks must be folded together with their back sides facing each other, and then fixed in this position in several places with strips of masking tape. If the skirting boards are not fastened, then when cutting with a package, their displacement cannot be avoided.
Scheme of laying the left and right planks in a miter box when cutting them separately
- If it is decided to cut each plank separately, then they are laid and cut one by one, but when cutting they are laid in the opposite direction. That is, one baguette is cut along the left guide cuts of the miter box, located at an angle of 45 degrees, and the second - along the right.
Combining two cut strips
- The next step is to combine the two cut strips with each other. First, the test is carried out on the table, and then installation is carried out under the ceiling in the corner being finished. Only by attaching the baguette to the future installation site can you see the real picture. If small errors occur, the ends of the baguette segments should be corrected using a sharp knife.
- Only after the planks have been adjusted as closely as possible can they be fixed with glue.
As for the difference in the execution of cuts made using a miter box for different types of angles (external and internal), it is clearly shown in the diagrams below.
Demonstration of examples of cutting a baguette using a miter box to form the internal and external corner of the ceiling plinth
If you carefully study the diagrams, you can see that the cuts are made from different sides of the edge of the baguette, that is, for the internal corner, the hacksaw is installed at an angle of 45 degrees from the main surface of the plank to its edge (when viewed from top to bottom), and for the external corner - vice versa .
Making a miter box or template
If the corners in the room turn out to be even, but you don’t have a miter box at hand, then you can make such a device or a simplified version - a template yourself. You can do it in several ways.
First option
If you need a miter box for constant work, but for some reason there is no opportunity to purchase it at the moment, then you can make such a tool from plywood or a well-treated board. For this purpose, you will need to prepare three wooden parts. The walls should have dimensions of 500×100×15 and 500×80×15, and the bottom should be 500×200×20 mm. Different wall heights will make cutting down parts more comfortable. The parts will be used to assemble a kind of box without end walls.
Homemade miter box: 1. Side walls. 2. Bottom of the product
The walls are attached to the bottom of the future miter box - it is best to fix them with wooden dowels glued into the drilled holes, but you can also use ordinary self-tapping screws.
Before fixing the walls, it is very important to set them perfectly level, since they must be located at right angles to the bottom board.
Marking a homemade miter box
- Next, you need to find the middle of the length of the walls and mark it using a construction square and immediately file it at the same time, since the cuts must be exactly on the same line. The cutting depth is 60 mm.
- After this, retreating approximately 150 mm in each direction from the middle, two more marks are made on one of the ends of the walls. Then, using a protractor or protractor, set the direction to 45 degrees. Lines are drawn at the ends of the side walls.
- After drawing the lines, their slope should be rechecked again, and then cuts should be made using a beam saw. It is very important that when forming cuts the vertical plane is strictly maintained, otherwise the miter box will be produced with a large error. The cuts should sink 3÷5 mm into the base of the board.
The miter box itself is a simple tool, but making a really high-quality device is not so simple, since there is a high probability of mitering the cuts, at least slightly. Therefore, it is best to immediately take care of purchasing a miter box if you are planning a repair. Fortunately, it is not expensive.
Second option
This method of making a template yourself can be called the simplest, since it does not require special skills or complex tools. To work, you need a sheet of thick paper or cardboard in A4 format, a simple pencil, a ruler and a protractor.
The manufacturing process takes place in the following sequence:
- The first step is to set aside 30÷50 mm on both sides of the sheet from its edge.
- Using these marks, two lines are drawn perpendicular to each other and parallel to the edges of the sheet.
- At the point of their intersection, the vertex of a right angle is formed.
- The next step, using a protractor or simple graphic constructions, is to divide the right angle into two equal halves, which form angles of 45 degrees. The dividing line - the bisector should be located both above and below the lines - it is better to bring it to the middle or even to the edge of the sheet. This will help to more accurately mark the edge of a baguette of any width at the desired angle.
Fitting a baguette using a homemade template
- A whole baguette is attached to the resulting template, for example, on the left side. A cut is marked on it, which should coincide with the bisector line. The top and bottom points are marked on the bar, then they are connected to each other, forming a cutting line. Then, the right plinth is marked and cut off in the same way.
- After this, a right angle is formed using a template of two planks, which is then tried on at the installation site.
- If necessary, the joint is adjusted using a knife.
Third option
This is a modernized previous version, for the manufacture of which you will need a sheet of thick cardboard measuring 300x300 mm, and two even wooden planks measuring 300x30x10 mm.
- A sheet of cardboard must have at least two perfectly smooth edges perpendicular to each other.
- On these sides of the sheet, wooden strips are fixed with glue, which will also form a right angle.
- Then, just as in the previous version, the angle must be divided in half, and it is advisable to draw the intended bisector to the opposite edge of the cardboard sheet. The baguette cuts will be formed along this line.
It is more convenient to work with planks, as there is a good, reliable stop. That is, there is no need to control the alignment of the long side of the plinth with the guide line - just press it against the plank, and then you can mark the cutting line.
Fourth option
Any horizontal plane having a right angle can be adapted to the template. An ordinary rectangular or square workbench or table top is suitable, on which you can also temporarily attach the stop strips, for example, with double-sided tape and mark with a simple pencil a bisector dividing the right angle in half.
The remaining actions are carried out according to the same principle as when using other similar devices.
Using a Laser Level
In modern conditions, many home craftsmen already have a laser level in their tool arsenal, which is excellent for checking the straightness of the corner and marking the baguette when forming both internal and external corners.
How this is done is described step by step in the following instruction table.
| Illustration | Brief description of the operation performed |
| First you need to accurately position the laser level itself. To do this, the same distance is set aside from the corner along the joint lines of the floor and walls, for example, 500 mm. The marked points are connected to each other by a diagonal line. After this, its middle is found and marked. The laser level is installed on the floor, turned on, and then placed so that the vertical plane it sets (its projection in the form of a line) passes through the middle marked on the diagonal and coincides with the corner of the room. The beam should pass vertically along the corner line - this will also show how smoothly the corner of the room is formed. In essence, a plane is specified that cuts the corner of the room exactly in the center. It is in this plane that the junction of the skirting boards should be located. | |
| In this case, the level should be positioned so that the projection of this plane is also displayed on the ceiling. You can fix the resulting bisector line with pencil marks. But it’s even better not to remove the device, as it will help to more accurately display the desired cutting line on the baseboard placed at the place of future fastening. It is probably clear that the next step is to install one baguette at the installation site. The plank must be rested with its end side against the wall. The beam from the laser builder, passing along the surface of the plinth, and even along all its relief protrusions, will accurately show the cut line. | |
| After this, a cut line is drawn along the beam line using a pencil or thin marker. | |
| A corner is cut along the intended line using a knife - it is impossible to make a mistake in this case. Then the cutting line is marked and the second plinth is cut in the same way. | |
| Now that both parts for forming the corner are ready, they need to be connected to each other at the site of future fastening. If the joint is neat, then you can install the baguette with glue. If a small gap has formed between the planks, the ends of the plinth must be adjusted with a knife. | |
| When installing ceiling plinths, the strips that form the corner are glued first, and the flat areas of the finishing are fixed last. | |
| If, during the fitting of the corner side of the baguette, its other end ends up on an already fixed piece of plinth, you should immediately mark the required length in order to cut off its excess. In this case, the smooth edge is simply cut at a right angle. | |
| To correctly cut the baguette for the outer corner, you must also start marking from the floor using a laser level. There is a slight difference in the primary construction here. First, lines are simply drawn along a ruler, which are continuations of the walls. Then an equal distance is laid on them from the corner; these points are connected by a diagonal, on which the center is determined. The beam is directed through this mark to a protruding angle, also with a projection of this plane on the surface of the ceiling. | |
| Next, pieces of baguette are alternately applied to the wall and the protruding corner so that the beam passes through them. Marking is carried out along the projection line, and then the end part of the plinth is cut. Then you need to try on both sections at the installation site, aligning the cuts. If necessary, the ends of the planks are adjusted. If everything is fine, proceed to fixing the fillets on the surface. |
The advantage of using a laser builder is that its beam shows the exact cut line, as it passes along all the relief irregularities of the surface of the baguette. All that remains is to make the correct markings and a neat cut.
Adjustment of ceiling plinth without additional devices
If you have only the simplest tools at hand - a ruler, a square and a pencil, then using them you can also make markings and cut the ends of the baguette for their precise alignment. Next, we will consider two methods that are applicable if the corners in the room are far from 90 degrees, since when marking you have to focus only on the actual alignment of the planks at the place of their installation.
First option
In this case, the work occurs in the following order:
Marking line along the first plinth attached to the corner
- The first step is to place the molding strip on the site of future installation and press it along its entire length with the end resting in the corner.
- Using a pencil, mark its location - draw contours along the upper and lower edges of the plinth.
- After this, the baguette is applied to another wall and the same marking procedure is performed.
The second line will give the intersection point with the first. From this point to the corner point the cutting lines will be drawn.
- As a result of the construction, an angle drawn in pencil is formed on the ceiling. Its vertex can be connected to the vertex of the real angle - using the resulting ray it will be easier to mark cut lines.
- Now you need to again attach both strips to the corner one by one and draw cutting lines from the corner point to the intersection point, directly along the baguette relief.
Trying on the cut plinth at the installation site
- After this, both skirting boards are trimmed along the marking lines. All that remains is to try them on in the corner, as they say, in place. If they match well, then they are installed on a permanent basis.
Combining two trimmed baguettes in the corner
- If necessary, the edges of the baguettes are trimmed or cleaned using sandpaper.
Second option
Another way to form a corner from a baguette using the simplest tools. Its complexity lies in the fact that it is necessary to simultaneously press both baseboards to the walls and mark the future cut.
The work is carried out in the following order:
One of the simplest, but also the most imperfect way of adjusting ceiling skirting boards. Many complex profiles cannot be adjusted in this way.
- One of the two plinths is pressed against one wall of the corner with its back side, and against the other with its end part. It is better to immediately mark its location with a pencil by drawing a line along it on the wall.
- Then, the second baguette is pressed against it with its end. After that, a line is drawn on the first plinth along which both plinths intersect.
- Next, the skirting boards are removed and adjusted on the table. A cut is made along the intended line of the first plinth. Then a second bar is attached to it, a cut is outlined and made, and the accuracy and accuracy of joining the parts is checked.
Transferring the cut line from one fillet to the second
- If after trimming there is no gap between the baguettes, you can glue them in place.
- If a gap forms, it is necessary to make adjustments - cut in the right place with a knife.
It must be said right away that not all skirting board profiles can be adjusted to each other in a similar way. Therefore, when purchasing baguette slats, it makes sense to take one extra so that you can practice on it. But this may not help either - such an adjustment is too primitive.
By the way, if, when forming an angle between the ends of the planks, a small gap nevertheless appears, and you cannot completely get rid of it, then it can be masked by filling it with white sealant or diluted finishing putty. After such a “patch” has dried, it is processed with fine-grained sandpaper.
Approximately
If you have enough experience, you don’t need a miter box or markings. In this case, the master simply places the skirting boards on the wall, estimates the size of the angle, and makes the cut by eye. But this method is only permissible with a lot of experience, when the finisher has a good eye and a very precise hand. If this is not the case, this method is highly not recommended: you can ruin two parts of the plinth at once without achieving the correct fit.
This video will show you how to cut corners on ceiling plinths.
Hand Right IMPORTANT: Eye fitting is more suitable for plastic and foam elements than for wooden ones. They are easy to cut with a knife right in place - and with a strong hand and a faithful eye, everything will fit perfectly. The tree must be cut - and the cost of a mistake is extremely high.
Decorative connecting corners
The easiest way to join a plinth in a corner is to use ready-made decorative corners, which are sold separately, but are often universal as they fit many profiles. The main thing is to choose the right corner to match the width of the plinth and the overall style of its design, so that it does not look too “conflicting.”
Such corners are made from both polystyrene foam and polyurethane, so it is better to purchase them together with the main finish in order to choose not only the pattern and joining method, but also the material.
Examples of corner joining elements
These elements come in several types:
- Corners to which the plinth is joined end-to-end. This option is presented in the illustration above - left fragment. This option is suitable for verified right angles.
- Corners under which the edges of the baguette are hidden - one of the models is shown in a fragment of the picture. Such inserts allow you to decorate corners that have errors in their perpendicularity.
- External decorative corners are usually designed to hide the ends of the baguette slats.
Installation of these elements is simple. The corner is first glued at the junction of two walls of the room. Before joining the skirting boards to it, the glue must dry completely. After this, the end of the baguette is leveled and glued end-to-end or inserted into the groove on the side of the decorative corner.
* * * * * * *
Having understood the technology of joining ceiling plinths at the corners, armed with the best possible tool, you can move on to performing this task yourself. Don’t despair if the first time it doesn’t work out the way you would like: a little effort, maximum accuracy - and the result will not be long in coming.
In conclusion, here’s a short video tutorial on how to adjust the corners of ceiling plinths if you don’t have a miter box at your disposal.
Is it possible to do without cutting corners?
As a rule, corners on the ceiling plinth are made by cutting parts (most often at 45 0) and then gluing them together. However, this task, as will be seen from the following sections, is quite labor-intensive, so sometimes special adapters are used to connect fillets - the same as for floor plinths.
If you do not want to waste time and effort on adjustment, then you need to proceed according to this scheme:
- First, we cut the plinth panels at an angle of 90 0, adjusting the length so that there is a gap of about 10 mm.
- We select corner elements for the ceiling plinth in accordance with the size and color of the fillet.
Details for white PVC molded skirting board
- If a PVC panel is used for finishing, then we put the adapter on one of the strips, which we then glue to the wall. During installation, we insert the second strip into the already secured corner element.
Note! When analyzing what kind of corner ceiling plinths with cable channels there are, be sure to pay attention to the adapters: for laying communications, it is very important that the joint of the panels be formed using a special cover with a hole for the wire.
- We glue products made of foam plastic, polystyrene or polyurethane in three parts: first we mount the panels, and then we close the gap in the corner with a decorative overlay.
Foam insert and its use
In principle, such a corner ceiling plinth looks quite attractive. However, most masters still adhere to the classical technology, which we will describe below.
Let's cheat a little
In some places, the neatness of the joint of the baseboard is not important - for example, behind a tall cabinet. In this case, you can simplify your life by gluing the ceiling plinth and cutting out the corner after gluing. True, there is no need to talk about a clean cut and perfect joining of fragments - most likely, joining defects will have to be covered with putty of a suitable color.
It may be necessary to putty the joint even if the walls are not level enough. Here it is better to take care in advance about the simple profile of the skirting boards and their small width, as well as sufficient flexibility. Otherwise, it will be clearly visible that in some places the edging does not adhere to the wall/ceiling.
Special corner elements for PVC skirting boards will help to disguise sloppy corners. They can be simple or figured, matched to the color and texture of the ceiling edging.
For complex profiles, larger corner sections are specially produced that imitate stucco.
When using such corner elements, gluing the plinths to the ceiling in the corners requires straight cutting of the ends. For corners placed on top, the accuracy of cutting is not very important, but if the joining fragment is inserted between two planks, it is necessary to process their edges as carefully as possible.
Before or after wallpapering
Professionals often differ in opinion regarding the technology and order of gluing ceiling plinths. There are 2 possible installation options for this decor:
- After wallpapering, this is the best option, which helps to hide all defects in the adhesion of wall finishing materials to the painted ceiling. The only disadvantage of this solution is the difficulty of choosing the right adhesive composition for reliable adhesion to the wallpaper.
Also, when installing foam plinth on top of wallpaper, extreme caution should be taken, as there is a high risk of glue getting on the wallpaper. In such situations, removing the composition without damaging the material is almost impossible. The same applies to finishing the baseboard - if the element is installed after finishing the walls, you need to choose a ready-made coating that does not need to be puttied and painted. Before installation, you should protect the wallpaper from possible contact with glue.
Installation of ceiling plinth after wallpapering
- Before wallpapering. It is considered the most practical option - the ceiling plinth can be glued without the risk of damaging the wallpaper. The part can be finished and painted without restrictions. The disadvantage of this type of plinth arrangement is the need to be careful when gluing wallpaper - the ends of each new row must carefully approach the lower edge of the ceiling decor. If the work is performed poorly, all defects in the adaptation of the rolled materials will be visible along the lower edge of the plinth.
Installation of ceiling plinth before wallpapering
Thus, to preserve the final finishing elements, the best solution would be to install a ceiling plinth before wallpapering. In this case, the standard order of finishing is also followed - “from top to bottom”, when experts advise first working on the ceilings, and then moving on to the walls and floors.