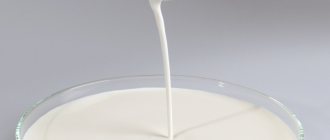
Putty as a building material is a homogeneous, finely dispersed paste-like mass or powder mixture for subsequent dilution with an appropriate solvent and is used for the final leveling of surfaces before painting, wallpapering or other finishing work.
There are many types of putty for different purposes, including PVA-based putty, which is one of the most versatile and popular.
What is it used for?
PVA-based putty has received a wide variety of applications. It is successfully used to smooth the following surfaces:
- Concrete and asbestos-cement slabs;
- Drywall sheets;
- Foam and cinder blocks;
- Wooden boards;
- Outer layers of plaster.
After the surface has been puttyed with a mixture based on polyvinyl acetate, and the drying process of the putty has been completed, lime or chalk whitewash, water-based, oil or latex paint, and various adhesives can be applied as the next layer. PVA putty is suitable as a putty for filling small gaps that form at the junction of the floor and baseboard.
Since PVA putty has low moisture resistance, its use in damp rooms with the possibility of frequent contact with water, such as kitchens and bathrooms, is not recommended. It is ideal for indoor use and is not suitable for outdoor use.
The putty is ideal for indoor use and is not suitable for outdoor use.
Wallpapering procedure
First, the work is prepared for the baseboards. Determine where on the fillet the top, which will lie on the ceiling, and where the bottom, which will lie on the wall, is. Mark bottom-to-top with a pencil. Cut the ends at a 45 degree angle using a miter box. This is a device for correctly cutting the edge with the desired angle of inclination. Immediately after this, join two skirting boards at the corner of the wall without glue and check whether everything is done correctly. Ideally, the edges should meet without gaps. Do not forget that the corners of the plinth can be internal and external and the cutting will be different.
You need two people to glue the plinth, since the two-meter length will not allow you to press the fillet well over a long distance. Start work from some corner, connecting two canvases. If you are working with glue, apply it to the back of the workpiece in two strips at once, both for the ceiling and for the wall.
There is no need to press hard; the panel may burst under pressure. When adjusting the last plinth, first cut off one corner, then measure and adjust the other. If gaps form at the joints, they are leveled with putty or sealant.
If you work with glue-putty, then apply it to the wall. After aligning the seams, allow the work to dry. After this, you can apply paint to the ceiling and baseboard in two layers, pre-drying each applied layer. Choose water-based or acrylic paint for work. To prevent paint from getting on the wall, use masking tape.
If you then need to glue the wallpaper, then using a spatula, which is used to slightly lift the baseboard, and a knife, which is used to tuck the edge of the wallpaper, you can easily hide it under the baseboard.
Composition and characteristics
From the very name of the product it is clear that PVA putty contains polyvinyl acetate-based adhesive, which was invented by English chemists about seventy years ago and is a transparent, non-toxic, chemically inert polymer without taste or odor.
In nineteen fifty-one, British scientists discovered that the polymerization of vinyl acetate in a toluene solution in the presence of a catalyst produces a substance similar in properties to natural resins, but at the same time even more plastic and swelling in water.
It turned out that this substance mixes well with various plasticizers, does not dissolve in water, but forms stable homogeneous suspensions with it and is a film-forming and adhesive material.
This prompted the inventors to create the well-known glue, which in liquid form has a white or slightly yellowish color due to the addition of the plasticizer dibutyl phthalate. The glue has a barely noticeable specific, rather pleasant, aroma, and after drying it forms a transparent, hard, but rather elastic glassy layer without color or odor.
This glue is so environmentally friendly and non-toxic that it is used to glue food packaging together, and PVA-based putties are recommended for use in finishing rooms intended for children.
PVA-based putties are recommended for use in finishing rooms intended for children.
In addition to polyvinyl acetate glue, they contain the following components:
- Chalk is calcium carbonate, chemically precipitated from minerals containing calcium. Gives the putty a pure, opaque white color;
- Ground talc is a mineral that reduces the crystallization time of polymers, therefore promoting faster drying;
- Latex is the stabilized milky sap of rubber plants. Additive to prevent cracking of the putty layer;
- Carboxymethylcellulose is a product of cellulose processing. Gives additional softness;
- Antiseptics and antifungal components. Prevents mold and bacterial growth.
The finished putty composition contains exclusively harmless ingredients, each of which has found its application in medicine, perfumery and the food industry.
The finished putty composition contains exclusively harmless ingredients.
This type of putty is different:
- High adhesion, that is, the ability to have very strong adhesion to other surfaces and increase friction. This characteristic is stronger, the more intense the intermolecular interaction of the glued layers;
- Optimal density and viscosity and good ductility, which greatly facilitates the application process;
- Economical consumption. It ranges from 0.4 to 0.8 kg per square meter;
- Neutral white color. Therefore, the composition is ideal as a ceiling leveling material and creates an excellent basis for painting the treated surface in any color;
- Relatively short hardening time. One layer takes three hours to dry; a day is enough for all layers to dry completely.
The mixture is resistant to temperature fluctuations, withstands a temperature range from forty to one hundred and twenty degrees and a three-time cycle of freezing and thawing without changing its properties.
The composition is ideal as a ceiling leveling material.
Three best recipes for solutions for whitewashing trees
We offer three best recipes for solutions for whitewashing trees for those who are already in the garden in the spring and are eager to protect their plantings from insects, diseases and pests, as well as from sunburn. The sooner this is done, the more benefits such an event will bring to your garden.
But first, let's talk about the components that should or can be included in the composition for whitewashing: what are their functions and what effect they have.
Components for preparing whitewash solution
To prepare a solution for whitewashing fruit trees, you need time and the necessary components (components):
- lime;
- clay;
- glue;
- carbolic acid;
- copper sulfate;
- fungicide.
Additional and very beneficial for trees in the solution will be milk or whey.
Popular manufacturers
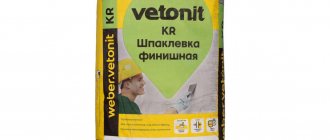
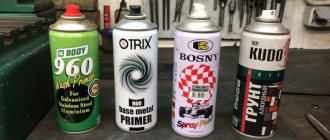
PVA-based putty is generally available and has a low price. Such domestic companies as “Leningradskie Kraski”, “Rainbow”, “Prestige” produce a wide range of ready-to-use paste-like PVA-based putties in sealed packaging; the Economtex company offers customers 5-15 kg bags of powder for making putty on their own.
PVA-based putty is generally available and has a low price.
How to remove it at home?
If the PVA stain was not noticed immediately, you will have to use more serious methods to eliminate it. In the case where the trace of glue remains voluminous, you must first try to remove the bulk of the frozen substance.
If the fabric cannot withstand such treatment, then it is better to use soda:
- wet and squeeze out the sponge;
- dip a washcloth in soda;
- working from the edges of the stain towards the center, rub the area;
- stand for half an hour;
- wash the damaged area of the item first;
- wash the entire product.
It is recommended to take into account the brand of glue, since its construction varieties have greater durability and better adhesive ability compared to stationery ones.
Vinegar
Table vinegar will help to deal with old glue stains. This method can be helpful for cleaning thin fabrics, such as chiffon.
Application:
- Lay out the product horizontally.
- Soak a sponge in vinegar.
- Place a sponge on the stained area.
- Allow the time necessary for the reaction to occur, as a result of which the PVA film begins to wrinkle.
- Carefully remove the glue.
- Wash the product.
Alcohol
Before removing traces of glue, the item should be turned inside out. Operating procedure:
- place the item on a horizontal plane;
- Place a sheet of cardboard under the area to be treated - this will prevent the stain from moving to the other side;
- moisten a cotton sponge or swab in alcohol or vodka;
- Treat the stain with blotting movements, ensuring that the dried glue dissolves;
- wash as usual.
The use of alcohol is indicated for linen, cotton, and denim fabrics. Read about removing glue stains from jeans here.
Exposure to high temperatures helps remove the adhesive from the material. It is convenient to use a regular iron for this.
Work order:
- The item with the stain is placed on the ironing board.
- Place a piece of white cotton cloth over the stain.
- From the inside, fabric is also placed under the product.
- Iron it, trying to get the glue absorbed into the additional fabric.
- Wash using powder or gel.
Application methods
Before applying the first coat, carefully prepare the base surface by removing moisture, dust, dirt or residues of previous coatings. Hygroscopic surfaces of gypsum or wood must be pre-treated with a primer mixture.
Then mix the putty thoroughly and apply it using a clean, well-polished steel spatula in a thin layer of no more than one millimeter. It is not advisable to apply a greater thickness; there will be a risk of slipping, and the drying process will take much longer.
After three hours, you can apply a second layer on top of the first. After another day, you can begin sanding the surface using fine-grained sandpaper and treating it with a polishing polyurethane sponge, and after finishing polishing, use a vacuum cleaner to remove loose small particles of putty. After this, the wall or ceiling is ready for whitewashing, painting or wallpapering.
Significant irregularities are first corrected by plastering. It is not recommended to apply putty in a thick layer.
It is not advisable to apply a greater thickness; there will be a risk of slipping.
What determines glue consumption?
It is recommended to purchase glue at the same time as wallpaper. The choice depends on the distinctive characteristics of the facing material. Specialists at a hardware store will definitely advise you on the issue. If you have information about the characteristics of wallpaper and strictly follow the technology for performing the work, glue consumption will be minimal. You don't have to make your own adjustments. It is important to strictly follow the manufacturer's recommendations.
In fact, the consumption of the fixative indicated on the packaging may vary depending on the specific conditions of its application. As the mass of wallpaper increases, a thicker composition is required.
A few recommendations from experts:
- priming the surface is performed not once, but twice. The fixative is not so absorbed into the base of the wall;
- use glue and wallpaper from the same manufacturer.
Important! The structure of the wall surface directly affects the consumption of the fixative. The smoother and more uniform the surface, the less composition is used.
Disadvantages of PVA putty and errors in application
It is necessary to take into account several disadvantages of putties containing polyvinyl acetate glue, they are:
- Not suitable for external objects exposed to natural factors;
- Not suitable for treating rooms with high humidity;
- Cannot cope with deep defects;
- They cannot serve as a base for tiles.
Common mistakes:
- Applying the mixture to the surface in a layer that is too thick. This cannot be done, as it will begin to slide under its own weight;
- Insufficient drying time for the first layer. Before applying the next layers, it is necessary to dry the previous ones for at least three hours, otherwise it will be smeared under the spatula.
In general, PVA-based putty is a pleasant to use, effective and obedient technical building material.
Before applying subsequent layers, it is necessary to dry the previous ones for at least three hours.
Why add PVA glue to cement mortar?
In addition to its direct purpose - gluing paper, wood, leather, etc., PVA glue is used as an improver for putties and mortars.
Concrete and cement-sand mortar, to which polyvinyl acetate dispersion is added, acquires better ductility, and the composition sets faster.
Using PVA as a plasticizer additive is an effective technique that allows you to solve various problems. Thus, by mixing cement with PVA glue, the floor screed better fills all voids, adheres more firmly to the concrete base, and cracks do not form on the surface of the finished screed.
Making your own mixture
Moreover, you can make the putty mixture yourself. To do this, just take regular PVA glue and mix it with powdered chalk or plaster. If you only need a little mixture, you can use tooth powder.
The proportion of the components of the mixture should be as follows: for a three-liter jar of crushed chalk, take one glass of glue with a capacity of 200 ml. The mixture must be thoroughly stirred until the consistency of thick sour cream and the absence of lumps, after which it is ready for use.
The mixture must be thoroughly stirred until the consistency of thick sour cream and the absence of lumps.
To treat the surface of wood, part of the gypsum or chalk must be replaced with small oak sawdust, and then the masked defect will become completely invisible.
DIY repairs - repairs
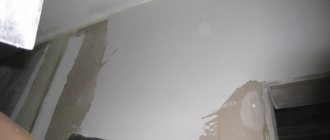
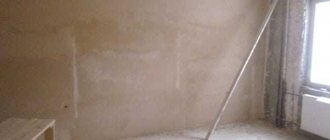
Puttying and cleaning of wall and ceiling surfaces
After stripping the old wallpaper from the walls and whitewashing the ceiling, you need to inspect and tap the walls. If there is a crack, then we open it up, set up a serpyanka mesh (sold at every market) and seal it with putty. If the old plaster has come off, we cover up all the places that are pouring. Next, we wet the wall with water and putty or plaster the broken places. The consistency of the putty should be thick sour cream.
The first stage is priming the surface. At this stage, we cover the surface with a special primer composition. I use the deep-penetrating primer CERESIT CT17.
The second stage is puttying the surface. Mix the putty to a consistency reminiscent of thick sour cream. Tools required for work:
-Bucket for mixing putty;
- Spatula width - 40mm; 100mm; 350mm and 600mm;
-Abrasive mesh-No. 40; No. 100; No. 150;
The putty is mixed with a mixer or a narrow spatula. For better adhesion to the base, you can add a little PVA glue to the putty. Initially, putty is putty with starting putty, corners are brought together, holes and differences are leveled. There are cases when you have to putty with starting putty two or even three times. Starting putty can be applied up to 5 cm thick in several layers. This is the main stage in puttying surfaces. Next, we perform stripping, sanding the walls and ceilings, followed by priming. The surface must be primed after each stripping.
The third stage is puttying the surface with finishing putty. This is the last stage in puttingtying the surface. Apply in one layer - for wallpapering, followed by stripping and priming, and in two layers for painting. The thickness of the putty is no more than 5 mm. Do not forget to prime after each layer of putty.
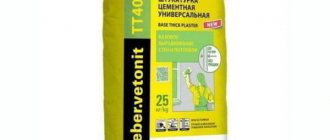
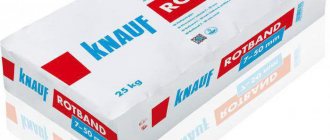
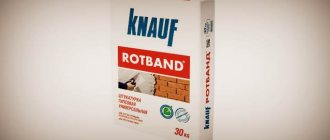
I work with putty from the company KNAUF.
And the last stage is wallpapering or painting .
Easy and dust-free repairs for you.
Prepare the solution. To do this, take a small amount of water into a clean container. Add gypsum putty (finish) to the water. Also, to increase the adhesive properties of the mixture, add a small amount of PVA glue to it. Mix the gypsum mixture thoroughly using a drill and a mixer attachment.
Advantages of homemade plaster
The main advantage is low cost. Such mixtures are inexpensive and are sold everywhere. They are much cheaper than decorative plaster and are also quite simple to mix and subsequently apply. There are many ways to refine ordinary putty and give it a luxurious look.
Other advantages include:
- long service life,
- wide possibilities for choosing proportions (convenience in applying the solution directly depends on this),
- environmental friendliness, since the putty does not contain harmful and particularly caustic components,
- antibacterial properties,
- has excellent thermal insulation, which is especially important for residents of cold regions,
- characterized by noise-absorbing properties, for which many people value it,
- a properly prepared solution greatly facilitates the covering of surfaces, which increases the pace of work,
- the ability to create an original and attractive pattern on the wall.
Conclusion
By doing the putty yourself, you can save money and be confident in the good quality of the material. Don’t be afraid to experiment, all the mixture recipes I’ve given are very simple and it’s impossible to make a mistake.
If you have any questions, ask them in the comments. So I say goodbye, and good luck to you in your endeavors!
Hello! Interested in the proportions of materials for putty (PVA, chalk, fine sawdust
Arseny, here are the recipes for homemade putties:
To make putty for linoleum, you need to mix ground chalk (120 g) with crushed sawdust (20 g) and add linseed oil or drying oil until a thick, homogeneous mass is formed. You can add a dye to this mixture that matches the color of the linoleum.
For wood, ground chalk is replaced with PVA glue.
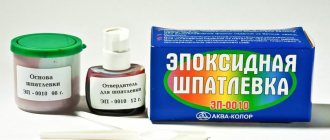
When making putty, lead sulfate is required to be added to an aqueous solution of glycerin (water - 50 ml, glycerin - 50 g). Stir until smooth. The mixture hardens quickly, so it must be used immediately after preparation.
Main Ingredients
Decorative plaster differs slightly from conventional compositions, since in order to create some relief it must remain plastic for a long time. In addition, after the layer is completely dry, it must be durable and reliable. It is very important that the exterior finish is easy to clean from dust. Before making decorative plaster with your own hands, you need to find out what are the main ingredients of the mixture and what are they used for?
The base can be putty, and PVA glue can be used as a binding ingredient. It allows the solution to remain plastic for a long time, which allows you to achieve the desired texture or pattern. The filler can simply be a pigment that will color the composition in the desired color. Solids:
- marble pieces,
- quartz sand,
- granite chips
- synthetic elements.
These ingredients are added in the smallest quantities.
Putty is a highly malleable material, similar in texture to clay or dough, and is commonly used in home construction and renovation as a sealant or filler to fill holes and small cracks.
PVA glue is one of those few things that is difficult to replace - both on the construction site and during renovations. It improves the physicochemical properties of solutions and gives them better viscosity. Plasters made with this glue become more flexible. When added to dry mixes, the PVA construct acts as a modifier, improving their processing properties and improving adhesion to various surfaces.