Why putty walls under wallpaper?
Many beginners in the matter of renovation wonder: why apply putty before the wallpaper, if, for example, you can glue the material directly onto the concrete.
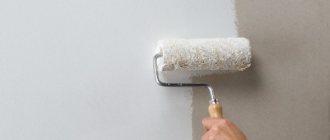
In fact, puttying the walls is a necessary step before the final finishing, as it allows you to level the walls and improves the adhesion of the wallpaper to the surface.
Other advantages of wallpaper putty:
- Low glue consumption;
- Reducing the risk of wallpaper peeling;
- Elimination of cracks on walls;
- Smooth surface;
- The concrete base will not show through thin wallpaper.
Putty does not take much time, but it saves effort and money. In addition, thanks to the preliminary finishing of the wall, the risk of damage and peeling of the wallpaper is reduced, so it is definitely necessary to putty the walls.
What is putty essentially?
Putty (putty) is a universal, quickly hardening finishing composition of special materials used for leveling and repairing walls and other surfaces before subsequent finishing work.
Judging by the popular name “putty”, this mixture is designed to cover cracks, potholes, joint seams and other surface irregularities.
Materials for putty
There are different types of putty mixtures on the market, including dry and ready-made ones. Dry ones are more popular because they are cheaper, and even a beginner can handle preparing the composition.
- Each manufacturer includes instructions for all stages of working with the material.
- A ready-made mixture is also available on the market.
- It is sold in plastic buckets; it does not need to be diluted, but can be immediately applied to the surface.
If the repair budget is unlimited, it is more convenient to use such putty, since its preparation does not require additional time.
How long does it take for the base layer to dry?
The manufacturer indicates the need to dry the layer for 24 hours before applying the next layer. Don't rush, otherwise the putty may fall off the surface ahead of time, and you'll have to putty again.
The manufacturer indicates the need to dry the layer for 24 hours before applying the next layer.
Types of putty
Depending on the purpose, several types of material can be found on the market. Among them:
- Starter - putty, which is applied as the first layer to the base surface. Most often it is made on the basis of gypsum with quartz sand. Putty allows you to apply thick layers to the wall to even out significant differences;
- Finishing - intended for the final stage of puttying under wallpaper or for painting. Apply a thin layer and dry quickly;
- Universal is a less popular putty, but some people still like it. It consists of finishing and starting putties; it can be applied as the first or last layer.
Typically, craftsmen purchase starting and finishing putty for the project; universal putty is less popular due to unpredictable consequences in operation.
Materials should be selected taking into account the characteristics of the walls. For example, if there are significant differences in height on the surface, you need to take more starting putty.
Tools
We've sorted out the materials, let's move on to the tools. To begin with, you can assemble a minimum set if you plan to do the repair yourself.
It is best to purchase tools immediately when purchasing materials. This way, store consultants will know what they have to work with and will give recommendations on the selection of tools.
To putty the walls you will need:
- Container for solution;
- Construction mixer or drill;
- Building level;
- Set of spatulas;
- Grouting mesh;
- Primer roller;
- Brush for priming hard-to-reach areas;
- Serpyanka mesh for adhesion of layers of putty.
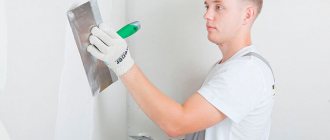
Important! To putty the walls, you need to purchase at least two spatulas - a narrow one and a wide one. If the spatulas have been previously used, they must be cleaned of dried contaminants.
Review of manufacturers
When purchasing finishing materials, you should pay attention to the name of the manufacturer. Often it will serve as a guarantor of quality.
The most popular starters include Volma Standard, Osnovit Ekonsilk and Bolars Façade . The latter is intended for external work and is characterized by uniquely high frost resistance.
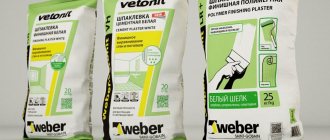
The best finishing putties include Knauf Rotband pasta, Sheetrock Superfinish, Weber Vetonit LR+ . The base of the first option is vinyl - it provides high dispersion and a remarkably white color of the base. Weber Vetonit LR + is a polymer mixture with high plasticity. It retains its working properties for more than 2 days.
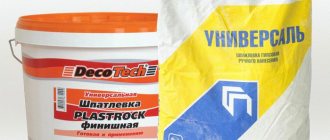
Popular universal options are Knauf Fugen and UNIS BLIK . Putty from Knauf is very economical.
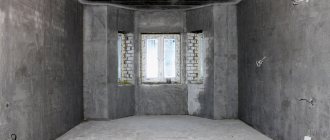
Preparing the walls
In order for the putty to stick firmly to the wall and not peel off along with the wallpaper a week after the repair, the surface must be carefully prepared.
Stages:
- Removing old wallpaper, dried glue and other contaminants;
- Elimination of obvious defects (for example, cement tubercles, etc.);
- Applying a primer layer.
Without basic training, not only will the quality of the putty leave the best, but the work process itself will not be pleasant. On an uneven surface, the putty will slip and quickly crack, which is why you will have to redo the areas that were not immediately treated.
Important! The walls need to be primed at least twice.
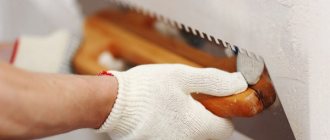
Also, at the stage of preparing the walls, you can get rid of the cracks in the wall by covering them with putty. To do this, you need to take a tool with which you can slightly widen the gap. Next, you need to cover the gap with the prepared solution and let it dry.
Price and quality
One of the main criteria for choosing building materials is price. However, to compare the profitability of buying putty for different surfaces, it is not enough to look at their price on the shelf.
- These products are offered in packages of various capacities - from 1 to 30 kg.
- Therefore, it is best to calculate how much we will pay for the selected kilogram.
- But this is not enough, because the products described differ significantly in characteristics.
Therefore, in our list there is an item “wear at a layer thickness of 1 mm,” which allows you to estimate how many kilograms will be required to finish partitions with a given surface.
High-quality putties from famous manufacturers usually cost more than no-name ones. However, among little-known brands you can also find a quality product that will provide a good appearance to the walls and will last a long time.
Starting putty
Puttying walls is no different, for example, from puttingtying ceilings. The preparation stages and the process itself are practically no different. Probably besides the fact that it is customary to glue wallpaper to the wall, but they haven’t glued it to the ceiling since the times of the USSR.
To putty the walls under wallpaper, you need to follow all the important preparation steps:
- In a container, mix the putty with water in the proportions indicated in the instructions. To do this, use a construction mixer or drill with an appropriate attachment. It is necessary to stir the mixture until the lumps completely disappear;
- The required amount of the mixture is applied to a wide one using a narrow spatula;
- With a smooth gesture, the mixture is applied in one long stroke to the wall.
Important! If the solution turns out to be too liquid, you need to add more putty to the container and mix it again with a construction mixer until the lumps completely disappear. If the material turns out thick, you need to add a little water.
Application conditions
The possibility of using putty in rooms with high humidity significantly depends on its composition. The most popular gypsum finishes should not be used where air humidity remains above 70% and where walls may be exposed to splashing water.
In the case of polymer and cement products there are no such restrictions.
- Most manufacturers state that the finish can be used at temperatures between 5-25°C.
- During work, drafts should be avoided so that the surface of the partitions dries evenly.
- Drying (setting) times vary greatly.
- Some products bind in a few or tens of minutes, others in a few or tens of hours.
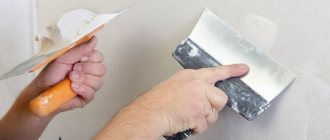
Finishing putty
Applying the finishing putty is a very important stage, since it is precisely this that is designed to hide the last remaining unevenness on the wall before wallpapering. The process of preparing the mixture is the same as for the starting putty.
How to apply the finish correctly:
- Use a small spatula to scoop up a little of the composition;
- Apply to a large spatula;
- Using a large spatula, spread the putty in a thin layer at an angle of 45 degrees.
After applying the finishing putty to the wall, you need to let it dry and smooth out all the unevenness with a mesh. Next, you can start gluing wallpaper.
Features of puttying
Facade putty for exterior use is applied in exactly the same way as putty for interior use. To do this you need:
- It is good to clean the surface of old decorative finishes. Traces of old paint, glue or lime will impair adhesion, and the repair will be short-lived. Any tool can be used for cleaning. There is no need to be afraid of damaging or scratching the base: with the help of putty, all defects will be hidden.
- Wash. If the interior walls can be washed manually, then it is recommended to use a car wash to wash buildings, especially since this unit is quite affordable and is available to many car enthusiasts. The water jet released by the car wash under pressure will ensure more complete cleansing of all contaminants.
- Dry. Only mineral solutions may be applied to wet surfaces. For all others, moisture is unacceptable - it will disrupt the adhesion to the base and make the drying of the putty uneven.
- Prime. It is recommended to select a soil similar in composition to the putty solution. Application of primer is necessary to increase adhesion.
- After the primer has dried, apply a base layer of putty and wait until it sets. If there are still large irregularities, then prime the surface, dry it and correct it with the base mixture in problem areas. This can be done using a rubber spatula or a paint brush.
- After correction, repeat application of primer. Regardless of how many layers of putty are applied, each of them must be primed to improve adhesion.
- After hiding large defects, a finishing layer with a finer grain size is applied, and after it has dried, you can begin decorative finishing.
If finishing is not planned after puttying and a solution with tinting is applied, then you need to apply 2-3 layers, not forgetting about priming. You should choose a transparent primer or take a white one and tint it to the desired color.
The putty can be applied using a rubber spatula, brush or roller. It is impossible to use a spray gun in this case: the viscous mass will quickly clog the nozzle. The spray gun can only be used when applying primer and for final painting.
Useful tips
- If finishing walls with putty is your first experience in life, you should use a narrow spatula. Once the process is clear, you can begin to carefully use a wide spatula;
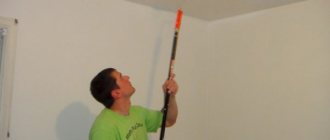
- During the work process, it is worth checking the quality of the coating using a level. If even at the finishing stage it is possible to replace unevenness, they can be quickly eliminated. When the wall is puttied and the material is dry, this will be much more difficult to do;
For better adhesion of subsequent layers of putty to the previous ones, it is better to use a painting mesh.
Despite the fact that the putty is applied under the wallpaper, this does not mean that unevenness can be allowed. Thin wallpaper or wallpaper without a clear pattern will only emphasize the recess, and over time may completely peel off in place with an uneven surface.