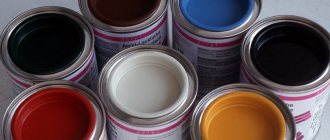
Types of putties
All of them are divided into types according to the binder: gypsum, cement, polymer, acrylic, epoxy. Another division is by area of application. For example, gypsum putties are usually recommended only for dry rooms. However, due to the additional additives included in them, the compositions can be used both in damp places and in places that are not subject to direct contact with water: universal putty compositions are suitable for any room.
Based on the grain size of the composition, roughing and finishing putties are distinguished, and the latter can be used for both types of work. Mixtures for rough leveling have a coarser grain than finishing ones. They are applied in a thick layer, filling all the unevenness. Finishing putties are placed on top of the rough ones in a thin layer, sanded thoroughly, after which the surface is ready for final finishing - painting, applying Venetian plaster or gluing wallpaper.
How long does putty take to dry? The answer to this question depends on many factors. Among them, the binder on the basis of which the mixture is prepared is of great importance.
What affects drying time?
Each composition dries differently. This depends on various factors:
- thickness of the working layer,
- temperature in the room where work is carried out,
- air humidity level,
- presence/absence of additives affecting drying speed,
- base material and priming.
The greater the thickness of the working layer, the longer the putty dries. Finishing compounds on any binder dry quickly because they are applied with a thickness of no more than 2 mm.
The higher the ambient temperature, the faster the putty dries, the lower it is, the longer. It is not recommended to work at sub-zero temperatures. In the cold, the polymerization process of the putty is disrupted. Even if it hardens, it will still fall off quite quickly, and the work will have to be done again. The introduction of frost-resistant additives will help correct the situation.
The higher the humidity level, the worse the surface dries. This point must be taken into account if outdoor work is carried out.
All modern putties contain additional substances that ensure plasticity, viscosity, adhesion, and drying speed. To find out if the purchased mixture contains any of the above, study its composition indicated on the label.
The base material and priming have a direct bearing on the drying speed of the putty. If you tidy up regular and primed walls, the latter will dry less. The primer reduces the level of moisture absorption by the surface. Accordingly, the drying time of the putty is reduced.
How long does putty take to dry: construction forum - repair and finishing of apartments, houses, cottages.
How long does it take for primer, rotband, putty to dry? How long does it take for primer, rotband, putty to dry? Today, many people undertake to do repairs in their home on their own. At the same time, few people have special training, and therefore a lot of questions arise during the repair process. So, during any repair you will have to deal with such building materials as primer, rotband and putty. All these materials are used for finishing walls and floors. When working with them, it is very important to know the specifics of their use, in particular their drying time. Let's look at each of these materials. Primer is an important part of any finishing work. It is a liquid mixture of various polymer binder components designed to facilitate bonding of the material to the surface. The primer is designed to prepare the surface before plastering or puttying walls, wallpapering or pouring floor screed. This material can protect metal from corrosion, reveal the texture of wood, or hide defects in concrete, brick or plaster. The drying time of the primer is usually indicated on the packaging, as well as the approximate consumption of this building material. If the manufacturer does not indicate the drying time on the packaging, then professionals advise letting the primer dry for 3-4 hours. Naturally, you should also take into account such indicators as humidity and air temperature in the room. For example, at temperatures above 25 degrees the primer dries faster, and if the humidity exceeds 65%, the drying time of the primer increases by 2-3 times. Rotband is one of the types of primer produced by KNAUF. It is intended for preparing surfaces such as gas and foam concrete, ceramic and silicate surfaces, as well as brick and others before puttying. Before applying rotband, a simple primer is usually used to clean and remove dust from the surface. It is important while the rotband is drying to ensure that the temperature in the room is maintained from 5 to 25 degrees, and that construction dust does not fall on the treated surface. The drying time of the rotband is affected by both the thickness of the applied layer and the temperature in the room. In any case, when it comes to pouring floors, it is recommended to begin further work no earlier than 6 hours after priming. In other cases, the drying time of the rotband can last up to 7 days. Most often, the next step in the interior finishing process is to putty the walls. This building material is sold dry, and it must be diluted exactly in accordance with the instructions on the packaging. Putty helps to fill in all the unevenness and cracks on the walls and make the surface smooth. You cannot store the putty diluted for a long time. The choice of a specific type of putty is influenced by the type of surface to be treated. Thus, acrylic putty is used for both facade and interior work, and silicone mixtures are intended for rooms with high humidity. The drying time of the putty also depends on the thickness of the applied layer. The putty hardens quickly, but then time must pass for the excess moisture to evaporate. Depending on temperature and humidity, a very thick layer of putty can take anywhere from a few days to two weeks to dry.
Properties of compositions
Gypsum putty dries quickly, gives a perfectly smooth surface that is pleasant to the touch (can be used as a finish), and does not shrink. It is better to use in dry rooms, even if the manufacturer claims that its mixture is moisture resistant.
Cement putties are universal. They are suitable for both wet and dry rooms, but they shrink strongly and are often coarse-grained, so they are mainly used as starters.
Polymer compositions are sold ready for use (with the exception of epoxy, they are two-component), they give the same perfectly smooth surface as gypsum, while they are moisture resistant, do not crumble, do not crack, are white, plastic, and sand well.
Wild show off, or what to do when the putty doesn’t dry)))
Hello everyone, I finally decided to make my first logbook entry.
On a cold winter day the putty doesn't dry, but you're in the garage and you need to do something. You ask WHAT:
We will merge the key with the signaling key fob together)))
It's better to have two sets just in case.
we take what we will combine
cut off the rubber from the key
This will only happen to me (the key fits perfectly into the keychain and the hole fits evenly under the screw
and now everything is ready
Later the keychain will be painted in body color))))
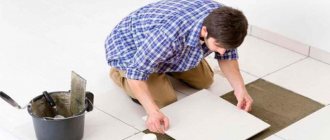
Work technology
The operating rules include the following recommendations:
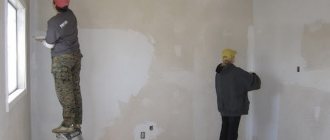
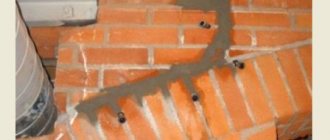
- Prepare the surface - remove old coating, remove dust, degrease, repair cracks.
- Wait for suitable conditions for puttying - the room temperature should not be lower than +5 and higher than + 25 ° C. Humidity should not be more than 55 - 60%. If it is higher, the drying process will be delayed.
- Prime the surface, this will reduce its moisture absorption and prevent cracking of cement compounds.
- Use starting putty to fill rough unevenness in walls (ceiling, floor). The thicker the composition is applied, the longer it will take to dry. Therefore, a good option would be to break the work into several stages - thin layers of plaster will dry faster.
- After complete drying, sand the surface and bring it to perfect evenness, then apply a thin layer of finishing putty.
- To sand the finishing putty, use very fine sandpaper and do not overdo it, otherwise you will have to putty again.
Many people are interested in the question of how long it takes for finishing putty to dry. It is applied in a very thin layer, so its drying time is no more than 1 hour under optimal operating conditions. Any quick-drying putty is finishing in 99% of cases.
Decorating walls with your own hands - how, what, why?
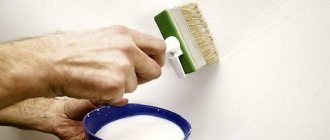
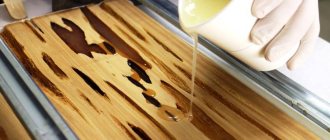
So, having chosen the type of putty that is suitable for you in all respects, you can begin applying it. The ready-made solution from the manufacturer does not require additional mixing efforts, but if you purchase a dry mixture, you will have to add water yourself, taking into account the recommendations on the packaging. You will need a round plastic container and cold water.
Please note that breaking all the lumps and achieving a homogeneous mass is possible only with the help of electrical engineering; by hand you will never be able to make a mixture of the required quality. You need to stir for 5 to 10 minutes, resulting in a thick paste-like mass without lumps. Almost every manufacturer recommends priming the walls before finishing with mixtures of their own production. It happens that this is not economically feasible.
You can reduce costs without compromising the quality of work by applying an adhesive solution to pre-moistened walls. The recipe is simple - 1 part PVA glue and 9 parts water. It is advisable to moisten the surface before applying the finishing putty. Firstly, you will remove dust and dirt from it, and secondly, you will increase the hardening time of the material and improve its penetration into the small pores of the wall. Dry surfaces will instantly absorb moisture from the mixture, which will then be extremely difficult to level.
To work, you need a container with the composition and 3 spatulas: one smaller one is for taking the mixture, the second one is for applying it to the surface and leveling it, the third one is angular. We press the spatula against the wall at an acute angle of about 20°, moving from top to bottom and covering an increasingly larger area. Using an angled spatula, we adjust the surface in hard-to-reach places such as the junction of walls and ceilings. The layer thickness should be about a millimeter to avoid cracking and shedding.
Please note that when leveling the putty, the tool must be wiped with a damp sponge, removing dried pieces of the mixture from its surface. For those wishing to complete their wall decor with thick wallpaper, one layer of putty will be enough, but for painting or thin wallpaper, two or three layers are needed
Then, before final hardening, we remove roughness and inaccuracies with fine-grained sandpaper or a mesh with a grain size of 200–250.
Is it worth artificially accelerating drying?
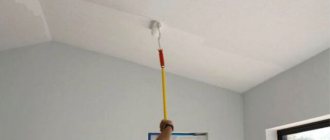
The vast majority of experts do not recommend doing this. When using various heating devices (hair dryers, heat guns, etc.), the surfaces of the walls dry unevenly; more precisely, only the surface layer dries out. Therefore, to speed up work, for example, with finishing putty, the method of accelerating drying is quite acceptable. When working with starting mixtures applied in a thick layer, forced drying can cause cracking, peeling of the top layer, crumbling or destruction of the entire restoration site.
Conditions that will help naturally speed up the drying process:
- optimal air temperature,
- high-quality ventilation in the room,
- normal humidity.
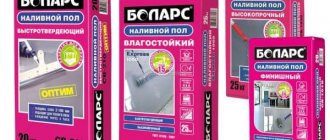
To speed up the repair at least a little, modern quick-drying putty is often used. There are options for such mixtures for surfaces made of concrete, metal, wood, as well as universal compositions, which, as a rule, are inferior in quality to both starting and finishing mixtures, while being significantly more expensive than both the former and the latter.
Excellent results in terms of drying time for latex putties. They are quite expensive, but the price/quality ratio is optimal. Such compositions are elastic, adhere well to the walls, one layer dries for about an hour at +20-25° C. Another advantage of this material is its readiness. Latex putty is produced immediately ready for use and does not harden for a long time.
Drying time based on binder
To coordinate repair work, you need to know the hardening speed of putty compounds:
- Gypsum mixtures are the fastest drying. Starting compositions “Knauf” with a layer of up to 30 mm dry up to 7 days, quick-drying finishing compositions dry from 4 to 6 hours. A 3 mm layer is ready for further processing in 1 day.
- Cement. Starting dry mixtures set in 5 hours, and the drying time of the finishing layer up to 3 mm thick is 1 hour.
- Polymer. Here the drying time depends on the type of putty. For example, epoxy takes 8 hours to dry, latex takes at least 12 hours. The acrylic starting layer of 1 mm is ready for further processing in just 3 hours, and the finishing layer of 3 mm dries up to 24 hours.
- Knauf universal quick-drying compounds dry in just 30 minutes.
Knowing how long the putty takes to dry, you can properly plan the work, which is very important if it is carried out outdoors and depends on atmospheric conditions (heat, cold, precipitation).