Surface plastering is a technological process in construction and repair aimed at leveling the surface, creating the correct geometry of the room and creating an intermediate protective layer between the finishing and the rough base. Also, a layer of plaster can serve as a technical layer for installing hidden wiring in houses where gating is prohibited.
By type, plaster mixtures are divided into:
- Cement;
- Calcareous;
- Plaster;
- Clay;
- Calcareous-clayey;
- Lime-gypsum;
- Lime-cement.
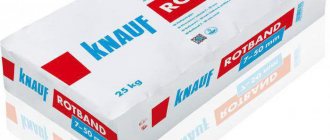
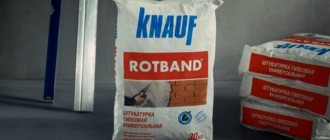
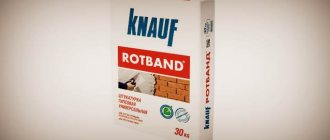
Rotband plaster belongs to the class of gypsum plasters for manual application.
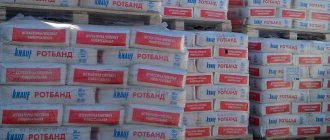
Rotband 5 kg Bag 30 kg
Why putty the walls after plastering?
Special polymer and stabilizing additives are introduced into putty mixtures based on gypsum or cement-sand compositions, making the solution more plastic and slowing down its setting. Thanks to this, the putty is applied in a very thin layer, creating a perfectly flat and smooth surface.
After the plaster has dried, it is not necessary to putty the walls only before laying tiles or gluing thick wallpaper. Small defects underneath will simply not be visible, so the surface is only primed. In other cases, especially when painting or finishing with thin wallpaper, you cannot do without plaster. After all, it is capable of not only smoothing out the smallest cracks, but also:
- prevent the plaster from falling off over time;
- significantly improve the adhesion (adhesion) of walls to wallpaper and other finishing materials, they will hold more firmly and will not peel off;
- reduce the consumption of wallpaper glue and paint.
Work methodology
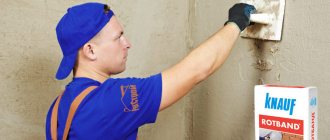
Using the described composition, you can form a relief pattern on the surface. The working solution is prepared in such a way that the consistency resembles thick sour cream. The composition is applied to walls that have been previously treated with Rotband Grund. To create a texture, you can use one of the methods existing today. The simplest is the “rock” texture. To do this, the plaster is applied to a small area, the area of which varies from 0.5 to 1 m2. This is done so that the 3 mm layer does not dry out prematurely.
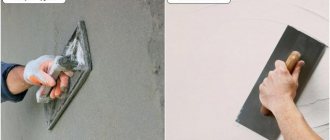
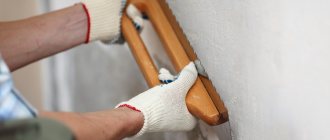
Next, the trowel should be applied flat to the plastered area, but you should not press it too hard. The lower edge of the trowel rises, while the master should make a smooth movement directed downward. Before the final separation of the tool from the surface, it should be directed in different directions. As soon as the plaster has dried, its surface should be rubbed, which will remove the most protruding areas. This can be done using a grout mesh or a construction float. The dried surface can be painted.
After what time can putty be applied?
Cement-sand leveling mixtures take quite a long time to fully gain strength - 4 weeks.
But there is no need to wait this long after plastering. Cement gains 70% of its strength in a week. This is quite enough for applying putty and subsequent finishing, including heavy tiles. For example, Knauf Unterputz cement facade plaster 20 mm thick dries within 7-10 days. Gypsum compositions set in 40-60 minutes and dry completely in about a week . For example, the popular Knauf Rotband, applied to the walls with a layer of 15-20 mm, can be puttyed after 7 days. In a humid room or low temperatures, the drying time may increase to 10-14 days.
Drying time also depends on the thickness of the layer, as well as the temperature and humidity in the room. Using construction hair dryers or creating drafts to speed up the process is not advisable - significant cracks can form on the surface if it dries unevenly, and over time the plaster will begin to peel off.
After drying, before puttingtying, the plaster must be sanded - using a special grater with a fine mesh or sandpaper, the wall is processed in a circular motion. In this way, small deposits of the dried mixture, traces of a spatula, and places where layers were applied are removed.
Useful tips
- The putty layer should not exceed the values specified by the manufacturer. Otherwise, after drying, the composition may partially crumble.
- If the composition is applied in 2 layers, it is recommended to use reinforced mesh. A second layer is applied only after the previous one has dried.
- After using each portion of the mixture, equipment must be thoroughly washed.
- It is better to dilute Knauf starting putty with cold water. If the mixing water temperature exceeds +30 degrees, the putty may crack after drying.
- If you used Knauf composition for rough finishing of the walls, then it is recommended to also use products from this manufacturer for finishing.
Do I need to prime the walls?
Many people believe that pre-priming walls is just an unnecessary waste of money. However, if you want the future decorative coating to look perfect and last as long as possible, then the walls must be primed before puttying.
Primer that penetrates deep into pores:
- protects the surface from peeling;
- promotes more uniform penetration of putty, adhesives and dyes.
Primer solutions are also an excellent antiseptic that protects walls from fungus.
In addition, they prevent moisture, which contributes to its development, from penetrating too deeply into the walls. The choice of primers is quite large on the construction market, and manufacturers offer special types for each type of surface. To cover walls after plastering, it is better to use acrylic, polystyrene or perchlorovinyl mixtures of deep penetration or universal compositions of medium porosity.
The walls must first be treated with a wet sponge to remove the smallest dust particles. You can prime with either a roller or a brush - a roller distributes the mixture more evenly, and a brush is more convenient to apply it in hard-to-reach places. Also, for convenience and speed, hand sprayers are used.
Puttying begins only after the primer has dried. The time for complete fixation is always indicated on the packaging and can vary from 5 to 15 hours.
How to prepare the mixture?
Experts do not recommend mixing gypsum putty in large quantities, especially if the work will be performed by beginners. The fact is that the solution dries out quite quickly and loses its properties. Repeated stirring will reduce its quality and strength. It will be very difficult to work with such material.
Since the putty should be mixed in small quantities, it is necessary to use an appropriate container. A bucket or other container with rounded edges is best suited for this. This form will allow you to use the entire prepared mixture.
It is also worth noting that the container must have high walls. During the process of stirring with a construction mixer, the solution may fly in different directions. High containers will prevent this.
In the process of preparing Rotband finishing putty, you should adhere to the established sequence:
1. Pour the required amount of water into the prepared container. It is better to use cold water, which will significantly slow down the hardening of the solution.
2. Slowly pour in the gypsum mixture. The instructions indicated on the packaging indicate the proportionality of the components. It is often 2 parts water and 3 parts mixture.
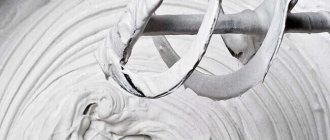
3. Thoroughly stir the solution with a construction mixer. Stirring should be done in two approaches. After the first kneading, the solution is left for 10 minutes, after which the procedure is repeated. This scheme will allow you to prepare the putty efficiently, without lumps.
There are several ways to check how well the solution is prepared. If stirring is carried out correctly, then when you remove the mixer, a funnel should form in place and will not be drawn in. You can also take a little ready-made putty and apply it to a spatula. If the mixture is prepared well, then after turning the tool over it will not fall.
Important! After the Rotband putty is prepared, it is not recommended to add water or dry mixture. This will significantly reduce the quality of the solution. The instructions may not indicate such features.
What is the best way to putty?
Basic requirements for compositions for interior decoration:
- high plasticity;
- ease of application;
- ideal smoothness of the created surface;
- affordable price.
Gypsum-based compositions are ideal for puttying inside the house . A feature of gypsum materials is their rapid setting (40-60 minutes), ease of application and subsequent grouting.
The requirements for facade putty are completely different. First of all, they must:
- be frost-resistant;
- easily withstand temperature changes;
- have high strength;
- resist precipitation and high humidity.
For finishing facades and rooms with high humidity, it is better not to use gypsum putties without covering them with waterproofing. Therefore, cement or acrylic mixtures are used for external plastering work. Cement ones are resistant to destruction when wet, while acrylic ones do not let moisture inside at all.
Aligning corners
To align the corners, specialized metal corner profiles are used. If the wall curvature is less than 10 mm, then the profile is fastened with a self-tapping screw, and in other cases, alabaster or putty is used. The standard length of the corner profile is 3 meters, and metal scissors are used for cutting.
When filling a space, you need to let one side dry first, and only then proceed to the other. Otherwise, with mechanical impact on the corner, the solution will shift and the work will have to start over.
To align the corners, specialized metal corner profiles are used.
Knauf Rotband, which produces putties or plasters, is the undisputed leader in the building materials market. The manufacturer takes into account all the needs of builders and constantly improves its products and creates new mixtures. Rotband finish putty allows you to achieve excellent results during repairs at a fair price and in the shortest possible time.
Consumption per 1 m2 for plaster
The consumption of the putty mixture depends not only on the thickness of the applied layer, but also on the type and density of the composition. You can find out the exact number on the packaging:
- heavy and dense cement putties for facade and interior decoration are used the least economically: with a layer thickness of 1 mm they will need 1.2-1.5 kg/m2 of plastered wall;
- the consumption rate of gypsum putty on plaster will be 0.8-0.1 kg per 1m2;
- Polymer-based putty is considered the most economical - consumption per 1 m2 is only 600 g.
The better the walls are leveled with plaster, the smaller the layer of putty is needed after it. Much depends on the manufacturer:
- "Wide." Compositions for interior work of this brand are used very economically: on average, with a thickness of 1 mm per 1 sq. m will require only 0.68 kg; the only drawback is that the company packages its products in very large containers, which is not always convenient;
- Vetonit sells both facade plaster and mixtures for interior work; in the first case, the consumption will be 1.2-1.5 kg, and for finishing the premises you will need 1.2 kg; The company also produces high-strength oil-adhesive compositions, but they are per square meter. m will need up to 3 kg;
- Knauf products for interior work, made on the basis of resinous substances, are of very high quality, but not very economical: it will take 1.7 kg to finish a square meter.
Advice! Unlike plaster, which can be applied in a thicker layer, the starting putty layer should be no more than 3 mm, and the finishing layer should be no more than 1 mm. If re-correction of the surface is required, it must be thoroughly dried, and only then a new layer must be applied.
A little history
Until the 60s of the last century, all gypsum plaster solutions were mixed directly on the construction site in proportions determined by the craftsmen “by eye” based on their own experience. Moreover, due to the property of gypsum to set almost instantly, batches were made in very small portions in order to have time to work them out in a short period of time. This affected both the speed of work and its quality, since the mixture quickly lost its plasticity and was poorly distributed over the surface.
The situation changed after the invention of a substance that, when added to the gypsum mixture, slows down its setting. It was named Alenal after the inventor.
And in 1962, the Knauf company, at its production facility located in West Germany, began producing Rotband dry mixes, the consumption of which for each batch increased significantly compared to the previous technology, and it became easier to apply the finished solution. The company's technologists have developed a precise recipe for mixing the mixture with exact proportions of dry matter and water, holding time and application.
On a note! Translated from German, Rotband means Red Ribbon. Knauf also has other “ribbons” - green (Grundband), blue (Blauband), gold (Goldband).
Knauf products “came” to Russia and the CIS countries in 1993. It is produced in the Moscow region (Krasnogorsk), in St. Petersburg, Chelyabinsk and Kuban, as well as in Moldova.
What do we need
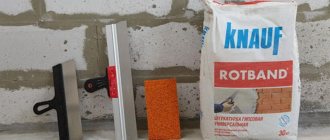
To complete the work of leveling the surface of the walls, we will need:
- grout float with attachment for sandpaper;
- sanding mesh;
- wide metal spatula 20-45 cm;
- large and small trowel;
- plaster trowel for applying mortar;
- paint roller for applying deep penetration primer;
- plaster trowel made of polyurethane foam;
- construction mixer and whisk attachment;
- container for mixing the mixture;
- fine and medium grit sandpaper;
- plastic film to protect the floor covering from dirt and speed up cleaning time.
Additional materials not included in this list will require a primer and rollers for its application.
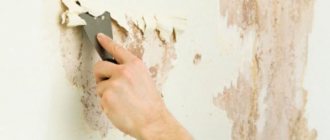
Before you start puttingtying the walls, you need to prepare the surface. If the walls are already plastered, they should be smooth and without depressions or protrusions. If we are talking about repairing old walls, then you need to remove the old finish, be it wallpaper or paint, evaluate the condition of the old plaster layer, if necessary, it will need to be knocked down and the walls re-plastered. If the walls of the house are built of brick, plaster is necessary; if they are made of reinforced concrete, then with more or less even walls it is possible to do without plastering work.
