Anyone who has ever dealt with drywall knows that this material is capricious. Particular difficulties arise when it is necessary to cover the surface with plaster. Due to the fact that it is a fairly fragile material, drywall can become damaged and change shape under the influence of the heavy weight of the applied layer of finish. Using a material such as drywall, everyone who makes repairs with their own hands asks whether it is possible to plaster drywall with a rotband and how to plaster it with a rotband, avoiding damage. There is only one answer - technology.
Finishing walls and ceilings with plasterboard is very popular due to its ease of installation and low price. However, you should be careful when plastering drywall.
Plasterboard sheets are the most popular finishing material, affordable for most consumers, and also allowing one to achieve excellent results in finishing premises in a short period of time.
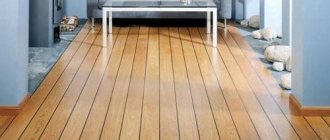
Drywall allows you to quickly and perfectly level the walls and ceiling.
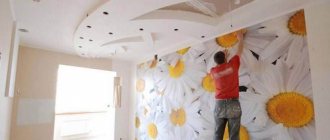
After finishing with plasterboard, there is only one problem left - visible joints between the sheets and recesses from the heads of the screws. These irregularities can be eliminated by plastering the plasterboard covering.
Sealing seams between sheets of drywall
Sheathing a metal frame with plasterboard is not the end of the repair work. After covering, you need to seal the drywall seams yourself. To do this, you don’t need to make an effort, draw drawings and follow precise measurements. But, following the step-by-step instructions is necessary.
Stages of sealing seams between sheets of drywall Return to contents
Full contents of the material
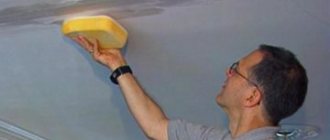
Plastering a plasterboard ceiling with Rotband
Anyone who has ever dealt with drywall knows that this material is capricious. Particular difficulties arise when it is necessary to cover the surface with plaster. Due to the fact that it is a fairly fragile material, drywall can become damaged and change shape under the influence of the heavy weight of the applied layer of finish. Using a material such as drywall, everyone who makes repairs with their own hands asks whether it is possible to plaster drywall with a rotband and how to plaster it with a rotband, avoiding damage. There is only one answer - technology.
Finishing walls and ceilings with plasterboard is very popular due to its ease of installation and low price. However, you should be careful when plastering drywall.
Plasterboard sheets are the most popular finishing material, affordable for most consumers, and also allowing one to achieve excellent results in finishing premises in a short period of time.
Drywall allows you to quickly and perfectly level the walls and ceiling.
After finishing with plasterboard, there is only one problem left - visible joints between the sheets and recesses from the heads of the screws. These irregularities can be eliminated by plastering the plasterboard covering.
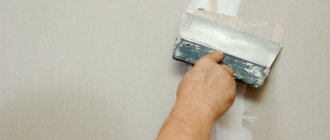
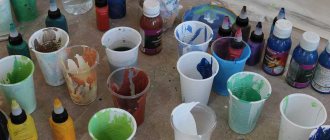
How to mix and apply the solution
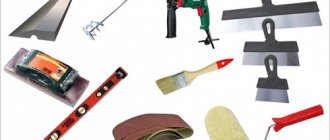
To mix and apply the Rotband putty mixture, you will need the following tools and materials:
- Bucket (or some kind of mixing container).
- Construction mixer.
- Spatulas (of various shapes and sizes - selected for the object of work).
- Sanding materials (sandpaper or float).
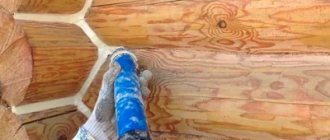
Before mixing the putty, it is necessary to carry out preparatory work. The surface should be cleaned of dirt, dust, protruding fittings or other objects. Then treat all metal parts with an anti-corrosion solution.
Next, treat the surface with a primer. Depending on the type of surface, different types of primer are used. Before starting work, the temperature of the wall (or other surface) should not be below 5°C.
After completing the preparatory work, the putty mixture is mixed. It is recommended to make batches in small portions for better mixing and to prevent the mixture from drying out. The putty is poured into a clean mixing container and filled with clean cool water at the rate of 1 kg of mixture per 0.7 liters of water (a 20 kg bag is filled with 13.5 liters of water, a 25 kg bag is filled with 16.5 liters of water), as the instructions say. A couple of minutes after pouring, the putty begins to be mixed. First, the mixture is mixed by hand, then with a mixer operating at low speed.
Ready putty Rotband
Stir until the mixture becomes homogeneous, similar in consistency to sour cream. The temperature of the room and water should be within 10-25 o C. At temperatures different from the specified, cracks form on the putty surface. Do not add foreign mixtures or additives to the putty. It is also prohibited to use a dried and thickened solution. The solution can only be used within 1.5 hours from the end of the batch. Apply the solution to the wall only with clean stainless steel spatulas.
The solution is applied to the surface with a spatula, then leveled to the required thickness. You can level the solution with a spatula, a Swiss falcon, or using a rule. After applying the putty, the tool should be washed. Tools should also be cleaned of dried large fractions of the solution if they are formed during the puttying process.
The putty solution should dry in the dark (or should be protected from sunlight) and in the absence of drafts.
Ready-made finishing putty Rotband-Paste
The finished finishing putty Rotband-Paste, which is produced on a polymer-dispersion basis, is completely ready for use. In order to create the most stable properties of the finished composition, a variety of mineral and lime fillers are added to it.
Rotband-Paste is an excellent finishing material for applying a thin layer of putty to the surface of the base. Thanks to its excellent plasticity, this finishing putty easily fills all small unevenness and small cracks, perfectly leveling them. The resulting flat and smooth surface after drying is excellent for both applying paint and gluing wallpaper onto the surface of the base.
Ready-to-use finishing putty Rotband-Paste is a putty mixture from the well-known global manufacturer of dry construction mixtures Knauf. Rotband-Paste is an analogue of ready-made Shitrok finishing putty, and its quality is no worse. It is used, as a rule, for finishing puttying the surface indoors, as well as for joints of gypsum boards, gypsum boards, and preparing the base surface for high-quality painting; filling concrete surfaces before painting or wallpapering; filling the joints of plasterboard sheets using reinforcing tape.
Remember that the finished finishing putty Rotband-Paste is not used for sealing seams of perforated sound-absorbing plasterboard sheets.
The main advantages of finishing putty Rotband-Paste:
• High plasticity; • The solution does not shrink and cracks do not appear on the finished surface; • Improved recipe and high consumer qualities; • Multifunctionality (sealing joints in Knauf sheets and finishing putty); • Does not chalk; • On the surface of the base, the finishing construction putty dries quickly; • The paste composition is already ready for use.
Application of Rotband-Paste putty:
Before applying the putty, the surface of the base must be cleaned of dust, dirt, fats, oils, old paints, etc. Large irregularities should be plastered. Before starting work, the mixture must be thoroughly mixed and, if necessary, diluted with a small amount of water.
For continuous puttying:
- apply a 3-mm layer of putty by mechanized or manual means; - smooth out using a spatula; — after drying, grind the surface of the base and remove dust; — After use, wash all tools and containers with water.
When filling joints of Knauf sheets:
- apply the first layer of composition to the surface; - lay the reinforcing tape and apply the next layer of putty by pressing with a spatula, avoiding the formation of bubbles and folds on the tape, as well as removing the solution from under it; — putty the places where the screws were installed; - apply the finishing layer of putty to the dried and hardened first layer; - After drying, sand the seam and remove dust.
Choosing putty for grouting joints
When choosing putty for drywall, you should remember that it must be made on the basis of gypsum, since this is the best option for working with gypsum plasterboard. An acrylic mixture will also work, but additional priming of the surface with acrylic highly abrasive primers will be required.
Sealing drywall seams
Using the right putty has the following advantages:
- fits well on a prepared base;
- easy to rub over after drying;
- forms a perfectly flat surface and does not crack;
Is it possible to plaster drywall?
Now that the difference between leveling mixtures is obvious, let’s look at what exactly gypsum sheets need to be treated with. Let's start with the fact that after installation, the base finished with such plates is flat. If the installation was carried out correctly, only marks from the fasteners and seams at the joint areas will remain on it. Dents are possible, but very small. All these flaws must be smoothed out.
Putty is enough to remove them. A special composition is used for fasteners and corners, finishing for final finishing. And it's all. No need to plaster. If mistakes were made during installation, the base will be uneven. In this case, many try to plaster it and level it at the same time. You need to understand that this is only possible for small differences. To seal significant defects, it will be necessary to apply a thick layer of material, and this is extremely undesirable for gypsum boards.
Firstly, the leveler will have a significant mass, which can even destroy the structure. Secondly, over time, the thick layer will begin to crack and collapse. Therefore, if the differences are large, it is better to dismantle the sheets and redo the frame. Plastering drywall without any doubt is necessary only in one case: if a decorative mortar is applied, which will become the final finishing of the base.
Gypsum plaster Volma Layer, 30 kg
"Volma Shov"
The dry solution contains gypsum as a base, enriched with mineral and chemical fillers. The putty has good adhesion. The working time of the diluted solution is 40 minutes.
- sealing gypsum board and gypsum board seams;
- eliminating cracks and potholes;
- eliminating micro-irregularities and obtaining a glossy surface.
- the joint is primed;
- then the first layer of putty is applied and the reinforcing tape is pressed in;
- after hardening, a second layer is applied;
- After hardening, it should be polished, for which a grater with a mesh is used.
The material is suitable for application to the entire plane of the sheet. Small graininess requires further application of a finishing layer.
The question of plastering gypsum boards
Good day to all.
I looked through a bunch of sources, but didn’t find anything intelligible, that’s why I’m here. Situation: I was doing soundproofing in a room, one of the elements of which is plasterboard. I used this gypsum board to cover the walls and ceiling. The walls turned out to be smooth, but when installing the ceiling, an error crept in and the middle turned out to be 1 cm lower than the edges (the first time I did this). I decided to correct the mistake with plaster. Attention, question: will the rotband adhere normally to the ceiling if ceresite tst17 is used as a primer, given that the layer of plaster does not exceed one centimeter? And is it possible to apply rotband to drywall at all? Doubts began after reading the instructions for the rotband - among the surfaces on which it can be applied there is not a word about gypsum board. On the Internet they recommend using concrete contact in such cases, but I have a small problem - I have already primed everything with ceresite. And on the manufacturer’s website (Knauf) it is written about concrete contact: “Designed for pre-treatment for gypsum plaster of dense, smooth, weakly and non-moisture-absorbing bases, for example, concrete, cement plasters.” But gypsum plasterboard absorbs moisture well, not cement and a smooth material, why not use a regular acrylic primer? But, again, somewhere it was not recommended. Overall, I'm confused. Help me please. Go over the ceiling - it will be faster to remove a couple of sheets and straighten the guide than to plaster. Moreover, it is impossible to plaster gypsum boards. The basic rule is to go from more durable to less durable. Although many people do it, it’s impossible, but if you really want to... More than once I’ve seen that gypsum boards are also plastered, but never the ceiling.
I would have gone over it long ago and not suffered, but:
- two layers of drywall
- the cavity is filled with glass wool
- no assistants
- walls are attached to it
- everything is puttied i.e. in order to fix what it hangs on, you have to break everything and start over. I don’t really want to put plaster on the ceiling, but I don’t have the time and money to redo the whole room, so I’m looking for other options. Before that, I worked with Volma in a layer, but it failed and I hate to deal with it in the future, maybe this is not the most insidious surprise yet. Rotband is somewhat different from Volma layer in properties, so I think it will be suitable.
Hypo-cardboard can be plastered.
Drywall can be easily plastered with gypsum plasters. The main thing is that the drywall is not puttied. Here is a photo showing that the layer of plaster is 2 cm. [
C2h5-OH wrote: change the city in your profile, otherwise you will be banned.
OK. You can plaster - it's getting closer. But the topic is not disclosed. Will plaster fall on my head (Volma doesn’t fall, I’ve never used a rotband) if I have a deep-penetrating acrylate primer between it and the drywall, ceresit tst17
no, it won’t fall, but I would use betocontact.
Ind1g0 wrote: Will plaster fall on my head (Volma doesn’t fall, I’ve never used a rotband) if I have a deep-penetrating acrylate primer ceresit tst17 between it and the drywall
It won't fall off, I always use a deep penetration primer.
If you are very worried, then use a fiberglass mesh with a cell of 5x5 mm for additional reinforcement.
To begin with, prime the entire surface of the gypsum board with tifeng primer, stick punched tape on the joints, then putty with a 5 x 5 mm mesh. Uniflot, or Pufas. Then equalize either by beacons or by the Pufas rule. Plaster to plaster is a homogeneous material, everything will be ok. Checked Then finish and repair interlining. Painting
Labor without art is barbarism!
I'm afraid we can't find a pofas here. We don’t have Rotband in every store. I filled all the joints with uniflot putty, without mesh, as it allows. So far, not a single crack (it's been a year already). I will use the rule for lighthouses, the lighthouses have already been frozen. What do you mean by serpyanka mesh? Okay, let me put the question this way: is rotband very different from Volma layer in properties?
Rotband is very different from Volma layer in properties?
What didn’t you like about Volma? Volma is more “long-lasting”, i.e. easier for an unprepared person. In terms of strength it seemed weaker than Rotband, although according to the documentation almost everything is the same. Rotband is like the “ancestor” of gypsum plasters. The main thing is to make sure that it is not counterfeit or expired.
The following mess happened with Volma: in the summer of 2013, I took 4 bags of Volma layers and two ten-liter canisters of soil in castoram. The soil already smelled of rotten meat, but I managed to buy one canister of lime almost immediately after purchase. After 4 months of standing in the room, it completely went rotten, the lid swelled and smelled strongly, I had to throw it away. (and it costs almost a coat for the cylinder) Although the production date is indicated as 05/03/13, i.e. She could stand for another six months. I took ceresit tst17 instead of Volma, it costs the same, but there is more trust. Of the four bags of Layer, I only managed to use half a bag; the ones I smeared along with the first canister of soil were smeared normally. Half a year later (i.e., the other day) I started to smear it again - the volma from the open bag dries at the speed of ordinary plaster, I didn’t even have time to mix it before it set, the mixer almost bricked it up. I thought it was because the bag was standing open, and I opened another bag - the same nonsense. However, as in the third and fourth. This is where I became annoyed, read fifteen hundred pieces of wood for the trash and sabotaged work. But the plaster was released on 07/01/13, lay in a dry and heated room (in my room), and the shelf life is stated to be 12 months. I wrote to them on their website - no answer. He waved his hand at the Volma, because it costs a little less than the same Knauf, and that’s what it can afford. I decided to give fifty dollars more, at least the Knauf won’t let you down. By the way, it honestly states that it can only be stored for half a year.
Materials and tools for puttying Knauf drywall joints
- Sheets of plasterboard, as required by technology, are attached to a frame made of “Knauf profile”;
- Screwdriver;
- Self-tapping screws with increased corrosion resistance;
- A spatula with a screwdriver (width 150 mm) made of stainless steel, with which, without being distracted by the search for a second tool, you can tighten the screws (8);
- Spatula - a stainless steel trowel, the width corresponding to the bottom of the box;
- Putty box made of stainless steel;
- Dry gypsum putty "Uniflot". Thanks to polymer additives, the fastening strength increases. Particularly effective when sealing joints together with reinforcing tape. Available in 25 and 5 kg packs;
- Paper reinforcing tape "Kurt" with the addition of synthetic fibers to increase strength. It takes effort to break it! It does not change shape, is not afraid of moisture, fits perfectly both on a straight joint and in a corner; for this purpose, there is a special “groove” in the middle of the tape, thanks to which, when pressed, the tape easily folds exactly in half, forming a corner.
Useful tips from professionals
And in conclusion, some useful tips from professionals, thanks to which you can prevent mistakes that may seem insignificant at first glance, but can reduce all the work done to zero.
Professionals recommend:
- Even if all the rules regarding grouting are followed, small cracks cannot be ruled out. This is due to the fact that during the puttying work there were temperature fluctuations in the room. Of course, at home it is quite difficult to achieve constant temperature conditions, but it is worth trying to at least slightly minimize the risks.
- If there are wooden floors in the room, and plasterboard structures were attached directly to them, it is possible that cracks may occur in the area of the corner seams. In this case, the seismic activity of the walls is to blame.
- Some putty mixtures have the inscription on the packaging: “intended for sealing seams without the use of reinforced tape.” Don't let this inscription mislead you. If you putty the joints without using tape, cracks may still occur. In this case, the manufacturer wanted to say that this type of putty simply could not hold it.
That's all, you can start sealing the seams on the drywall.
Finishing gypsum putty “KNAUF-Rotband Finish”, 25 kg
Price for a one-time order in the amount of 500,000 rubles.
Price for a one-time order in the amount of 100,000 rubles.
This price is available to all buyers.
| Code | S-000057269 | Brand | Knauf |
| Manufacturer's code | 246918/631031 | Weight, kg | 25 |
| Country of origin | RUSSIA | Packing | 25 kg |
| Layer thickness, mm | 0.2-5 mm | Readiness | dry |
| The basis | gypsum | Application method | Manual |
| Room type | dry rooms | Viability of solution | 1.5 h |
| RGB color | grey | Working at sub-zero temperatures | No |
| Application temperature | from +5°С to +30°С | Type of work | Finish |
| Base material | concrete, drywall, plaster | Type of work | for interior work |
| Quantity on pallet | 48 |
KNAUF-Rotband Finish
— dry putty mixture for internal use based on gypsum binder with polymer additives. Designed for putting a thin layer of concrete surfaces, plasterboard and gypsum fiber sheets, tongue-and-groove slabs, gypsum and cement plasters and obtaining a high-quality surface for painting, wallpaper and other decorative coatings. Do not use for sealing joints of plasterboard and gypsum fiber sheets.
Application of gypsum putty KNAUF-Rotband Finish
Used indoors for surface puttying of plasterboard and gypsum fiber sheets, tongue-and-groove slabs, gypsum and cement plasters, concrete surfaces with a layer of 0.2 to 5 mm. After puttying, the surface is ready for finishing.
Advantages of KNAUF-Rotband Finish gypsum putty
- high strength;
- resistance to cracking;
- consumption is 20% lower than that of polymer putties;
- easily reset to “zero”;
- does not generate dust;
- layer thickness: 0.2 – 5 mm;
- open operating time 90 – 100 minutes;
- made of environmentally friendly material (gypsum).
Preparation of the solution
Pour KNAUF-Rotband Finish into a container with clean cold water up to the water level mark (at a ratio of 1 kg per 0.65-0.7 l) or 1 bag (25 kg) for approximately 16-17 l of water. After 2-3 minutes, mix by hand or using a mixer running at low speed until a homogeneous mass has the consistency of sour cream. The water temperature for mixing the dry mixture should be in the range from +5°C to +30°C. Warmer water degrades the water-holding capacity of the putty and can cause cracks in the putty. It is not allowed to add other components to the putty mixture, as this leads to a significant deterioration of its properties! Do not use a thickened putty solution; adding water and stirring will not restore its working properties. Contaminated containers and tools help reduce the length of time the material can be used. The duration of maintaining the working properties of the putty solution before thickening begins is at least 80 minutes.
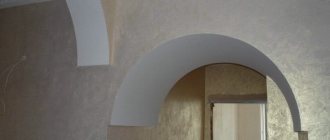
Rotband plaster on drywall.
On a construction site, like in a kitchen, there are incompatible products, in our case materials. Although individually they are simply wonderful. Here, for example, is drywall and Rotband plaster. Both can simply be called a great invention of mankind, but if you combine one with the other, then someone somewhere made a marriage. The fact is that Rotband is necessary where it is necessary to level the surface of walls with a thickness of 2 or more centimeters. If a master created a partition from plasterboard that gives such unevenness, then he is not such a master. Permissible differences in plane and deviation from level along plasterboard partitions should not exceed 10 mm. And such a layer is leveled with ordinary putty.
Why Rotband?
But, as they say, anything happens in life. If such a problem occurs and the plasterboard partition produces differences in plane or level of more than 20 mm, and it is not possible to redo the entire structure, you will have to use Rotband (by the way, in such a situation Rotband would be the optimal solution). I'll explain why.
Rotband belongs to the category of lightweight plasters and has really good adhesion to various surfaces, including cardboard. When applying a layer of plaster or putty to drywall, it is critical that the layer adheres well and is not heavy, otherwise it will simply pull away from the base. The second important point with the finishing of drywall is that no matter how moisture resistant it is, prolonged exposure to moisture on drywall leads to its deformation. Simply put, plaster absorbs moisture and simply begins to twist in different directions.
The thicker the layer of plaster or putty is applied to the drywall, the longer it takes to dry. It becomes covered with a crust on top (any material of this kind) and a significant part of the moisture goes into the wall. That is, in drywall. And this, as already indicated, leads to its deformation. You get the following picture: you level the surface with putty, check it, put it under a thread, and the next day the wall is crooked again, as if no one had leveled it at all. The reason is simple - the drywall was twisted. This means you need a material that will dry quickly. And Rotband is again a very good option here.
Applying plaster.
So, Rothband. Gypsum plaster, not heavy in weight, dries quickly and is capable of maintaining a layer of application without falling off, up to 5 cm. Excellent. There is only one caveat: when applying Rotband to the surface of a plasterboard partition, do not get carried away with the thickness and do not try to correct all sins at once. Apply a layer of plaster no thicker than 5 mm. Place the wind heater near the wall and let this layer dry. The second layer, after the first has dried, can be up to 10 mm. But no more. Again, let the whole thing dry for about a day. Only the third and subsequent layers can be applied up to 15-20 mm thick.
Yes, this process will take at least three days. But believe me, in this case, haste will cost you even more time. And by the way: if the total layer of plaster on a plasterboard surface exceeds 50 mm, it is better to stick a mesh after the first layer (which is 5 mm). It won’t ruin the mess, that’s for sure, and with a large layer of gypsum plaster, the reinforcement will protect against cracks.
The process of applying plaster mixtures
After you have purchased all the necessary materials and tools, you can begin the main work.
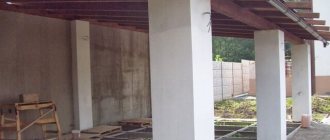
Preparing the base
It begins with preparing the foundation. In our case, consider a clean rough ceiling in a new building.
If you are repairing an old coating, we recommend that you clean it down to the very base. This is the only way you can guarantee high quality work and a long service life of the coating.
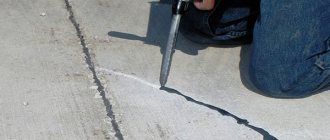
The joints between floor slabs can be quite large
- First of all, you will need to clean the surface of adhering debris and loose parts with a hard spatula.
- Next we move on to processing the joints between the plates. This stage is important to prevent cracks and improve sound insulation.
- We clean the joints from fragile parts and go over them with primer - apply with a small brush.
- After drying, take the tow soaked in a liquid gypsum solution and hammer it into the seam as tightly as possible with a chisel. If you don’t have tow, then take a rag and soak it with PVA glue.
Seam reinforcement with tow
Some craftsmen don’t bother and use serpyanka for these purposes, but such a solution will not guarantee the integrity of the coating when the house shrinks. We wait for the tow to dry and fill the joint with a plaster mixture. After a day you can continue working.
Application of concrete contact to the ceiling
Using a roller, we apply concrete contact to the concrete base, which should also gain strength according to the instructions on the package. Once it dries, it forms a hard, rough surface on which the plaster will adhere perfectly.
You can see this for yourself by trying to tear off a piece of a frozen quartz particle.
Installation of beacons
Once the concrete contact has dried, we begin to place the beacons. This stage is the most important, since it determines 90% of the evenness of future ceilings. Why only 90%, we will explain towards the end of the article in the chapter with useful tips.
Applying bosses to the ceiling
- We place the laser level on a tripod, bracket or spacer right at the ceiling, as shown in the photo above. Please note that in addition to the horizontal line, the line for the location of the beacon is also drawn with a laser. This allows you to pour the mixture accurately.
- If your device does not have such a function, then use a dye thread or draw lines on the ceiling with a pencil according to the rule.
- Using a small spatula, we place bosses of pre-diluted plaster along the intended line, with a height according to the expected difference.
- We place them at a distance of 15-20 centimeters from each other.
Securing the beacon
- We place the beacon from below and lightly press it into the mixture so that it is fixed.
- Additionally, we coat it on the sides to strengthen the coupling.
- Having walked along the entire length of the lighthouse, we begin to set it up. As we have already said, if a laser axis builder is used, the procedure is performed very quickly and accurately.
- Take the square and wrap it with masking tape at the base. Next, we apply it to the lighthouse at the lowest point of the ceiling and press it down.
- The laser strip, intersecting with the square, will draw a line on it, which must be marked on masking tape with a pencil or thin marker. This mark will be the main guideline for alignment (by the way, you can also navigate using the native graduation, but this is more difficult).
Beacon alignment
- The further procedure is extremely simple - we move the square along the bosses and adjust the position of the beacon in this place, according to the received mark, achieving its exact alignment with the laser line. The excess mixture is removed, and the beacon is further strengthened from different sides.
- The remaining beacons are placed in a similar way.
Advice! After you have gone through and fully exposed the beacon, do not be too lazy to double-check, since the flaws after the plaster has hardened will no longer be corrected without a major rework.
As soon as the mixture on the bosses has set (30-40 minutes), thoroughly coat the lighthouse with plaster in the missed places so that it does not sag during work.
Applying plaster
So we got to the most important thing. However, before continuing any work, be sure to cover the floor with plastic film, even if it is rough. This will save you from further tedious cleaning of the room.
To prevent the floor from getting dirty, we lay down an oilcloth
It will be better if you cover the floor before placing the beacons, since falls of the mixture are possible there too.
So, first things first:
- Pour clean cool water into the prepared container and pour dry plaster on top. You should not do it in the reverse order, as it will be much more difficult to stir the mixture to a homogeneous consistency - lumps will form.
Mixing plaster
- Using a mixer, mix the contents thoroughly. If you have a large enough tub at your disposal, then you can knead the whole bag at once, using the preparation recipe indicated on the package.
- If this is not possible, then proceed as follows. Such an amount of dry mixture is poured into the water so that it protrudes above its surface in the form of a slide. Further adjustments to thickness are made during mixing. In general, the consistency of the finished plaster should be like thick sour cream - it should not flow from the spatula, but at the same time maintain sufficient softness for comfortable application.
- After the first stirring, allow the mixture to become well-hydrated for a few minutes. The plaster is ready for application.
Laying plaster on the ceiling
- Next, we raise the tub and the prepared sawhorses for ease of work.
Attention! The height of the trestle should correspond to the height of the master. He should not cling to the ceiling with his head, but he should be comfortable reaching it with outstretched arms.
- Using a small spatula, we begin to spread the plaster onto the ceiling. Walk immediately the distance within one span between the lighthouses of about a meter, not forgetting about the wall areas.
- Do not coat the ceiling under any circumstances. There should be a good slap so that the mixture adheres securely to the base. You will see how an experienced master works in the video, the link to which will be given at the end of the article - be sure to watch it.
- Make sure to apply evenly and try not to get everything around too dirty - this procedure requires some skill.
Pulling the mixture
- Start pulling the plaster. It is most convenient to do this in the opposite direction, so that too much mixture does not collect on the rule, which always tends to fall to the floor.
Take your time
- There is no need to pull the plaster in a straight line. Install the rule blade with a slight tilt towards you and move it smoothly with quick vibrating movements from side to side.
Advice! Wear a hat if you don't want to plaster your hair.
- Using a small spatula, remove the mortar from the rule and again throw it on the ceiling, in places where voids have formed.
Sealing voids
- Repeat the procedure until you get a fairly smooth surface without gaps.
The plaster is almost level
Advice! When working with the rule, try not to put too much pressure on it, otherwise it will begin to sag, taking out excess mixture, which will lead to unevenness.
Repeat all of the above steps until you go through the entire ceiling. Although no, breaks from work will be needed, and here's why.
Trimming and smoothing
Trimming plaster
After 40 minutes, the applied plaster begins to actively harden. By this time it has already gained some strength and is ready for pruning. Do not skip this moment, as after 60 minutes this procedure will be much more difficult.
- We take a pure rule and at a slight angle, again avoiding sagging, we begin to methodically clean the surface.
- Your task is to achieve evenness, without protrusions.
Smoothing plaster
- After trimming, the ceiling surface must be smoothed. We use a rubber sponge for this. We often moisten it in water and rub the plaster in a circular motion, achieving the formation of a viscous film.
- After covering a small area, the softened plaster should be smoothed with a large spatula or metal trowel.
- It is more convenient to perform this operation together - one washes, the other irons.
Smoothing plaster
This is how, alternately performing the work, the entire surface of the ceiling is plastered.
Final surface treatment
However, the work doesn't end there. Next, you need to remove the beacons and seal the grooves. This procedure is mandatory, as cracks or rust stains from corroding metal may appear.
Retrieving Beacons
The voids formed by the beacons, as well as small voids remaining from the plastering process, are filled with fresh mixture. Don't forget to clean them with a brush first.
Sealing voids
The grooves are filled with plaster using perpendicular strokes, and then leveled with longitudinal movements using a wide spatula.
Leveling the groove
That's all! At this point the ceiling can be considered ready!
Smooth surface of plastered ceiling
What is the allowable gap between the sheets?
When installing plasterboard sheets, do not leave a gap of more than 7 mm between them.
An acceptable distance of up to 7 mm allows sheets to:
- squeeze freely
- expand according to temperature and humidity conditions.
By the way, do not forget to leave a gap between the material and the floor - a centimeter, and a five-millimeter gap between the ceiling and the material.
Subsequently, the seams will be puttied, and if we are talking about the floor surface, they will be covered with a plinth.
Gaps between sheets