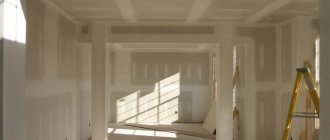
After installing the gypsum board on the walls, the next stage begins - finishing the surface with plaster mixtures. And a logical question arises: is it mandatory to use reinforcing tape for drywall, or can you do without it? And how to finish the joints between the sheets?
The answer to this question is clear: you must use one or another method of reinforcement. Otherwise, the putty itself will not ensure the solidity of the structure, which means that cracks will appear over time. And during plastering work it is easier to achieve a smooth surface than without any additional processing.
When sealing drywall joints, it is imperative to use one of the reinforcement methods.
Why do you need putty joints?
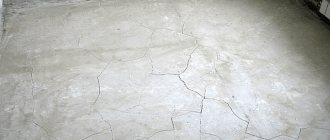
Under the influence of moisture and high temperatures, drywall is subject to certain fluctuations. This is most evident in the weak areas of the plasterboard structure - the joints of the sheets. If you do not use joint tape during the process of filling gypsum board panels, after a while cracks will certainly form on them. At the same time, a special tape product will help prevent damage and facilitate surface leveling.
When installing plasterboard sheets, it is extremely important to seal all seams efficiently. Over time, mistakes made will certainly remind you of themselves and lead to considerable financial expenses. Therefore, the space between gypsum board panels should always be filled with reinforcement.
Types of reinforcing tapes
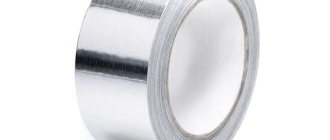
To strengthen the joints of plasterboard sheets, two types of tape products are often used:
- fiberglass;
- paper
Additionally, when finishing seams between drywall, the following tapes can be used:
- non-woven – reinforces corners;
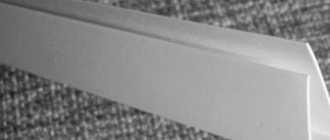
- with metal strips – designed for reinforcing external corners;
- wide made of fiberglass - helps strengthen the junction of drywall and the wall, can have a width of 10 cm or more.
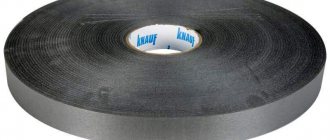
Serpyanka
It is a thin fiberglass mesh with a special adhesive composition on one side. To prevent the glue from drying out, it should be stored wrapped. In cheap products there is no sticky layer at all. They are attached using a construction stapler or laid directly on the putty.
The width of the serpyanka strip is 5 cm, the length of the roll is 20 m or more. This material is extremely easy to install; even beginners can easily handle its installation.
If self-adhesive fiberglass tape was used when sealing the seams, it must be packed in polyethylene after completion of the work. Otherwise, after a while the glue will dry out, causing the material to become unusable.
Important information! It is unacceptable to use serpyanka to reinforce internal corners or transverse joints. It can stretch even under a small layer of putty. In addition, there is a high probability of cracks forming at stressed seams.
Paper
Tape for plasterboard joints is made from durable paper containing transverse and longitudinal fiberglass reinforcement. To make it easier to handle internal corners, it has a special fold. This product is produced in rolls of various lengths with a standard width (5.2 cm).
For beginners, using paper tape is much more difficult than using sickle tape. If there is not enough putty, air will accumulate under it and bubbles will begin to form. To avoid such problems, it is better to use perforated products.
Compared to fiberglass tape, paper tape is considered less convenient to use. But at the same time, it is superior to serpyanka in a number of parameters:
- more affordable;
- the minimum thickness of the material allows it to be used when strengthening completely finished surfaces;
- goes well with putty and drywall, is completely invisible after drying, and provides special strength to the seam.
To improve adhesion to gypsum board panels, roughness is provided on the adhesive side of the paper tape.
How to glue serpyanka - glue review
Self-adhesive serpyanka is always covered with adhesive on one side. Although it is intended for self-gluing, you should not rely too much on the glue that has already been applied to the mesh.
Standard glue alone is not capable of reliably fixing the material to the work surface. It will peel off and this will worsen the quality of the repair. To avoid such problems, it is necessary to use additional adhesive materials.
For a strong bond, craftsmen often use putty or plaster.
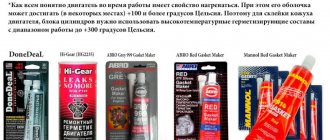
Glue will be no less effective:
- PVA. A universal water-based adhesive with a creamy consistency. Firmly adheres serpyanka, paper, cardboard, wallpaper, plywood, tiles, glass, wood, fabrics and porcelain. The cost of a 1 kg package: 69 rubles.
- Bustilat. A broad-spectrum construction adhesive designed for serpyanka, wallpaper, fiberboard, chipboard, linoleum, ceramic tiles and many other materials. It perfectly fixes decorative elements on the ceiling and walls. It is a white-gray mass. The cost of a package weighing 1.2 kg: 70 rubles.
It's easy to stick the tape to the ceiling, but making sure it stays there for a long time is much more difficult.
Craftsmen often glue reinforcing construction mesh to the ceiling, pressing it evenly into a fresh layer of putty. This is a more difficult, but very effective method.
Which serpyanka is the most reliable?
The quality of serpyanka gluing largely depends not only on the use of additional adhesive materials, but also on the reinforcing tape itself.
Therefore, it is very important to choose a quality product:
- Axton 45 mm x45 m. Axton offers excellent tapes for treating corners, seams and crevices, holding putty and plaster in joints, as well as continuous reinforcement of surfaces. It is universal, as it can be used with other materials: concrete, wood, drywall, etc. And it costs only 67 rubles apiece.
- Semin 150 m. Tape for plasterboard joints, made of corrugated paper. Moisture-resistant and resistant to soaking and tearing. Forms and protects the corner edges of plasterboard structures. The fabric of such a tape adheres well to the surface. Serpyanka can also be glued to damp putty. The material is made from environmentally friendly substances. Price: 388 rubles per piece.
Self-adhesive reinforcing mesh
In construction, serpyanka is used for sealing small holes, cracks, and processing seams formed by gypsum plasterboard sheets with a thinned edge. Products of many brands demonstrate high tensile strength.
Gluing serpyanka to seams
Serpyanka, in turn, is divided into non-self-adhesive and self-adhesive.
The first option is somewhat cheaper, but the process of sealing seams is more labor-intensive, since they are fastened with special paper clips. When using self-adhesive sickle tape, make sure that the packaging is sealed, otherwise the adhesive layer may dry out.
Mixtures for sealing joints in drywall
To reinforce the joint, you should choose the right mixture. The material used must be gypsum based and have good adhesion.
Knauf Fugen - putty produced by specialists for sealing seams between plasterboard sheets. But, sometimes it is used as an adhesive.
Knauf Uniflot is a durable waterproof mixture. After drying, this putty does not absorb moisture, so it is intended for rooms with high humidity. When using putty, reinforcing tape is not needed. The mixture is also used to seal cracks on plasterboard surfaces.
Semin CE78 - “New Formula” is intended for sealing seams in plasterboard construction. It has sufficient strength, does not crack after drying, and reinforces joints well.
JS weber vetonit is a polymer putty for sealing drywall joints. The maximum thickness of applied putty is up to 5mm.
Volma Shov is a non-shrinking putty mixture intended for reinforcing seams and correcting defects on drywall. The thickness of the applied putty is up to 5mm.
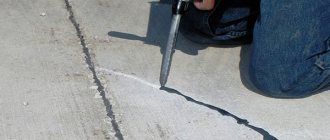
How to prevent drywall seams from cracking
How to prevent seams on drywall from cracking.
If you are making repairs, you are probably interested in the question of how to properly seal drywall seams. so that they do not crack in the future. We prime the gypsum plasterboard seams or the entire ceiling with a deep penetration primer). Let's wait 4-12 hours for the primer to dry and proceed to the next stage.
A very common problem, you are making repairs for yourself, you have assembled 2 or 3 level ceilings, and before you have time to finish it, the seams on the ceilings begin to crack. 2) We cover the seams with putty like: Uniflot, after 1=2 hours we pass a second layer if necessary. We wait for the putty to dry completely and proceed to the next stage. As a rule, all builders blame the shrinkage of the house for this, but this is not always the case.
Well, I would also like to note. that it is not the drywall that is cracking, but the putty between the seams of the drywall.
Working with perforated corner-forming tape
Be that as it may, perforated paper tape for drywall was created. The logical interaction of paper tape and the cardboard surface of the plasterboard sheet greatly increases the reinforcing properties of the tape and significantly strengthens the formation of corners and joints.
However, it is worth noting that it is better to use an aluminum perforated corner to form the external corner. It is more durable and really protects the corner from minor impacts.
When working with perforated tape for drywall, as always, there is a different approach. The first one recommended by the manufacturer. Second, from practitioners.
For all manufacturers of perforated reinforcing tape, the recommended method of application is approximately the same.
- Apply a layer of putty to the joint of the sheets;
- From the ceiling to the floor, continuously stick the tape to this layer;
- From top to bottom, slightly holding the tape at the top, press the tape into the putty layer with a narrow spatula. Remove excess putty from the wall with the same spatula;
- Wait until it dries and cover the tape with a second layer of putty;
- After the second drying, you can proceed to sanding the joint.
The second option for working with tape is similar to the first, only before using it, the tape is soaked in a bucket of water. Let me explain the difference between these methods.
The classic (let's call it that) KNAUF-Kurt reinforcing tape contains reinforcing synthetic fibers. They prevent the tape from stretching when the putty absorbs moisture. This prevents the tape from swelling when wet and warping when it dries further. This is exactly the tape that is applied to the putty joint.
Other manufacturers, such as Unibob, do not add synthetic fibers to the tape. As a result, if this tape is not wetted with water before use, it will take water from the putty, get wet unevenly and, as a result, go in waves. That is why the tape is wetted before use.
In addition, for gluing perforated tapes it is better to use special putties for seams. They are less wet and interact better with paper. For example, KNAUF-Fugen putty or Volma Seam.
Advantages
The main advantages of sealing tape for drywall are the following facts:
- good noise, steam and sound insulation;
- vibration damping;
- lack of water absorption;
- temperature stability;
- elimination of various surface roughnesses;
Metallized sealing tape for strengthening the corners of plasterboard structures - resistance to all kinds of negative manifestations;
- the existence of construction allowances that help the structure not to deform when the geometry of the frame walls changes.
All of these properties are achieved due to the flexible, soft texture of the material. The positive side is the ease of operation when sealing joints. The price range ranges from 75 to 1500 rubles.
Fixing the sealing tape is not difficult
Sealing technology
Before you start processing the joints of plasterboard sheets, they need to be prepared in advance:
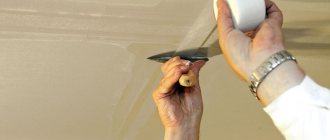
- Using a paint knife, make chamfers (if there are none).
- Sand the seams (remove burrs), then clean them thoroughly: preferably blow them with a stream of air.
- Prime the joints. For this, it is best to use an acrylic solution.
Laying serpyanka
In most cases, fiberglass tape is glued to the putty, but sometimes it is laid over a dry base.
When implementing the first option, you must perform the following steps:
- Prepare the putty mixture. You need to mix the solution in small portions so that you have time to fully use the material before it begins to lose its qualities.
- Fill the seams with putty using a narrow spatula.
- Apply a thin layer of the mixture to both sides of the drywall. It is advisable that its width is slightly larger than the size of the tape.
- Lay the serpyanka, starting from the top. When you have to use several pieces of material, their edges must be overlapped. The excess is carefully trimmed with scissors.
- Gently smooth the solution and remove any excess. The mesh should be completely immersed in the putty.
- Wait until the composition is completely dry. This will take about ten hours.
- Apply a finishing layer of putty mixture. Its main purpose is to eliminate minor errors.
- After the material has dried, carefully sand the seam with fine-grained sandpaper.
- The next stage involves applying primer and filling the entire surface.
It is also possible to lay adhesive or regular serpyanka dry. To do this, the material with an adhesive base is glued to the surface, and in the absence of self-adhesive, it is fixed with a stapler along its entire length. A layer of plaster is applied on top, which is then smoothed.
Laying paper tape
It is recommended to use strips of special paper to seal transverse joints. In these areas, it provides much greater strength than serpyanka and helps avoid the appearance of cracks in the future. When attaching a perforated product, you must adhere to the following procedure:
- Fill the prepared seams with putty.
- Apply a layer of homogeneous mixture completely covering the tape. If the composition used contains lumps, it will be impossible to hide them with thin material.
- Place a stretched tape in the middle of the seam, press it into the putty mixture and, starting from the center, smooth it out with a spatula. The pressure on the material should not be strong, but at the same time sufficient for strong adhesion. Do not squeeze out all the putty, otherwise the tape will not be able to stay on the drywall.
Advice! Since the putty mixture dries quite quickly, it should be applied gradually, to small areas of the joint.
When laying reinforcing paper tape, it is extremely important to prevent the formation of air bubbles under the material. Therefore, it is much more convenient to use products with holes through which air subsequently escapes.
Excess putty, squeezed out from under the paper with a spatula, must be removed in a timely manner so that it does not have time to dry out. The finishing layer is applied after the material has dried. Then the putty strip is carefully sanded and the entire surface begins to be puttyed.
After proper treatment of the space between the plasterboard sheets, the plane is finished using the traditional method - plaster mixtures using reinforcing mesh. Subsequently, the resulting base can be finished with any material.
Correctly gluing serpyanka to plasterboard walls - instructions
It is worth approaching gluing reinforced tape onto drywall with all responsibility, because the further reliability of the joints will depend on the quality of the repair.
Sealing plasterboard seams with serpyanka is done using the following tools:
There are several options for how to do this: without glue and with glue.
Without adhesive, the construction mesh is attached to plasterboard walls as follows:
- Apply primer to the surface of the drywall;
- Fill the joint between the sheets evenly with the first layer of putty, then move the spatula from top to bottom to remove excess mixture;
- Allow the first layer of finish to dry;
- Cut a piece of tape to the required length and glue it into a layer of putty;
- The serpyanka needs to be smoothed out and pressed onto the material as best as possible using a spatula;
- Apply another layer of putty on top of the tape. The serpyanka will stay securely in its place;
- Don't try to spread the layer as thick as possible. The thinner it is, the less likely it is that the putty will begin to fall off over time;
- Wait until the finish dries;
- Sand the dried putty with sandpaper.
If the reinforced material cannot be held on the wall in any way and falls off, then they resort to the method using PVA glue:
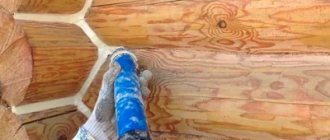
- Take glue and coat the seam with it;
- Press the serpyanka to the seam with a brush, move it down, adding PVA;
- In order for the tape to stick tightly, you need to use a large amount of glue;
- Wait until the glue hardens;
- Then everything is done similarly to the first method.
Working with corners and ceilings
When reinforcing corners, beginners often have problems. Experienced craftsmen advise not to glue the tape along the entire length of the corner at once. It should be cut into small strips, and then glue them one by one using putty.
The edge of each subsequent strip should be fixed on top of the previous one. Do not worry about the resulting unevenness - they can be removed with a second layer of putty finish.
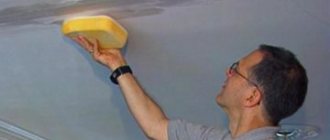
Difficulties with gluing serpyanka to the ceiling are associated with the effect of gravity on it, due to which it often falls off. This is where using a thick joint primer comes in handy, applying adhesive along the edges of the tape with a paint brush and pressing it into the putty finish layer.
Question: is it possible to glue serpyanka in cold weather?
It is worth noting that the construction mesh is intended for interior work with positive thermometer values. This means that the adhesive on the tape is unstable in the face of frost and there is a greater chance that it will simply come off.
During the installation of reinforcing material, it is worth following some recommendations to avoid further problems.
- When gluing the serpyanka, you need to make sure that it fits tightly to the surface to be finished. This will help avoid layers, which then take a long time to level out.
- It is also worth preventing voids under the tape - this will provoke the formation of cracks at the joints.
The process of sealing seams using self-adhesive serpyanka
To reinforce the longitudinal joints formed by two sheets of gypsum plasterboard, self-adhesive mesh is used. Much less time is spent on the sealing process with serpyanka, since it is easier to use. The danger of air bubbles is not terrible for the serpyanka; they do not worry about it.
The disadvantages of using serpyanka include:
- Reduced level of strength compared to paper tape;
- Selecting the appropriate type of putty solution.
Applying a plaster layer over serpyanka
If the joints are treated with serpyanka, then experts recommend carefully applying it to all the seams of the room. Before applying the reinforcing mesh, the surface is dust-free, otherwise the formation of wrinkles cannot be avoided. When gluing the serpyanka, press it well against the wall or ceiling. Afterwards, a layer of putty material is applied over the mesh and into its depth using a spatula. The putty layer should be uniform and thin.
The following video clearly demonstrates all the subtleties and nuances of gluing paper tape:
Summarize
Numerous tests of the strength of reinforced seams have shown:
Joints reinforced with ordinary sickle tape and finished with ordinary putty mortar are much more prone to cracking than seams reinforced with Knauf paper tape and putty mortar from the same company.
This is easily explained - self-adhesive tape (serpyanka), even under a layer of putty material, is prone to stretching, which occurs under load. It is quite difficult to carry out major repairs of formed cracks. Therefore, it is more advisable to use paper tape to seal seams.
Knauf plaster mortars
Rules for sealing seams using Knauf tape
Fiberglass mesh is an excellent material for sealing seams formed by gypsum board sheets with a thinned edge. But its strength is not enough to seal transversely located seams. Paper tape will reduce the risk of cracks in these places. It forms a seam of extreme strength, regardless of the chosen brand of putty. But the sealing of seams will be of high quality only if certain subtleties of the work are observed:
- Knauf does not have an adhesive base, so a uniform thin layer of putty solution is applied to the joint, which will act as glue;
Sealing seams using paper tape
- The putty solution, especially a thin layer, dries quickly enough, so do not apply putty to all joints at once. Otherwise, the work process will become somewhat more complicated, and air bubbles may form;
- The tape is adjusted in the center of the seam. Holding it in a taut position, applying slight force, press it into the layer of putty. Its ends overlap when crossing;
- From the center to both sides of the seam, use a spatula to “stretch” the glued tape. In this case, a force is applied so strong that it is sufficient for reliable gluing, but so that an excess amount of putty solution is squeezed out. There should be approximately 0.8 mm under the edge, 2 mm under the middle of the tape. If too much putty is squeezed out, the tape will have nothing to stick to;
- After completing the gluing stage, smoothing out wrinkles, they remove the excess amount of putty solution that has formed on the longitudinal edge;
- Then, after the putty material has completely dried, using a spatula with a wide blade, more than 100 mm, the seam is finally smoothed out. Attention is drawn to the fact that the layer of putty mixture on the plasterboard sheets forms a single plane. For the process, super-thin putty solutions from Knauf or Semin are used;
- The last stage is sanding.
Types and characteristics of serpyanka
All reinforcing tapes for drywall are divided into paper and fiberglass, some brands are combined. The second type is better known as serpyanka; the thread pitch in the fabric varies from 2 to 4 mm; in order to increase alkali resistance, it is impregnated with special compounds. It can have an adhesive layer or be without it; in the first case, installation is simplified. Serpyanka is well suited for processing longitudinal seams at the joints of sheets and does not bubble after the putty dries, but is inferior in strength to paper putty. It is used less frequently for internal corners or curved structures; fiberglass in these areas bends poorly and forms folds. The peculiarities of self-adhesive options include the need to store them in airtight packaging after printing, otherwise they lose their beneficial properties.
The paper tape is made from high-strength grades and is reinforced with fiberglass in all directions. To enhance the quality of adhesion, the side glued to the gypsum board is slightly rough; to reduce the risk of air bubbles, some varieties are perforated. The best brands have a pressed strip down the center, making installation easier (the seam is easier to find and equal amounts of material will be directed in different directions) and finishing inside corners. The advantages include good stretchability at low thickness, helping to avoid folds and cracks. The disadvantages are a more complex gluing process and the risk of bubbles, but with proper installation they do not appear.
In addition to the usual types, specialized strips are used for gypsum plasterboard structures, reinforcing corners, areas of contact with other building materials or between dissimilar slabs. A striking example is Knauf Alux, made of paper with aluminum inserts. It is designed to cover outside corners, hide defects, improve crack resistance and prevent peeling of cardboard and trim. The presence of reinforcement protects the corners from chipping and abrasion.
The need to strengthen the joints of dissimilar products is explained by their different characteristics: weight or moisture resistance; these areas are considered a risk zone. Simple, albeit durable paper is not enough; such seams are reinforced with combined products. A striking example is Knauf Kurt, with increased strength and pre-folding. It is optimal both for finishing internal corners and for gluing problem areas. Serpyanka is not suitable in such cases. In addition to Knauf, Sheetrock and HDP produce products with appropriate characteristics.
Regardless of the type used, a high-quality reinforcing strip has isotropic properties and resists tensile loads equally well in any direction. The material has high adhesion to gypsum plasterboard and putty compounds and, if necessary, can be overlapped. The average thickness is 0.2 mm, fiberglass - 0.5. Any tape can be cut without any problems with a paint knife.
Tips for choosing tapes
No brand can save poorly attached gypsum boards from cracking; the slabs must be securely fixed during the sheathing process. When working with sheets with thinned edges Knauf and their analogues for finishing joints, it is worth purchasing a serpyanka for plasterboard with cells within 2 mm, or, if time is limited, its self-adhesive variety.
If there is a high risk of cracking, preference is given to paper reinforced and perforated strips. To process internal corners, it is worth buying materials with folding that bend exactly in the center. For external applications, wear-resistant paper tapes with aluminum or polymer inserts are best suited.
How to properly glue on gypsum board?
Processing begins after fixing all the slabs; gypsum and polymer putties are used as glue and joint filler. In this case, dry mixtures are mixed exclusively by mechanization, in small portions. The technology for attaching serpyanka and paper tape is slightly different. General requirements include the need to first fill the voids at the joints with mortar and remove its excess, coincidence of the center of the strip with the seam line, immediate leveling and smoothing. Common ones include wetting perforated paper or overlapping application in certain areas.
The gluing steps include the following steps:
- Checking the fixation of the plates, tightening the protruding screws.
- Treatment of gypsum boards with antiseptic primers.
- Applying a thin layer of putty to the joint of plasterboard sheets. The recommended width is 6 mm; the most convenient way to do this is with a spatula up to 150 m wide. You cannot fill all the voids with the composition at once; it begins to dry out, which is unacceptable.
- Place the reinforcing strip in the center of the joint and press it into the putty using a spatula. In this case, it is recommended to slightly stretch the material, and stretch the tool itself as long as possible. At this stage, it is important to monitor the pressure on the spatula - the excess solution should be squeezed out on its own, ideally more than 1.5-2 mm remains in the center, about 0.8 at the edges.
- Checking the quality of fastening and final smoothing.
- Remove excess mixture from edge edges.
- Drying the seam.
With proper reinforcement, the paper tape does not protrude above the sheets and does not have wrinkles. The main difficulties arise when forcing air out; if the putty is not applied sufficiently, voids form under the material. This causes the finish to peel or crack. Using a perforated paper variety helps to avoid risks; it bubbles less.
When using serpyanka, the scheme of actions generally remains the same, but the putty is applied not only under it, but also on top. If you have no experience, it is better to buy a self-adhesive type; when used, the quality does not depend on the uniformity of the first and top layers. The thickness of the plaster is monitored; it should be enough to hold the tape, but strong protrusions are avoided.
Excess solution is removed immediately, but without putting unnecessary pressure on the sickle. After drying, the uneven surfaces are lightly sanded with sandpaper.
Work is carried out at positive air temperatures and after the removal of the main construction moisture has been completed. The desired mode is achieved by heating the room to +10 °C for at least 2 days and excluding drafts. If there is an increased risk of cracking, specialized compounds are used to seal these areas: Knauf Uniflot or Fugen, Glims MasterFlott, Volma Seam. Pay attention to the shelf life of the putty. Occasional tears are easy to hide, but in general, during installation, the tape for drywall seams is not stretched or deformed; it is covered with a thin layer of finish along with the entire surface of the sheet.
- Where two sheets of drywall meet, remove all excess (cardboard scraps, broken areas).
- They begin to cut the chamfer. Do this at an angle of 40-45 degrees. That is, the joints of the plates should resemble one well-known symbol - a “tick”. It is more convenient to do this before fastening. Although, there is nothing to be done after.
- A set of spatulas - it is better to choose three main ones: wide, medium and narrow. The first one will do the least amount of work, but it is very convenient for smoothing out seams.
- If you wish, you can add a falcon - a special device for working with putty. It is a flat plate with a handle. It is convenient to take the solution from its surface. Although, a wide spatula will perfectly fill its role.
- Level.
- Drill with mixer attachment.
- Brush and roller for priming.
- Block and sandpaper.
- Construction knife.
The main types of tapes used for sealing seams
To strengthen the joints of sheets of plasterboard structures, two types of tapes are most often used:
- serpyanka, consisting of fiberglass;
- paper reinforcing tape.
In addition, when finishing drywall joints the following types of tapes can be used:
- Non-woven or bandage - to strengthen the corners.
- With metal strips - for reinforcing external corners other than 90 degrees.
- A wide piece of fiberglass to strengthen the joint between drywall and the wall, for example when constructing an arched structure in a doorway. It can have a width of 10 cm or more.
Useful tips
In order to obtain the highest quality result after sealing plasterboard joints, during the work process it is necessary to follow the following recommendations of specialists:
- Ensure optimal temperature (more than 10 C°) indoors. It is also extremely important to eliminate drafts.
- In conditions of excessive humidity, the tape for sealing gypsum board joints will not adhere well. Therefore, its installation should be planned after the completion of wet finishing work.
- Before you begin laying the reinforcing tape material, you need to make sure that the drywall is securely fastened.
- If there is no chamfer at the joints of the gypsum plasterboard, you definitely need to apply it yourself.
- To prevent cracks from appearing in the corners over time, they should be filled with putty carefully and evenly.
- When special tape is not used to finish the corners, ordinary tape must be folded in half, then glued to the seam.
- Before using putty, you need to read the information on its packaging. Some compounds are incompatible with reinforcing tapes and are not able to hold them at the joint.
- If air bubbles have formed on the paper tape material, they should be pierced with a needle, then the air should be removed.
- To process joints that are too long, it is advisable to divide the reinforcing products into meter-long sections, which are then glued in stages.