Irregularities in the ceiling immediately catch the eye and look ugly. This problem can be solved with drywall. A simplified method is to level the ceiling with plasterboard without a frame. This option is a good replacement for stretch ceilings, the popularity of which has recently increased. Leveling with plasterboard was abandoned mainly due to the fact that it most often requires the construction of a frame, and this requires additional costs and is a labor-intensive process.
You can level the ceiling not only using a profile, but also without it, provided that it does not have large unevenness.
The frameless method allows you to make the ceiling surface smooth in a short time, without much effort. It does not require much labor, is carried out quickly and gives a good effect of leveling the ceiling, giving it an aesthetic appearance with the prospect of further design. This is possible when the difference in ceiling level in different places is insignificant.
Advantages of using drywall when leveling the ceiling
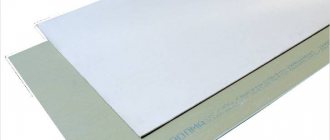
Drywall has proven itself positively among building materials because it has an affordable price and is quite easy to install, contributing to the formation of a flat surface, which can later be painted, glued or finished in another way. It has a number of the following advantages:
- High evenness of the material, which makes it possible, with correct installation, to easily bring the ceiling to an ideal condition.
- The composition of drywall does not contain any components that can harm human health.
- Giving preference to it, it is not necessary to hire specialists, since the installation process is quite easy to do with your own hands, after first familiarizing yourself with the correct technology and carrying out all the actions in a similar sequence.
- In the event of a fire, the material does not burn and does not release toxic fumes, since its key component is gypsum.
- If necessary, you can create a visually attractive multi-level ceiling with lighting from plasterboard sheets.
- The presence of different types of gypsum boards allows you to level the ceiling in living rooms, kitchens, bathrooms, as well as in production workshops.
- The use of this finishing material allows, in addition to leveling the surface, to decorate it with shaped elements with backlighting.
- Behind a structure made of plasterboard, you can hide various communications (wiring, cables, components of the exhaust system).
In addition, it has one significant drawback, which is its fragility, which is why extreme care must be taken when using the material.
When purchasing drywall, you should pay attention to a number of the following criteria:
- Labeling. The most suitable solution when leveling the ceiling is to use moisture-resistant plasterboard.
- Dimensions. The thickness of the sheets can vary from 0.6 to 1.25 cm. The best option when leveling the ceiling is 9 mm plasterboard.
- External condition. Before leveling the ceiling with plasterboard, it is necessary to inspect it for defects and damage. The material used must be smooth and have a green surface.
Methods for eliminating defects
Before making a plasterboard ceiling, you must remember that you need to get rid of flaws on its surface. The choice of method should depend on the type of defect. Disadvantages are divided into 2 subgroups:
- local (chips on the ceiling surface, potholes, unevenness);
- horizontal ceiling deviation (in situations where this is not provided for in the project).
Regarding the methods used to eliminate defects, the following are distinguished:
“Wet” - in this situation, an ordinary solution is used, through which minor defects on the ceiling surface are eliminated. This method is applicable primarily to eliminate single defects. Using a plaster mixture to eliminate the resulting slope requires a certain time (for the mixture to harden) and creates a significant auxiliary load on the load-bearing part
This is important if wooden floors are used. Minor defects can be eliminated using starting putty.
Dry method
Its use makes it possible to level the ceiling with plasterboard using a frame. It is often used in a large room, where the loss of 4-7 centimeters of space in height will not be noticeable. A frame is made to hide defects in the ceiling. The resulting tilt is eliminated by adjusting the length of the hangers. This method is distinguished by an insignificant auxiliary load on the supporting part and the speed of work. An important advantage will be that it will make it possible to lay all communications behind the drywall.
There is also a third method of creating a plasterboard ceiling - gluing sheets to the surface using a special adhesive mixture. However, it is often used when gluing plasterboard sheets to an already leveled ceiling. This method is not used to eliminate significant defects.
Preparing the ceiling before erecting the sheathing
Before leveling the ceiling with plasterboard and starting to build a frame for it, you need to perform the following steps:
- First of all, you need to remove the lighting fixtures from the surface.
- If there is wallpaper on the canvas, then it is necessary to peel it off.
Important! If the installation of plasterboard sheets will be carried out without erecting a frame, then the whitewash must be removed from the surface.
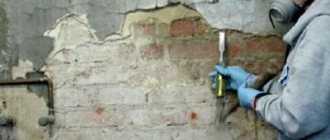
- Existing bulges in the plaster should be knocked off, after which fresh plaster mixture must be reapplied to this area.
- Next, the entire ceiling must be checked for areas with fallen coating. If they are detected, the surface must be plastered, bringing it to a smooth state.
- Finally, the resulting dust must be removed with a vacuum cleaner.
Note! If the ceiling is placed in a room with an increased level of dampness, then a primer must be applied to its surface, which will eliminate the likelihood of fungus.
Preparatory work
Leveling a concrete or wooden ceiling
In a situation where the ceiling is made of concrete, it is first necessary to level it, optimally close the joints and cracks in order to increase sound insulation characteristics. When the room has wooden ceilings, they should be freed from plaster and make sure that the load-bearing elements of the structure are of proper quality and are able to support the weight of the suspended ones.
At the second preparatory stage, the ceiling level is marked. When you only need to level it without installing lighting devices and other equipment, you should select the lowest mark and use a level to mark the perimeter.
When planning an installation, then from the indicated mark the height of the lighting fittings should be set down and the level should be set at the new marks.
Ceiling markings
The next step is to mark the surface. To do this, you need to perform a number of specific actions:
- On the entire ceiling area, you should find the lowest point and make an indent from it down the wall by 5 cm, on which you want to make a mark.
- Next, using a level and a tape measure, you need to make points in the same way on all the internal and external corners of the room.
- After this, these marks must be combined into horizontal stripes, for example, using a chokeline or a thread wound on a cassette, which must be even, since the evenness and strength of the entire structure being built in the future largely depends on this. It is necessary to pull the thread between two points, pulling it back like a bowstring and then sharply releasing it. It will create an even strip, which can be conveniently used as a guide when installing a frame for a suspended ceiling, while indicating the lower limit of this sheathing.
- On the surface along the entire perimeter, horizontal lines should be drawn every 60 cm, along which the profiles will be fixed in the future. In addition, on these strips you need to mark points for fasteners every 50 cm.
- For the rigidity of the structure, it is necessary to install transverse profiles, under which it is necessary to mark lines every 30-40 cm perpendicular to the main ones.
When drawing all places for fasteners, as well as during the application of each strip under the profiles, extreme accuracy must be observed. The angles must be strictly 90° and the lines straight.
Note! To perform high-quality installation, before marking the ceiling, you must first draw up a plan on paper, in which you should exclude the presence of cross-shaped joints, which should be arranged in a checkerboard pattern, since this is the method that will create a perfectly flat surface.
Cutting plasterboard sheets
Before cutting drywall, you need to purchase a special cutting tool that will allow you to separate the sheets properly. Using a suitable knife, you will only need to run along each of the strips marked with a pencil a few times, after which the material can be broken into two parts without much effort. The remaining uneven edges on the cut workpieces can be easily smoothed using a plane.
For greater convenience and to avoid possible shortcomings, before attaching the drywall to the ceiling, you can make holes for lighting fixtures, which will later be located on it.
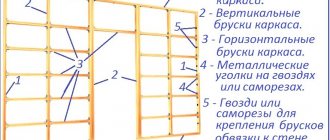
Installation of sheathing
You can do the work quite simply with your own hands, since the whole process is not too complicated if, before attaching the frame under the drywall, you familiarize yourself with the correct technology and, in accordance with it, carry out a number of specific actions in a similar sequence:
- Along the lines marked on the walls, it is necessary to fix the guide profiles at a distance of 40 cm from each other around the perimeter of the entire room, using dowels as fastening elements.
- Next, they should use the points marked on the ceiling to fix the suspensions.
- Ceiling profiles should be installed in the fixed guide profiles and mounted to the suspensions. If there are protruding antennae, they can be bent on different sides.
- Upon completion of fastening the longitudinal guides, it is necessary to install transverse sections of profiles, which will ensure the strength of the structure.
All actions performed must be checked using a level. Having finished installing the frame, you need to try to move it slightly. The absence of creaking and movement of the sheathing indicates an optimal level of rigidity for further fixation of plasterboard sheets.
How to calculate the required materials?
To carry out high-quality ceiling leveling, you should select, purchase and prepare all the necessary materials and tools in advance so that everything is ready by the start of the first stage of work. This will significantly reduce installation time.
The easiest way to calculate materials is to use a calculator:
*Attention ! All results are approximate - accuracy depends on the wall material, condition and shape of the room
To make your own calculations, follow the instructions below. Leveling the ceiling with plasterboard involves the following consumption of materials:
- tape for sealing - the amount completely corresponds to the perimeter of the room;
- dowel - 0.7 pcs.;
- screws - 23 pcs.;
- suspension rod - 0.7 pcs.;
- hanger with clip - 0.7 pcs.;
- extension for profiles – 0.2 pcs.;
- reinforcing tape – 1.2 linear meters;
- PN profiles (60x27 and 28x27) - completely corresponds to the perimeter of the room;
- profile connector – 1.7 pcs.;
- mounting dowel – 3 pcs.
To calculate their number as accurately as possible, all indicators must be multiplied by the area of the room being repaired.
Insulation and wiring
After attaching the frame from metal profiles, if necessary, it is necessary to lay insulation, as well as lay electrical wiring. When laying wires, the following nuances should be taken into account:
- The location of lighting fixtures must be considered before laying electrical cables.
- It is necessary to exclude the possibility of the wires touching metal elements, since this may cause a short circuit. To avoid this, they should be hidden in a corrugation.
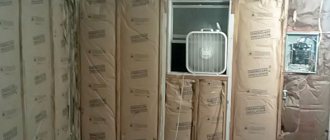
- In the free space of the metal sheathing, in addition to electrical wiring, you can easily hide television and Internet cables, ventilation pipes, a boiler or a gas water heater.
If necessary, you can insulate the frame with a layer of mineral wool by gluing foam plastic or aerated concrete slabs. The last option is the most optimal, since it has not only low weight, but also thermal conductivity. In the first case, it is enough to simply install mineral wool slabs into the appropriate cells without gluing them.
Giving preference to foam plastic or aerated concrete insulation, before gluing the insulation, you should thoroughly prime the ceiling and wait until it dries completely. It is also recommended to cover the material used with this mixture on the side that will be adjacent to the surface and to the ends. Next, you need to apply glue to the foam or aerated concrete slabs using a notched trowel, and then press the insulation to the surface of the ceiling. One row should be glued in a similar manner. The slabs of the second row must be glued in a checkerboard pattern.
Upon completion of these works, you can begin sheathing the erected structure with plasterboard.
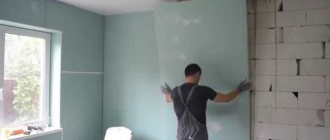
Fastening plasterboard sheets
This stage is one of the simplest, but almost no one is able to carry it out on their own, especially without the proper experience, and also if the sheets have not been cut, remaining intact, since in this case they have significant dimensions and weight. In such a situation, when carrying out installation work yourself, it is necessary to acquire an assistant, together with whom the installation of drywall can be carried out without any difficulties.
The process itself is performed as follows:
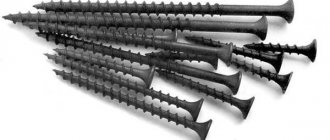
- The pre-prepared plasterboard sheet must be lifted to the area where it will be installed using metal screws. The length of the fasteners used must be 25 mm.
- Next, you can screw the screws into the supporting and guide profiles, pressing the material tightly against the frame. In this case, a distance of 20-25 cm must be maintained between the fixed fasteners, not forgetting to also slightly recess their heads into the drywall itself while screwing.
Note! When attaching sheets, it is imperative to leave gaps of about 5 mm, which will prevent the possibility of cracks forming.
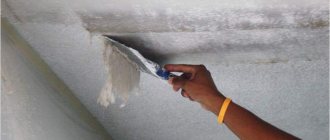
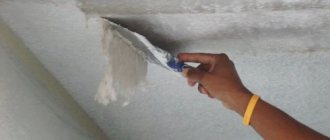
Plasterboard ceiling finishing
Attaching the plasterboard sheets to the frame is not the last step, since there are seams between the screwed pieces, and in the places where the fasteners are screwed, there are traces that need to be hidden. For these and other reasons, rough finishing should be done by performing a number of the following actions:
- Initially, the drywall must be opened with a primer, trying to achieve a thin and evenly applied layer. It is best to use a roller for this task. After this, the surface must be dried and re-coated with a layer of primer.
- After the mixture has dried, the seams of the plasterboard sheets must be covered with self-adhesive reinforced tape.
- Next, the starting putty should be used to cover the joints and screw heads in an even layer.
- After waiting for the treated areas to completely dry, it is necessary to open the entire surface of the ceiling with the putty mixture using a wide spatula. In corners and other hard-to-reach areas, application can be done using a special angle tool.
- After the putty has dried, the surface of the ceiling should be sanded, eliminating noticeable defects.
- After this, it is necessary to remove the resulting dust and re-open it with a layer of primer.
- Then you can go over the ceiling again with fine-grained sandpaper.
Upon completion of all of the above, the structure is ready for further finishing, for example, painting.
The final stage
Before painting, a plasterboard ceiling should not have even the slightest roughness, since after painting they will be noticeable. To eliminate all defects, the entire surface is sanded. This finish will also ensure strong adhesion of the paint to the base.
Sanding is carried out using a special grater and emery cloth or sanding machine. To ensure personal safety during work, you must use a respirator and goggles.
After eliminating visible roughness, you need to use a flashlight or lamp to identify hidden irregularities and eliminate them.
At the last stage, the surface is primed. Now the plasterboard ceiling is ready for painting.
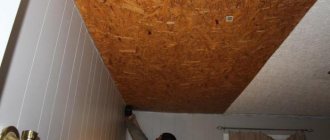
Installation of drywall without erecting a frame
It is effective to resort to this method of fastening sheets in rooms of small size and in which there are no significant differences in height, not exceeding 3 cm. In this case, the plasterboard is fixed to the ceiling surface using a special glue, and the whole process consists of carrying out a series of the following actions:
- First of all, the ceiling should be cleaned of plaster, whitewash or other old coating, and mold and dust should be washed off from it.
- After complete drying, the surface should be covered with a layer of primer, which contains antiseptic additives.
- At the next stage, it is necessary to take measurements of the ceiling, draw up a plan and cut the drywall into elements of appropriate sizes.
- From scrap material, cut strips no more than 10 cm wide and create a kind of sheathing by gluing them to the surface. Thanks to this, it is possible to level the ceiling under plasterboard without installing profiles.
- At the next stage, gypsum glue must be applied to the ceiling using a notched trowel, to which the prepared drywall must be immediately pressed tightly.
The horizontality of the glued sheets should be checked using a building level. Next, you need to wait until it dries completely so that the material is securely fixed with the adhesive mixture. - After this, the plasterboard ceiling should be covered with a layer of deep penetration primer and completely dried.
- The seams present between the sheets must be sealed. Before gluing the serpyanka to the drywall, you should apply a layer of putty to embed the tape in it, and then re-seal it with the solution one more time to completely hide it.
- Dried treated areas should be sanded using fine-grit sandpaper.
- At the end of all the steps described above, it is necessary to re-open the entire surface with a layer of primer mixture.
The ceiling brought to this state is ready for applying the finishing touch.
Having understood how to level a ceiling with plasterboard, you will be able to do the work yourself without turning to specialists, but it is important to follow all the recommendations described above in the correct sequence, thanks to which the structure will be made with high quality and will last for many years.
Video:
Selection of materials
Leveling the ceiling with plasterboard will be an excellent option if the ceiling slabs have caused deformation of the finish and caused the appearance of cracks. In this case, leveling the ceiling is the most optimal, inexpensive and low-cost method, which can be done with your own hands in the shortest possible time, without turning to the help of specialists. It will save not only money and time, but also energy. It can be used if it is necessary to create a ceiling alignment with plasterboard without a frame or with a frame.
Plaster, tension structures, and plasterboard can serve as a leveling base for the ceiling. Using the first 2 options entails some difficulties, for example, plaster is applicable only if the unevenness does not exceed 5 cm, while its use is quite labor-intensive, time-consuming and effort-consuming, and suspended ceilings often do not allow working alone. Drywall is the most convenient and practical option.
Drywall is great for leveling the ceiling with your own hands. Its installation is many times simpler than working with plaster.
Also, there is an option for leveling gypsum board ceilings without using a metal frame, however, this method has its own characteristics and limitations, which we will discuss at the end of the article.