High-quality putty is the basis of any repair. This seemingly elementary process has its own subtleties. Our article will tell you how to properly putty any surface.
Cracks, grooves, potholes - all this requires treatment. Putty technology does not tolerate flaws: in the future they can cost nerves and money. In order to properly prepare any surface for painting or wallpaper, it is necessary to take into account some nuances, which we will discuss below.
Let's go in order.
Puttying in unnecessary places
It is very important to understand what puttying is and what places the putty solution is applied to. This is the final surface treatment for decorating walls with wallpaper or painting. Under no circumstances should putty be applied to an unprepared surface or walls with large defects. Preliminary work with walls includes complete cleaning of surfaces from old wallpaper, plaster or paint. After this, you can proceed directly to leveling the walls. It is important to remember that putty is useless on walls with unevenness greater than 2 mm. Large defects and crooked walls can only be leveled with plaster. The putty is applied to the rough-prepared and primed surface. If you plan to tile or panel the walls, puttying is not required at all. In this case, there is no need for a completely flat surface, so applying the solution is pointless and will only lead to unnecessary costs.
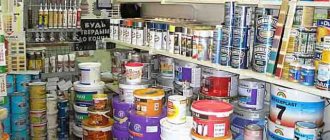
Selection of putty mixture
There are several types of putty for leveling walls. They differ both in purpose and composition. Various manufacturers have their own special components that give the finished solutions certain qualities.
In general, we can distinguish mixtures intended for pre-treatment, as well as for finishing. There are also universal solutions.
Which mixture is best suited for renovating a particular room? It all depends on the qualities of the solution being created.
The composition of the material can be:
- plaster;
- polymer;
- cement.
Which type is suitable must be determined in each specific case.
- In order to level the walls with putty in the bathroom or in other rooms with high humidity, a cement mixture is usually chosen. However, due to the possibility of severe shrinkage and the appearance of cracks, it is used for the rough layer.
- Gypsum solutions can be used for both primary, rough, layers, and for finishing. They do not shrink, but are only suitable for rooms with low humidity and no sudden temperature changes.
- Polymer mixtures containing many different specific additives that improve the quality of the material are usually classified as universal coatings. They can be used for both roughing and finishing. They are also beneficial because when using them you can work without haste (the finished solution dries only after a day).
Having decided on the qualitative composition of the mixture, add a small amount of water corresponding to the information on the packaging.
Note! Dry mixtures are lighter, so they are more convenient to store and transport. Ready-made solutions have the best qualities.
Leveling walls with putty requires careful preparation. The material created after adding water should have a creamy appearance.
USEFUL INFORMATION: The process of leveling walls using beacons with your own hands step by step: how to place beacons
Important! It is imperative to take into account that the prepared solution dries very quickly, so it is better to make batches in small portions, timing the time of their use.
Dirty tools
Any tiny dirt or speck that gets under the spatula will not allow you to cover the wall with an even layer, leaving scratches on the surface. Therefore, the bucket and tools must be perfectly clean. For puttying, you must have a separate container and not use it for other types of work. The presence of sand particles in the bucket is especially undesirable. After the process is completed, the bucket is thoroughly washed. Tools also need to be washed after each use. And the mixer - immediately after mixing.
Which putty is better to putty walls under wallpaper?
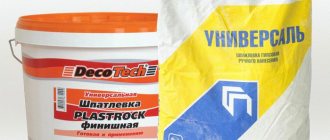
First of all, you need to decide on the type of putty you will work with. There are a lot of them in stores, and it is especially difficult for a beginner to navigate such a countless number of options offered. To make it easier for you, I will talk about one of the popular materials from Weber Vetonit, which I myself constantly use:
Let's make the following estimate. The walls of your house are not the same. Some are load-bearing thick walls facing the street. In cold weather, such walls can freeze very much. And there are interior walls that live at a relatively constant temperature. For these cases, Weber Vetonit has the following options:
- Weber Vetonit VH - when hardened, this putty is resistant to low temperatures.
- Weber Vetonit KR is just a putty for dry rooms.
I have a separate article on how to work with Vetonit putty.
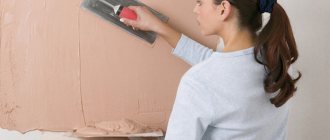
Wrong spatula selected
Choosing this tool can greatly facilitate or complicate the puttying process. You don't have to choose the most expensive tool. For beginners in repair, a flexible and wide spatula is suitable, because a hard one, when pressed too hard, leaves grooves in the mortar. A wide spatula is also good because it leaves much fewer stains on the surface being treated. It is best to use two flexible tools - 40 and 12 cm. The narrow one is used in hard-to-reach places. It is also used to remove the solution from the container.
Putty fractions
Putties have different fractions, mainly putties for the first layer and for the finishing layer, there is also a super-finishing one. When puttingtying walls under wallpaper, it doesn’t make much difference what kind of putty you use to putty the walls, but it is advisable to use finishing compounds before painting.
For beginners and for do-it-yourself repairs, the above definitions of putty fractions are enough to carry out repairs. The putty fraction must be indicated on the packaging.
There is a special compositions of the “superfinish” category, sold ready-made in both large and small containers. They are quite expensive for large volumes and have the finest fraction. Sometimes such compositions are necessary for high-quality putty in certain places, for example, at the joints of polystyrene foam ceiling plinths, in order to properly mask the joint. Also, such compositions are used as a third and even fourth layer when puttingtying ceilings or walls for painting. With this puttying, the surface becomes perfectly smooth.
Putty of the “superfinish” fraction
The putty solution is too thin or thick
It is very important to mix the solution at the correct thickness. Too thick or liquid will cause a lot of cracks and subsidence. The correct consistency of putty is medium thick, like sour cream, so that it does not flow off the spatula, and the tool immersed in it does not fall. But you need to distinguish between the starting and finishing layers - the second is made thinner than the first. Otherwise, the solution will not lie on the surface and will crumble. The ideal solution in this case would be to prime the surface before applying the finish. And under no circumstances should the solution be diluted with drying oil, turpentine and similar means.
Preparing the walls
The walls are cleaned of old coatings - wallpaper, paint, old putty.
Before applying a layer of putty, it is necessary to prime the surface with a deep penetration compound. The primer improves the adhesion of the leveling mixture to the wall, strengthens the surface, filling small cracks. It is most convenient to apply the primer mixture with a roller. You can level the walls with putty after 6–10 hours, when the surface is completely dry.
Putty is applied in a thin layer
People who are new to puttying often press the spatula too hard and apply too thin a layer of mortar. The ideal thickness should be at least a millimeter. It is better to carry out the work in several stages. Each layer is applied after waiting for the previous one to dry. It is advisable to use reinforcing tape. Finishing may be carried out in a thicker layer. But if you overdo it, bubbles may form. The maximum thickness of the solution is usually indicated in the instructions on the packaging. These recommendations should not be ignored.
Performing operations independently
Beginners starting to putty with their own hands can find many recommendations on the Internet, many of which are presented in the video.
Each stage of work consists of two steps:
- checking the evenness of the wall;
- applying a leveling layer.
Using a broad rule, the size of the gaps is checked. These holes will need to be filled with the starting putty mixture, so you need to mark them with a pencil. The rule must be applied in different directions - vertically, horizontally and diagonally.
Note! If most of the protrusions are located horizontally, then the movements during puttying should be horizontal, if vertical, the spatula at the first stage must be moved from bottom to top.
What is the best way to level a wall with putty?
- Using a small spatula, apply the mixture onto a large one and distribute it evenly and forcefully. Professionals often recommend using a tool at least 45 cm wide to quickly and accurately level walls.
Attention! You need to start putting putty from the corner. To create neat corners, it is convenient to use a special corner spatula.
- Movements are carried out in two directions: vertically and horizontally.
- Sometimes experts advise applying one layer strictly from top to bottom, the other from left to right. Moreover, when explaining to beginners how to level walls, experts recommend creating two or three rough layers and the same amount for finishing. Whether it is necessary to strictly adhere to such rules, everyone can determine from their own experience, however, when performing work for the first time, it is better to follow the recommendations.
- Having distributed the putty over the wall, the remaining material is removed from the spatula. After each movement vertically or horizontally, a little solution is added.
- Each new movement is made overlapping with the previously applied solution.
- After processing an area of about 0.5 square meters. m, you need to apply the rule to the surface and pull it from top to bottom to remove excess material.
- You need to wait until the wall leveled with the first layer dries well. This may take up to 2 days.
- Then a clean spatula or block wrapped in sandpaper is passed along the wall, removing the formed tubercles and grouting the surface. This can also be done with a special grater.
- Next, the evenness of the surface is checked again.
- Leveling the walls with a special finishing putty is the final stage. It is carried out when an almost ideal flat surface is achieved according to the principles described earlier.
USEFUL INFORMATION: How to properly glue wallpaper in corners: join the pattern
Starting puttying from the corners
Puttying should smooth out surface defects, namely the most crooked corners. Therefore, starting to treat the walls from them will only worsen the unevenness. You should start working by stepping back from the corner by at least 5, and preferably 15 cm. The corners are processed at the end, after the very first solution has completely dried. Starting from the leveled area and focusing on it, slowly bring the angle to the same level. If the corners in the room are rounded, this can be removed with a hammer drill. Otherwise, the angle will not be even.
Tips from the professionals
A few final tips on how to properly putty walls with your own hands so that the result is as effective and durable as possible:
- To prepare the working solution, be sure to use an electric drill with a mixer attachment. It is almost impossible to prepare a mixture of even consistency without lumps by hand.
- Only completely dry plaster should be treated Through a layer of putty it will dry much longer.
- After the last layer has dried, it must be sanded with sandpaper or a special sanding mesh to make the surface completely smooth.
Now you know all the secrets of this work for wallpaper or painting and you can pick up a spatula yourself. This is one type of work that you can safely take on to save on repairs without ruining anything.
Are you afraid or not sure that you can properly putty the walls with your own hands? Then look for a master!
Applying a second coat without stripping the first
Before applying the second layer of the mixture, it is necessary to thoroughly clean the first layer to ensure maximum fixation of the finishing solution. You can go over it with a clean wide spatula - the tool will remove all the unevenness and remove the bubbles that inevitably appear on the walls during the work. In addition to a spatula, you can use a grater to level the wall. The final stage is to clean the surface with pumice or sandpaper. It is strictly not recommended to use a rag. The resulting dust is carefully swept away with a brush, otherwise the final layer will not stick.
How to putty correctly: little tricks
- When working with putty, do not forget about safety precautions. It is best to dilute the dry mixture while wearing a respirator.
- If you decide to use a wide spatula, apply the putty onto it with a smaller one. This will make the work much easier.
- After use, immediately rinse the tool with warm water. Do not wash the aqueous solution of putty down the drain, this can cause blockages!
- In the first three days after application, the putty must be protected from moisture, hypothermia or drying out.
Here, perhaps, are all the main nuances of working with putty.
Incorrect putty chosen
Be sure to pay attention to the quality and shelf life of the putty. Almost any type of wallpaper is suitable. A finishing coat is required for painting, but it is applied to a primed surface.
Types of putty:
- Plaster. Considered a starter species. Suitable for wallpaper and other decorative finishes. Evens out even deep cracks and does not settle when dry.
- With polymers. Sold in liquid form at the desired consistency. The structure is fine-grained, this type can be used under paint. This coating is very elastic and is not afraid of dampness.
- Cement. Coarse-grained, it is not suitable for finishing walls before painting, as it will bleed through the paint layer and highlight all the imperfections.
To avoid lumps in the solution, it must be mixed using a special tool - a mixer or whisk.
By following all the rules, you can level the walls to perfect condition and make high-quality repairs at home yourself.
Technology
The technique for applying plasters is the same for any composition. What matters is only compliance with the recipe indicated on the packaging (ratio of water and dry mass) and the time within which it must be used. Otherwise, the plastering technique is the same.
Preparing the base
Work begins on a dry and clean base. If there is an old covering, everything that can fall is cleaned off, cracks are opened, screws and nails, remnants of wallpaper and other coverings are removed.
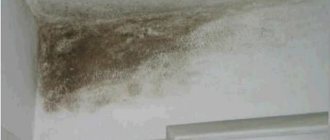
As sad as it may be, both paint and whitewash must be removed. Paint for the reason that the putty does not stick well to it, and if it does stick, it may later fall off. The whitewash is removed because it is loose. With it, after priming, adhesion is normal, but after a while the finish begins to crack and peel. If you don’t want to redo the ceiling or wall again in a year and a half, you need to clean off the lime.
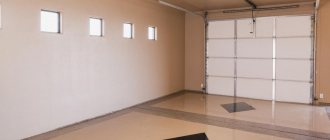
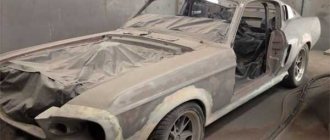
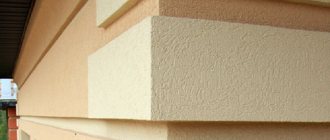
This is what the prepared surface looks like
After the old coating is removed, remove the dust. If you have an industrial vacuum cleaner, you can use it (you can’t use a household vacuum cleaner - it will break). If you don’t have such equipment, you can first go over it with a dry broom, then with a brush, and finally with a slightly damp cloth to collect the residue.
Primer
Priming walls under plaster is used to ensure that the materials adhere better. Its second task is to reduce the amount of moisture absorbed by the base. This is very important on porous surfaces such as brick, dry plastered wall, etc. On walls that are loose and prone to crumbling, special deep penetration compounds are used. They bind particles of material to each other, increasing the overall strength of the base.
It’s better not to skip the primer
To get a guaranteed good result, it is better not to skip this stage. Even though primers cost a lot.
Primers are sold either as ready-to-use mixtures or as liquid concentrates. The second type requires additional dilution with water. In any case, before use, carefully read the instructions and follow them strictly.
Usually the technology is as follows: the composition is poured into a container and distributed over the surface using a brush or roller. In difficult places - corners and bends, go thoroughly with a brush. If two or more layers are needed, they are applied after the previous one has completely dried.
Tools
To putty the walls directly, you only need two spatulas. One large, with a long blade (300-600 mm) and one small. The small ones take the composition out of the container and distribute it over the blade of the larger one. They also use it to remove the remains from the blade and distribute them again along the edge. A large spatula is needed directly to distribute the composition over the wall.
Need two spatulas
The blade of a large spatula should be made of stainless steel. It should be flexible, without nicks or scratches. If you look at it in profile, you can see that its ends are slightly bent to one side. This was done specifically so that when puttingtying walls or ceilings, stripes from the edges of the blade would not appear on the surface. You can also work with a straight spatula, but you will not be able to get rid of the streaks, as a result - after drying you will have to compare them, and this is a long and dusty job.
You will also need a container in which to mix the putty and a construction mixer or drill with a stirring attachment. It is better to take a plastic container - a bucket or basin with high sides. Pay attention to the shape of the bottom. The transition from the bottom to the walls should be smooth. Then it is possible to mix the entire composition without residue or lumps.
Wall putty technique
In general, everything has already been said, but let’s focus specifically on the process and sequence of work. First, the putty is mixed. Water is poured into a bucket, the dry composition is added to it, making sure that there are no lumps. You need to wait a while until the whole mass gets wet, then you can stir. Kneading can be mechanical or manual. This is indicated on the packaging with the putty. When you have achieved a homogeneous composition without lumps, you can begin work.
Large imperfections are covered first
Apply the putty to the wall using a large spatula. The composition is applied small on it, forming a roller two to three centimeters wide and about a centimeter high on the edge of the blade. If the composition is thick, you can take more solution; if it is liquid, it can flow, so the roller is made small.
Step 1. Starting putty . If there are large irregularities - more than 3 mm, they are first covered with starting putty. If the unevenness is only in places, only these are repaired, bringing them to the same level as the surface. If there are a lot of them, you will have to putty the entire surface. When working, it is advisable not to exceed the maximum permissible layer thickness, otherwise cracks may appear or the finish will fall off. If there are no significant irregularities, you can do without this layer. But in this case, the consumption of the finishing composition will be greater, and it costs more than the starting one.
The thickness of the putty layer that remains on the wall is adjusted by the angle of the spatula. If it is strongly inclined towards the wall, the layer remains thicker; if the angle is closer to a straight line (60-70°), it can be 1 mm.
There is another technique for applying putty. It is called "na sdir". In this case, the spatula is placed perpendicular to the wall. As a result, only pores, streaks and other defects are covered, and consumption is minimal. But this technique only works on smooth walls, without deviations in geometry. Puttying uneven walls with differences of more than 1-2 mm using this method is impossible.
Step 2. Leveling the first layer . After the starting layer has dried (the time indicated on the packaging), take sandpaper for sanding and use it to smooth out the most prominent irregularities. Most often these are stripes, but due to inexperience, bumps may also appear. After sanding is completed, dust is swept away from the walls with a broom, then brushed with a dry brush.
You need to smooth out any uneven areas with sandpaper.
Step 3. Finishing putty of the walls. A layer of finishing putty, no more than a few millimeters thick, is applied to the cleaned walls. At this stage, you should try to get a flat surface by carefully leveling the composition. Leave to dry.
Step 4. Aligning the final layers . For this stage, take a mesh with a finer cell. They try to get a smooth surface. Good lighting is necessary for normal results. The absence of defects is also checked with the palm of your hand.
That's all. Next, step 3 and 4 are repeated until you are satisfied with the result. A little about the extent to which it is necessary to level the walls. It all depends on the type of finish you choose. If the walls are puttied under wallpaper, there is no need to achieve perfect smoothness. Even the thinnest wallpaper hides small differences. Multilayer paper wallpapers - duplex or triplex - are less demanding on the surface. A more even base is necessary for a non-woven base, as well as for all vinyl wallpapers except foam and textured ones.
The requirements for putty for painting are higher. The paint does not hide even the most minor flaws, so it has to be leveled to perfection. Up to six very thin coats may be needed.
How to make smooth corners with putty
You saw several methods in the video - just remove the mass well from the very corner. Everything seems simple, but in practice it turns out to be difficult and not very smooth. For beginner plasterers, there are special corner spatulas for the outer and inner corners.
After applying a certain amount of putty to the corner, they apply it, removing the excess and forming an ideal line. It's easier to work with them.
Spatulas for creating smooth corners using putty
Mixing the solution
For mixing you will need a clean bucket or any other suitable container. Add the dry ingredient little by little to water at room temperature or below. A mixer or drill is used as a means to knead the putty until a homogeneous consistency is formed. The solution can also be mixed manually in the absence of a mixer. It is advisable to strictly adhere to the manufacturer’s recommended proportions.
The optimal consistency is between a liquid and a thick composition, but without lumps.
When the mixing procedure is completed, it is advisable to clean the tools immediately - after hardening, the putty is extremely difficult to remove.
In the video: preparing putty and leveling the wall.
Putty, what is it and what is it for?
There are two names, some say putty, others putty. Both options are correct. The word comes from the tool used to do all the work - a spatula. The mixture is a plastic finishing material. It is applied to the wall in one or several layers. A reliable and durable foundation is created for subsequent finishing of the room. That's what putty is for.
We recommend you read: How to properly putty walls before painting.
Using the mixture, both the ceiling and walls are treated. The process consists of several preparatory works. Each stage requires its own putty. For example, there are ready-made and dry mixtures. The good thing about ready-made wall putty is that you just need to open the container and start working. Dry ones are sold in powder form, which, according to the instructions, must be diluted with water.
There are 3 types of materials according to the area of destination:
- Starting putty.
- Finishers.
- Universal.
The starting layer is the base. It allows you to hide surface defects, make it smooth and clean. Can be applied in several layers from 3 to 12 mm. The finishing layer is decorative. They use it to putty the walls on top of the base layer. The material allows you to make the wall perfectly flat, smooth and beautiful. Layer thickness is from 0.5 to 1 mm. Universal compositions have a high price, but they also allow you to hide defects and act as a decorative layer.
Main components included:
- chalk;
- plasticizers;
- gypsum;
- different types of fillers;
- hardeners and thickeners.
Preparing the composition
The finished compositions are already ready, but they can be diluted with water by 10% if you think they are too thick. It is better to mix the putty using a drill or hammer drill with a whisk attachment; a spatula will take a long time and lumps may form.
To mix the putty, take or purchase a plastic bucket.
I recommend: Do-it-yourself drywall putty, how to putty drywall
Let's add water, about a third of the bucket to begin with. Pour the putty into the water. You can pour it directly with your hands, or you can take some kind of container. There is no need to lift a 25-30 kg bag and pour from a full bag into a bucket until you have used at least half of the bag.
You need to add enough putty so that a small hill of 5 centimeters is formed above the water.
Next, take a drill or hammer drill with a mixer whisk and mix the putty.
Mix the putty with a mixer
When mixing the putty with a mixer, pay attention to the bottom of the bucket and its edges, passing there with the mixer, as well as the fact that the putty at the bottom may become thinner than at the top, mixing it evenly, moving the mixer from bottom to top.
Be sure to check to see if any lumps have formed; if there are any, you can wait until they are saturated with moisture, about 5-15 minutes. and mix again with a mixer.
Recommendations for leveling with putty
Following the following recommendations will help to avoid problems with the quality of putty. You need to putty in one step. Mix the putties as much as you can use immediately. It dries quickly (half an hour) and if this factor is not taken into account, there will be overspending. Experts even recommend doing a small test batch to determine the production rate.
Priming the walls
Before continuing work after a break, the edge of the previously puttied surface must be moistened generously with water.
Two types of compounds will be required: one is leveling, the other is finishing. Or one, if universal. Two layers are applied.
Tools and required materials
To level the wall, prepare the tool:
- Spatulas - of different widths (15 - 20 and 45 - 60 cm) and angled.
- Rule. Preferably two meters.
- Capacity. Needed for mixing the composition.
- Drill with mixer attachment.
- Sandpaper grater.
- Sandpaper of different grains.
In addition, you need to stock up on primer and a roller (or a brush). The workspace needs to be covered with something, so you will need plastic film.
The cost of leveling walls with putty varies depending on the volume of material used and its cost. Before choosing a putty, they are interested in the consumption per square meter declared by the manufacturer. The higher quality the material, the more expensive it is, but sometimes it is wise to look for a compromise or alternative.
Based on experience, the average consumption per meter with a layer thickness of 2 mm is 1.5 kg of putty. One layer is not enough, so the final calculation figure is multiplied by two.
Putty tool