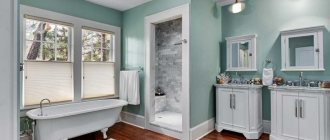
The window between the bathroom and the kitchen is an echo of the past, when its presence was mandatory. It performed many functions, the most important of which were: visual expansion of the kitchen space; source of lighting with a burnt out light bulb in the kitchen.
Why is a window between the kitchen and bathroom needed now? However, the layout of modern apartments is such that this window has become only a “blank spot” in the impeccable furnishings of the apartment. The same situation is with old, Soviet-style housing: the variety of building materials makes the presence of a window poor and spoils the design of the kitchen. And there is only one way out: to seal this opening. You can find out how to install a window between the bathroom and kitchen in the article.
Blind seal on both sides
Putting out a window and leaving everything as is means contributing to the presence of a hole in the wall. Therefore, you should go the other way - organize a flat wall. To do this, you can use the following tools:
- Cover the window with bricks or foam blocks.
- Use drywall.
- Make a mortar from cement.
All of the above methods have their own characteristics.
Useful article “Which flooring is best for the kitchen: analysis of materials” Are you interested in a Roman blind for the kitchen? Here are photos and analysis of the assortment.
Follow the link: features of kitchen renovation 9 sq.
Bricks or foam blocks
So, covering a window with bricks or foam blocks is the simplest and least expensive method. The brickwork can be covered with wallpaper or some paintings on top. As for foam blocks, they should be installed using construction adhesive. The organization of the process is built according to the following scheme:
- To begin, carefully remove the glass. This can be done using a self-tapping screw or by bending the wooden strips holding the window in the opening.
- Then the frame is removed.
- The freed opening is cemented.
- The brick is laid on it, and the foam blocks are placed using an adhesive solution.
- If small holes remain in the masonry, they must be filled with scrap and cement mortar.
- Plaster is applied to the wall and leveled using a spatula.
- Everything is covered in different variations of finishes.
Alternative options
What if you don’t follow the line of least resistance, and it’s interesting to play with this design flaw? In this case, the window turns from an annoying design misunderstanding into a full-fledged element of the interior. Let's see what we can come up with and mark interesting ideas for our future experience.
Plastic window
Take all the necessary measurements and order from specialists the production of a plastic window equipped with a special tilt-and-turn mechanism. It will easily fit into the opening and will allow you to maintain a pleasant and aesthetic appearance.
The window can be made with bars so that air can circulate freely from one room to another - reducing the likelihood of condensation and mold.
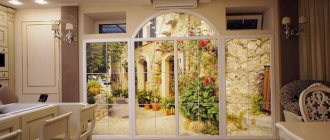
Stained glass
A chic option for decorating a site, allowing you to radically change its perception.
Glass can be selected either whole or divided into segments. In the latter case, it is better if these segments are painted in different colors.
If stained glass seems like an ambitious but expensive project, you can lower your budget by using special stained glass film. Due to the fact that it changes the color of the rays passing through the glass, you can get a surprisingly pleasant light mood.
Add here another interesting drawing or pattern - and you will get a real interior revelation, created literally from nothing.
However, even ordinary translucent stained glass looks quite stylish and modern.
Greenhouse
The window can be used to place a small flower bed on it. You have two great options at your disposal:
- design an open mini-greenhouse, in which flowerpots with plants are simply placed in a niche on the kitchen side;
- place the plants on the side of the bathroom so that they can be beautifully viewed through the glass in the kitchen.
In the second case, additional finishing with an LED strip suggests itself. Or any other lamp that can highlight the beauty and freshness of your improvised mini-greenhouse.
Storage niche
It can be decorated both in the bathroom and in the kitchen. You just need to disguise the opening to match the finish of the wall. If you have tiles, then it would be optimal to use its fragments to design the length and height.
But whether to use the formed niche specifically for storage or to extract aesthetic benefits from it and place all sorts of interesting souvenirs and accessories is up to you.
Cement
When cementing the opening, make a thick solution. After this you can start working:
- Take out the glass.
- Attach a special mesh to the frame.
- Cement is poured in several layers.
- After each time it is necessary to level it and dilute it with a small amount of water.
- There should be about 5-6 layers in total.
- After drying, the wall can be finished with tiles, panels or wallpaper.
This method is the most effective. However, it also has disadvantages: it requires quick casting and smoothing - otherwise, everything will seize and you will have to redo everything.
Ventilation installation
How to make ventilation in the toilet? Before installing ventilation, of course, you should decide on its location. Then drill a hole for laying the air duct and decide on the type of material and type of box for installation in the ventilation duct.
We suggest you familiarize yourself with How to clean a toilet in an apartment
It is important to think through and analyze each installation step, and assume what difficulties may arise when installing the hood. In general, you need to take the work very seriously in order to avoid the slightest mistakes, which can later be very expensive
Beautiful niche on the side of the bathroom
Sometimes, when planning the design of an apartment, absolutely every corner may be needed. And there’s a whole window between the kitchen and the bathroom. Therefore, if you don’t like the ways to seal the window between the bathroom and the kitchen, you can use it more practically - make a beautiful niche.
The organization of this process includes the following stages:
- It is necessary to remove the glass and place a sheet of drywall into the hole.
- The resulting niche is treated with plaster and then decorated with any type of decor. Most often, the one that was used throughout the bathtub is used to match the color.
- You can equip the niche with glass shelves.
- Thus, we get a wonderful place for arranging all hygiene products or some trinkets.
- If you absolutely do not like a small niche, you can organize additional construction work and make a wonderful niche for installing a large number of shelves.
Why was it made at all?
During the construction of Khrushchev houses, the main plan was to quickly provide housing to the population, in particular to the working class. The emphasis was not on building comfortable and spacious mansions, but on housing that was completely suitable for living. Under these conditions, the well-known 438 and 480 series of apartment buildings were born, which were distinguished by a small bathroom and a small kitchen. The unintentionally resulting “crowdedness” had to be compensated somehow. As a solution to the problem, a window was provided between the bathroom and the kitchen, which visually increased the volume of both rooms.
Decorative window decoration from the kitchen to the bathroom
If the window from the kitchen to the bathroom seems quite acceptable to you and fits perfectly into the interior, then you shouldn’t get rid of it. All that is necessary in this case is to decorate it. Perfect for this:
- Glass blocks.
- Stained glass windows.
- Mosaics.
- Double-glazed windows.
For any of these options, the following scope of work is carried out:
- The old window is carefully removed. The frame remains in place.
- Cement the entire opening.
- Carefully install the new glass.
Modern wood-effect kitchens are the best choice for your home. Design and photo of a kitchen in Provence style - create a relaxed romantic atmosphere.
Materials and tools
To work with a window, the following set of materials and tools is required:
- Bricks.
- Sand.
- Cement.
- Putty.
- Emulsion based paint.
- Construction adhesive.
- Tile.
- Means for filling cracks.
- Pickaxe or hammer.
- Fine mesh.
- Wire.
- Grater and set of spatulas.
All the tools described above are ideal for all types of work.
Effective solution
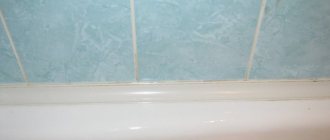
The light will shine well into the bathroom, but it will not be possible to open it from the kitchen, which will protect you from intrusive glances.
Redevelopment with illumination looks fashionable and stylish, however, it will take up money. The owner of the apartment can independently decide on the desired option.
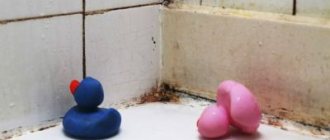
The need to cover a window with furniture may be caused by an external inconvenience that residents do not like.
A person, after weighing all the nuances, must decide what is best. The design feature will not disappear, but you cannot cover the window with plasterboard; excess moisture and dampness will fill the bathroom. The solution is to properly decorate the space. In old houses, a window is provided for air exhaust.
Currently, builders do not install such windows in apartments; inconveniences exist, but they can be eliminated.
Modern models of hoods and new equipment allow you to leave the window, but not use it.
Collected air will escape through the glass, even if the window is not ventilated.
conclusions
It’s easy to make a wall instead of a boring window! It is enough to choose the appropriate material. There are many ways to decorate a finished wall. To seal glass, you need the entire set of suitable tools listed above. Do you have nowhere to place shower gels, soaps, creams and much more? The answer is simple: you need to make a convenient niche in place of the window.
Do you want to see your bathroom in an unusual design? Install stained glass or mosaic windows, and the entire bathroom will be illuminated with unusual colors. Don't want some colors? Install economical double-glazed windows with the ability to ventilate the bathroom.
Dismantling the frame
First you need to dismantle the frame of the old window, for which you arm yourself with a nail puller and a hacksaw, after first removing the sashes or, at worst, removing the glass. First, the platband is removed, then the frame is sawed on one side and the frame is pressed out with a nail puller and removed in pieces.
In some cases, the window is held so weakly that, after removing the casing, you can simply push it out of the bathtub into the kitchen or vice versa - depending on your luck. There is no need to swing a hammer behind your ears - the tiles in the bathtub or on the kitchen side may fall off and you will find yourself another piece of unnecessary work.
Characteristics and types
The flexible hose for connecting plumbing is a hose of different lengths made of non-toxic synthetic rubber. Thanks to the elasticity and softness of the material, it easily takes the desired position and allows installation in hard-to-reach places. To protect the flexible hose, there is an upper reinforcing layer in the form of a braid, which is made from the following materials:
- Aluminum. Such models can withstand no more than +80 °C and retain functionality for 3 years. At high humidity, aluminum braiding is prone to rust.
- Of stainless steel. Thanks to this reinforcing layer, the service life of the flexible water line is at least 10 years, and the maximum temperature of the transported medium is +95 °C.
- Nylon. This braid is used for the manufacture of reinforced models that can withstand temperatures up to +110 °C and are designed for intensive use for 15 years.
The fasteners used are nut-nut and nut-fitting pairs, which are made of brass or stainless steel. Devices with different permissible temperatures differ in the color of the braid. Blue ones are used to connect to a pipeline with cold water, and red ones for hot water.
When choosing a water line, you need to pay attention to its elasticity, reliability of fasteners and purpose. It is also mandatory to have a certificate that prevents the rubber from releasing toxic components during operation.
Features of gas connections
When connecting gas stoves, water heaters and other types of equipment, flexible hoses are also used. Unlike water models, they are yellow and are not tested for environmental safety. For fixation, end steel or aluminum reinforcement is used. There are the following types of devices for connecting gas appliances:
- PVC hoses reinforced with polyester thread;
- made of synthetic rubber with stainless steel braid;
- bellows, made in the form of a corrugated stainless steel tube.
The Santekhkomplekt holding offers engineering equipment, fittings, plumbing fixtures and devices for connecting them to communications. The assortment is represented by products and materials from well-known foreign and domestic manufacturers. Discounts apply for bulk purchases, and product quality is confirmed by standard certificates. For information support and assistance, each client is assigned a personal manager. The ability to arrange delivery within Moscow and to other regions of the Russian Federation allows you to quickly receive the purchased goods without unnecessary hassle.
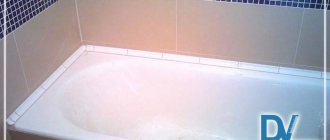
How to seal an opening
Decorative closure. Just to make it beautiful
If you do not plan to hang a cabinet in the place of the former window, it is enough to align the walls on both sides: the cavity inside will not interfere. Almost any materials will do for this:
- Plywood
- Drywall
- Fiberboard
After attaching them, all that remains is to glue the wallpaper/level and paint the walls/sew up with PVC panels - the plan of action depends on your finishing preferences. On the bathroom side, if desired, you can even make small shelves in a niche in place of the former window.
Functional sealing. Hanging a locker
If you plan to hang a cabinet on the kitchen side instead of a window, the niche must be thoroughly sealed. The following will work for this:
- Foam blocks
- Bricks
- Cement
- Frame made of metal profiles
After using any of the methods, the former window must be puttied and leveled with the wall. After this, you can begin decorative finishing and installing cabinets.
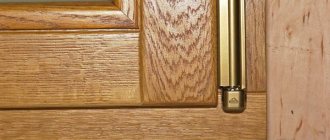
Why did the doors to the apartments only open inward?
When we first moved into the Khrushchev-era building in 1974, everyone had the same wooden doors, painted with floor paint. They opened into a small corridor. It was inconvenient, but there were no questions.
This standard was introduced into building codes and regulations (SNIP) starting in the sixties. Everything is explained very simply. The landings are very narrow. The exits from the apartments are arranged in a fan pattern.
In the event of a mass simultaneous evacuation of residents, for example, in the event of a fire, doors open to the outside will block the path for those fleeing from the upper floors and even their neighbors.
I still live in such a house: the eternal problem is moving furniture in and out.
For security, modern owners install second doors, sometimes keeping the old ones.
Later, when the Brezhnevkas were built in the seventies, the sites became larger, the exits from the housing were located opposite each other. SNIPs remained old.
The spy version is as follows: “The norms were introduced at the request of the KGB to quickly knock down doors in the event of the arrest of criminals.” I somehow have little faith in this, but who knows.
Why were the walls painted blue or green?
On stairwells, and initially in apartments, the walls were painted blue or green, up to half of them. The upper part was simply covered with whitewash, like the ceiling.
The height of painting was determined by the average height of men: so that their shoulders would not touch the whitened part.
Why did they do this? The answer is simple - from savings. The whole country worked for defense. Green and blue colors were most needed for army needs, and on a residual basis they were also supplied to civilians.
“Camouflage” paints were resistant to fading and abrasion.
Having received an apartment, the residents immediately did their best to find light paint and repaint this squalor in the kitchens and bathrooms. I remember how, at the age of 12, I was given a brush for the first time and a part of the wall was highlighted.
Recipes from the maestro
If you are not an architecturally sophisticated person, then you can seal the window between the kitchen and the bathroom using M-400 or M-500 cement (you will need no more than 7-8 kg for the job).
Don't forget about sand and water (we take sand in a ratio of 3:1). You will also need 2 pieces of metal mesh. (in this case we mean material already cut to fit the window).
Cement grade M-500
Let's start work
So, you will have to seal the window in several stages, which we will now consider:
- The first thing you need to tackle is dismantling. It is recommended to remove the glass carefully to avoid cuts. So, after you have managed to remove the glass, you should think carefully about whether to remove the frame from the opening or leave it in place. If the wall between the bathroom and the kitchen is thin, then it is not recommended to remove the frame yourself, since it is unknown what consequences all this can lead to (if it spoils your mood so much, then just get rid of the trim);