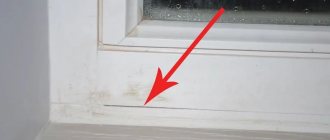
When installing a new bathtub in a bathroom, the question inevitably arises of sealing the area where the bathtub adheres to the wall surface. It is clear that the gap between the bathtub and the wall must be closed, since this area is practically not ventilated, which leads not only to the appearance of mold, but also to damage to the finishing material. In this article we will talk about methods for sealing joints between a bathtub and a wall, and also provide several photos for clarity.
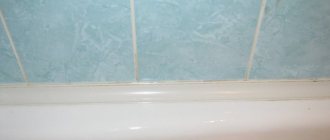
Using a ceramic border to seal the joint between the wall and the bathtub
Today, there are two main options for how to seal the joint between the bathtub and the tiles. Each method has its own advantages and disadvantages, and also differs in technology. Such methods include;
- sealing joints using mastics and grouts;
- insulation using decorative borders.
For your information. The use of various mastics or grouts is preferable in those cases where the tiles are laid after the installation of the bathtub, while the method of sealing with curbs is used if the cladding has already been installed. So the choice of method is influenced by the distance between the wall and the bathtub, as well as the material from which the font is made.
Let's look at each of the methods in more detail.
Sanitary Silicone Bathroom Sealant
Sealant
Seal the bathtub joint with sealant - the simplest and most universal way.
It is suitable for joints no more than 1 cm. In other cases, you will have to choose another method or combine silicone sealant with other building materials - polyurethane foam or cement. To make the joint you will need: degreaser or solvent, masking tape, syringe gun, sanitary silicone sealant and a soft spatula or brush.
The photo shows the use of sealant with a syringe
- Fill an acrylic bathtub with water (for cast iron bathtubs, skip this step).
- Clean the surface from dirt and dust, degrease it.
- Cover the tiles and the surface of the bathtub with masking tape, leaving a corner of 5-7 mm.
- Insert the sealant into the gun and go over the joint in one go. Do not re-coat as this will result in surface defects.
- Remove excess with a spatula or brush dipped in soapy water and smooth the surface.
- Leave to dry for 24 hours, remove the tape, drain the water.
Important: While drying, do not use the bathtub for its intended purpose.
Summary
Be sure to cover the bath with cellophane or cloth before work. It is very difficult to remove all sealants and glue from enamel. If you have any additions or significant comments on seam sealing methods, I invite you to discuss the topic in the comments. And in addition to what has been said, watch the video in this article.
Did you like the article? Subscribe to our Yandex.Zen channel
August 13, 2016
Bathroom, Tiles, Construction and renovation
If you want to express gratitude, add a clarification or objection, or ask the author something, add a comment or say thank you!
Corner
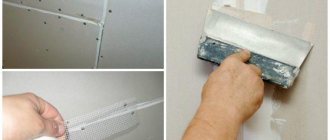
If you decorate the walls in the bathroom with tiles, purchase a special insert along with it - an inner corner made of plastic or aluminum. It is fixed tightly above the bathtub, and tiles are already installed on top.
The main advantages of this method are reliable sealing, hygiene, and aesthetic appearance. Disadvantage: installation only during repairs. You won’t be able to use this method in a finished bathroom.
You will need: a corner, a utility knife or saw, tile adhesive, tiles, grout. How to install a corner in the joint between the bathtub and the tile:
- Mark and cut the planks to the desired size.
- Apply tile adhesive to the wall.
- Install the corners.
- Insert the first row of tiles into the grooves of the glued corners and glue them.
- Lay down the remaining rows and leave for a day.
- Decorate the joints with grout after the glue has dried.
The photo shows an example of installing an inner corner under a tile
If the distance is very large
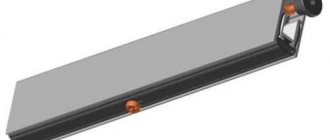
If the gap is too large, but you need to close it, at least for waterproofing reasons, you can make a shelf.
On one side it rests on the wall of the bathtub, and on the other on a stand on the wall. In this case, the material used must have sufficient rigidity and moisture resistance. Drywall or impregnated plywood can be used.
It is possible to take this solution even further if you make a door instead of a shelf. Then you will get a box in which you can store household chemicals, for example. In this way, the space will be used, and things that always have nowhere to put will be hidden securely and conveniently.
Polyurethane foam
The method of sealing the seam between the bathtub and the wall using foam is used exclusively as a rough method, because even a waterproof composition in the bathroom needs additional protection. This option is suitable if the joint between the bathtub and the wall does not exceed 3 cm. The advantages of polyurethane foam include its ability to expand and dry. The disadvantages are the need for extremely careful work, because it is incredibly difficult to wash the composition from hands and walls.
To seal the joint between the bathtub and the wall you will need: a mask, gloves, degreaser, masking tape, waterproof foam, a syringe gun, a stationery knife.
Step-by-step process instructions:
- Spread film or newspapers on the floor.
- Clean the walls and sides of the bathroom, degrease.
- Place paper tape around the surface to be treated.
- Wear gloves and a mask.
- Shake the can, then insert it into the gun.
- Pour the foam into the joint quickly and carefully, leave until completely dry.
- Trim off the excess with a utility knife.
- Seal the joint from above using any decorative method.
A sealant is usually applied over the polyurethane foam, and ceramic or plastic baseboards are installed.
Which method to choose
When choosing a technique, consider:
- gap size and configuration;
- financial opportunities;
- speed of work completion.
To quickly eliminate small cracks, waterproof sealant and decorative overlays made of plastic profiles are used.
A good result is achieved by using a cement mixture and grout, but it will take several days to complete the work (for the evaporation of moisture from the solutions). Polyurethane foam allows you to seal wide gaps, but you should take into account the need for additional protection of the material, which is destroyed by exposure to light and does not provide a tight seal.
When choosing a sealing method, financial capabilities are taken into account.
Cement mortar
For large gaps between the bathtub and the wall, use a cement solution. The advantages of cement mortar include its low cost, ease of installation and reliability. Disadvantages include the need for waterproofing and unattractive appearance. Like polyurethane foam, cement is a material for rough renovations in the bathroom. Tiles, plastic corners or border tape are attached on top of it.
For the cement mortar sealing method you will need: dry mixture, water, spatula. If the gap is larger than 1 cm, use temporary formwork or plastic mesh - they will prevent the mass from falling through. It is installed before work begins, and after drying it is removed.
- Clean the surface you plan to apply cement to.
- Dilute the mixture to the consistency of thick sour cream.
- Wet the surface of the bathtub and the wall to increase adhesion.
- Apply the solution with a spatula, tamp it down as you add it.
- Leave until completely dry.
Tip: For additional water drainage in the bathroom, lay the cement at an angle and glue the tiles on top.
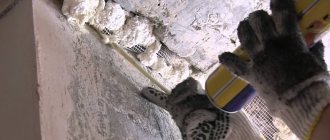
After the cement plaster has dried, it must be insulated with water-repellent impregnation. Only after this the resulting joint can be decorated.
The photo shows rough finishing of joints in the bathroom
How to prevent a gap from forming
If you think through all the stages of repair in advance, you can prevent the appearance of a gap. Technologically, it looks like this: first we install the bathtub, and then we lay the tiles. But this method is not suitable for acrylic bathtubs; it can only be used when installing cast iron and steel products. Let's look at several options and nuances of this method.
One option is laying tiles from the side of the bathtub . In this case, the wall behind the plumbing equipment is not lined, which has its advantages and disadvantages. In this case, the water flowing down the lining goes directly into the bathtub. Since the tiles are laid almost flush against the side (a gap of 1–2 mm is left), such a seam is usually filled with elastic, waterproof grout or sanitary sealant.
Another version of this technology is that the tiles are laid from the floor , and when they reach the height where the side of the bathtub will be located, a small indentation is made. After installing the bathtub, laying the tiles continues from the edge of the equipment. Thus, it turns out that the wall behind the bathtub is protected from dampness, but at the same time the side is recessed into the cladding. As in the previous case, the seam between the cladding and the edge of the equipment is filled with grout or silicone.
Note! It is not recommended to embed corner bathtubs, Jacuzzis or other equipment with additional functions into the tiled finish, or if the mixer is installed on the side. If it is necessary to access the flexible connection points, the bath will have to be moved away, which will cause damage to the lining.
When laying tiles from the edge, a plastic corner is sometimes installed, which with one of its edges is wrapped behind the tile. This design of the junction allows you to make the seam more attractive and “streamlined”, since the lower part of the plinth has a smooth bend for water drainage. This option is well suited for bathtubs with a wide side. But when choosing plastic, you need to take into account that if it turns yellow during operation, it can only be replaced by dismantling the bottom row of tiles.
You can also use a built-in ceramic border, which is glued above the side, and tiles begin to be laid from it and cover the upper edge of the border. Built-in borders often have a decorative design like marble, granite or a colored pattern, which allows you to beautifully design the junction, but there are also pure white products. The disadvantage of this option is the laboriousness of installation, as well as the fact that the border does not hide the unevenness of the edge of the bathtub and cannot be adjusted to this curvature.
Tile grout
One of the easiest ways to seal the joint between the tub and the tile is to use what you already have at home. Surely, after grouting the joints between the tiles, you have some mixture left. But be careful: this method is used only at joints no larger than 0.5 cm.
Tip: For an aesthetically pleasing overall look, use the same shade of grout as on the tiles. Most often it is contrasting classic white or any other color of the tile.
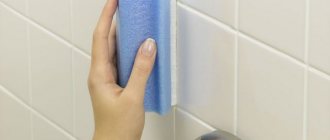
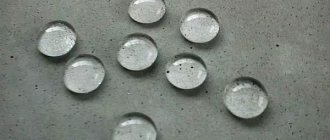
The only drawback of tile joints with grout is the appearance of rust, mold and dirt after some time. To avoid this, use Fugue-Shine impregnation for tile joints. It glazes the surface, makes it smooth, and protects it from moisture and stains.
The list of work for grouting gaps near the wall is the same as for the joints between tiles. Prepare the mixture itself, water, a container, a rubber spatula and a sponge. Correct procedure:
- Clean the gap from dirt and dust.
- Wet the surfaces with water.
- Dilute a small amount of grout.
- Fill any gaps using a rubber putty knife. Hold it at a 45-degree angle and press as hard as possible to ensure the joint is sealed.
- Wipe off excess mixture with a damp sponge no later than an hour after completion of work.
If you are going to treat the gap with Fugue Gloss, wait 72 hours until it hardens completely and apply the composition with a brush. Remove excess with a dry cloth.
In the photo, covering the joint with grout
Ceramic or PVC border
To decorate the gap between the bathtub and the wall, borders are used on top. They are made of plastic or ceramics, the former are suitable for PVC panels, we will talk about them in the next section. The second ones are for tiles, let’s focus on them.
The disadvantages of skirting boards include the difficulty of replacing the bowl and the need for special tools for the job. The main difficulty when installing ceramic borders is cutting to the desired size and cutting out holes for pipes and plumbing. An angle grinder with a diamond blade will best cope with this task. In addition, you will need: a spatula, tile adhesive, sandpaper, rubber or wooden mallet, sealing silicone.
In the photo, decorating the joint with a ceramic border
Tip: To make the finished bath look beautiful, match the width of the borders to the width of the tiles and install them end-to-end.
- Clean and degrease the surface, wipe dry.
- Prepare tile adhesive according to the instructions on the package.
- Start from the corner. Cut 2 adjacent elements at 45 degrees to each other, sand.
- Cover the back of the border with adhesive, place it in place, and remove the excess.
- Repeat for the second piece.
- Continue in the same spirit, using a mallet to adjust the parts to each other in height.
- After the glue has completely dried, it is recommended to cover the joints with grout.
You can also make a ceramic plinth yourself: to do this, cut the tiles into pieces of the required height and install them according to the same instructions. It is convenient to use this method over cement mortar laid in a slide.
Plastic skirting board
The main advantages of modern plastic are inexpensive price, ease of installation, and aesthetic appearance. This can be installed over any finish: paint, tiling, panels.
Before starting work, prepare masking tape, a measuring tape or ruler, adhesive sealant, and a stationery knife.
- Clean and thoroughly degrease the surface.
- Apply paper tape to the wall and the edge of the bathtub, leaving the width of the border.
- Fill the joint with sealant and leave until dry.
- Cut the skirting boards to the required sizes.
- Glue using the same sealant or liquid nails.
- Install the plugs.
Before using the bath, allow it to dry completely for 24-48 hours.
Main types of bath screens
This is the name for a lightweight design that easily hides communications, is easy to install, and has an attractive appearance. There are different designs of this type. In each case, access to the niche under the plumbing fixture is provided in different ways.
Deaf
In this case, a closed wall is installed. In this case, an inspection hatch is not provided, which complicates the maintenance and repair of communications. To get to the pipeline, you need to dismantle the screen. This option is most often used when the room has a lot of space for storing household products, containers, and items, since it is not possible to use a niche for these purposes.
With sliding or hinged doors
To close the bottom of the bathtub, this method is often chosen. This is due to the ability to maintain communications and use the space under the plumbing fixture to store detergents. Sliding panels are easy to use. They move along guides in different directions. Hinged doors are inferior to this option. To open them, you need more free space next to the bathroom. The disadvantage of sliding panels is the inability to provide full access to the niche.
With drawers
Separate compartments are provided. The doors that close them move across the plumbing fixture. This option is considered the most expensive. In addition, it is not always possible to plug the bathtub in the event of a leak, especially if the inspection compartment is located further from the pipe connection point.
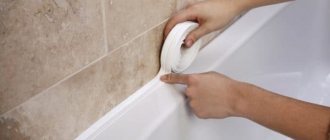
Self-adhesive tape
One of the fastest and easiest ways to finish the joint between the wall and the bathtub bowl is with closing tape. All you need is the roll itself and a spatula to form a corner (often included in the kit). Another advantage of curb tape is that it contains a sealant that saves time and money.
Step-by-step installation instructions:
- Wash and degrease the surface.
- Remove the protective film from a small area.
- Press the adhesive side of the border against the wall and bathtub, starting at the corner and using a putty knife to form the corner.
Tip: To make the material more flexible, heat the border tape with a hairdryer as you install.